How to Blanch Green Beans
- Time: Active 10 mins, Passive 3 mins, Total 13 mins
- Flavor/Texture Hook: Crisp, vibrant, and snap tender
- Perfect for: Meal prep, salads, or holiday casseroles
- The Science Behind Your Vibrant Results
- Recipe Specs for Fast Meal Prep
- Simple Shopping List for Best Flavor
- Modern Equipment Needed for This Method
- Clear Step by Step Cooking Instructions
- Common Mistakes and Effective Troubleshooting Tips
- Scaling Logic for Large Family Gatherings
- Creative Ingredient Twists and Smart Swaps
- Smart Make Ahead and Leftover Tips
- Perfect Complements to Finish Your Meal
- Recipe FAQs
- 📝 Recipe Card
The first time I tried to prep for a big family dinner, I just tossed the beans straight into the steamer. Big mistake. Half were squeaky and raw, while the others turned a depressing shade of army green by the time they hit the table. It was a total texture disaster that I’m still slightly embarrassed about.
Since then, I’ve realized that knowing how to blanch green beans isn't just an extra step it's the only way to guarantee that restaurant quality "shatter" when you bite into them. Now, I use this method to batch prep three pounds at a time on Sundays.
It saves me so much stress during the week when I just want a quick sauté.
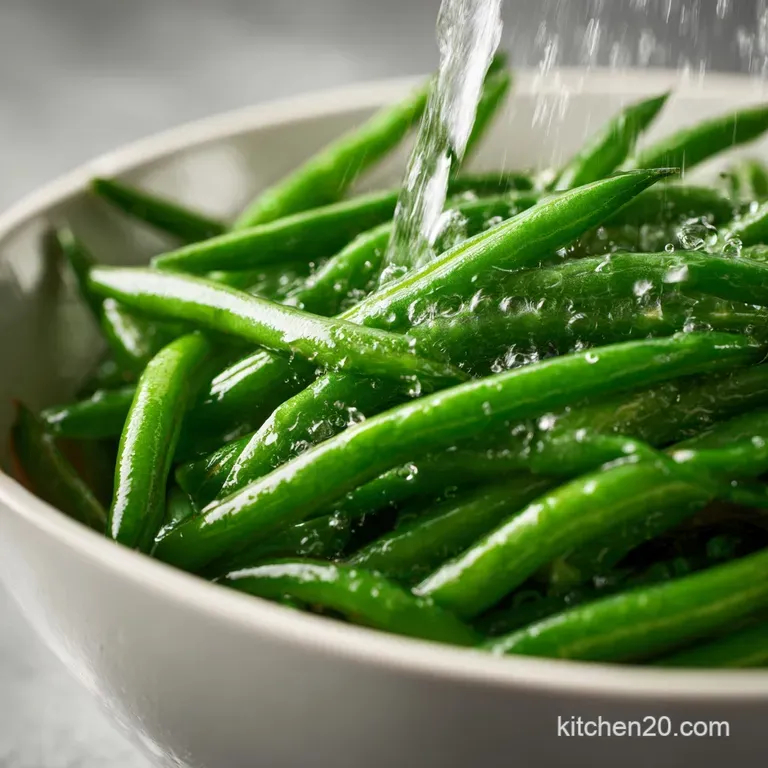
We're going to use a simple boiling to ice bath system that stops the cooking process dead in its tracks. This keeps the beans bright and firm, whether you’re tossing them into a cold salad or prepping them for a holiday bake. It’s all about efficiency and precision, so let's get the water boiling.
The Science Behind Your Vibrant Results
Chlorophyll Stabilization: High heat quickly neutralizes the organic acids in the vegetable, which prevents the bright green chlorophyll from degrading into a dull brown pigment.
Enzymatic Deactivation: The short burst of heat destroys enzymes like lipoxygenase that cause off flavors and toughening during storage or freezing.
Cellular Softening: Boiling briefly breaks down the tough pectin in the cell walls, transforming a woody bean into something tender but still structurally sound.
Recipe Specs for Fast Meal Prep
| Method | Time | Texture | Best For |
|---|---|---|---|
| Stovetop | 3 mins | Crisp tender snap | Salads and side dishes |
| Microwave | 5 mins | Softer, less even | Emergency quick fixes |
| Oven (Roast) | 15 mins | Charred and sweet | Immediate serving only |
Choosing the right approach depends on your final goal. If you are prepping ahead for a Blanching Green Beans recipe used in a casserole, the stovetop method is non negotiable for that professional finish.
The stovetop allows for the most control over the texture, which is vital if you plan on reheating them later. If you're wondering how to blanch green beans for freezing, this immersion method ensures every single bean is heated through enough to stop those spoilage enzymes. It's the standard for a reason.
Simple Shopping List for Best Flavor
- 1 lb fresh green beans: Look for slender beans that snap easily when bent. Why this? Thinner beans cook more evenly and have less woody fiber.
- 2 tbsp kosher salt: Essential for seasoning the vegetable from the inside out. Why this? Salt raises the boiling point and enhances the natural sugars.
- 8 cups water: You need a high volume to maintain the boil when beans are added.
- 4 cups cold water: Used for the "shock" bath to stop cooking instantly.
- 2 cups ice cubes: Keeps the shock bath at a true freezing temperature.
| Ingredient | Science Role | Pro Secret |
|---|---|---|
| Kosher Salt | Osmotic Seasoning | Use more than you think; most stays in the water. |
| Ice Cubes | Thermal Shock | Keep a 2:1 ratio of ice to water for the fastest chill. |
| Fresh Beans | Cellular Integrity | Avoid limp beans; they won't regain their snap after blanching. |
I've found that using a larger pot than you think you need is a massive efficiency win. When you drop a pound of cold beans into a small pot, the water temperature plummets and takes forever to return to a boil. That's exactly how you end up with soggy, overcooked vegetables.
Modern Equipment Needed for This Method
Streamlining your workflow starts with the right tools. I always reach for a large 6 quart stockpot to ensure there's plenty of "thermal mass." You’ll also want a large slotted spoon or a "spider" strainer.
This allows you to move the beans from the boiling water to the ice bath in one swift motion, which is crucial for consistency.
A salad spinner is my favorite "smart gadget" for this process. After the ice bath, you need the beans bone dry, especially if you’re moving them to the freezer or a sauté pan. A quick spin removes every drop of moisture in seconds, preventing that dreaded freezer burn or a watery sauce later on.
Clear step-by-step Cooking Instructions
- Trim the ends. Snip off the stem ends of the 1 lb fresh green beans using kitchen shears for speed.
- Boil the water. Bring 8 cups water to a rolling roar in a large pot. Note: A lid helps it reach temp faster.
- Season the water. Add 2 tbsp kosher salt once the water is boiling until it looks like clear sea water.
- Prepare the shock bath. Combine 4 cups cold water and 2 cups ice cubes in a large bowl.
- Submerge the beans. Carefully drop the beans into the boiling water until they are fully submerged.
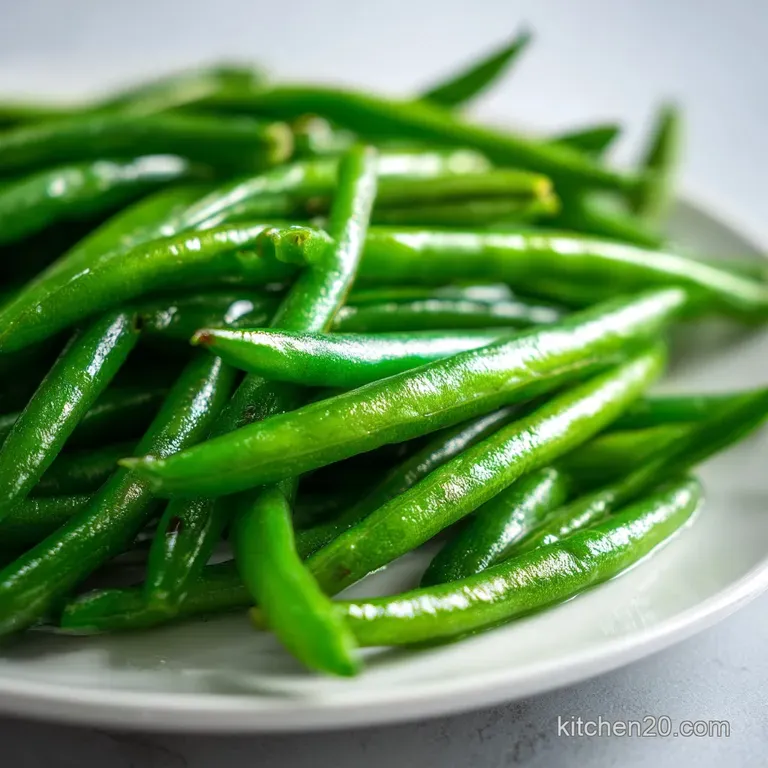
- Cook briefly. Set a timer for 3 minutes until the beans turn a neon, vibrant green.
- Test for doneness. Pull one bean out and bite it; it should be tender but still have a distinct snap.
- Transfer to ice. Use a spider strainer to move beans to the ice bath until they are cold to the touch.
- Drain and dry. Move the beans to a salad spinner or clean towels until no moisture remains on the surface.
Chef's Tip: If you're prepping these for a later sauté, like my favorite Garlic Butter Green Beans recipe, undercook them by 30 seconds. They will finish perfectly in the pan.
Common Mistakes and Effective Troubleshooting Tips
Your Beans Turned Gray
If your beans look dull or brownish, they stayed in the boiling water too long or the ice bath wasn't cold enough. The heat continued to cook the core of the bean, breaking down the chlorophyll. Always use a timer and don't guess the "look."
The Texture Is Squeaky
That "nails on a chalkboard" squeak happens when the beans are slightly undercooked. The heat hasn't quite broken down the internal starches. It's better to go an extra 20 seconds than to have a squeaky salad, so always do a taste test before shocking them.
| Problem | Root Cause | Solution |
|---|---|---|
| Soggy Texture | Overcooking | Reduce boiling time by 30 seconds next time. |
| Watery Dish | Poor Drying | Use a salad spinner or pat dry thoroughly with paper towels. |
| Lack of Flavor | Not Enough Salt | Ensure the water is as salty as a soup or brine. |
Common Prep Mistakes Checklist ✓ Skipping the ice bath - the residual heat will keep cooking the beans. ✓ Adding beans before the water is at a full, rolling boil. ✓ Trimming both ends when only the stem end is usually tough.
✓ Overcrowding the pot, which drops the water temperature too low. ✓ Leaving the beans in the ice bath too long, which makes them waterlogged.
Scaling Logic for Large Family Gatherings
If you're doubling this for a holiday crowd (2 lbs or more), work in batches. Never try to cram 3 lbs of beans into one pot of water unless you have a commercial sized burner. The temperature drop is too significant, and you'll end up with unevenly cooked veggies.
When scaling down for a single serving, the timing remains the same. You still need 3 minutes in the water. For the salt, you can cut it in half for a smaller pot, but don't skimp the water needs that salinity to drive flavor into the beans' dense fibers.
Creative Ingredient Twists and Smart Swaps
| Original Ingredient | Substitute | Why It Works |
|---|---|---|
| Kosher Salt | Sea Salt | Similar clean flavor profile. Note: Use slightly less if using fine grain. |
| Ice Cubes | Frozen Peas | Chills the water and you can cook the peas afterward. |
| Green Beans | Wax Beans | Same structure and cook time; adds a beautiful yellow contrast. |
If you want an extra bright result, some people add a pinch of baking soda to the water. It keeps the beans incredibly green, but be careful it can make the texture a bit mushy if you go overboard. I usually stick to the salt and ice method for the most reliable, modern results.
For a flavor boost during the blanching process, you can smash a few cloves of garlic and toss them into the boiling water. It won't be as strong as a sauté, but it adds a subtle, professional background note that makes the beans stand out in a cold salad.
Smart make-ahead and Leftover Tips
Blanching is the ultimate "buy one, get one" for time management. You can store blanched beans in the fridge for up to 5 days in an airtight container. Make sure they are completely dry before storing; any trapped moisture will lead to slime.
For long term storage, lay the dried beans on a baking sheet in a single layer and freeze for 1 hour. Once they are "flash frozen," move them to a vacuum seal bag or a heavy duty freezer bag. They will stay perfect for up to 8 months, ready to be tossed into a soup or a quick stir fry.
Perfect Complements to Finish Your Meal
These beans are a blank canvas. I love tossing them with a simple lemon tahini dressing while they are still slightly warm from the drying process the heat helps them absorb the flavors. If you're serving them cold, a handful of toasted slivered almonds adds a necessary crunch.
Right then, you're ready to master this. Whether you're getting ahead on your weekly meal prep or trying to avoid the "gray bean" catastrophe at your next dinner party, this method is your best friend. Trust me, once you see that vibrant neon green hit the plate, you'll never go back to steaming. Let's get to work!

Recipe FAQs
How do you blanch green beans perfectly?
Trim, boil briefly, then shock in ice water. Trim the stem ends, boil fresh green beans in generously salted boiling water for 3 minutes until vibrantly green and crisp tender, then immediately plunge them into an ice bath to stop the cooking process. Ensure they are thoroughly dried afterward.
Is blanching necessary for green beans?
No, but highly recommended for best results, especially for freezing or meal prep. Blanching locks in bright color and crisp texture by deactivating enzymes that cause spoilage and dulling. For immediate consumption, it's less critical but still improves texture.
What is the difference between boiling and blanching?
Blanching is a very short boil followed by an ice bath, while boiling is sustained cooking. Blanching aims to briefly heat the food to preserve color and texture, while boiling fully cooks it. This rapid cooling step is what distinguishes blanching.
How many minutes do you blanch green beans before freezing?
Blanch green beans for exactly 3 minutes before freezing. This short duration is crucial for deactivating enzymes that cause spoilage and textural breakdown during freezing, ensuring they retain their vibrant color and crispness when thawed.
Can I blanch green beans in the microwave?
Yes, but stovetop is generally better for consistent results. Microwave blanching involves placing beans in a microwave safe bowl with a little water and heating on high for 3-5 minutes, then shocking in ice water. Stovetop allows for more uniform heat distribution.
What's the best way to dry blanched green beans?
Use a salad spinner for speed and efficiency. After the ice bath, transfer the beans to a salad spinner to remove most excess water. Then, spread them on clean towels or paper towels to air dry completely to prevent moisture related issues during storage or cooking.
How long do blanched green beans last in the refrigerator?
Up to 5 days when properly dried and stored. Ensure the beans are completely dry before placing them in an airtight container or resealable bag in the refrigerator. Any residual moisture can lead to sliminess and faster spoilage.
Blanch Green Beans Quick
Ingredients:
Instructions:
Nutrition Facts:
| Calories | 35 calories |
|---|---|
| Protein | 2.1 g |
| Fat | 0.3 g |
| Carbs | 7.9 g |
| Fiber | 3.1 g |
| Sugar | 3.6 g |
| Sodium | 245 mg |
