Blanching Green Beans: Snap Tender Finish

- Time: Active 5 mins, Passive 3 mins, Total 8 mins
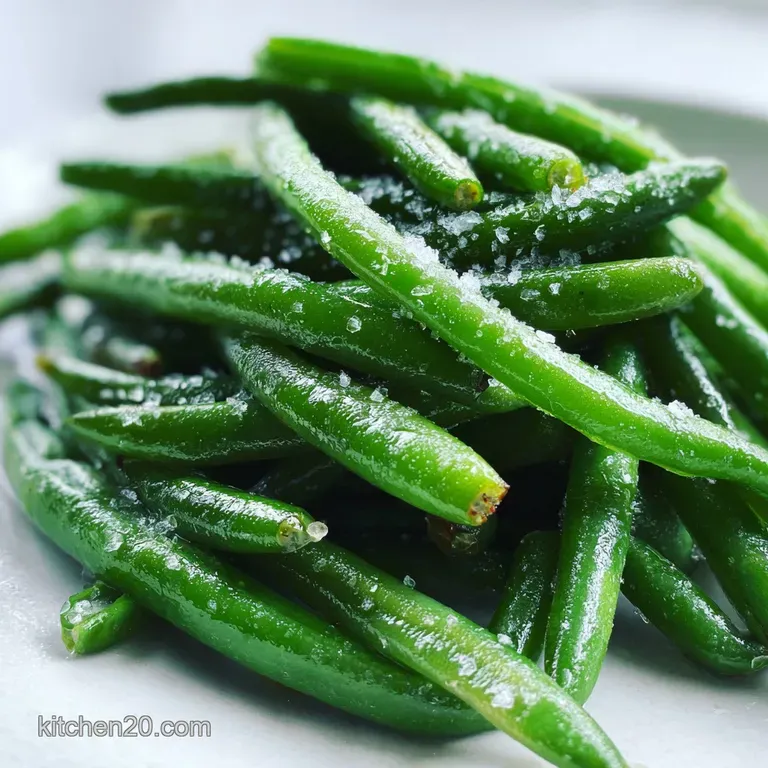
- Flavor/Texture Hook: Snap tender with a clean finish
- Perfect for: Holiday meal prep and healthy weeknight sides
- Why This Cooking Platform Works
- Critical Specs and Time Ratios
- Elements of the Green Bean
- Essential Toolset for Success
- Executing the High Heat Flash
- Avoiding Common Kitchen Disasters
- Innovative Flavor Profiles
- Storage and Resource Efficiency
- Ideal Meal Connections
- Myths Regarding the Blanching Process
- Recipe FAQs
- 📝 Recipe Card
Snap. That’s the specific sound of a kitchen success story. I remember hosting my first big dinner party and serving what I thought were "gourmet" greens, only to have them arrive at the table looking like soggy, olive drab ropes. It was a total system failure.
I hadn't realized that boiling is just half the battle; the real magic happens when you cut the power to the heat and force a thermal reset.
We are essentially revolutionizing the side dish by treating the vegetable as a high performance component. By mastering this method, you aren't just "cooking" - you're building a platform for flavor that stays crisp and bright, no matter how much garlic butter you throw at it later.
Trust me, once you see that neon green hit the ice bath, you'll never go back to the old ways.
Why This Cooking Platform Works
- Chlorophyll Compression: Rapid heat followed by cold shocks the gas out of the plant cells, making the green color appear more intense.
- Pectin Stabilization: Short exposure to boiling water softens the cell walls just enough for a tender bite without losing structural integrity.
- Enzymatic Deactivation: The flash boil stops the enzymes that cause browning and loss of flavor during storage.
- Thermal Interface: Using a high volume of water ensures the temperature doesn't drop when the beans are added, maintaining a consistent cook.
| Servings | Ingredient Adjustments | Pan Size | Cook Time |
|---|---|---|---|
| 2 people | 0.5 lb beans, 1 tbsp salt | 2 qt pot | 3 mins |
| 4 people | 1 lb beans, 2 tbsp salt | 4 qt pot | 3 mins |
| 8 people | 2 lbs beans, 4 tbsp salt | 8 qt stockpot | 4 mins |
When you're ready to take these from plain to gourmet, our Garlic Butter Green Beans recipe is the logical next step in the workflow. It builds perfectly on the blanched base we're creating here.
Critical Specs and Time Ratios
This section acts as your hardware diagnostic. We need to ensure the salinity and temperature are calibrated to deliver that perfect "shatter" when you bite into the bean. If you're wondering about the nuances of Cooking Fresh Green recipe, it really comes down to the timing and the ratio of water to salt.
| Component | Science Role | Pro Secret |
|---|---|---|
| Sea Salt | Seasoning & Color | Acts as a fixative for the green pigment. |
| Ice Bath | Thermal Shock | Stops carryover cooking instantly to prevent mush. |
| Water Volume | Heat Retention | Prevents the boil from dying when beans enter. |
Getting the salt right is non negotiable. Don't worry about the high amount; most of it stays in the water. It just provides a high saline environment that seasons the bean from the inside out during those few minutes of exposure.
Elements of the Green Bean
- 1 lb fresh green beans, stems trimmed Why this? Fresh beans have the highest moisture content for a better snap.
- 2 tbsp sea salt Why this? Provides essential seasoning and locks in the bright color.
- 4 quarts water Why this? Necessary volume to maintain a rolling boil during the process.
- 4 cups ice cubes Why this? Drops the water temperature to near freezing for the shock.
- 4 quarts cold water Why this? Creates the volume needed for the ice bath platform.
| Original Ingredient | Substitute | Why It Works |
|---|---|---|
| Sea Salt | Kosher Salt | Similar purity. Note: Use 1.5x the volume if using Diamond Crystal. |
| Fresh Green Beans | Frozen Green Beans | Already blanched. Note: Only use if fresh is completely unavailable. |
| Ice Cubes | Frozen Peas | High surface area. Note: Keeps the water cold but might soften quickly. |
Using high-quality water is also a hidden trick. If your tap water is heavily chlorinated, it can sometimes dull the greens, though the salt usually acts as a shield against this.
Essential Toolset for Success
You don't need a lab full of gear, but a few specific items make this "connected" cooking experience much smoother. A large spider strainer or a slotted spoon is your best friend here. You need to be able to migrate the beans from the boiling pot to the ice bath in a matter of seconds.
Chef's Tip: Freeze your colander for 10 minutes before you start. It helps keep the beans cold as they drain after the ice bath, preserving that velvety texture.
If you don't have a large enough bowl for the ice bath, you can use a clean kitchen sink, but a stainless steel bowl is better for maintaining the thermal shock. The goal is to drop the temperature of the beans to "refrigerator cold" as fast as humanly possible.
Executing the High Heat Flash
1. The High Saline Prep
Fill your 4 quart pot with the water and add the 2 tbsp of sea salt. Bring it to a aggressive, rolling boil. Note: The water should taste like the ocean; this is your only chance to season the interior.
2. The Ice Bath Integration
While the water heats, combine 4 cups ice cubes and 4 quarts cold water in a large bowl. Place it right next to the stove. Note: Proximity is key to preventing overcooking.
3. The 120 Second Flash Cook
Carefully drop the 1 lb trimmed green beans into the boiling water. Set a timer for 3 minutes. Note: Don't walk away; 30 seconds is the difference between snap and mush.
4. The Thermal Shock Plunge
At exactly 3 minutes, use a slotted spoon to transfer the beans into the ice bath. Cook until they are cold to the touch.
5. The Final Dry Down
Remove the beans from the ice and spread them on a clean kitchen towel. Shatter dry them by patting gently.Note: Excess water will ruin any sauce you add later.
6. The Garnish Layering
Transfer to a serving platter. Add slithers of purple radish for a sharp color contrast.
7. The Zest Application
Microplane fresh lemon zest over the top. The yellow pops against the emerald green.
8. The Texture Finish
Sprinkle toasted almonds or crispy garlic bits just before serving. This adds a necessary crunch to the velvety skin of the bean.
Avoiding Common Kitchen Disasters
Why Your Green Beans Turned Gray
This is the classic "acid crash." If you cook the beans too long or cover the pot, the natural acids in the vegetable react with the chlorophyll, turning it a dull olive color. The fix is a wide open pot and a strict 3 minute limit.
| Problem | Root Cause | Solution |
|---|---|---|
| Rubbery Texture | Under blanching | Increase time by 30 seconds next batch. |
| Squeaky Teeth | Incomplete cook | Ensure water is at a full rolling boil before adding. |
| Watery Sauce | Poor drying | Use a salad spinner or dry thoroughly on towels. |
If you encounter the "squeaky" bean problem, it usually means the pectin hasn't broken down enough. This happens if the water temperature dropped too much when you added the beans. Next time, use a larger pot or cook in smaller batches to keep that thermal energy high.
Common Mistakes Checklist ✓ Never cover the pot while boiling; it traps acids that dull the color. ✓ Don't skimp on the salt; it's the bridge to flavor. ✓ Prepare the ice bath before the beans go in the boiling water.
✓ Ensure the beans are fully submerged in the ice to stop the heat. ✓ Pat the beans completely dry; moisture is the enemy of sautéing.
Innovative Flavor Profiles
For those looking to integrate these into a larger platform, like an iconic green bean casserole, blanching is the "version 1.0" step. It ensures the beans stay firm even after baking in a heavy cream sauce.
If you're going for a Low Carb Mediterranean salad, the blanched beans provide a structural foundation that stands up to heavy vinaigrettes without wilting.
| Method | Snap Factor | Color Rating |
|---|---|---|
| Fresh (Blanched) | High definition | Bright Emerald |
| Canned | Soft/Mushed | Olive Drab |
| Frozen | Medium | Muted Green |
Scaling this recipe for a massive holiday party? Treat your kitchen like a server farm. Instead of doing 5 lbs at once, do five 1 lb batches. This keeps the water temperature stable and ensures every single bean gets the same high-quality treatment.
If you double the recipe, only increase the salt by 1.5x to avoid over seasoning.
Storage and Resource Efficiency
Blanching green beans is actually a revolutionizing way to handle meal prep. Once shocked and dried, they stay fresh in a sealed container in the fridge for up to 5 days. For long term storage, you can freeze them for up to 8 months.
Just make sure they are bone dry before bagging them to prevent ice crystals from damaging the cell walls.
Don't toss those trimmed stems! Even though they are fibrous, they are packed with flavor. Throw them into your next vegetable stock or compost them to keep your kitchen's ecosystem connected. If you have leftovers, they make a fantastic addition to a cold grain bowl the next day.
Ideal Meal Connections
I've found that these beans act as a perfect "bridge" side dish. They are light enough to balance a heavy steak but substantial enough to hold their own next to a delicate fish fillet. If you want to try an even more refined version, check out the Green Beans with recipe for a classic French take.
3 Bullet Decision Shortcut: If you want a crunchy salad base, blanch for only 2 minutes. If you want soft casserole beans, blanch for a full 4 minutes.
If you want to freeze them, 3 minutes is the sweet spot for preservation.
Myths Regarding the Blanching Process
One of the biggest misconceptions is that blanching "washes away" all the nutrients. While some water soluble vitamins might migrate, the short cooking time actually preserves more nutrients than long term steaming or roasting. Another myth is that you can just use cold tap water instead of an ice bath.
Trust me, the tap water isn't cold enough to stop the thermal momentum; you need the actual ice cubes to create that "connected" shock to the system.
Finally, people often think you can skip the salt if you're watching your intake. While you can, you'll lose that bright neon color and the beans will taste flat. Since you're rinsing them in the ice bath anyway, much of the surface salt is removed, leaving just enough to make the natural flavors pop. Enjoy the snap!

Recipe FAQs
What are some common mistakes when blanching green beans?
Not using enough salt in the water. A high salt concentration is crucial for locking in that vibrant green color and seasoning the beans from the inside out. Another common error is not preparing the ice bath beforehand, leading to overcooked beans.
Do you dry green beans after blanching?
Yes, absolutely. Thoroughly drying the beans after shocking them in the ice bath is critical. Excess moisture can lead to mushy beans or watery sauces if they're being incorporated into a dish like our Green Bean Casserole: The Ultimate Recipe, From Scratch with Fresh Beans.
What is the point of blanching green beans?
To preserve color, texture, and flavor, and to prepare them for further cooking or storage. Blanching stops enzymatic activity, which prevents the beans from turning gray and mushy, locks in their bright green hue, and gives them a tender crisp bite.
Do you salt water when blanching green beans?
Yes, and generously. The water should taste like the ocean. This high salinity is essential for seasoning the beans deeply and, more importantly, acts as a fixative for the chlorophyll, keeping them a vibrant green.
How long do you blanch green beans?
Typically 3 to 4 minutes for fresh beans. The exact time depends on their thickness; thinner beans may only need 2-3 minutes. You're looking for a "snap tender" texture, not soft or mushy.
Can I blanch frozen green beans?
Yes, but it's less common and slightly different. You can add frozen green beans directly to boiling salted water for about 1-2 minutes, then shock them in ice water. However, the texture and color won't be quite as vibrant as with fresh beans, as they've already undergone some processing.
What happens if you don't ice bath green beans after blanching?
They will continue to cook from residual heat, becoming overcooked and losing their vibrant color. The ice bath provides an immediate thermal shock that halts the cooking process, ensuring the beans retain their crisp texture and bright green appearance. Mastering this thermal shock is key, similar to how precise temperature control ensures perfect results in our Green Bean Casserole from Scratch: Rich, Creamy, and Crispy.
Blanching Green Beans

Ingredients:
Instructions:
Nutrition Facts:
| Calories | 35 kcal |
|---|---|
| Protein | 2.1 g |
| Fat | 0.3 g |
| Carbs | 7.9 g |
| Fiber | 3.1 g |
| Sugar | 3.7 g |
| Sodium | 240 mg |
