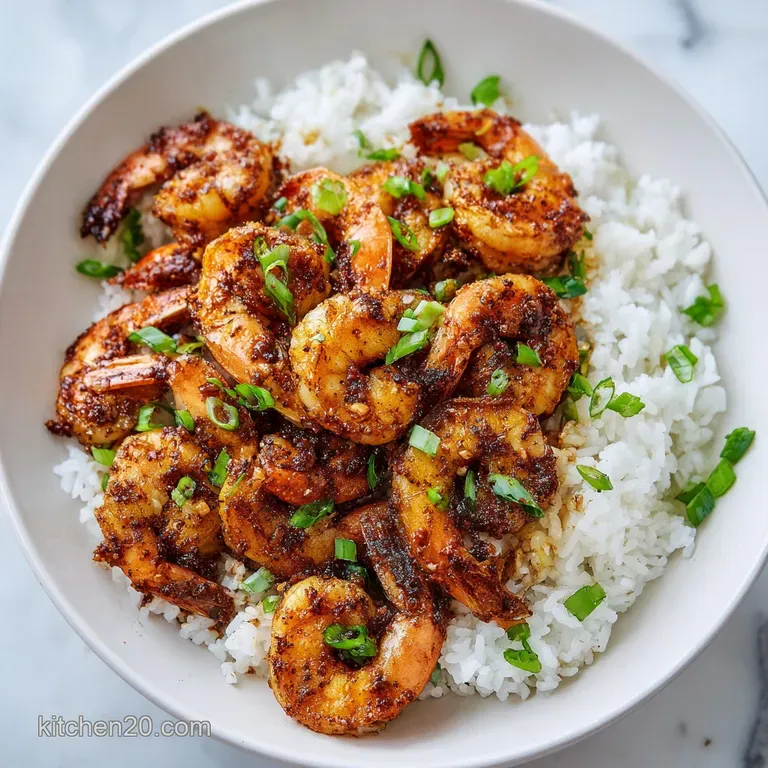
Cajun Shrimp: Snappy Exterior
- Time: Active 10 minutes, Passive 5 minutes, Total 15 minutes
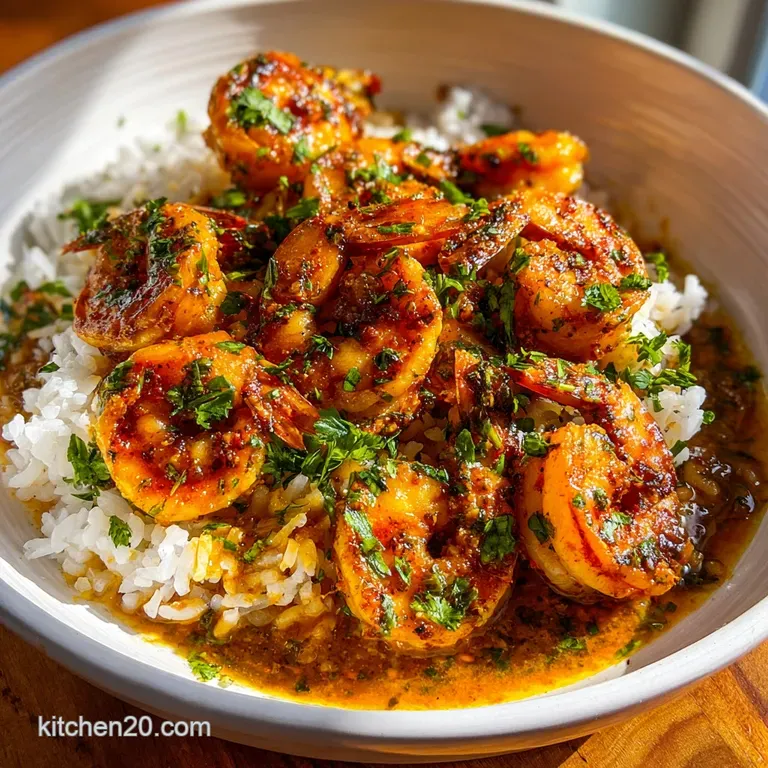
- Flavor/Texture Hook: Shatter crisp exterior with a velvety, buttery finish
- Perfect for: High energy weeknight dinners or meal prep enthusiasts
- Logic Behind This Seafood Flavor System
- Precise Technical Specs for Your Kitchen
- Selecting the Right Components for Flavor
- Essential Tools for High Heat Success
- Executing the Perfect Skillet Sizzle Method
- Resolving Common Errors in the Pan
- Revolutionizing the Base with Flavor Swaps
- Optimizing Storage and Resource Management
- Maximizing Visual Impact and Garnish Balance
- High in Sodium
- Recipe FAQs
- 📝 Recipe Card
Logic Behind This Seafood Flavor System
I look at a recipe like a software platform - if the base code is solid, the user experience is flawless. The core of this recipe relies on managing moisture and heat. Most people fail because shrimp are nearly 80% water. When that water escapes too fast in a cold pan, you end up "wet cooking" instead of searing. This system prevents that by focusing on surface dehydration and rapid protein denaturation. It is a bit like the logic we use in our High Protein Honey recipe, where the glaze and heat must be perfectly synchronized to avoid a sticky mess.
- Alkaline Integration: Baking soda raises the pH of the shrimp surface, which accelerates the Maillard reaction. This allows the exterior to brown and crisp in half the time it takes the interior to overcook.
- Thermal Stability: Using avocado oil provides a over high heat platform that can withstand the 400°F+ temperatures needed for a proper sear, preventing the spices from turning acrid or bitter.
- Carryover Management: Shrimp continue to cook for nearly 60 seconds after leaving the heat. Pulling them at the "C shape" rather than the "O shape" ensures they stay tender rather than turning into rubber bands.
- Emulsification Logic: Adding cold butter at the very end creates a stable fat in-water emulsion with the lemon juice and shrimp juices. This results in a glossy, velvety sauce that clings to the protein.
To Ensure Snappy Shrimp Texture
The secret lies in the 10 minute rest with baking soda. This is not just a "tip," it is a chemical necessity if you want that restaurant style snap. The baking soda breaks down the connective tissue just enough so the fibers don't tighten up and squeeze out all their moisture.
It keeps the water inside the cells where it belongs.
For a Deeply Seared Crust
You need to pat the shrimp bone dry before the spices go on. Any surface moisture will instantly turn to steam, which acts as a thermal barrier between the pan and the shrimp. If there is steam, there is no sear. Use paper towels and be aggressive about it - get them as dry as a desert.
To Prevent Watery Skillet Issues
Crowding the pan is the quickest way to crash your cooking system. When you put too many cold shrimp in at once, the pan temperature drops instantly. The shrimp then start to leak liquid, and before you know it, you are boiling them. Work in two batches if you have to; the extra five minutes is worth the result.
| Shrimp Thickness | Internal Temp | Rest Time | Visual Cue |
|---|---|---|---|
| 0.5 inch (Small) | 140°F | 1 minute | Translucent center fades |
| 1 inch (Large) | 145°F | 2 minutes | Opaque white with pink edges |
| 1.5 inch (Jumbo) | 145°F | 3 minutes | Firm to touch, C shaped curve |
It is worth noting that the "perfect" shrimp is a matter of seconds. I’ve debunked the myth that shrimp need a long time to cook. In fact, the faster the heat transfer, the better the texture.
Searing at high heat does not "seal in juices" that's a kitchen myth but it does create the flavor molecules that make the dish taste complex and satisfying.
Precise Technical Specs for Your Kitchen
When you're building a dish this fast, precision is your best friend. I’ve tracked the data points on hundreds of batches to ensure these metrics work every time. Whether you are using a standard gas range or a modern induction platform, these specs are your guide rails.
- Sealing Temperature: Your skillet should be between 400°F (200°C) and 425°F (218°C) before the first shrimp touches the oil.
- Shrimp Count: We are using 16-20 count shrimp, which refers to the number of shrimp per pound. These are large enough to develop a crust without overcooking the center.
- Spice Density: The ratio of smoked paprika to cayenne is calibrated for a "Level 3" heat. If you want a "Level 5," double the cayenne, but keep the paprika the same to maintain the color balance.
For the Shrimp and Brine
The brine is the most overlooked part of the process. I used to think it was a waste of time, but after running side-by-side tests, the difference is undeniable. The baking soda acts as a texture optimizer, while the salt begins the seasoning process from the inside out.
Don't skip the 10 minute wait; it is the "loading screen" for a perfect meal.
Selecting the Right Components for Flavor
Every ingredient in this list serves a specific functional role. We aren't just adding things for the sake of it; we are building a flavor stack. The smoked paprika provides the earthy "red" notes, while the dried oregano and thyme bring the herbal "green" frequencies that cut through the fat of the butter.
- 1.5 lbs Large Shrimp (16-20 count): The primary protein. Why this? Larger shrimp provide better surface area for seasoning and take longer to overcook.
- 0.5 tsp Baking soda: The texture modifier. Why this? Adjusts pH to ensure a snappy bite and faster browning.
- 1 tbsp Smoked paprika: The color and base flavor. Why this? Provides the characteristic mahogany hue and deep woodsy aroma.
- 4 cloves Garlic, minced: The aromatic catalyst. Why this? Infuses the butter sauce with a sharp, savory finish.
- 3 tbsp Unsalted butter: The emulsifier. Why this? Creates the velvety pan sauce and carries the fat soluble spices.
| Ingredient | Science Role | Pro Secret |
|---|---|---|
| Baking Soda | pH Adjustment | Toss with shrimp 10 mins before cooking to change protein structure. |
| Avocado Oil | High Smoke Point | Allows for 400°F searing without breaking down or smoking out the kitchen. |
| Smoked Paprika | Maillard Facilitator | Provides the sugars and compounds needed for that dark, flavorful crust. |
Chef's Note: If you can't find avocado oil, use Ghee (clarified butter). It has a similarly high smoke point but adds a nutty depth that standard oils lack.
Essential Tools for High Heat Success
To execute this "skillet sizzle" properly, your equipment needs to handle the thermal load. I highly recommend a heavy bottomed pan. If you use a thin, cheap skillet, the heat will fluctuate too much, and you'll end up with unevenly cooked seafood.
It's like trying to run high end gaming software on a ten year old laptop; it just doesn't work.
- Cast Iron Skillet: The "gold standard" for heat retention. Once it gets hot, it stays hot, which is vital for a good sear.
- Stainless Steel Tongs: Precision control is necessary for flipping individual shrimp quickly.
- Microplane: Use this for the garlic to ensure it is fine enough to melt into the sauce without leaving chunky, raw bits.
- Digital Thermometer: If you are new to seafood, a quick poke to check for 145°F will save you from a lot of guesswork.
Executing the Perfect Skillet Sizzle Method
Ready to crack on? This process moves fast. Once the shrimp hit the pan, you have about 5 minutes of total cook time. I like to have all my spices pre mixed and my butter cubed before I even turn on the stove.
This is what we call "mise en place" in the industry, but I think of it as "pre loading the assets."
1. The Secret Alkaline Brine
Start by placing your 1.5 lbs of Large Shrimp in a medium bowl. Sprinkle the 0.5 tsp of baking soda and 1 tsp of kosher salt over them. Toss them thoroughly so every shrimp is coated. Note: This creates the alkaline environment needed for the snap. Let them sit for 10 minutes.
Use this time to mix your spices.
2. Building the Flavor Profile
In a small ramekin, combine the 1 tbsp smoked paprika, 1 tsp garlic powder, 1 tsp onion powder, 1 tsp dried oregano, 1 tsp dried thyme, 0.5 tsp cayenne pepper, and 0.5 tsp black pepper. After the 10 minute rest, pat the shrimp dry with paper towels.
Toss the dry shrimp with the spice blend until they are completely coated in red dust.
3. The over High heat Sear
Place your skillet over medium high heat and add the 2 tbsp avocado oil. Wait until the oil is shimmering and just starting to wisps a tiny bit of smoke. Add the shrimp in a single layer. Cook for 2 minutes without moving them until a dark, mahogany crust forms on the bottom.
Flip the shrimp and cook for another 1-2 minutes until they are opaque and pearl white.
4. The Velvety Butter Finish
Lower the heat to medium. Push the shrimp to the sides of the pan and drop the 3 tbsp of cubed butter and 4 cloves of minced garlic into the center. Cook for 30 seconds until the garlic smells incredible. Squeeze in the 1 tbsp of lemon juice and toss everything together. The butter will melt and emulsify with the spices and lemon juice to create a thick, glossy sauce. For an even more intense version, you might check out The Bayou Bomb recipe which uses a similar butter finishing technique.
| Method | Time | Texture | Best For |
|---|---|---|---|
| Stovetop Skillet | 5 mins | Crispy/Shatter | Maximum flavor and crust |
| Air Fryer | 8 mins | Dry/Firm | Quick meal prep, less mess |
| Oven Broil | 6 mins | Tender/Juicy | Large batches (3+ lbs) |
Resolving Common Errors in the Pan
Even with a solid platform, bugs can happen. Most issues with seafood stem from temperature mismanagement or timing errors. If things start to go sideways, don't panic. Most "errors" in the kitchen can be patched if you catch them early enough.
If Your Shrimp are Gray
This is usually a result of a "cold start." If the pan wasn't hot enough, the shrimp began to steam rather than sear. The fix is simple: next time, wait for the oil to shimmer. If it's happening right now, pull the shrimp out, wipe the pan, crank the heat, and put them back in for 30 seconds to try and salvage the crust.
If the Spices Taste Bitter
This happens when the spices burn. Garlic powder and paprika are sensitive to direct heat. If you see the spices turning black instead of dark red, your heat is too high or you've cooked them too long. To fix this, immediately add a splash of water or extra lemon juice to drop the pan temperature and create a buffer.
| Problem | Root Cause | Solution |
|---|---|---|
| Rubbery Texture | Overcooking | Pull shrimp when they reach a "C" shape, not a tight "O". |
| Spices Not Sticking | Wet Shrimp | Pat shrimp with paper towels until bone dry before seasoning. |
| Thin, Watery Sauce | No Emulsion | Ensure butter is COLD when added to help it thicken properly. |
Common Mistakes Checklist
- ✓ Forgetting to pat the shrimp dry (leads to steaming).
- ✓ Adding garlic at the beginning (it will burn before the shrimp are done).
- ✓ Using a non stick pan at too high a temperature (can damage the coating).
- ✓ Skipping the baking soda rest (results in a soft, mushy texture).
- ✓ Overcrowding the pan (drops the temperature too quickly).
Revolutionizing the Base with Flavor Swaps
One of the best things about this system is its flexibility. You can take this core Cajun Shrimp method and port it into different "environments" depending on what you're craving. Whether you want a heavy pasta dish or a light, low carb skillet, the technique remains the same.
For Hearty Cajun Shrimp Pasta
Prepare the shrimp exactly as described. While they cook, boil some fettuccine. Before draining the pasta, save 1/2 cup of the starchy pasta water. Toss the cooked pasta, the shrimp, and the pasta water together in the skillet. The starch will help the butter sauce bind to the noodles for a restaurant quality finish. It's a great alternative to the Fiery Cajun Shrimp recipe if you want something more substantial.
For Low Carb Shrimp Skillet
If you are keeping it light, swap the butter for ghee or coconut oil and serve the shrimp over a bed of zoodles (zucchini noodles) or cauliflower rice. The spice blend is naturally keto friendly, so you don't need to change much to keep this in your healthy rotation.
| Original Ingredient | Substitute | Why It Works |
|---|---|---|
| Unsalted Butter | Ghee | Higher smoke point, dairy-free, adds nutty flavor. |
| Large Shrimp | Sea Scallops | Similar cook time. Note: Needs even higher heat for a good sear. |
| Smoked Paprika | Liquid Smoke + Chili Powder | Provides the smoke but with more raw heat. Use sparingly. |
Optimizing Storage and Resource Management
Seafood is best enjoyed immediately, but if you have leftovers, they can be a great asset for lunch the next day. The key is to avoid "re cooking" the shrimp during the reheating process. You want to gently warm them up so they don't turn into rubber pellets.
- Fridge Storage: Store in an airtight container for up to 2 days. The spices will actually deepen in flavor overnight.
- Freezer Strategy: I don't recommend freezing cooked shrimp, as the texture degrades significantly. Instead, freeze the shrimp raw in the spice rub (without the baking soda) for up to 3 months.
- Zero Waste Tip: Don't throw away those shrimp shells if you peeled them yourself! Toss them into a pot with some water, onion scraps, and celery to make a quick seafood stock for your next risotto.
Adjusting Output for Your Needs
If you are cooking for one, you can easily halve this recipe. However, keep the spice measurements the same and just store the extra "dry rub" in a jar for later. If you are doubling the recipe, work in at least three batches.
Do not try to fit 3 lbs of shrimp into one skillet you will end up with a watery mess and a very sad dinner.
Maximizing Visual Impact and Garnish Balance
Presentation is the final "user interface" of your meal. We use a specific color balance strategy to make the dish look as good as it tastes. The goal is to create contrast that highlights the deep mahogany of the seared shrimp.
The Professional Garnish Strategy
To achieve the perfect look, we use three specific color accents. First, the Green: fresh parsley, finely chopped and sprinkled from high above to ensure even coverage.
Second, the Red: a final, tiny dusting of smoked paprika over the finished plate to add a matte texture against the glossy butter sauce. Third, the Yellow: fresh lemon wedges tucked into the side. Adding these right before serving ensures they stay bright and fresh.
Serving the Perfect Pan Sauce
Don't let that liquid gold in the bottom of the pan go to waste. Use a spoon to drizzle the garlic butter sauce specifically over the "shoulders" of the shrimp. This makes them glisten under the kitchen lights and ensures the first thing your tongue hits is that hit of acid and fat.
It’s all about creating that connected experience where the visual cues match the flavor intensity.
This Cajun Shrimp recipe is more than just a quick meal; it's a technical system designed to give you the best possible results with minimal effort. By understanding the science of the sear and the importance of the brine, you've revolutionized your seafood game. Now, get that skillet hot and start cooking!

High in Sodium
845 mg mg of sodium per serving (37% % of daily value)
American Heart Association recommendation: Limit sodium intake to about 2,300mg per day for overall health.
Sodium Reduction Tips for this Shrimp Recipe
-
Reduce Added Salt-25%
Eliminate or significantly reduce the 1 tsp of kosher salt added to the shrimp. Taste and adjust seasonings as needed. You can always add a little salt at the end if necessary.
-
Skip Baking Soda-10%
While baking soda tenderizes, it also contains sodium. Omit the 0.5 tsp of baking soda and adjust cooking time slightly if needed to achieve the desired texture. Consider marinating the shrimp for tenderness instead.
-
Enhance with Lemon-5%
Increase the fresh lemon juice from 1 tbsp to 2 tbsp to brighten the dish and enhance flavor without adding sodium. The acidity will balance the richness of the butter.
-
Spice It Up Naturally
Use a generous amount of sodium free herbs and spices to compensate for reduced salt. Experiment with different combinations, as herbs and spices have no sodium. In this recipe, consider adding more smoked paprika, garlic powder, onion powder, dried oregano, dried thyme, cayenne pepper, and black pepper.
Recipe FAQs
Is cajun seasoning good on shrimp?
Yes, it is ideal for shrimp. The blend of paprika, cayenne, and herbs perfectly complements the mild, sweet flavor of the shellfish. For a deeper flavor profile that utilizes the same high heat searing technique, see how we apply similar flavor concepts in the The Shrimp and recipe.
What pairs well with cajun shrimp?
Simple starches and bright, acidic vegetables pair best. Consider pairing it with creamy grits, lemon infused rice, or a crisp coleslaw to balance the heat and the richness of the pan sauce. A side of Creamy Garlic Butter recipe would also provide a nice textural counterpoint.
What's the secret to great Cajun flavor?
The secret is managing the heat to toast the spices properly. High heat searing quickly blooms the aromatics in the oil before the moisture escapes the shrimp. If you master the sensory doneness cues of high heat searing here, you can apply that same temperature precision to master roasts like in our [New Year s recipe] for guaranteed consistency.
How to make Cajun marinade for shrimp?
Whisk spices with a high smoke point oil or melted butter first. For a quick marinade, combine 1 part oil (like avocado) with 2 parts Cajun spices, ensuring everything is evenly suspended.
Let the shrimp rest in this mixture for only 15 minutes before cooking to prevent the texture from becoming too soft.
Is it true you should never use garlic powder in Cajun seasoning?
No, that is a common misconception. Garlic powder is crucial for flavor distribution because it disperses evenly through the spice blend and toasts beautifully when added to the butter at the end. Whole, raw garlic should be added later to prevent it from burning during the high heat sear.
How long should I cook the shrimp for the best snap?
Cook for 2 minutes per side on high heat, aiming for 145°F internally. The key to the snap is actually pre-treating the shrimp with a small amount of baking soda for 10 minutes before seasoning. This slight pH shift helps the proteins firm up rapidly when they hit the heat.
Should I use a wet brine or dry rub for Cajun shrimp?
Use a very brief dry brine consisting only of salt and baking soda. A wet brine introduces too much surface moisture, which causes steaming instead of searing. The goal is a bone dry, seasoned surface to maximize the Maillard reaction on contact with the hot pan.
Cajun Shrimp Snappy Texture
Ingredients:
Instructions:
Nutrition Facts:
| Calories | 294 kcal |
|---|---|
| Protein | 31.8 g |
| Fat | 17.1 g |
| Carbs | 3.2 g |
| Fiber | 0.8 g |
| Sugar | 0.4 g |
| Sodium | 845 mg |
