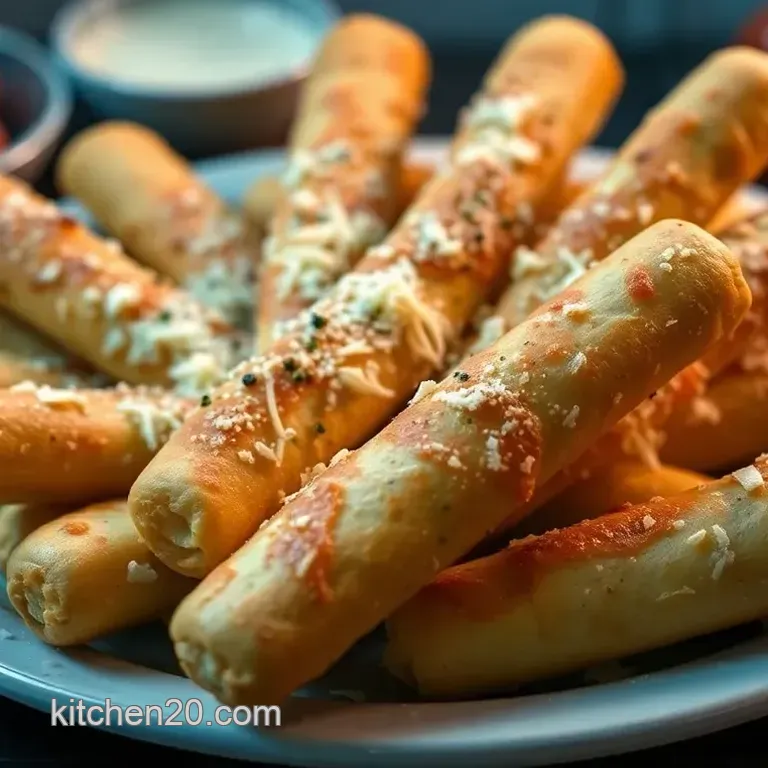
Cheese-Stuffed Breadsticks: a Cheesy Delight
- Essential Ingredients Guide: Your Go-To for Cheese-Stuffed Breadsticks
- Mastering the Art of Professional Cooking
- Pro Tips & Secrets for Cheese-Stuffed Breadsticks
- Perfect Presentation for Your Cheesy Snacks
- Storage & Make-Ahead
- Creative Variations to Spice It Up
- Complete Nutrition Guide
- Encouraging Conclusion
- Frequently Asked Questions
- 📝 Recipe Card
Oh my gosh, let me tell you about the first time i tried to make cheese and stick breadsticks! i was all set for a cozy friday night with a movie and some snacks, but my store-bought ones just didn’t cut it.
So, i thought, why not try to whip up my own? spoiler alert: it was a gooey, cheesy, delightful mess.
But you know what? it turned into a recipe i still treasure, and i'm excited to share it with you.
If you're looking for the perfect snack or appetizer that’s guaranteed to impress, you’ve hit the jackpot with these bad boys.
Recipe Overview
Cheese stuffed breadsticks have roots in traditional italian cuisine, where they celebrate simplicity and high-quality ingredients. much like a classic italian pizza or a hearty plate of spaghetti, these cheesy wonders are all about warmth and flavor.
In modern times, these breadsticks have become a go-to comfort food and are perfect for gatherings, parties, or just a cozy night in.
With about 80 minutes from start to finish, including the time it takes for the dough to rise, this recipe isn’t just straightforward it’s totally doable even for novice bakers.
And don't sweat it if you're budget conscious! the ingredients are super simple and usually already hanging out in your pantry, making this not just a filling meal but a wallet friendly one too.
You’ll end up with about 12 delicious breadsticks, perfect for sharing (or maybe not no judgment here!).
Key Benefits
Now, let’s talk about the perks of whipping up these cheesy snacks. first off, they’re a hit when it comes to health.
We've got the goodness of mozzarella , packed with protein, and paired with parmesan , which adds a nutty flavor without being too heavy.
Plus, they tick all the boxes for comfort food. carbs and cheese? yes, please!
These cheesy breadsticks are not only a fantastic treat on a regular night; they shine just as bright for special occasions.
Whether you’re hosting a game day, having friends over for dinner, or even shaking things up for a birthday celebration, they’ll steal the show.
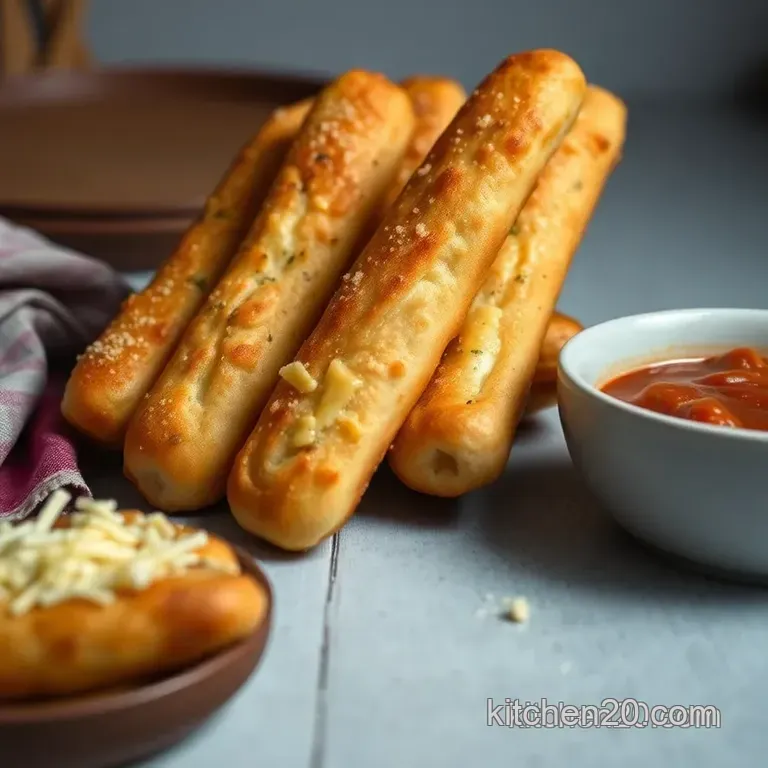
Seriously, they pair oh-so-well with marinara sauce , making them a fabulous choice for appetizers with cheese.
What’s more, they have a unique advantage over similar recipes. instead of slapping some cheese between two slices of bread, you get that lovely texture of crispy breadsticks on the outside with a gooey, cheesy surprise on the inside.
Less mess, more wow.
So, if you're ready to gather some ingredients, let’s dive into how to make these scrumptious treats your new go-to.
Just imagine having these warm and cheesy breadsticks soaking up all that marinara sauce while watching the game or catching up with your friends.
Honestly, there’s nothing better!
Are you intrigued? Let's get into the nitty gritty of the ingredients needed for our cheesy magic!
Essential Ingredients Guide: Your Go-To for Cheese Stuffed Breadsticks
Alright, listen up, folks! if you wanna whip up some cheese stuffed breadsticks that’ll have everyone drooling, you gotta start with the right ingredients .
Let’s dive into my essential ingredients guide for you to level up your cooking, especially if you want to tackle some amazing cheese recipes .
Premium Core Components
First things first, let’s break down the essentials. You wanna pay attention to the measurements . For our dough, we’re talking about:
- 2 ½ cups of all-purpose flour (that’s about 312 g for my metric friends).
- 1 packet of active dry yeast ( 7 g ).
- A bit of sugar and salt to kick things off!
Make sure your ingredients are fresh fresh yeast means a better rise. and when you’re checking your yeast, it should be foamy when mixed with warm water.
If it’s not, ditch it and grab a new pack, trust me!
Storage guidelines are easy peasy. store your flour in a cool, dry place, and keep your yeast in the fridge once opened.
And oh, that dough? it’s best when used right away, but you can store it for up to a week in the fridge if you need to pull back the baking a bit.
Signature Seasoning Blend
Now, spice things up! for that cheesy goodness, you need the right flavor profile. i’m all about italian seasoning here mix some oregano, basil, and thyme .
Trust me, it’ll make your appetizers with cheese sing! and garlic powder? oh gosh, it’s an absolute must! it adds that killer flavor i can’t live without.
Don’t be shy about switching things up. you can use fresh herbs or even come up with your own signature blend.
Wanna feel adventurous? try adding some red pepper flakes for a little heat!
Smart Substitutions
Sometimes life throws you a curveball, and that’s totally okay. Here are some smart substitutions for what you have on hand:
- Dough: No all-purpose flour? No worries! Use bread flour instead; it’ll give you a nice chewy result.
- Cheese: If mozzarella’s not in your fridge, fontina or provolone do the trick!
- dairy-free: For a vegan twist, go for some nut cheese or vegan mozzarella.
And hey, if it's the dead of winter and you can’t find fresh herbs, dried will totally do!
Kitchen Equipment Essentials
You don’t need fancy gadgets for these delectable breadsticks, but a few basics will help make your life easier.
- Mixing bowls and measuring cups are your best buddies here.
- A rolling pin is great for shaping your dough, but, honestly, your hands work too!
- A baking sheet is essential; don’t forget parchment paper for easy release and clean-up.
And don’t skip on the kitchen towel to cover that dough while it rises.
Conclusion and Transition
So, there you have it! few things feel better than pulling a tray of golden brown, cheese filled delights from the oven.
With these tips and ingredients, you’re all set for some easy bread recipes that will knock your socks off.
Next up, let’s dive right into the how-to instructions for crafting those delicious, gooey cheese and stick breadsticks that’ll steal the spotlight at your next gathering.
I won’t let you down, i promise!
Mastering the Art of Professional Cooking
Alright, folks, let’s dive into the wonderful world of professional cooking methods . whether you're feeding a crowd or just whipping up a cozy meal for two, the way we prep and cook makes all the difference.
So grab a snack maybe some cheese and stick? and let’s get into this.
Essential Preparation Steps
Mise en place is our best buddy in the kitchen. it’s french for “everything in its place.” before you start cooking, gather all your ingredients.
Chop, measure, and organize them beforehand. trust me, it saves so much time and keeps your kitchen from feeling like a tornado hit it.
Time management tips ? oh boy, that’s crucial! start by thinking about the order of things. which ingredients need longer to cook? always start those first.
Pro tip: write down your cooking times next to each dish. this little list helps avoid the mad dash at the last minute!
And let’s not forget safety considerations . Always have a clean workspace. Wash those hands! And don't forget to keep knives and hot surfaces away from little helpers. Safety first, friends!
Step-by-step Process
Now, let’s break down the cooking process with clear, numbered instructions . After all, we want everything to come out perfectly, right?
Activate your yeast at about 110° F ( 43° C) in warm water. Wait about 5- 10 minutes until it gets frothy. You want that bubbly goodness!
When it comes to shaping dough, roll it out to about ¼ inch thick . This is key in making sure those cheesy, gooey centers while keeping that delightful crust.
Bake those lovely cheese sticks at 425° F ( 220° C) for 12- 15 minutes . Keep your eyes peeled! They should be golden brown and oozing with melted cheese.
Expert Techniques
Let’s dive into some expert techniques that’ll level up your game! the secret is in the details. when kneading your dough, think about the kneading technique you want it smooth, not sticky.
Keep an eye on temperature control points . too hot, and the cheese might scorch; too cold, and it won’t melt right! and quality checkpoints are essential.
Look for a nice golden crust imagine it, soft inside but crispy outside.
If you mess up? No sweat! Troubleshooting tips : If the dough isn’t rising, your yeast could be dead. Rinse and repeat!
Success Strategies
We’ve all had those kitchen disasters, right? here’s a cheat sheet of common mistakes to avoid . don’t rush the dough rising time! give it that good 30-minute rise to double in size.
It’s all in the patience, my friends!
For perfect results , always taste as you go. is that garlic flavor popping? did you season enough? and when it comes to make-ahead options, you can always freeze those stuffed dough packets and bake them fresh later.
That combo of cheesy snacks and breadsticks recipe isn’t just for appetizers; they can also slay at any party or potluck.
If you’re baking for a crowd, think baked snacks that everyone can pair with homemade marinara sauce. it’s a win-win!
So, whether you're pulling together a cool app for watching the game or just treating yourself on a chill Friday night, these breadsticks hit the spot.
Additional Information
And there you have it, peeps! with a little prep and attention, you can whip up cheesy breadsticks that'll make anyone swoon.
From dough rising techniques to perfect timings, you’ve got the tools to impress!
Whether you're an aspiring chef or a weekend warrior, remember this: cooking is all about the love you put into it. Happy cooking!
Pro Tips & Secrets for Cheese Stuffed Breadsticks
Oh my gosh, let me tell you these cheese stuffed breadsticks are the real mvps when it comes to appetizers with cheese.
Let’s sprinkle in some pro tips that’ll make your cheese game strong!
Chef's personal insights : when i first whipped these up, i thought, “how hard can it be?” spoiler alert: kneading dough isn’t as scary as it sounds! just remember, you're not wrestling alligators.
It’s more like giving a gentle hug to that dough until it’s smooth.
Time saving techniques : if you’re in a rush, pre-measure your ingredients the night before. then all you got to do is mix and knead! your future self will thank you for this little time hack.
Flavor Enhancement Tips : Feeling adventurous? Add some garlic powder directly into the dough for a delicious base. Or throw in a pinch of your favorite herbs to give those homemade breadsticks a kick !
Presentation Advice : Now here’s a trick: after you bake those beauties and they’re all golden brown, brush them with melted butter and sprinkle with fresh parsley. Talk about Insta ready!
Perfect Presentation for Your Cheesy Snacks
You know how they say people eat with their eyes first? Well, let’s make sure your breadsticks look as good as they taste!
Plating Techniques : Lay them out on a cute wooden board or a fancy plate. You can even stack them like a tower for that dramatic effect.
Garnish Ideas : Don't underestimate the power of a sprinkle of Parmesan on top after baking! Adds a nice bite and makes everything look more fancy .
Color Combinations : A splash of red cherry tomatoes or a vibrant green salad can make your cheesy snacks pop!
Visual Appeal Tips : Arrange those garlic breadsticks in a circle with a bowl of marinara sauce in the center. Hello, cheese lovers recipes worthy of a Michelin star!
Storage & make-ahead
Sometimes, life gets in the way, and we can’t polish off those breadsticks in one sitting. Here’s how to make sure they stick around!
Storage Guidelines : Place any leftovers in an airtight container. Trust me, you’ll want to keep that cheesy goodness fresh.
Preservation Methods : These great cheesy snacks can last about 3 days in the fridge. Just make sure to separate them with parchment paper to avoid sticking.
Reheating Instructions : Pop them in the oven at 350° F ( 175° C) for about 5- 10 minutes. That’ll get them nice and crispy again!
Freshness Duration : For maximum enjoyment, eat within those three days. After that, they might lose that ooey gooey charm.
Creative Variations to Spice It Up
Let’s get a little wild with some creative variations ! After all, the world doesn’t revolve around just one breadsticks recipe .
Flavor Adaptations : Switch up your cheese game! Pepper jack gives a spicy zing, while cheddar can take you to a whole new level of cheesy bliss.
Dietary Modifications : Want a gluten-free option? Use a gluten-free flour blend. It can be done, y'all!
Seasonal Twists : How about incorporating some pumpkin spice into your dough during fall? It’ll give a cozy vibe that goes great with any comfort food!
Regional Variations : You could even style these breadsticks like Italian breadsticks and serve them alongside a tasty marinara sauce pairing if you're feeling authentic.
Complete Nutrition Guide
Let’s break it down so you know just what you’re munching on.
Detailed Breakdown : Each cheesy breadstick has approximately 200 calories , with a good punch of protein thanks to the cheese.
Health Benefits : Mozzarella is a solid source of calcium, and paired with bread , you’ve got a pretty balanced snack.
Dietary Considerations : Just keep in mind there’s a bit of sodium and fat, so enjoy in moderation if you’re keeping an eye on that.
Portion Guidance : Two or three of these breadsticks should make a nice serving along with some salad it’s all about balance, right?
Encouraging Conclusion
So, whether you’re whipping these up as part of a big family meal or just as a late night snack, these cheesy delights are bound to impress.
Honestly, can you ever go wrong with something that involves cheese and stick ? i mean, think about it gooey, melted cheese in a golden crispy section is pure joy.
So go ahead, roll up those sleeves, and dive into this amazing cheese recipes adventure! You got this, and I can’t wait to hear how it turns out! Happy cooking, my friends!
Frequently Asked Questions
What are some tips for making the perfect cheese and stick?
To make the perfect cheese and stick, ensure your yeast is fresh and properly activated before mixing. Knead the dough until it's smooth, and let it rise in a warm place for optimal texture. Experimenting with different cheese combinations can also enhance the flavor of your breadsticks!
How can I store leftover cheese and stick?
After they cool down, store leftover cheese and sticks in an airtight container at room temperature for up to 2 days. For longer storage, you can freeze them by wrapping each stick individually and placing them in a freezer safe bag for up to 3 months. Reheat in the oven to restore their crispiness!
Can I make variations of cheese and stick?
Absolutely! You can infuse the dough with herbs for added flavor or turn the breadsticks spicy by adding jalapeños to the cheese filling. For a sweet twist, try filling them with Nutella or a mixture of cinnamon and sugar.
What is the nutritional information for cheese and stick?
Each cheese and stick contains approximately 200 calories, 8g of protein, and 9g of fat, along with 24g of carbohydrates. This estimate can vary based on specific ingredients used, so adjust accordingly if you make substitutions or add toppings.
How can I enhance the flavor of my cheese and stick?
Enhance the flavor of your cheese and stick by brushing the tops with garlic butter before baking or sprinkling them with fresh herbs like parsley or basil right after they come out of the oven. Pairing them with marinara sauce for dipping provides a delightful contrast of flavors.
What types of cheese work best for cheese and stick?
Mozzarella and Parmesan are traditional choices due to their meltiness and flavor, but you can experiment with other cheeses like fontina, cheddar, or even pepper jack for a spicy kick. Just ensure that the cheese you choose can melt well for that gooey filling effect!
Cheese Stuffed Breadsticks A Cheesy Delight

