Classic Chili: the Proper Pub Grub Recipe
- The Proper Pub Grub: An Introduction to Classic Chili
- The Science of Deep Flavor: Layering Umami and Heat
- Essential Components for an Authentic Chili
- Crafting the Perfect Pot: Step-by-Step Method
- Elevating Your Homemade Classic: Chef’s Tips and Troubleshooting
- Ultimate Comfort: Serving and Garnish Pairings
- Make-Ahead & Preservation Guide
- Recipe FAQs
- 📝 Recipe Card
The Proper Pub Grub: An Introduction to Classic Chili
The smell of classic chili simmering slowly on the stove is honestly one of life’s great, sensory pleasures. It means instant comfort, simple as that. Deep, smoky spices mingling with rich, slow cooked tomatoes make the entire kitchen feel like the warmest, safest spot in the world, especially when the weather turns crisp.
And the best part? This isn’t one of those high maintenance recipes that requires hours of fussing; it’s a total lifesaver. This recipe is cheap, incredibly hearty, and it feeds an absolute army, making it perfect for game day or just a terrible, cold Tuesday night.
We call it "Proper Pub Grub" for a very good reason.
I used to make watery, sad chili that tasted mostly like under seasoned canned tomatoes, and I know you’ve been there too. We are going to change all that today. This method focuses entirely on layering flavor early on, transforming a simple pot of ingredients into something truly complex and profound.
Let’s ditch the shortcuts and cook the best Classic Chili you’ve ever tasted.
The Science of Deep Flavor: Layering Umami and Heat
What Defines a Truly Great Chili?
A truly great classic chili has tremendous depth, not just raw heat. The flavor should be smoky, savory (umami), subtly sweet from the long cooked onions, and balanced by a touch of acidity. If your chili tastes flat, you’re missing one of those critical layers.
Why We Include the Beans: Heartiness and Texture
Some Texans might disagree, but for a true Classic Chili Recipe intended for a crowd, we need those beans. They add incredible bulk, necessary fiber, and a wonderful creamy texture that thickens the pot beautifully. They also help soak up that incredibly rich sauce while keeping the cost down.
Medium Difficulty: What to Expect from This Recipe
The steps are actually quite simple, like chopping and stirring, which is great for beginners. However, this recipe demands precision in two areas: seasoning early and monitoring the crucial blooming stage .
Don't be fooled by the long simmer; the first 20 minutes are where the magic truly happens.
The Importance of Browning the Beef Properly
If you just steam your ground beef, you lose all that lovely complex flavor. You need to use medium high heat and let the meat develop a deep brown crust on the bottom of the pot. That brown stuff (the fond ) must be scraped up and integrated into the broth later; it’s pure flavor gold.
Balancing Acidity with Rich Spice
We use two secret weapons here: canned tomatoes and a splash of vinegar. The tomatoes are acidic, but their flavor deepens over time. The vinegar, added towards the end of the layering process, cuts through the incredible richness of the beef and spices, ensuring the finished chili tastes bright, not heavy.
The Slow Simmer Advantage (Maximizing Depth)
If you only simmer chili for 30 minutes, you essentially have spicy tomato soup. Simmering for at least 90 minutes allows the fat, meat, spices, and liquid to fully meld together.
This long, gentle cook time is essential for creating that thick, deeply colored sauce we associate with the Best Chili Recipe .
Essential Components for an Authentic Chili
Selecting the Right Cut of Beef
For Classic Beef Chili , you absolutely want ground beef with some fat. I use 80/20 lean-to-fat ratio. If you go too lean (90/10), the chili will lack flavor and the spices won't bloom correctly, as they need a little fat to release their oils.
The Role of the Chili Powder Blend
Do not just use any random jar of chili powder from the back of the cupboard. A quality blend is essential here, specifically one that uses Ancho or New Mexico chiles. A fantastic chili uses a generous amount of seasoning, so don't be shy!
Trust me when I say the cocoa powder, which adds deep, earthy bitterness, is non-negotiable for true depth.
Notes on Tinned vs. Dried Beans
I prefer tinned beans for this Easy Chili Recipe because they save about two hours of soaking and boiling time. If you insist on dried beans, you must soak them overnight and boil them separately until tender before adding them to the chili during the final 30 minutes.
Always rinse tinned beans thoroughly to remove the packing liquid, which can be slimy.
Aromatics and Liquids: Building the Base
This chili relies on simple aromatics: onion and garlic. We build the base with beef stock for deep flavor, though water works in a pinch. We use diced tomatoes for texture, but the real secret weapon is the Apple Cider Vinegar for balancing the heavy flavors.
| Ingredient | Viable Substitute |
|---|---|
| Ground Beef (80/20) | Ground turkey (add 1 Tbsp bacon fat) |
| Chili Powder Blend | 2 Tbsp Smoked Paprika + 1 Tbsp Ground Ancho |
| Beef Stock | Vegetable Stock + 1 Tbsp Better Than Bouillon |
| Apple Cider Vinegar | Red Wine Vinegar or 1/2 tsp Lime Juice |
| Canned Diced Tomatoes | Passata (tomato puree) (chili will be smoother) |
Crafting the Perfect Pot: step-by-step Method
Prepping and Sautéing the Flavor Base
First, get your mise en place sorted, which just means measuring everything out. Heat your oil in a massive Dutch oven over medium heat, then sauté the diced onion until it’s soft and translucent this takes patience, about 7 minutes.
Add the minced garlic right at the end and cook it for just 60 seconds until you get a nutty aroma.
Building the Broth and Spice Foundation
Increase the heat to medium high and introduce the ground beef, breaking it up and seasoning it with the initial salt. Once browned, scoop out any truly excessive fat; we just want a little left for the spices.
Now, this is crucial: Reduce the heat to medium low and sprinkle all your spices, including the cocoa powder and cumin, over the meat. Stir constantly for 60 to 90 seconds until the spices smell profoundly fragrant you are "blooming" them!
Chef's Note: If you smell bitter or burnt notes during the blooming stage, you’ve cooked them too long. Start over if they taste acrid; otherwise, your chili will be ruined. I learned this the hard way once by answering a text during this minute long stage.
The Critical Simmering Stage
Pour in the diced tomatoes and stir aggressively, scraping up all those browned bits from the bottom of the pot. Add the beef stock, the vinegar, and the bay leaves. Bring the whole thing to a healthy simmer, then drop the heat way down to the lowest setting possible.
Cover it loosely and let it bubble gently for 90 minutes.
Final Seasoning and Consistency Check
The chili should look significantly darker and richer after the long simmer. Stir in the rinsed and drained beans and continue simmering, uncovered this time, for a final 15 minutes to thicken things up and heat the beans through. Remove the bay leaves, taste it, and adjust the salt and pepper.
Trust me on this: If it tastes almost perfect but needs something , add 1 tsp of brown sugar; it boosts the tomato flavor beautifully.
Elevating Your Homemade Classic: Chef’s Tips and Troubleshooting
Troubleshooting Common Issues (Too Watery, Too Hot)
- Too Watery: You probably covered it too tightly during the simmer, preventing evaporation. Simmer uncovered on low heat for an extra 20– 30 minutes. Adding 1 Tbsp of cornstarch mixed with 2 Tbsp cold water (a slurry) during the last 15 minutes works too, but simmering is better.
- Too Hot (Spicy): Stir in a generous dollop of sour cream or crème fraîche directly into the pot. Alternatively, add another half cup of diced tomatoes and a pinch of sugar to mute the raw heat.
- Too Bland: Did you skip the blooming? If so, you can still save it! Take 1/2 cup of chili liquid, mix in 1 Tbsp of fresh chili powder, cook that paste in a separate small skillet for 1 minute, and stir it back into the pot.
Achieving the Desired Thickness and Texture
The texture of a classic chili comes from the breakdown of the diced tomatoes and onions, plus the starch released by the beans. To achieve maximum thickness, slightly mash some of the beans against the side of the pot just before the final seasoning check.
This releases starch and naturally thickens the sauce without needing flour.
The Importance of the Overnight Rest
This is the non-negotiable truth of Pub Grub Chili : it tastes ten times better the next day. The overnight rest allows the spices to fully hydrate and the flavors to truly penetrate the meat and beans. Make it on Sunday, eat it gloriously on Monday.
Ultimate Comfort: Serving and Garnish Pairings
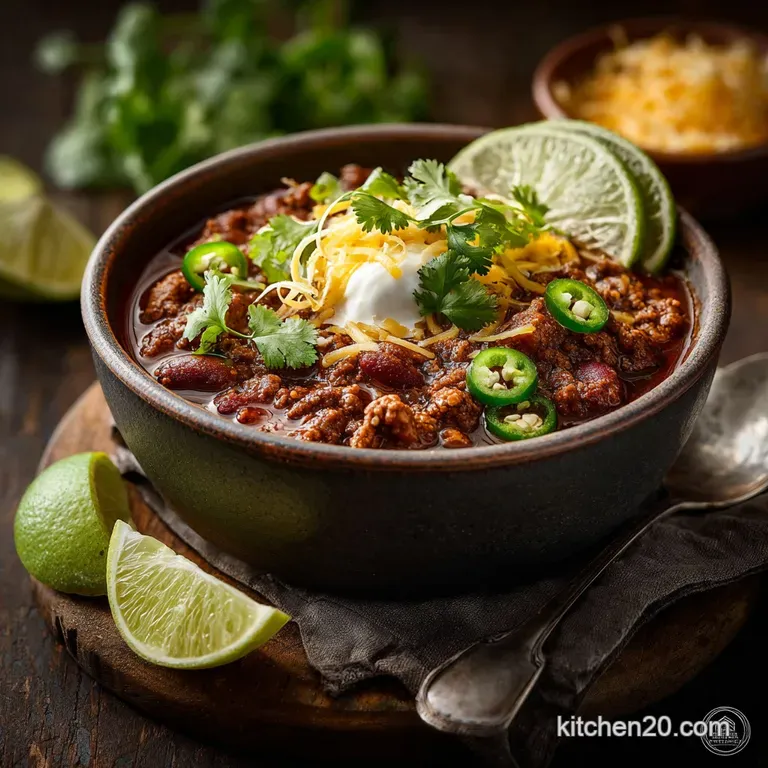
Traditional Toppings and Fixings
The toppings are really what make the meal fun. I recommend a bowl of classic fixings so everyone can build their own:
- Grated sharp Cheddar or Monterey Jack cheese
- A cooling dollop of full fat sour cream
- Sliced scallions (spring onions)
- Fresh chopped coriander (cilantro)
- A handful of crushed tortilla chips (for crunch!)
Perfect Sides to Soak Up the Sauce
You need something robust to wipe the bowl clean, right? Forget boring white bread. I insist on warm cornbread (it must be slightly sweet!) or, for something heartier, serve this chili over rice or baked potatoes. If you're feeling ambitious and need an appetizer while the chili rests, try these Chili Lime Baked Shrimp Cups: Zesty Wonton Appetizers (Ready in 27 Mins) .
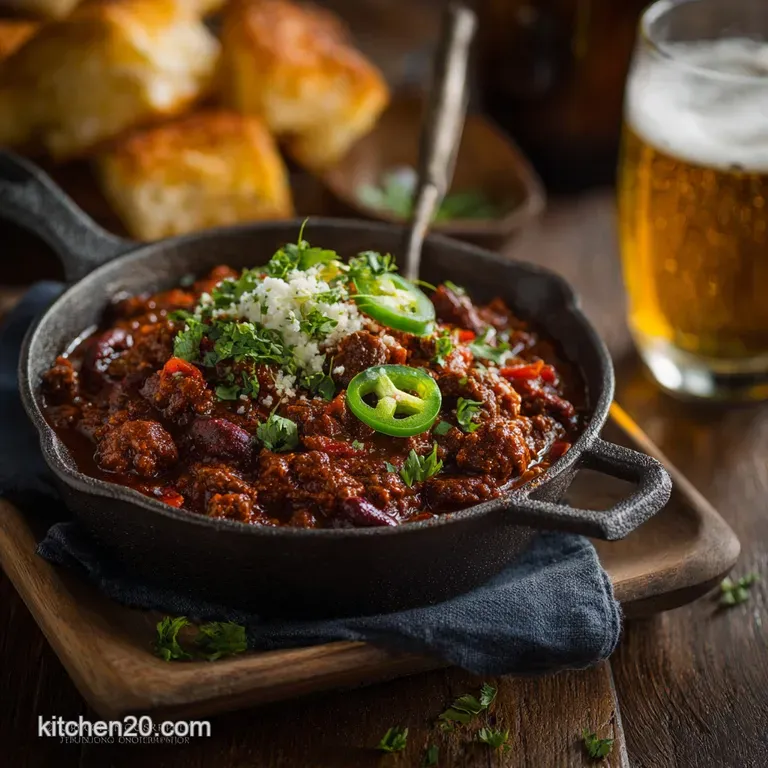
Suggested Beverage Pairings
A dark beer works wonders here; think a hearty stout or a smoky porter. If you prefer wine, a robust Zinfandel stands up beautifully to the rich spices. For dessert, something simple and comforting like a big spoonful of this chili is best followed by a baked treat like our classic Peach Cobbler: Classic Buttermilk Recipe for a Flaky Topping .
make-ahead & Preservation Guide
Chili is the ultimate meal prep champion; it lasts ages and freezes perfectly.
- Fridge Storage: Store in an airtight container for up to 4 days.
- Freezing: Classic chili freezes like a dream. Cool it completely, then transfer it to rigid, freezer safe containers (leave about 1 inch of headspace). It keeps well for up to 4 months.
- Reheating: Thaw overnight in the fridge if possible. Reheat gently in a pot over medium low heat, stirring occasionally. If it has thickened too much during cooling, add a splash of beef stock or water to loosen it up. Do not microwave it cold —it heats unevenly and you lose the texture.

Recipe FAQs
My chili tastes bland after simmering. How do I deepen the flavour?
If the flavor is lacking, it usually means the chili needs more time or seasoning adjustments. Continue simmering uncovered to allow excess liquid to reduce, which naturally concentrates the inherent flavors of the meat and spices.
Finally, taste and adjust the balance with a splash of acidity (like apple cider vinegar or lime juice), or a pinch of salt and brown sugar for deep umami resonance.
My chili is too thin or soupy. How should I thicken it quickly?
To naturally thicken soupy chili, remove the lid and allow it to simmer vigorously for the last 30-45 minutes of cooking until the liquid reduces to your desired consistency. If you need a rapid fix, remove about a cup of the cooked beans, mash them into a smooth paste, and stir them back into the pot; the starches will bind the remaining liquid effectively.
Can I use ground turkey or another meat instead of beef?
Absolutely. Ground turkey, chicken, or pork are excellent alternatives, though they contain less fat than beef and may require adding a tablespoon of oil to the pot during the initial browning stage.
Be aware that non-beef meats may require slightly more aggressive seasoning especially salt and smoke to achieve the deep umami flavor inherent in the classic beef recipe.
How long will leftovers last, and can I freeze this chili?
Properly stored in an airtight container, leftover chili will remain delicious in the refrigerator for 3 to 4 days. Chili freezes exceptionally well, making it ideal for batch cooking. Transfer cooled chili to freezer safe bags or containers, leaving about an inch of headspace, and it can be stored for up to 6 months.
Can I omit the beans to make it truly “Texas style” chili?
Yes, you can omit the beans entirely to adhere to the traditional "Texas Red" style, but you must compensate for the lost bulk and thickening starch. If omitting beans, use a little more diced beef and ensure you stir in a small amount of masa harina (corn flour) or cornmeal toward the end of cooking to maintain the desired rich, thick consistency.
Is it necessary to sear the beef before adding the liquid ingredients?
Searing the beef is a crucial step for building the foundational flavor profile of this classic dish. This process creates the Maillard reaction, developing deep, nutty, caramelized notes that dissolve into the liquid during the long simmer.
Skipping this step results in chili that tastes simply boiled rather than deeply layered and complex.
How can I adjust the spice level if I prefer a milder chili?
To produce a milder chili, reduce the amount of chili powder by one-quarter, and ensure you thoroughly seed and devein any fresh jalapeño or serrano peppers used. Alternatively, if you want to increase the heat, add a pinch of cayenne pepper or a chopped habanero pepper during the initial seasoning phase.
Chefs Classic Beef Chili

Ingredients:
Instructions:
Nutrition Facts:
| Calories | 375 calories |
|---|---|
| Fat | 13.5 g |
| Fiber | 9 g |
