Classic Pumpkin Pie: Silky and Structurally Sound
- Time: Active 30 minutes, Passive 60 minutes, Total 90 minutes
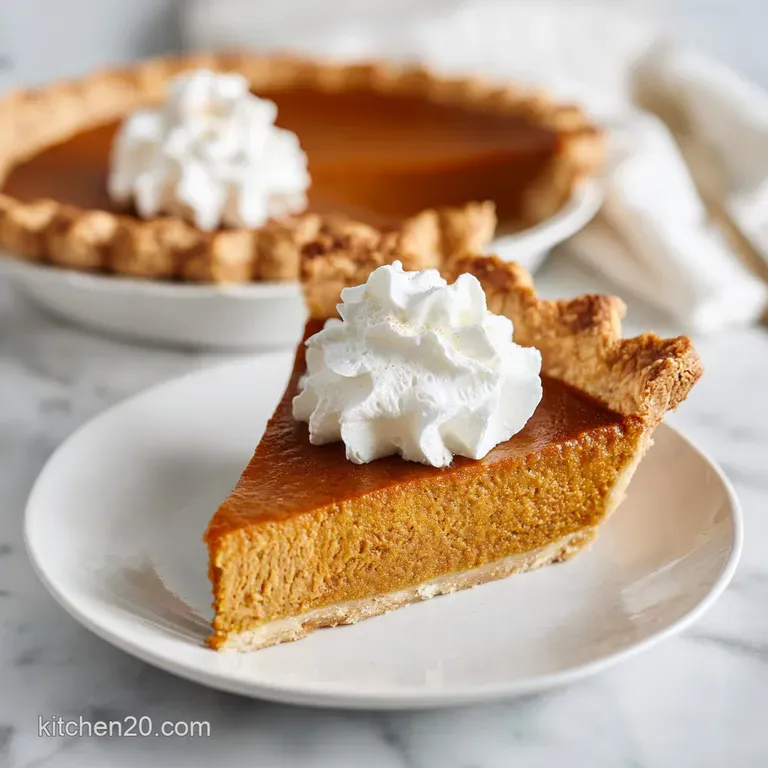
- Flavor/Texture Hook: Velvety spiced custard with a shattering, buttery flake
- Perfect for: Thanksgiving dinner or stress free holiday meal prepping
- Why This Classic Pumpkin Pie Always Wins
- Quick Specs for Stress Free Baking
- Essentials for Your Holiday Shopping List
- Best Gear for Efficient Pie Making
- Step by Step Filling and Baking
- Solving Common Texture and Crust Issues
- Clever Ways to Customize Your Slice
- Debunking Baked Good Misconceptions
- Keeping Your Leftovers Fresh and Tasty
- Finishing Touches for a Stunning Table
- Recipe FAQs
- 📝 Recipe Card
Why This Classic Pumpkin Pie Always Wins
The smell of cinnamon, ginger, and toasted cloves hitting the warm oven air is basically the official start of the holiday season in my house. There is something truly grounding about pulling a heavy, golden brown tin out of the oven when the windows are fogged up from the cold outside.
I used to think the custard was the hard part, but I quickly realized that the real secret to a legendary slice lies in the temperature of your butter and the patience of your cooling rack.
We have all been there, sitting at the dinner table with a slice of pie that looks great on top but has a damp, gummy base that sticks to the plate. It is frustrating because you put in the work, but the physics of the bake just did not cooperate.
This method changes that by treating the crust like a structural barrier and the filling like a delicate custard. You are going to get a slice that stands tall, looks sharp, and feels like silk on the tongue.
This is not just another recipe to add to the pile, it is a streamlined system designed for a busy kitchen. Whether you are juggling a turkey and three side dishes or just want a reliable dessert for a quiet weekend, this approach prioritizes efficiency without cutting corners on the classic flavor we all crave.
We are looking for that specific bronze hue and a center that wobbles just enough to let you know it is going to be incredibly creamy once it sets.
Quick Specs for Stress Free Baking
Efficiency in the kitchen starts with a clear plan of attack. Before you even touch the flour, you need to know the timeline. This recipe is built on a "chill bake set" flow that ensures you aren't rushing the most critical stages.
If you try to roll warm dough or cut into a warm pie, the results will always be disappointing. We are aiming for precision here, using standard measurements and temperatures that work in any home oven.
The Three Stage Baking Timeline
- The Foundation (0-45 mins): Prepare the dough using chilled fats and ice water. This stage is all about keeping things cold to ensure the crust shatters later. While the dough chills, you can streamline your prep by measuring out your spices and pumpkin.
- The Structure (45-75 mins): Par baking the crust at 375°F (190°C) is non negotiable. This sets the floor of your pie so the wet filling doesn't soak through. This is also when you whisk together your filling, which takes less than five minutes if your eggs are at room temperature.
- The Set (75-150 mins): Lower the oven to 350°F (175°C) and bake the custard. The most important part of this stage happens after the oven dings. A 3 hour rest on a wire rack isn't a suggestion, it is the final step of the cooking process where the fats and starches fully bond.
| Servings | Ingredient Adjustments | Pan Size | Cook Time |
|---|---|---|---|
| 4 people | Half ingredients (use 1.5 eggs) | 6 inch deep dish | 35-40 mins |
| 8 people | Standard recipe (see below) | 9 inch pie plate | 60 mins |
| 16 people | Double ingredients (2 pies) | Two 9 inch plates | 65-70 mins |
The transition from a high heat par bake to a moderate custard bake is what keeps the edges from burning while the middle reaches the perfect temperature. Most people make the mistake of keeping the oven at one temperature the whole time, which leads to overcooked, rubbery eggs or an undercooked, doughy bottom.
By shifting the heat, we respect the different needs of the flour and the dairy.
Essentials for Your Holiday Shopping List
Selecting the right components for your classic pumpkin pie is about more than just grabbing the first can you see. I always look for a high-quality pumpkin puree that is 100% pumpkin, not "pumpkin pie mix" which already has sugar and spices added.
Controlling your own spice levels is the only way to get that deep, warm flavor profile that separates a homemade dessert from a grocery store afterthought.
| Component | Role | Pro Secret |
|---|---|---|
| Unsalted Butter | Creates flaky steam pockets | Cube and freeze for 10 minutes before use |
| Evaporated Milk | Provides a silky, low water fat | Do not use sweetened condensed milk by mistake |
| Light Brown Sugar | Adds moisture and caramel notes | Pack it tight to ensure the ratio is exact |
| Large Eggs | Binds the custard together | Ensure they are room temp for easy emulsification |
Using evaporated milk is a specific choice for efficiency and texture. It has about 60% of the water removed compared to regular milk, which means you are adding concentrated dairy solids without the extra liquid that can make a pie soggy.
It is a shelf stable powerhouse that gives you a much more consistent result than heavy cream, which can sometimes break if overbaked.
The Flour and Fat Balance
For the crust, 1.25 cups (160g) of all purpose flour provides just enough gluten to hold the weight of the heavy filling without becoming tough. The 0.5 cup (113g) of unsalted butter needs to be worked into the flour until you see small, pea sized lumps. Those lumps are what turn into flakes.
If you over mix the dough until it is smooth, you've essentially made a cookie, not a pie crust.
The spices are where the personality of the dish comes out. 1.5 teaspoons of cinnamon provides the base, while 0.5 teaspoon of ginger adds a tiny bit of heat and 0.25 teaspoon of cloves brings that aromatic punch. Don't skip the extra 0.5 teaspoon of salt in the filling either.
Salt is the bridge that helps the sugar and the spices actually taste like something. Without it, the pie will just taste "sweet" rather than complex and rich.
Best Gear for Efficient Pie Making
Modern appliances can take a lot of the guesswork and physical labor out of this process. If you have a food processor, use it for the crust. Pulsing the cold butter into the flour takes about thirty seconds and keeps the heat of your hands from melting the fat.
If you are doing it by hand, a pastry cutter is your best friend. Whatever you do, don't use a blender, as it will pulverize the flour and destroy the texture.
Chef Tip: Place your metal pie plate or ceramic dish in the fridge while you prep the filling. A cold dish helps the crust hold its shape the moment it hits the hot oven air.
A digital thermometer is the most underutilized tool in pie baking. While the jiggle test is the classic way to check for doneness, pulling the pie when the center reaches exactly 175°F (80°C) is the only way to guarantee a crack free top every single time.
It takes the "is it done?" anxiety completely out of the equation. You will also want a sturdy wire cooling rack. Air needs to circulate under the pie as it cools to prevent the bottom from steaming and losing its crispness.
| Original Ingredient | Substitute | Why It Works |
|---|---|---|
| Evaporated Milk | Heavy Cream | Higher fat content leads to an even richer, denser custard. |
| Light Brown Sugar | Dark Brown Sugar | Adds more molasses flavor. Note: Will darken the final color. |
| All Purpose Flour | Pastry Flour | Lower protein creates an even more tender, fragile crust. |
If you are looking to streamline even further, you can use a high-quality store-bought crust, but make sure it is the kind you roll out yourself rather than the pre baked frozen shells. The frozen ones are often too thin to handle the weight of this specific pumpkin filling.
If you go the store-bought route, still follow the par baking instructions to ensure the base stays crisp.
step-by-step Filling and Baking
When it is time to bring the classic pumpkin pie together, focus on the order of operations. We start by integrating the sugars and fats before adding the liquids. This prevents the eggs from being overwhelmed and ensures the spices are evenly distributed throughout the entire custard rather than clumping in one spot.
- Cut the fat. Combine 1.25 cups flour and 0.5 tsp salt. Work 0.5 cup chilled butter into the mix until pea sized crumbs form. Note: This creates the steam pockets needed for a flaky texture.
- Hydrate the dough. Add 4 tbsp ice water, one tablespoon at a time, mixing until it just holds together. Chill for 1 hour.
- Roll and fit. Roll the dough to 12 inches on a floured surface. Ease it into a 9 inch pie plate without stretching it. Note: Stretching the dough causes it to shrink during baking.
- The Par Bake. Line the crust with parchment and pie weights. Bake at 375°F (190°C) for 15 minutes. until edges are pale gold.
- Seal the base. Remove weights, brush with egg white, and bake 5 more minutes. Note: The egg white creates a waterproof seal for the filling.
- Whisk the base. In a large bowl, whisk 3 eggs and 0.75 cup brown sugar until smooth and slightly pale.
- Spice and puree. Stir in 15 oz pumpkin puree, 1.5 tsp cinnamon, 0.5 tsp ginger, 0.25 tsp cloves, and 0.5 tsp salt.
- Stream the dairy. Slowly pour in 12 fl oz evaporated milk while whisking gently. until the mixture is uniform and silky.
- The final bake. Pour into the warm crust. Lower oven to 350°F (175°C) and bake for 45-55 minutes.
- The Jiggle Test. Remove when edges are set but the center 2 inches wobbles like firm gelatin.
The cooling phase is where the magic happens. As the pie sits on the wire rack for 3 hours, the residual heat continues to cook the very center without the harsh direct heat of the oven. This slow finish is what prevents the middle from collapsing.
If you try to cut it early, you'll end up with a "soup" in the middle of your plate. Patience is the most important ingredient in this entire recipe.
Solving Common Texture and Crust Issues
Even with a perfect plan, things can go sideways. The most common complaint with a classic pumpkin pie is the appearance of a large crack across the surface as it cools. This usually happens because the eggs were overcooked, causing them to tighten and pull apart.
If you see the edges starting to puff up like a souffle in the oven, that is your sign to pull it out immediately, regardless of what the timer says.
Why Your Crust Is Soggy
A soggy bottom is almost always the result of skipping the par bake or having a filling that is too watery. By par baking and then brushing with egg white, you are creating a literal shield. But you also need to make sure you aren't introducing extra moisture.
If you are using fresh pumpkin puree instead of canned, you must strain it through cheesecloth for at least two hours to remove the excess water, or your pie will never set properly.
| Problem | Root Cause | Solution |
|---|---|---|
| Surface Cracks | Oven temperature too high or overbaked | Use a thermometer; pull at 175°F internal temp. |
| Shrunken Crust | Dough was stretched or not chilled enough | Chill dough after rolling; don't pull on the edges. |
| Grainy Filling | Eggs scrambled from high heat | Lower oven temp to 350°F for the custard stage. |
The key to a velvety finish is avoiding air bubbles. When you are whisking the milk into the pumpkin mixture, do it by hand with a gentle motion. If you use an electric mixer or whisk too vigorously, you'll incorporate air that will rise to the surface in the oven, creating little craters or a foamy top.
We want a dense, smooth custard that looks like polished mahogany.
Common Mistakes Checklist
- ✓ Forgetting to chill the dough after rolling it into the pan (leads to shrinkage).
- ✓ Using "Pumpkin Pie Filling" instead of "100% Pure Pumpkin" (throws off sugar ratios).
- ✓ Over working the crust dough until the butter disappears (kills the flakiness).
- ✓ Cutting the pie while it is still slightly warm (the custard won't be set).
- ✓ Ignoring the egg white wash during par baking (results in a soggy bottom).
Clever Ways to Customize Your Slice
Once you have the foundation of the classic pumpkin pie down, you can start tweaking the flavor profile to match your specific taste. If you want something a bit more southern and decadent, you might consider making a Pecan Pie recipe alongside it. The two textures one creamy and one crunchy are the ultimate holiday duo.
When scaling this recipe, remember that baking is a game of ratios. If you want to make mini pies for a party, you'll need to reduce the baking time significantly. Mini pies in a standard muffin tin usually take only 15 to 20 minutes at 350°F.
If you are doubling the recipe for a crowd, don't just double the spices. Start with 1.5 times the spices and taste the filling before adding the rest. Spices like cloves and ginger can become overpowering very quickly when doubled.
| Feature | Classic Method | Fast Method |
|---|---|---|
| Crust | Homemade, 1 hour chill | store-bought refrigerated |
| Flavor | Deep, nuanced spices | Pre mixed "Pumpkin Spice" |
| Texture | Velvety, structured | Soft, may be slightly loose |
For a slightly different presentation that uses similar ingredients, you could look into a Pumpkin Roll recipe for a more portable dessert option. The pumpkin roll uses a sponge cake base instead of a pastry crust, which is a great alternative if you really struggle with dough. However, nothing quite beats the satisfying "snap" of a well made pie crust against a soft filling.
Debunking Baked Good Misconceptions
There is a big myth that fresh pumpkin is always better than canned. In reality, most "sugar pumpkins" you find at the store are inconsistently watery and fibrous. Professional bakers almost always prefer canned 100% pumpkin because the moisture content is standardized. It results in a much more reliable custard.
If you really want to use fresh, you have to be prepared to roast, puree, and strain it significantly to match the quality of the canned version.
Another common misconception is that you should "seal" the crust by not pricking it with a fork. Actually, "docking" the crust (poking small holes in the bottom) prevents air bubbles from lifting the dough off the pan during the par bake.
Don't worry, the egg white wash you apply later will fill those tiny holes and keep the filling from leaking through. It's a clever way to keep the crust flat and even.
Keeping Your Leftovers Fresh and Tasty
The high dairy and egg content of this pie means it cannot sit out on the counter like a fruit pie. Once it has cooled completely on the rack, it needs to go into the fridge. I usually leave it uncovered for the first few hours in the fridge to ensure all the steam has escaped, then I wrap it loosely in plastic wrap or foil.
It will stay fresh and delicious for about 4 days.
For zero waste baking, don't throw away those dough scraps! Roll them out, sprinkle them with cinnamon and sugar, and bake them on a cookie sheet for 8-10 minutes. My kids call them "pie fries," and they are usually gone before the actual pie is even out of the oven.
If you have leftover pumpkin puree, stir it into your morning oatmeal or use it to thicken a batch of turkey chili.
- Fridge: Up to 4 days, wrapped loosely.
- Freezer: Up to 1 month. Wrap tightly in several layers of plastic wrap and then foil. Thaw in the fridge for 24 hours before serving.
- Reheating: Best served cold or at room temperature. If you must warm it, use a low oven (300°F) for 10 minutes; avoid the microwave as it turns the crust rubbery.
Finishing Touches for a Stunning Table
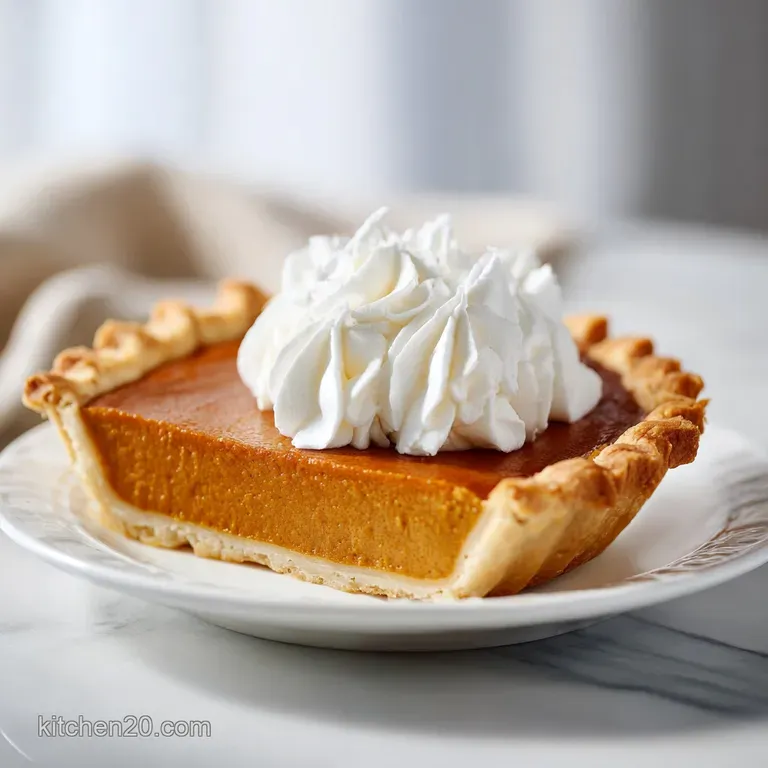
Presentation is the final step in the efficiency chain. A perfectly baked classic pumpkin pie doesn't need much, but a few small touches can make it look like it came from a high end bakery. A dollop of whipped cream is the traditional choice, but try adding a pinch of orange zest to the cream as you whip it.
The citrus oils cut through the heavy richness of the pumpkin and brighten the whole dish.
If your pie did happen to crack, don't panic. This is what decorative crust cutouts are for. Use your leftover dough scraps to cut out leaf shapes, bake them separately on a tray, and place them strategically over any imperfections. It looks intentional and adds a professional flair.
Serving each slice with a small sprinkle of flaky sea salt also helps highlight the caramel notes in the brown sugar.
The true beauty of this recipe is that it doesn't rely on gimmicks. It relies on solid technique, temperature control, and high-quality staples. When you sit down to eat, you'll notice the way the crust shatters into buttery flakes and how the filling holds its shape on the fork.
That is the result of the par bake and the slow cool down. It's a classic for a reason, and now you have the system to make it perfectly every single time.

Recipe FAQs
How to tell if the pie is done baking?
Look for puffed, set edges and a slight center wobble. The center two inches should move like firm gelatin when you gently shake the pan. If the center is completely still, it is overbaked.
Is it true I should bake the pie at a high temperature for the entire time?
No, this is a common misconception. You must start the crust at 375°F for par-baking, then lower the temperature to 350°F once you add the filling to ensure the custard sets evenly without cracking.
How to prevent the pie crust from becoming soggy?
Brush the par-baked crust with an egg white wash before adding the filling. This creates a moisture barrier that keeps the base crisp. If you enjoy mastering these structural pastry techniques, you will find similar crust handling principles useful for other complex desserts.
How to handle the dough so it stays flaky?
Keep the butter in pea-sized crumbs throughout the mixing process. Do not overwork the dough, as large butter pieces create the steam pockets necessary for a light, flaky texture.
Can I use pumpkin pie filling instead of pure pumpkin puree?
No, stick to 100% pure pumpkin puree. Pumpkin pie filling already contains sweeteners and spices, which will ruin the precise ratios of sugar and seasoning in this recipe.
How to avoid cracks in the pie surface?
Whisk the filling ingredients gently to avoid incorporating air bubbles. Additionally, remove the pie from the oven while the center is still wobbly to prevent the custard from over coagulating as it cools.
How long should the pie cool before serving?
Wait at least 3 hours for the custard to fully set. If you slice it while still warm, the filling will not hold its shape and will appear runny on the plate.
Classic Pumpkin Pie Guide
Ingredients:
Instructions:
Nutrition Facts:
| Calories | 355 calories |
|---|---|
| Protein | 8.2 g |
| Fat | 17.1 g |
| Carbs | 42.2 g |
| Fiber | 3.2 g |
| Sugar | 24.5 g |
| Sodium | 348 mg |
