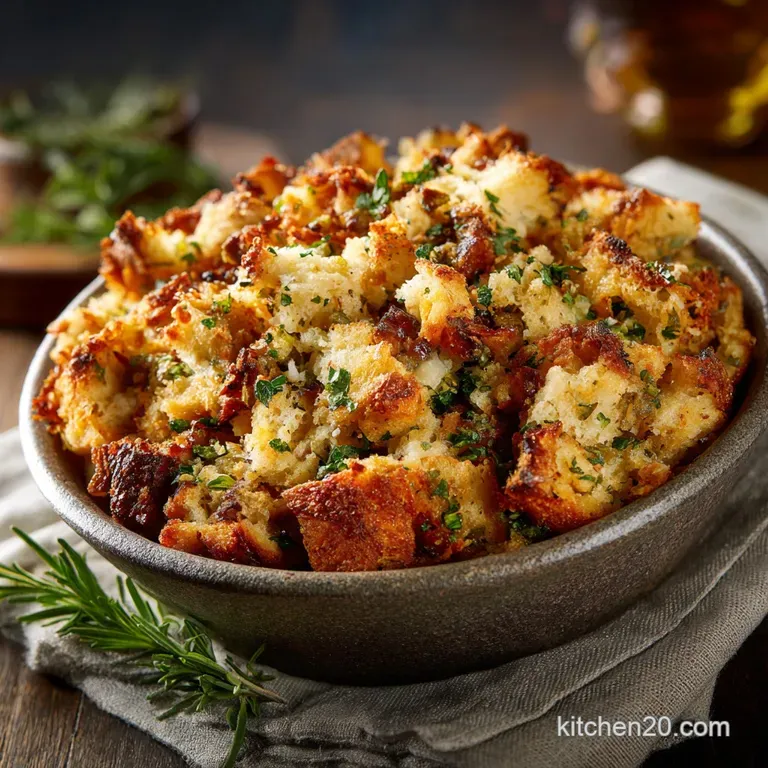
The Proper Homemade Stuffing: Sage, Onion, and Butter Perfection
- Welcome to The Proper Stuffing: A Classic Holiday Tradition
- The Science of Perfectly Balanced Homemade Stuffing
- Essential Ingredients for Sage, Onion, and Butter Perfection
- How to Bake the Best Homemade Stuffing: Step-by-Step Method
- Troubleshooting Your Dressing: Chef's Tips for Flawless Homemade Stuffing
- Preparing Ahead: Storage and Reheating Your Classic Stuffing
- What to Serve With Traditional Sage Stuffing
- Recipe FAQs
- 📝 Recipe Card
Welcome to The Proper Stuffing: A Classic Holiday Tradition
There is simply no sound in the kitchen quite as comforting as the sizzle of butter hitting the skillet, followed quickly by the glorious, pungent aroma of fresh sage and caramelized onions. This, my friend, is the smell of a holiday starting right, the foundation of every magnificent feast.
Forget the turkey for a minute; Homemade Stuffing is the real star, the dish everyone secretly piles extra high on their plate.
I used to think Traditional Stuffing Recipe was some complicated art, demanding hours of fussy work. Nope. It's the ultimate culinary illusion: complex, rich flavors built from basic, inexpensive ingredients like stale bread and pantry staples.
It’s fast, incredibly forgiving, and when done right, it blows any store-bought box mix out of the water.
This is the only recipe you will ever need for Homemade Stuffing for Thanksgiving . We’re talking golden crisp corners, a deeply savory interior, and just the right amount of herbal punch. We focus on technique over crazy ingredients.
Let’s crack on and make the best Classic Bread Stuffing you’ve ever tasted.
The Science of Perfectly Balanced Homemade Stuffing
This recipe focuses on four simple elements that prevent the common stuffing pitfalls dry edges or a mushy center. We don't want bread pudding; we want texture! It is about controlled absorption and flavor saturation.
What is the Difference Between Stuffing and Dressing?
Honestly? The difference is mainly regional, and whether or not you bake it inside the bird. We call this recipe "stuffing" because it sounds better, but we bake it separately in a dish, which technically makes it a dressing .
Baking it separately is not only safer, but it also guarantees those crispy, crunchy edges that we all crave.
Why Fresh Sage is Non-Negotiable for Deep Flavor
Dried herbs are fine, sure, but fresh sage is transformative in Simple Is Best Stuffing . When you sauté it gently in the butter, it releases oils that infuse the entire dish with that characteristic, cozy, holiday flavor. If you skip this step, the dish tastes flat.
It’s the backbone of this whole operation, so use the good stuff.
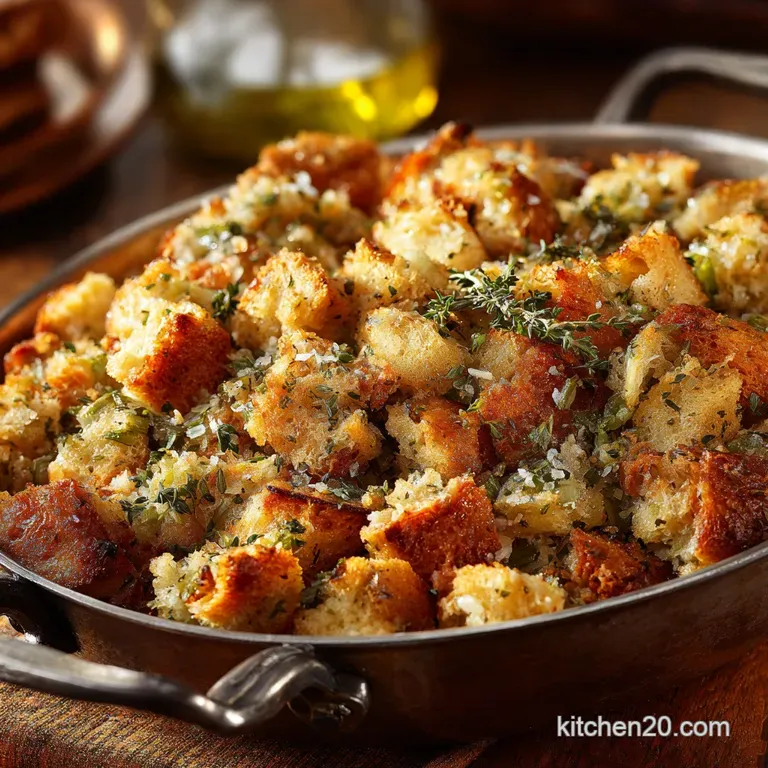
The Texture Paradox: Crisp Top, Moist Interior
Achieving that glorious contrast is all about preparation. The bread must be completely dry before mixing, and you absolutely cannot press the mixture into the pan. If you gently place the stuffing into the dish, leaving airy pockets, the top pieces will crisp up beautifully while the covered interior remains wonderfully moist from the stock.
The Role of Celery and Onion in Building the Flavor Base
This combination, often called the mirepoix , is fundamental. Cooking the celery and onion low and slow in the butter draws out their natural sweetness, concentrating the savory base before it even hits the bread. This step takes time, so don't rush the sauté.
Butter Saturation: Why Tossing is Key to Crispness
Once the aromatics are cooked, you pour that entire glorious skillet of butter, herbs, and veg over the bread cubes. The fat is what separates this from mush. Every cube must be coated in butter before the stock goes in.
This buttery layer waterproofs the bread slightly, allowing it to soak up just enough liquid without disintegrating.
Achieving the Ideal Bread-to-Liquid Ratio
This is where most people mess up! I made soggy stuffing for years because I was afraid of dryness. You need enough stock to bind the mixture so it holds a soft shape, but not so much that liquid pools in the bottom of the bowl.
The mixture should feel moist, definitely, but you should still be able to clearly identify the bread cubes.
Essential Ingredients for Sage, Onion, and Butter Perfection
You only need a few high impact ingredients for this Homemade Stuffing Recipe . Don't compromise on the quality of the butter or the freshness of the herbs they do all the heavy lifting here.
| Ingredient | Why We Use It | Substitution Idea |
|---|---|---|
| Rustic Bread (Sourdough/French) | Sturdy structure; doesn't turn to paste. | Stale cornbread or good quality gluten-free bread. |
| Unsalted Butter | Rich, controlled flavor base. | Equal amount of high-quality olive oil or dairy-free spread. |
| Fresh Sage & Thyme | The essential holiday aroma. | 1 Tbsp dried sage and 1 tsp dried thyme (bloom in butter). |
| Low-Sodium Stock | Adds moisture and deep savoriness. | Water mixed with 1 Tbsp nutritional yeast for depth. |
| Eggs | A necessary binder; helps hold the shape. | 1/4 cup applesauce or omit entirely (texture will be looser). |
Choosing the Right Bread: Stale Cubes vs. Fresh Loaves
Please, for the love of everything holy, use stale or thoroughly dried bread. I prefer a sturdy bread like sourdough or a good baguette; they provide excellent structure and chew. If you use fresh bread, the minute you add the stock, it's game over.
For a truly amazing crust, try my method for [Homemade Stuffing: Crispy Sourdough Stuffing for Turkey Dinner].
Stock Selection: Broth Depth and Salinity
Since you are adding a lot of salt to the recipe, you must use low-sodium stock. If you use regular stock, you run the risk of an overly salty dish, which is nearly impossible to fix. Warm the stock slightly before using it, too; warm liquid absorbs faster and more evenly than cold liquid.
Handling Fresh Sage: Chopping Techniques for Maximum Aroma
Don't just haphazardly chop your sage. Stack the leaves, roll them tightly (a chiffonade ), and then dice them fine. This ensures you release the maximum amount of aromatic oil when they hit the hot butter.
Dairy Fat Matters: Butter Quality Explained
If you can, use a European style butter that has a higher fat content. More fat means more flavor, more crispness, and a richer mouthfeel. Since this is a simple, five ingredient recipe, the quality of the butter really shines through.
How to Bake the Best Homemade Stuffing: step-by-step Method
This method is foolproof, provided you respect the importance of dry bread and gentle mixing. This recipe makes the ultimate Homemade Stuffing for Turkey Dinner .
Preparing the Aromatics: Sautéing for Maximum Sweetness
- Dry the Bread: Cube the bread first and get it drying. Spread the cubes on baking sheets and either leave them out overnight or toast them lightly in a 300°F (150°C) oven until they feel crisp and sound hollow.
- Melt and Sauté: Melt the 8 tablespoons of butter in a large skillet over medium heat. Add the finely diced onion and celery. Cook them gently for a good 8 to 10 minutes until they are soft and translucent. We want sweet and tender, not browned.
- Bloom the Herbs: Stir in the fresh sage, thyme, salt, and pepper. Cook for exactly one minute until the herbs smell intensely fragrant. Turn off the heat.
The Bread Tossing Technique: Coating Every Cube
- Toss with Fat: Pour the entire contents of the skillet, including all that beautiful melted butter and fragrant vegetables, over the dried bread cubes in your largest mixing bowl. Toss thoroughly with a spatula or your hands until every single cube looks glossy and coated.
Assembling the Mixture and Mandatory Rest Time
- Add Binder: Whisk the two lightly beaten eggs into the warmed stock.
- Moisten Gently: Pour about 3 cups of the liquid mixture over the coated bread. Gently fold it together. Add more stock sparingly, a quarter cup at a time, until the mixture is moist enough to clump easily when squeezed, but doesn't drip liquid. Do not stir aggressively! You’ll activate the gluten and get glue.
- Rest: Cover the bowl and let the mixture sit for 15 minutes. This gives the bread time to fully hydrate and the herbs time to really settle in.
Baking Times and Temperature for Golden Crust
- Prepare to Bake: Lightly grease your 9x13 inch baking dish. Scoop the stuffing mixture into the dish. Important: Spread it loosely. Do not compress it at all!
- Bake: Bake at 375°F (190°C) for 30 minutes, uncovered, until the top is golden brown and crispy. If the top looks dark, loosely tent it with foil and continue baking for another 10 to 15 minutes until the internal temperature hits 165°F (74°C).
- Rest: Let it sit for 5 to 10 minutes before serving.
Troubleshooting Your Dressing: Chef's Tips for Flawless Homemade Stuffing
I’ve made every mistake in the book, so you don’t have to. Here are the most common ways this recipe can go sideways and how we fix them.
Preventing a Dry Stuffing Disaster (Moisture checks)
If your stuffing comes out dry, you likely started with bread that was too crusty, or you didn't add enough stock. The fix? About 5 minutes before the stuffing is finished baking, check the center.
If it feels too firm, pour 1/4 cup of warm stock or melted butter evenly over the top, cover it loosely with foil, and let it steam for the remaining time.
Fixing Over Salted Stuffing
This happens when you use regular stock or get heavy handed with the seasoning before tasting. The simplest way to mitigate overly salty stuffing is adding acid or richness. Stir in a few tablespoons of finely chopped, fresh parsley and maybe 1/4 cup of heavy cream or unsalted melted butter right before serving.
The added fat and fresh herbs will help mask the excess saltiness.
Chef's Note: If you want truly next level crispness, try tossing 2 extra tablespoons of melted butter over the top of the dressing halfway through the baking time. It creates a beautiful, deep, golden crust.
Preparing Ahead: Storage and Reheating Your Classic Stuffing
Making stuffing ahead of time is a huge win for holiday sanity. You absolutely should do it.
Can I Assemble Stuffing Ahead of Time? (The 24 Hour Rule)
You bet you can! Assemble the mixture completely (Steps 1 8), but stop just before baking. Scoop it into the prepared dish, cover it tightly with plastic wrap, and refrigerate for up to 24 hours.
When you’re ready to bake, let it sit on the counter for 30 minutes while the oven preheats, then bake as directed (you might need 5 10 extra minutes of baking time since it’s starting cold).
Proper Refrigeration and Food Safety
Cooked stuffing keeps beautifully in an airtight container in the fridge for up to 4 days. Remember, if you baked any of it inside a turkey, you must remove all of it immediately after the turkey comes out of the oven. Safety first!
Freezing Unbaked vs. Baked Stuffing
This stuffing freezes wonderfully! You can freeze the fully baked and cooled stuffing in a freezer safe dish for up to 3 months. To reheat, thaw overnight in the fridge and bake covered at 350°F (175°C) until piping hot (about 30 minutes).
If you prefer, you can also freeze the assembled but-unbaked mixture, just add an extra 15 minutes to the baking time when you finally cook it.
What to Serve With Traditional Sage Stuffing
This robust, Herbed Stuffing pairs perfectly with rich poultry and anything tart. It's the grounding element on the plate.
- The Main Event: Roast Turkey or Chicken demands this rich flavor profile.
- Gravy, Gravy, Gravy: A generous ladleful of good gravy is non-negotiable for moistening the interior.
- The Tart Counterpoint: You need something bright to cut through all that butter. I always pair this with a tangy sauce, like my [Cranberry Sauce: Easy Homemade Compote with Zesty Orange Flavor]. The orange zest works magic here.
- A Spicier Take: If you’re feeling adventurous next time, check out my full, robust recipe for [Thanksgiving Recipes: Ultimate Crisp Sausage Stuffing Recipe] it adds meat and fruit for an even deeper flavor bomb.

Recipe FAQs
Why is my homemade stuffing dry and crumbly instead of moist and cohesive?
Dry stuffing is typically caused by insufficient liquid (broth/butter) or over baking uncovered. Ensure the bread cubes are lightly saturated and pressed down slightly before baking, resembling a soft sponge.
For a guaranteed moist result, cover the stuffing dish tightly with foil for the first 30 minutes of baking to trap steam, only removing it for the last 15 minutes to achieve a crisp golden top.
Can I prepare the stuffing mixture ahead of time?
Yes, you can prepare the full stuffing mixture (including the seasoned bread and vegetables) up to 24 hours in advance. Store the unbaked mixture in the prepared dish, covered tightly with plastic wrap, in the refrigerator.
Before baking, allow the mixture to sit at room temperature for about 30 minutes, then bake as directed, adding 5 10 minutes to the overall baking time if the mixture still feels chilled.
How can I make this traditional butter based recipe suitable for vegan diets?
Substitute the melted butter with an equivalent amount of high-quality vegan margarine or olive oil for sautéing the aromatics. Ensure you use rich vegetable broth instead of chicken or turkey stock for the liquid.
If your recipe calls for an egg as a binder, use a "flax egg" (1 tablespoon of ground flaxseed mixed with 3 tablespoons of water, rested for 5 minutes) to help hold the mixture together.
What is the best type of bread to use, and does it need to be stale?
The best breads are crusty loaves like sourdough, French bread, or Italian bread, as they have structure and won't disintegrate when wet. Avoid soft, pre-sliced sandwich loaves.
The bread must be stale or dried out, which prevents the stuffing from becoming overly mushy. Cut the cubes the day before and let them air dry, or toast them lightly in a low oven (250°F / 120°C) until dry to the touch.
My stuffing turned out soggy on the bottom; what went wrong?
Sogginess often results from over saturating the bread with broth or butter, or overcrowding the baking dish. Stuffing should be moist, but not soaking wet before baking.
Ensure the bread cubes are dry before mixing, and always use a dish large enough so the mixture is loosely layered, allowing steam to escape and circulate during baking.
Can I add sausage or mushrooms to this sage and onion recipe?
Absolutely, adding meat or fungi enhances the savoury profile. For sausage, cook and crumble it completely before adding it to the sautéed vegetables; drain off the excess grease.
For mushrooms, slice them thinly and sauté them along with the onions and celery until their liquid has fully evaporated to prevent them from making the stuffing watery.
How should I store and reheat leftover stuffing?
Leftovers should be cooled quickly and stored in an airtight container in the refrigerator for up to four days, or frozen for up to three months.
To reheat, sprinkle the stuffing with a tablespoon of broth, cover it loosely with foil, and bake at 350°F (175°C) until heated through (about 20 30 minutes) to maintain moisture.
Classic Sage Homemade Stuffing
Ingredients:
Instructions:
Nutrition Facts:
| Calories | 863 kcal |
|---|---|
| Protein | 22.1 g |
| Fat | 38.9 g |
| Carbs | 91.5 g |
