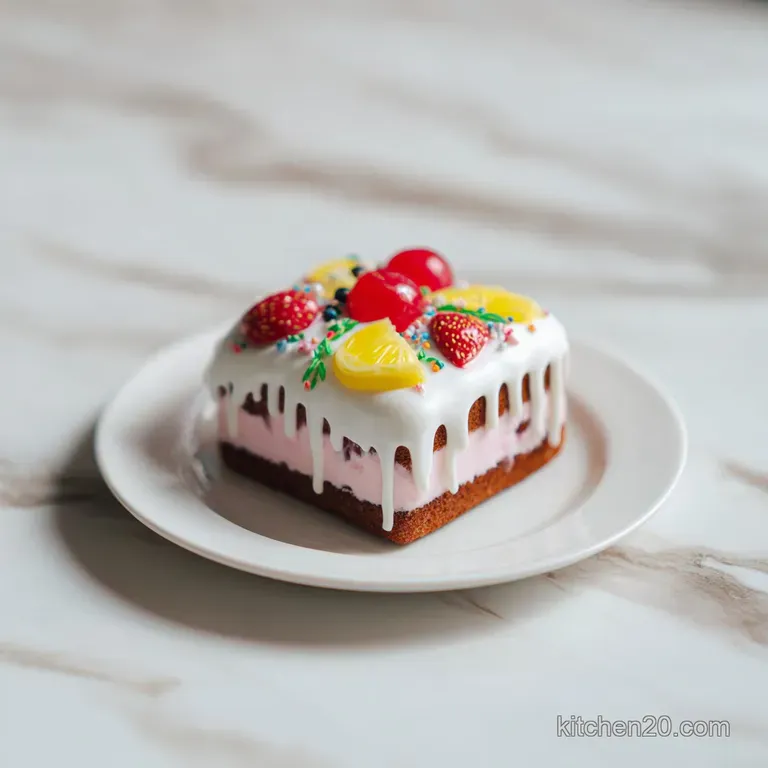
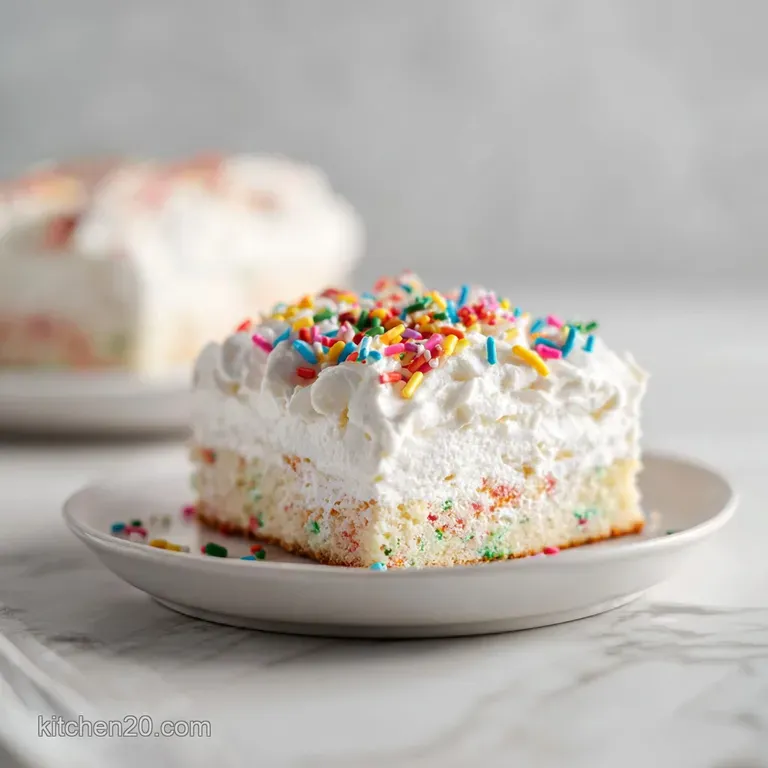
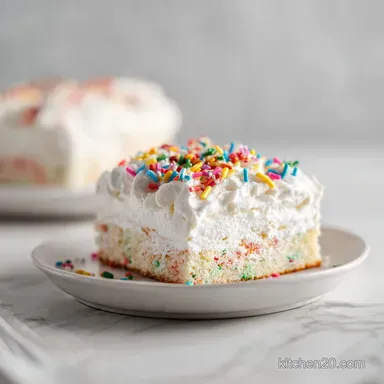
Texas Sheet Cake: Rich and Moist
- Time: Active 15 minutes, Passive 20 minutes, Total 35 minutes
- Flavor/Texture Hook: Silky chocolate crumb with a crackling, sugary pecan glaze
- Perfect for: Large family gatherings, office potlucks, or busy weeknight treats
- Master the Authentic Texas Sheet Cake Recipe
- The Secret to This Texture
- Deep Component Analysis
- Selecting the Best Pantry Staples
- Streamlining Your Kitchen Tool Set
- Mastering the Fast Mixing Process
- Preventing Common Baking Disasters
- Scaling for Different Crowd Sizes
- Smart Flavor and Ingredient Swaps
- Debunking Common Baking Myths
- Efficient Storage and Freezing Methods
- Perfect Pairings for Every Occasion
- Recipe FAQs
- 📝 Recipe Card
Master the Authentic Texas Sheet Cake Recipe
The moment that saucepan of butter, cocoa, and water hits a rolling boil, your entire kitchen transforms. It isn't just the smell of deep, dark chocolate filling the air, it's that specific, shimmering gloss the mixture takes on before it hits the dry ingredients.
I remember the first time I made this, skeptical that boiling water belonged anywhere near a cake batter. But the second that hot liquid met the flour, the aroma shifted from raw ingredients to something far more sophisticated and enticing.
This isn't your typical lofty, airy sponge that requires delicate folding or room temperature patience. This is a robust, efficient dessert designed for those of us who value both time and texture.
When you pour that warm glaze over the steaming cake, you'll hear a faint, satisfying hiss as the sugar begins to set into a thin, delicate crust. It's a sensory experience that promises a fudgy interior and a satisfyingly sweet finish in every square.
We are going to focus on streamlining the workflow here. You won't need a heavy stand mixer or a dozen separate bowls. By using smart heat management and a few specific pantry staples, you'll produce a cake that serves two dozen people with minimal cleanup.
It’s the ultimate solution for a modern cook who needs a reliable, crowd pleasing result without the fuss of traditional layer cakes.
The Secret to This Texture
Bloom Effect: Boiling the cocoa powder in water and butter instantly "blooms" the chocolate, releasing deep aromatic compounds that remain dormant in cold mixing.
Starch Gelatinization: The 212°F liquid partially cooks the flour starches immediately, which creates a tighter, more velvety crumb that resists drying out.
Chemical Synergy: The acidity in the buttermilk reacts instantly with the baking soda to create micro bubbles, ensuring the dense cake stays tender rather than leaden.
Flash Setting: Pouring hot glaze onto a hot cake allows the frosting to seep slightly into the top layer, creating a cohesive, moist barrier that seals in hydration.
| Pan Size | Total Servings | Average Cook Time | Visual Doneness Cue |
|---|---|---|---|
| 18x13 Jelly Roll | 24 Squares | 18-20 minutes | Edges pull away slightly |
| 15x10 Baking Pan | 20 Squares | 22-25 minutes | Center springs back |
| 9x13 Casserole | 12-15 Rectangles | 30-35 minutes | Toothpick comes out clean |
Choosing the right pan is the first step in streamlining your baking day. While a standard 9x13 inch pan works in a pinch, the authentic experience relies on that thin, 18x13 inch jelly roll pan. This increased surface area means the cake bakes in nearly half the time of a thick casserole style cake.
It also ensures every single bite has the perfect ratio of fudge like cake to crackly, pecan studded glaze.
If you are cooking for a smaller group, don't feel pressured to scale down the measurements immediately. This cake is an efficiency dream because it stays fresh so much longer than a standard sponge.
However, if you do use a deeper pan, remember that the "boil and pour" method still applies, but you'll need to extend the oven time to ensure the center isn't liquid.
Deep Component Analysis
| Ingredient | Science Role | Pro Secret |
|---|---|---|
| Unsweetened Cocoa | Structural Flavor | Sift this with the flour to prevent stubborn "cocoa pockets" in the final batter. |
| Buttermilk | Acidic Tenderizer | If you're out, use 120ml milk with 5ml lemon juice; the tang is non negotiable for the soda reaction. |
| Boiling Water | Hydration Catalyst | Use filtered water to ensure no mineral aftertaste interferes with the delicate chocolate notes. |
| Baking Soda | Leavening Agent | Ensure your soda is less than 6 months old; it provides the only lift this dense cake gets. |
The interaction between these components is what sets this recipe apart from a standard boxed mix. The buttermilk isn't just there for moisture, it provides the acidic environment necessary for the 5g of baking soda to do its job. Without that specific pH balance, the cake would be flat and have a soapy aftertaste.
Using 227g of unsalted butter might seem like a lot, but this fat content is what creates the "melt in-your mouth" quality. By melting it with the water and cocoa, we are creating a stable emulsion before it ever touches the flour.
This prevents the gluten from over developing, which is the main reason cakes turn out tough or bread like.
Selecting the Best Pantry Staples
- 250g All purpose flour: Provides the essential structure without being too heavy.
- 400g Granulated sugar: Essential for the tender crumb and the slightly crisp edges. Why this? Sugar is a liquid ingredient once melted, keeping the cake extremely moist.
- 2g Salt: Balances the heavy sugar content and intensifies the chocolate.
- 5g Baking soda: Our primary lifting agent for a soft texture.
- 227g Unsalted butter: Used for the cake base to provide a rich, creamy mouthfeel.
- 30g Unsweetened cocoa powder: For the cake base; look for a high-quality natural cocoa. Why this? Natural cocoa is more acidic than Dutch process, which helps the baking soda react better.
- 240ml Boiling water: This hydrates the cocoa and melts the fats instantly.
- 120ml Buttermilk: Adds a subtle tang and breaks down gluten strands for tenderness.
- 2 Large eggs: These should be room temperature to emulsify properly with the warm chocolate.
- 5ml Vanilla extract: Enhances the cocoa and rounds out the sweetness.
- 113g Unsalted butter (for glaze): Creates a smooth, pourable frosting.
- 30g Unsweetened cocoa powder (for glaze): Matches the flavor profile of the cake.
- 90ml Whole milk: Provides the liquid base for the cooked glaze.
- 450g Powdered sugar: Sifted to ensure a silky, non grainy finish on the cake. Why this? Powdered sugar dissolves quickly in the hot butter/milk mixture for a smooth pour.
- 5ml Vanilla extract (for glaze): The final aromatic touch.
- 100g Finely chopped pecans: Provides the classic Texas texture and a nutty contrast.
Streamlining Your Kitchen Tool Set
Efficiency in the kitchen starts with selecting the right appliances. For this recipe, you don't need a fleet of gadgets. A simple, medium sized saucepan is your primary tool. It will handle the melting of the butter and the blooming of the cocoa for both the cake and the glaze.
I recommend a stainless steel pan rather than non stick, as it allows you to see the color of the cocoa mixture more clearly as it reaches that critical boil.
You will also need a large heat proof mixing bowl. Since we are pouring boiling liquid into this bowl, glass or metal is preferred over plastic. A sturdy balloon whisk is actually more effective here than an electric mixer.
Because the batter is so thin and fluid, a hand whisk allows you to feel the texture and ensure there are no dry flour clumps hiding at the bottom of the bowl.
Finally, the 18x13 inch jelly roll pan is the star of the show. If you use a standard cookie sheet with low sides, you risk the batter overflowing. Ensure your pan has at least a one inch rim.
For the glaze, having a small offset spatula helps in spreading the frosting to the very corners of the hot cake, though the mixture is usually thin enough to level itself out with a gentle tilt of the pan.
Mastering the Fast Mixing Process
- Preheat your oven to 350°F (175°C) and grease an 18x13 inch jelly roll pan thoroughly. Note: Greasing is vital as the sugar content can make the edges stick.
- Whisk the 250g flour, 400g granulated sugar, 2g salt, and 5g baking soda in your large bowl. Make sure no clumps remain.
- Heat 227g butter, 30g cocoa powder, and 240ml water in your saucepan over medium heat. Watch for a vigorous, rolling boil.
- Boil the mixture for exactly 30 seconds, then pour it directly into the dry ingredients. Note: This heat blooms the cocoa and softens the flour starches immediately.
- Whisk the mixture until the flour streaks disappear and the batter looks dark and glossy.
- Stir in the 120ml buttermilk, 2 eggs, and 5ml vanilla extract. Whisk vigorously until the batter is thin and smooth.
- Pour the batter into your prepared pan, tilting it to ensure even coverage in the corners.
- Bake for 18-20 minutes until a toothpick comes out clean and the top looks matte.
- While the cake bakes, boil 113g butter, 30g cocoa, and 90ml milk in your cleaned saucepan.
- Remove from heat and whisk in the 450g powdered sugar, 5ml vanilla, and 100g pecans. Pour over the cake while both are still hot.
Preventing Common Baking Disasters
The most common issue I see with this specific cake is a grainy frosting. This usually happens when the powdered sugar isn't sifted or if the butter and milk mixture isn't hot enough when the sugar is added. If the sugar doesn't fully dissolve into the fat, it will leave a sandy texture on your tongue.
Always whisk the glaze immediately after removing it from the heat to ensure a velvety finish.
Why Your Cake Sinks
If your cake comes out with a dip in the middle, it’s usually one of two things: either the baking soda was expired, or the oven door was opened too early. Because this is a thin sheet cake, it doesn't have a lot of structural support.
Sudden drops in temperature can cause the air bubbles to collapse before the flour has set. Wait at least 15 minutes before checking for doneness.
Why the Glaze Is Running
If the glaze simply falls off the sides or pools in the middle, it likely wasn't boiled long enough. That 30 second rolling boil for the butter and milk is essential. It reduces the water content in the milk and creates a thicker syrup.
If you pour it on and it looks like soup, try letting it sit in the saucepan for two minutes to thicken slightly before the final pour.
| Problem | Root Cause | Solution |
|---|---|---|
| Dry, Crumbly Edges | Overbaking or poor pan heat distribution | Pull the cake when the center is just set; it continues cooking on the counter. |
| Grainy Frosting | Sugar added to cool liquid | Ensure the butter/milk mixture is steaming hot before whisking in sugar. |
| Bubbles on Surface | Too much air whisked into eggs | Tap the pan on the counter three times before sliding it into the oven. |
If you love the rich, nutty profile of this dessert, you might also enjoy my Pecan Pie recipe, which shares that iconic Southern sweetness and crunch.
Common Mistakes Checklist
- ✓ Sift your powdered sugar every single time to prevent white lumps in the dark glaze.
- ✓ Don't let the butter/cocoa mixture boil for more than 45 seconds or you'll lose too much moisture.
- ✓ Ensure your eggs are at room temperature so they don't curdle when hitting the warm chocolate batter.
- ✓ Pour the glaze the second the cake comes out of the oven; a cold cake won't absorb the frosting properly.
- ✓ Use a heavy bottomed saucepan to prevent the cocoa from scorching at the bottom of the pan.
Scaling for Different Crowd Sizes
When you need to adjust this recipe, remember that the surface area of the pan is your biggest constraint. If you want to cut the recipe in half, use a 9x13 inch pan. For a half batch, I recommend beating one egg in a small cup and using only half of it to maintain the correct protein to fat ratio.
You should also reduce the baking time by about 5 minutes, as the smaller volume will heat through more quickly.
Scaling up is where this recipe truly shines for party planning. To double the recipe, you will need two 18x13 inch jelly roll pans. I do not recommend doubling the ingredients in one giant pan, as the center will never cook before the edges burn.
When doubling, increase the salt and spices to only 1.5x the original amount to prevent them from becoming overpowering. Also, reduce the total liquid by about 10% to ensure the batter isn't too thin to hold its shape during the move to the oven.
If you are baking for a truly massive event and need three or four sheets, work in batches for the glaze. The glaze sets very quickly as it cools, so it's better to make a fresh batch of frosting for every two cakes. This ensures every square gets that perfect, glossy finish rather than a dull, overworked coating.
Smart Flavor and Ingredient Swaps
| Original Ingredient | Substitute | Why It Works |
|---|---|---|
| Buttermilk (120ml) | Plain Yogurt (120ml) | Similar acidity and thickness. Note: Makes the cake slightly denser. |
| Chopped Pecans | Toasted Walnuts | Provides a similar crunch with a slightly more bitter, earthy edge. |
| Whole Milk (Glaze) | Heavy Cream | Creates a much richer, truffle like frosting. Note: Sets firmer. |
If you are looking for another decadent, cocoa heavy option that works well for celebrations, my German Chocolate Cake provides a more layered, traditional experience with a similar flavor profile.
Debunking Common Baking Myths
One persistent myth is that you must "cream" the butter and sugar for a good cake. In the case of a Texas sheet cake, creaming is actually detrimental. We want a dense, fudgy texture, not a fluffy one.
Melting the butter and boiling it with the water breaks down the fat into smaller droplets, which coats the flour more effectively and results in that signature melt away crumb.
Another misconception is that boiling the water and butter together will "scald" the flour and ruin the rise. In reality, the hot liquid helps to dissolve the sugar faster and begins the starch gelatinization process early.
This is actually a technique used in many professional bakeries to create moist, long lasting cakes. The heat doesn't kill the leavening because the baking soda only activates once it hits the acidic buttermilk, which is added after the mixture has cooled slightly.
Efficient Storage and Freezing Methods
This cake is incredibly resilient thanks to its high fat and sugar content. You can store it at room temperature, tightly covered with plastic wrap or foil, for up to 4 days. In fact, many people (myself included) think it tastes even better on the second day once the glaze has had time to fully bond with the top layer of the cake.
If you live in a particularly humid climate, you can store it in the fridge, but let it sit on the counter for 20 minutes before serving to soften the butter in the crumb.
For long term storage, this recipe freezes beautifully. I recommend slicing the cake into squares first, then freezing them on a tray for an hour until the glaze is hard. Once firm, wrap each square in parchment paper and place them in a heavy duty freezer bag. They will stay fresh for up to 3 months.
To serve, just pull out the number of squares you need and let them thaw at room temperature for about 30 minutes.
Zero Waste Tip: If you find yourself with leftover crumbs or broken edges, don't throw them away. These chocolatey, pecan filled scraps make an incredible base for cake pops or a decadent topping for vanilla bean ice cream.
You can also pulse the leftovers in a food processor and use them as a "dirt" layer in a chocolate parfait.
Perfect Pairings for Every Occasion
The richness of this cake demands a contrast. A simple scoop of high-quality vanilla bean ice cream is the classic choice, as the cold cream cuts through the intense fudge. If you want something a bit more modern, a dollop of unsweetened whipped cream with a hint of sea salt works wonders to balance the 400g of sugar in the batter.
For beverage pairings, a strong, dark roast coffee is the natural partner for the deep cocoa notes. The bitterness of the coffee highlights the vanilla and pecans in the glaze. If you're serving this at a summer party, a cold glass of whole milk is the traditional way to enjoy it.
For a more adult twist, a small glass of tawny port or a nutty bourbon can complement the earthy pecans and the buttery finish of the cake beautifully.
- If you want a deeper chocolate hit, add 5ml of espresso powder to the boiling water step.
- If you want a crispier top, broil the pecans for 3 minutes before adding them to the glaze.
- If you want a cleaner slice, dip your knife in hot water and wipe it dry between every single cut.

Recipe FAQs
What's the difference between a sheet cake and a Texas sheet cake?
A Texas sheet cake is characterized by its signature thin profile and pour-on glaze. Unlike standard sheet cakes that are often taller and frosted with thick buttercream, this recipe results in a dense, fudgy crumb with a crackling, sugary topping applied while the cake is still warm.
What is so special about Texas sheet cake?
The unique boiling method is the secret to its success. By boiling the butter, cocoa, and water before mixing, you bloom the cocoa powder to deepen its flavor and create a velvety, moist texture that remains stable for days.
What kind of pan do you use for Texas sheet cake?
Use an 18x13 inch jelly roll pan. This specific size is essential for achieving the classic thin, flat layers that distinguish this cake from deeper, taller desserts like our classic farmhouse apple pie.
Why is Texas sheet cake so thin?
It is designed as a single layer dessert intended for easy serving. The batter is spread across a large 18x13 inch surface area, which ensures even baking in just 20 minutes and allows the glaze to permeate the surface for maximum richness.
How to ensure the glaze sets properly?
Pour the glaze over the cake immediately after removing it from the oven. The residual heat from the cake helps the glaze settle into a smooth, thin layer that firms up into a delicate, crackling crust as it cools.
Is it true the batter should be whisked after adding the buttermilk and eggs?
Yes, whisk vigorously until the batter is smooth and glossy. This ensures the buttermilk, eggs, and vanilla are fully emulsified into the warm chocolate base for a consistent crumb structure.
How to tell when the cake is finished baking?
Insert a toothpick into the center and verify it comes out clean. Because the cake is thin, the 18-20 minute window is critical; checking for a clean toothpick prevents the edges from drying out while ensuring the center is fully set.
Classic Texas Sheet Cake
Ingredients:
Instructions:
Nutrition Facts:
| Calories | 322 calories |
|---|---|
| Protein | 2.8g |
| Fat | 15.3g |
| Carbs | 45.8g |
| Fiber | 1.4g |
| Sugar | 35.4g |
| Sodium | 125mg |
