Creamy No-Churn Homemade Ice Cream: Easy Ice Cream Without a Machine
- Craving Sweet Treats? Here’s How I Fell in Love with Homemade Ice Cream Without Machine
- A Scoop of History: How No-Churn Ice Cream Became a Kitchen Star
- Why This Homemade Ice Cream Without Machine Wins Every Time
- Why You’ll Love Making Ice Cream This Way
- Essential Ingredients Guide for Creamy No-Churn Homemade Ice Cream
- Mastering the Professional Cooking Method for Your Homemade Ice Cream Without Machine
- Insider Secrets & Pro Tips for Perfect Homemade Ice Cream Without Machine
- Serving It Up: How to Make Your No-Churn Ice Cream Look As Good As It Tastes
- Storage & Make-Ahead Tips: Keeping Your Ice Cream Fresh and Feel-Good
- Remix Your Recipe: Fun Variations and Seasonal Twists to Explore
- The Nutrition Lowdown: What’s In Your Sweet Scoop?
- So, What’s the Verdict?
- Frequently Asked Questions
- 📝 Recipe Card
Craving Sweet Treats? Here’s How I Fell in Love with Homemade Ice Cream Without Machine
So, picture this: it’s a scorching summer afternoon, and i’m craving that smooth, creamy ice cream you get at fancy parlors.
But guess what? i didn’t have one of those pricey ice cream makers gathering dust on my counter. i remember thinking, “there’s gotta be a way to whip up the good stuff without all that equipment.
” and boom that’s when i stumbled on making homemade ice cream without machine . honestly, it changed my life (and my snack game)!
If you’re anything like me, when you hear “no machine,” you might think, “is it gonna be icy? grainy? meh.
” but no! this recipe is shockingly creamy and smooth and uses recipes with condensed milk and best whipped cream to hit that sweet spot.
Plus, it’s so flexible! wanna try bubble gum ice cream or classic eggnog ice cream? you can go wild with it.
A Scoop of History: How No-Churn Ice Cream Became a Kitchen Star
Ice cream has deep roots worldwide, but the traditional method churning milk, cream, and sugar while freezing can be a hassle without the right tools. Enter the no-churn variety!
The magic really took off when folks started using sweetened condensed milk to add sweetness and creaminess without needing to churn.
It’s like condensed milk became the secret weapon of home cooks everywhere. today, no churn ice cream recipes are mega popular because they’re simple, fast, and perfect for all skill levels.
What’s cool is that you don’t have to invest big bucks or spend hours. this recipe takes about 15 minutes of hands-on time, then a good 4 6 hours chilling in the freezer a perfect lazy day project! and you get around 6 generous servings, so plenty to share (or hoard).
Why This Homemade Ice Cream Without Machine Wins Every Time
Here’s the thing this recipe isn’t just about convenience. it’s also a winner health wise and flavour wise. using condensed milk ice cream recipes means less sugar fuss because that milk is already sweetened beautifully.
Plus, the whipped cream adds airiness, making it light and fluffy while keeping that rich mouthfeel. when i make mine, i throw in fresh berries or even swirl caramel for that fancy touch.
It’s a hit at bbqs, birthday parties, or just a solo netflix binge.
Compared to traditional churn ice cream recipes, you don’t have to babysit the freezer or worry about ice crystals messing with your texture.
And since it’s no churn , you get to skip waiting by the machine or fighting with semi frozen slush.
Honestly, if you’ve ever struggled to keep your ice cream scoopable or felt overwhelmed by the whole ice cream making process, this recipe is your new best friend.
Why You’ll Love Making Ice Cream This Way
First off, it feels so rewarding. There’s something deeply satisfying about mixing your own base and knowing exactly what’s inside it plus, no added preservatives!
Nutritionally, it gives you a good dose of calcium and protein from the dairy, while the make condensed milk step (if you ever try that) lets you control sweetness and thickness, which is a neat bonus for those who love diy kitchen hacks.
I also love that it’s easy to tweak. Wanna try a no churn vanilla ice cream today and swirl in fudge tomorrow? Done. Or thrift shop inspired with cookie crumbs? Sure thing!
And for the occasion? this ice cream is a star for lazy weekends, casual hangouts, or even holiday treats like eggnog ice cream at christmas.
It’s just straightforward, made from-scratch goodness that feels fancy with zero fuss.
Alright, enough chit chat! Ready to dive into the ingredients and get that freezer working? Let’s jump right in and make your dream creaminess a reality.
Essential Ingredients Guide for Creamy No-Churn Homemade Ice Cream
Alright, so you're diving into making homemade ice cream without machine awesome choice! it’s way easier than you think, and the ingredients you pick? super important.
I learned that the hard way, trust me. here’s the lowdown on making sure your ice cream is smooth, creamy, and just right.
Premium Core Components: What Makes or Breaks Your Ice Cream
First off, let’s chat about the stars of the show: your heavy whipping cream and sweetened condensed milk.
- You’ll need 2 cups (480 ml) of cold heavy whipping cream . Cold cream whips better, like right when it comes out of your fridge. It’s the magic that gives no churn ice cream its fluffy texture.
- Next up, a 14 oz (396 g) can of sweetened condensed milk . Not just any sweetener, this stuff is gold. It adds sweetness and the creamy body without all the churn hassle.
Now, quality here is key. for cream, look for labels saying “heavy whipping cream” or at least 36% fat. low-fat won’t whip up right.
For condensed milk, get the classic sweetened kind not evaporated milk!
Store both in the fridge until the moment you’re ready to whip and mix. the condensed milk can hang tight in your pantry unopened but once opened, keep it chilled and use within a week.
Trust me, stale condensed milk is a big nope. freshness counts because expired ingredients mess with flavor and texture.
Tip: If you’ve ever tried classic recipes with condensed milk , you know the difference fresh vs. old makes, especially in condensing that silky mouthfeel.
Signature Seasoning Blend: The Vanilla Touch and Friends
Vanilla extract is your bestie here. You’ll use 2 teaspoons (10 ml) of pure vanilla extract to flavor your base. I always snag the real deal, not imitation it’s a game changer.
I sometimes throw in a pinch of salt ( about 1/8 teaspoon ) it brings out all the sweetness and balances the profile.
Want to get fancy? Herbs aren’t typical here, but a little hint of fresh mint or crushed lavender can give a fun twist if you’re feeling adventurous.
If you love swapping stuff like I do, try a sprinkle of cinnamon or nutmeg for a nostalgic holiday vibe think eggnog ice cream but without the booze.
Smart Substitutions: When Life Throws a Curveball
Out of heavy cream? No sweat. Full fat coconut cream is a fab dairy-free substitute. It whips up nice and lends a slightly tropical vibe.
No sweetened condensed milk? i once improvised by making condensed milk at home by gently simmering milk and sugar until it thickened a slow dance but it worked when the store let me down.
For folks needing dietary tweaks, plant based condensed milk (like sweetened coconut condensed milk) plus coconut cream is your vegan dream team.
Running low? Emergency replacement hack: cool Greek yogurt mixed with a little maple syrup can pass in a pinch but texture and flavor will be different.
Seasonal? Fresh berries or crushed cookies are killer mix-ins that adjust easily by what’s popping at the farmer’s market.
Kitchen Equipment Essentials: What You Really Need and What You Can Skip
Luckily for all of us, no ice cream machine is required —hallelujah! Here’s what I swear by:
- Big mixing bowl (gotta have space to whip that cream)
- Electric hand mixer mine is from Walmart, serves me well! If you don’t have one, a strong arm and whisk can do it, but it’s a workout.
- Rubber spatula (for gentle folding)
- Freezer safe container with lid I usually use a loaf pan wrapped with plastic wrap for easy scoopin’
- Measuring cups and spoons to get those exact measurements right the key to consistent results
Storage tip: keep your ice cream covered tight in the freezer to avoid ice crystals. Last time, I forgot to cover mine and it got that weird icy crust yuck.
Wrapping Up The Essentials
So, the secret sauce here? using best whipped cream meaning cold and high fat paired with quality sweetened condensed milk, and just the right vanilla kick gives you seriously decadent condensed milk ice cream right at home.
The best part? you get to customize it with your favorite mix-ins and flavors, creating anything from classic vanilla to wild stuff like bubble gum ice cream .
Honestly, making this kind of frozen treat at home without a machine or fuss is one of those “why didn’t i try this sooner” moments.
It’s perfect for weekend evenings or summer barbecues. and yep, it pairs beautifully with warm brownies or crispy cookies.
Now that we’re all set on ingredients and gear, it’s time to get mixing. Let’s move on to those easy peasy steps for that dreamy, creamy no churn vanilla ice cream you’ve been craving!
Mastering the Professional Cooking Method for Your Homemade Ice Cream Without Machine

Okay, let’s get real for a sec. when i first tried making homemade ice cream without machine , i was a total mess.
Sticky counters, half whipped cream, and impatience were my best pals. but after a few tries and by a few, i mean more than i care to admit i figured out some game changing pro tips that make the whole process way smoother.
So, if you wanna level up from "meh" to "wow" with your no churn vanilla ice cream or any of those dreamy no churn ice cream recipes , keep reading.
Essential Prep: Mise en Place Is Your BFF
First off, mise en place fancy kitchen talk for “everything in its place” is a lifesaver. seriously, for no-churn ice cream, get your ingredients weighed and ready.
Cold heavy whipping cream in one bowl, your can of sweetened condensed milk (if you wanna make condensed milk yourself, that’s a whole other fun story), and your vanilla extract measured out.
Pro tip: chill your mixing bowl and beaters in the freezer for about 15 minutes before whipping. i swear my best whipped cream ever came from this little trick.
It helps the cream whip up faster and fluffier total game changer.
Oh, and time management? prep’s quick about 15 minutes but freezing takes a solid 4 to 6 hours . so don’t plan to enjoy this right after mixing.
Patience is the secret ingredient here.
Step-by-step That Even a Clutz Can Follow
Here’s how I roll:
Whip your cream: whip that cold heavy cream on medium high speed until it just forms soft peaks. this usually takes about 3- 5 minutes but watch closely.
You want those peaks to softly hold but still tip over. too much whipping and you get butter… which is a whole different vibe.
Mix condensed milk & flavor: in another bowl, stir together your sweetened condensed milk, 2 teaspoons (10 ml) of pure vanilla extract , and a tiny pinch of salt.
This salt twist punches up the flavor in a sneaky good way.
Fold, don’t mix like crazy: here’s where things get real. start by folding in one-third of your whipped cream into the condensed milk mix.
It lightens the base and makes folding in the rest easier. then gently fold in the rest without deflating the fluffiness.
No smashing allowed here, folks.
Add Mix-ins (If You’re Fancy): Whether it’s chocolate chips, crushed cookies, or even that wild bubble gum ice cream mix-in you’ve been craving, fold them in now.
Freeze It: Transfer everything to your freezer safe container, cover it tight (or use plastic wrap), then let it chill for at least 4 hours before serving.
Pro Moves and Critical Checks
Being a pro means knowing the little stuff. Like, always check your container lid is airtight nothing ruins ice cream faster than freezer burn.
Visual cues are key: when your ice cream is firm to the touch, like a square frozen block, it’s ready.
Another sign? let it sit out at room temp for 5 minutes before scooping; it should soften up but not melt completely.
One thing i’m super picky about is temperature control. freezers vary, so if you can set it to a colder setting just for this batch (around 0° f / - 18° c ), that’s perfect for that creamy texture.
Oh, and if you spot tiny ice crystals ugh, i had this happen when i was too slow covering the mix just stir gently after an hour or so of freezing.
It breaks those crystals up before they get ugly.
Avoid These Classic Blunders
Here comes the tough love. Don’t over whip your cream! It’s easy to go overboard thinking “more is better.” Nope, you’ll end up with butter. Been there, done that, hated it.
Another rookie mistake? skipping the cold bowls and cold cream. warm cream = sad, flat ice cream. also, don’t throw your container in the freezer and then forget about it.
Give the ice cream room to set properly and don’t open the box every five minutes (yeah, that one’s tough when you’re hungry, but seriously!).
Nailing Perfect Texture With Simple Steps
For the best results, always fold gently, freeze properly, and be patient. you can make your batch up to a week ahead it freezes well and even gets better with a little aging in the freezer.
Oh! if you wanna get adventurous, try swinging the recipe with a touch of eggnog ice cream flavor for the holidays or swirl in some homemade caramel sauce to turn it into a decadent dessert.
The options are endless.
Honestly, these no-churn recipes are such a win. you can whip up that creamy, luscious ice cream without dragging out your bulky ice cream maker or dealing with complicated freezing bowl setups.
Plus, who doesn’t love the idea of homemade desserts with simple ingredients like recipes with condensed milk and the ease of condensed milk ice cream ?
Next up, we’ll dive into some additional information to make your ice cream even more boss level. Stay tuned!
Insider Secrets & Pro Tips for Perfect Homemade Ice Cream Without Machine
Alright, so you’ve got your basic homemade ice cream without machine down congrats! but here’s the real scoop: some little hacks and secrets can crank this up from “yummy” to “holy moly, this’s insanely good.
” when i first tried it, i thought, how hard can it be? but don’t toss that whisk yet there’s more fun stuff to learn.
First off, always use cold heavy cream straight from the fridge. this helps it whip up faster and fluffier. seriously, don’t skip chilling the bowl too if you have time it’s a game changer.
Also, when folding the whipped cream into the condensed milk ice cream base, be gentle! use a rubber spatula and fold slowly to keep all that airy goodness intact.
Your ice cream will be smoother and not a brick when frozen.
Want to save some time? prep the whipped cream the night before and keep it in the fridge. then mix it fresh with the condensed milk mixture in the morning.
Boom you cut down active time and can just pop it in the freezer.
Flavor wise, i like adding a tiny pinch of salt to balance all that sweetness. oh, and vanilla? use real vanilla extract when you can.
It makes a world of difference over imitation stuff. oh yeah, and try swirling in caramel or fudge sauce just before freezing it makes your ice cream look like a dreamy dessert masterpiece.
Serving It Up: How to Make Your No-Churn Ice Cream Look As Good As It Tastes
You know what’s almost as important as taste? presentation. trust me, when i served my first batch of no churn vanilla ice cream at a bbq, folks dug in faster when it looked good.
Start with your container. using a loaf pan or a metal pan helps because the ice cream freezes more evenly.
When scooping, let the ice cream sit at room temp for about 5 minutes this softens it just enough for perfect scoops that don’t squish but don’t shatter either.
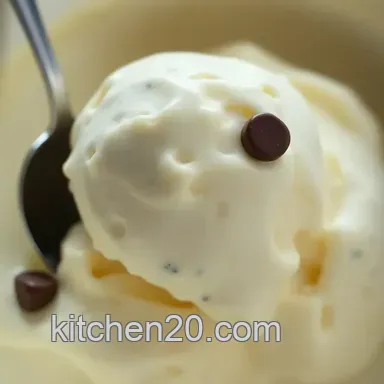
For garnish, crushed cookies, fresh berries, or even a few mini chocolate chips on top add fun texture and color.
Try throwing in a sprig of mint or edible flowers if you’re feeling fancy. i once made a batch of bubble gum ice cream and topped it with bright pink rock candy it’s silly but totally instagram worthy.
Mixing colors? layer different flavors in your container! i did a marbled effect using berry puree and vanilla and it was a hit.
It looks more gourmet than it really is secret pro tip right there!
Storage & make-ahead Tips: Keeping Your Ice Cream Fresh and Feel Good
Here’s the deal with storing your homemade ice cream: airtight is a must. when i first made a batch, i left the lid loose and woke up to ice crystals everywhere .
Not fun. so, cover it tightly with plastic wrap or foil before snapping the lid on.
For freshness, homemade ice cream without machine will last about 2 weeks in your freezer if stored properly. after that, the texture starts to go… not so good.
A quick thaw and stir can bring it back to life, but honestly? eat it fresh!
If you want to make this ahead for a party, you can prepare everything up to folding the whipped cream and condensed milk mixture a day before.
That saves you some crunch time stress.
Reheating? Nah, just soften on the counter for 5- 10 minutes skip the microwave unless you wanna ruin that creamy texture.
Remix Your Recipe: Fun Variations and Seasonal Twists to Explore
Let’s jazz this up! i’m all about a little twist in classic comfort food. for a chocolatey fix, throw in a few tablespoons of cocoa powder to your condensed milk before folding.
If you’re feeling festive, you gotta try the eggnog ice cream version; add nutmeg and some rum extract for a holiday vibe.
Dietary tweaks? no worries. swap heavy cream for full fat coconut milk to go dairy-free. use sweetened condensed coconut milk instead of regular condensed milk for a vegan friendly treat.
I made a batch for a vegan friend once, and she couldn’t even tell the difference.
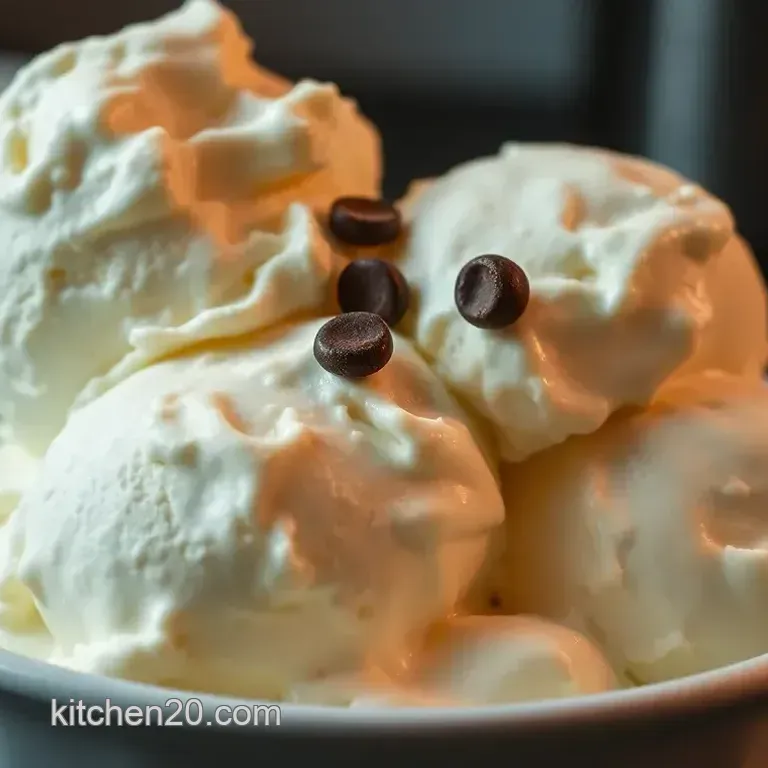
Seasonally, fresh berries in summer, or pumpkin pie spice in fall, bring beautiful colors and flavors. ever heard of no churn ice cream recipes with coffee? add some instant espresso powder and you got yourself a grown-up dessert.
The Nutrition Lowdown: What’s In Your Sweet Scoop?
Here’s the real talk: this isn’t diet food. but you already knew that, right? a single serving packs about 320 calories, mostly from fat and sugar since we’re using heavy cream and recipes with condensed milk .
But hey, it’s homemade goodness without preservatives or weird additives. Plus, you control what goes in no mystery ingredients! Eyeing portion control? Stick to about half a cup per serving and you’re golden.
Lastly, if you’re watching sugar, experiment with reduced sugar condensed milk or add natural sweeteners like honey. Just remember, sweetness affects freezing and texture, so don’t go too wild.
So, What’s the Verdict?
Honestly, making homemade ice cream without machine feels like kind of a magic trick. you mix a few simple ingredients, freeze, and boom instant reward.
I love how this recipe lets you get creative, saves time (no machine cleaning, yes please!), and is just plain fun to share with friends.
If you ask me, this recipe is like the cozy pair of sneakers in your kitchen reliable, comfy, and always hits the spot.
Give it a whirl, add your favorite mix-ins, and don’t hold back on the toppings. there’s nothing quite like biting into soft, creamy, dreamy ice cream you made with your own two hands.
Go on grab that sweetened condensed milk and heavy cream, and treat yourself. You won’t regret it.
Frequently Asked Questions
How can I make homemade ice cream without machine at home?
Making homemade ice cream without a machine is super simple! You just need to whip cold heavy cream until soft peaks form and gently fold it into sweetened condensed milk mixed with vanilla and salt. Then, freeze the mixture in a well covered container for at least four hours until firm.
No fancy gadgets required just a mixer and a freezer!
What are the best tips to keep my no-churn ice cream creamy instead of icy?
To keep your ice cream smooth and creamy, make sure to use cold heavy cream straight from the fridge and whip it to soft peaks to incorporate plenty of air. Gently folding the whipped cream into the condensed milk mixture prevents deflating the airy texture.
Also, cover the container tightly to avoid ice crystals forming during freezing, and let the ice cream soften a few minutes before scooping.
Can I customize this homemade ice cream without machine recipe with flavours and add-ins?
Absolutely! This recipe is super versatile mix in chocolate chips, crushed cookies, or fresh berries for extra texture. You can also swirl in caramel, fudge, or fruit purees for a flavour twist. For a chocolate version, simply add cocoa powder to the base. Feel free to get creative and tailor it to your tastes!
How long can I store homemade ice cream without a machine, and what’s the best way to store it?
This no-churn ice cream can be stored in the freezer for up to 2 weeks in an airtight container. To maintain the best texture, make sure the container is sealed well to prevent freezer burn and ice crystals.
If you’re keeping it longer, cover the ice cream surface with parchment paper before sealing for extra protection.
Is this no-churn ice cream recipe suitable for dairy-free or vegan diets?
Yes, you can adapt it for dairy-free or vegan options by substituting heavy cream with full fat coconut cream and using sweetened condensed coconut milk instead of regular condensed milk.
Keep in mind that the flavour and texture will be slightly different, but still delicious and creamy enough to satisfy your ice cream cravings!
Is homemade ice cream without machine healthier than store-bought ice cream?
Homemade ice cream lets you control the ingredients, so you can avoid artificial additives and tailor sweetness to your preference. However, it still contains rich ingredients like heavy cream and condensed milk, which are high in fat and sugar, so enjoy it as an occasional treat.
For a lighter option, try using lower fat cream or adding fruit purees to boost nutrition.
Creamy No Churn Homemade Ice Cream Easy Ice Crea