Creamy Pumpkin Pie: the Ultra-Silky Filling Secret for Holidays
- The Quest for the Perfect Autumnal Slice: Why This Creamy Pumpkin Pie Is Different
- Essential Ingredients and Expert Notes on Customization
- Step and by-Step Guide: Crafting the Ultra and Creamy Pumpkin Pie (From Crust to Cooling)
- Culinary Science: Why This Recipe Guarantees a Silky Filling and Flaky Crust
- Troubleshooting and Advanced Techniques for Creamy Pumpkin Pie Perfection
- Practical Guide: Storing, Freezing, and Thawing Your Holiday Dessert
- Elevation and Pairing: The Best Ways to Serve Your Pumpkin Pie
- Recipe FAQs
- 📝 Recipe Card
The Quest for the Perfect Autumnal Slice: Why This Creamy Pumpkin Pie Is Different
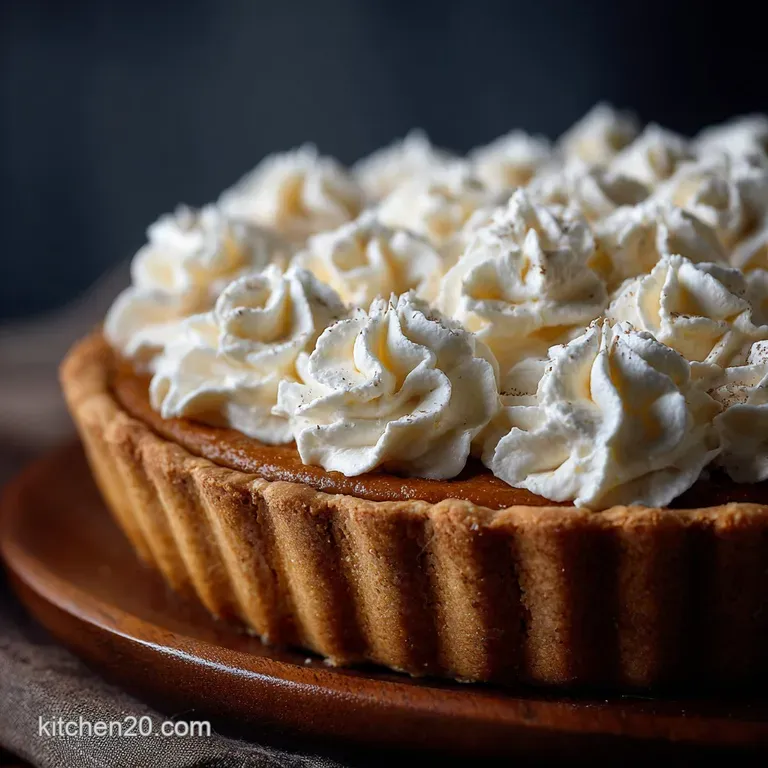
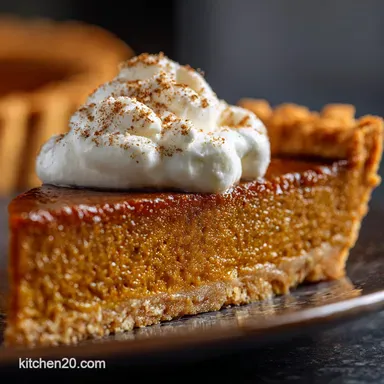
That first slice, still warm, where the steam smells like a cozy blanket made of cinnamon and nutmeg? That’s what we’re chasing. But the real triumph of this Ultra and Creamy Spiced Pumpkin Pie Recipe isn't the aroma it's the texture.
We’re talking about a filling so incredibly smooth it feels like silk, absolutely zero graininess, and a crust that somehow stays shatteringly flaky underneath all that creamy goodness.
Look, I’ve been burned by bad pies the ones that crack dramatically, sink sadly in the middle, or give you that horrifying spoon and in-sand feeling when you cut them. This version is my lifesaver.
It’s reliable, takes minimal active time, and uses kitchen staples you probably already have, proving that the best pumpkin pie doesn't have to be complicated.
We are going to nail this holiday season, and it starts right here. Forget everything you thought you knew about classic recipes; this is the definitive method for achieving that velvety, deep and spiced filling that everyone asks for. Let’s crack on and talk about the secrets to the best pumpkin pie.
Defining the Ultimate Texture: Silken vs. Grainy
The enemy of a good pie is a filling that has curdled or overcooked, which results in that grainy, gritty mouthfeel. To avoid this, we are using two key tricks: evaporated milk and precise temperature control.
Evaporated milk is thicker and richer than whole milk, which lends a luxurious density and prevents the custard from separating during baking.
The science is simple: custard is delicate. If you rush it, the egg proteins seize up. We bake low and slow until the very last minute. We are deliberately pulling the pie out of the oven when it still looks slightly jiggly in the middle, trusting residual heat to finish the job.
This is the difference between perfection and disaster.
Overview of the Preparation Timeline (Baking and Chilling)
If you start thinking about making this on Thanksgiving morning, you’ve already lost. A successful Ultra and Creamy Pumpkin Pie requires patience. Plan to blind and bake your crust the day before or early morning, then bake the filling in the late afternoon.
The chilling time is non and negotiable. It needs a minimum of four hours in the fridge to fully set the custard, stabilize the spices, and ensure you get clean, beautiful slices. I usually bake mine late in the evening, stick it in the fridge overnight, and then worry about the whipped cream the next day.
Essential Equipment Checklist for Baking Success
You don't need fancy gadgets for this one, but a couple of things make life easier. A 9 inch deep and dish pie plate is ideal because it holds all that glorious filling without overflowing.
Don’t skip the pie weights for blind and baking. If you don't have ceramic weights, dried beans or rice work perfectly fine. Finally,, always bake your pie on a rimmed baking sheet it stabilizes the pie, makes it easier to handle, and catches any potential drips, saving you a messy oven clean and up.
Essential Ingredients and Expert Notes on Customization
The ingredients list is standard, but the quality and preparation of a few items make a huge difference. Never, ever use canned pumpkin pie filling when the recipe calls for canned pumpkin purée . It's a rookie mistake I learned the hard way.
| Ingredient | Why it Matters | Viable Substitution |
|---|---|---|
| Evaporated Milk | Gives that dense, velvety texture without adding extra water. | Heavy cream (use 1/2 cup heavy cream, 1/2 cup whole milk) or full and fat canned coconut milk. |
| Brown Sugar | Adds moisture and a depth of molasses flavor. | All granulated sugar (if needed), but you lose the richness. |
| Pumpkin Purée | Must be 100% pumpkin, not the pre and spiced filling. | Homemade roasted and pureed butternut squash works beautifully. |
Canned Puree vs. Fresh Roasted Pumpkin: A Texture Comparison
I know, homemade sounds romantic, but hear me out: canned purée is often better for a Creamy Pumpkin Pie. Canned pumpkin has a consistent, dense texture and lower water content than many fresh pumpkins.
When using fresh pumpkin, you often have to roast it, drain it, and then dry it out for hours just to avoid a watery filling.
If you absolutely must use fresh, make sure it’s a baking pumpkin (like a sugar pumpkin) and strain it through cheesecloth for at least 30 minutes after puréeing. Seriously, drain that moisture!
The Master Spice Blend: Balancing Nutmeg, Ginger, and Cinnamon
Good pumpkin pie is all about the spices it should taste warm and complex, not just like a cinnamon bomb. The key here is the fresh nutmeg. Pre and ground nutmeg loses its punch quickly. If you want the Best Pumpkin Pie, grate that nutmeg right into the bowl. It releases oils that perfume the entire pie.
We use a generous amount of ginger and cinnamon, of course, but the tiny hint of cloves or allspice is what gives it that deep, almost peppery finish. Don't be shy with the salt either! The salt is essential for balancing all that sweetness.
Sweetener Options: Granulated Sugar vs. Maple Syrup Considerations
I use a mix of light brown and granulated sugar. The brown sugar adds that classic caramel note and moisture, while the granulated sugar ensures the custard sets cleanly.
If you want to try a twist, swapping out half the brown sugar for real maple syrup (Grade A or B) is a game and changer. It enhances the autumnal vibe and gives the filling a slightly fudgier texture. Just be aware that maple syrup adds liquid, so you might need to bake for an extra minute or two.
Step and by-Step Guide: Crafting the Ultra and Creamy Pumpkin Pie (From Crust to Cooling)
Phase 1: Preparing and Blind and Baking the Flaky Pie Shell
The secret to preventing a soggy bottom in this ultra and creamy pie is a thorough blind and bake. Start with very cold ingredients for your crust this is non and negotiable for flakiness. Roll your dough quickly, fit it into the dish, and crimp those edges.
When you blind and bake, line your dough with parchment and fill it completely with pie weights. Crucially, dock the bottom lightly (prick with a fork) before the second, unweighted bake. This allows steam to escape.
This is the foundation; if you want a detailed deep and dive into the perfect pastry, check out my guide on [Pumpkin Pie Recipe: Silky Filling Flaky Crust (No Soggy Bottom)].
Phase 2: Mixing and Tempering the Silken Custard Filling
This step is easy, but sequence matters. First, mix all your dry ingredients (both sugars, salt, and spices). Get them beautifully combined so you don't end up with pockets of raw spice later.
Next, whisk the pumpkin, eggs, yolk, vanilla, and molasses. Then, slowly whisk the dry mixture into the wet. Finally, and this is important, stream in the evaporated milk slowly while whisking constantly. You want the mixture to be smooth as velvet, with no lumps of spice or streaks of yolk remaining.
I always give it a minute or two of vigorous whisking at the end just to introduce a little bit of air.
Chef's Note: For the absolute creamiest result, gently pass the prepared filling through a fine and mesh sieve before pouring it into the crust. This catches any stray strings of egg or undissolved sugar, guaranteeing a flawless Silky Filling.
Phase 3: The Critical Baking and Chill Time Sequence
Place your pre and baked crust (on the baking sheet) into the oven set at 350°F (175°C). Carefully pour the filling into the warm crust don’t spill!
Bake for about 40– 50 minutes. Remember the jiggle test? The pie is done when the edges look puffy and set, but the center (about 2 inches across) still has a noticeable sway, like unset gelatin. If the centre is completely firm, you have overbaked it. Pull it out!
Let it cool on a rack for two hours before transferring it to the fridge. The chill is what transforms it from soft goo into firm, perfect slices.
Culinary Science: Why This Recipe Guarantees a Silky Filling and Flaky Crust

The Custard Ratio Secret: Evaporated Milk vs. Heavy Cream
The ratio of fat (from the eggs/milk) to liquid (the pumpkin and milk) is what dictates the texture. We use evaporated milk because it provides concentrated dairy solids without excessive water. This makes the filling dense and rich.
If you rely too heavily on regular milk or too little egg yolk, the filling will be watery and likely crack, leading to a much less Fluffy Pumpkin Pie experience.
Battling the Soggy Bottom: Blind and Baking Techniques Explained
We blind and bake to set the crust structure before the wet filling goes in. As I mentioned in my post, [Pumpkin Pie: The Ultimate Silky, Spiced Recipe with Flaky Crust], baking the crust naked for the final few minutes ensures that the bottom is completely dry and slightly golden before it ever meets the filling.
Warm crust + perfectly strained filling = No Soggy Bottom Pumpkin Pie.
Troubleshooting and Advanced Techniques for Creamy Pumpkin Pie Perfection
Controlling the Cracks: The Low and Slow Oven Method
Cracks happen when the outer edge of the custard finishes cooking and shrinks while the center is still liquid and expanding. When the center finally sets, the shrinking edges can’t accommodate the shift, and snap .
To avoid this, always use the low and slow heat method (350°F maximum) and pull the pie when it still wiggles. Sometimes, a full crack happens if you open the oven door too fast, so be gentle!
Preventing the 'Weeping' Pie: Adjusting Moisture Levels
"Weeping" is when clear liquid beads up on the surface after the pie has chilled. This is almost always due to residual moisture in the pumpkin. My tip: If you are using canned pumpkin, open the can and scoop the purée onto a few layers of paper towel or cheesecloth 30 minutes before mixing.
Blotting away that surface water makes a difference!
Identifying Done and ness: The Jiggle Test vs. Temperature
Forget the toothpick test for custard pies it only works for cakes. The internal temperature for perfectly set custard should be around 175°F (80°C). However, the simplest visual cue is the jiggle test. If only the exact centre is jiggling when you nudge the pan, it's done.
Quick Fixes for a Crust That Shrank or Burned Edges
Did your crust shrink down the sides of the pan? Next time, remember to thoroughly chill the dough after you’ve fitted it into the pie plate and crimped the edges.
If your edges start to brown too much during the baking process, cover them immediately with thin strips of aluminum foil or a dedicated pie crust shield. Better safe than sorry when it comes to edge burning!
Practical Guide: Storing, Freezing, and Thawing Your Holiday Dessert
Pumpkin pie, thanks to its custard base, must be stored in the refrigerator after it has cooled. Wrap it loosely in plastic wrap or transfer it to an airtight pie carrier. It is perfectly safe and still delicious for 3 to 4 days.
But does it freeze well? You bet! Once the pie is completely cooled and chilled, wrap the whole pie (still in the plate) tightly in two layers of plastic wrap and one layer of foil. Freeze for up to one month. To thaw, unwrap the pie and let it sit in the refrigerator overnight.
Do not thaw on the counter, as this can lead to a soggy crust and textural issues in the filling.
If you want a slight warmth, reheat individual slices in the microwave for 20 30 seconds, or in a 300°F oven for about 5 minutes.
Elevation and Pairing: The Best Ways to Serve Your Pumpkin Pie
You’ve mastered the Creamy Pumpkin Pie, so let’s talk toppings. A giant dollop of vanilla and bean whipped cream is a given, but try adding a tiny pinch of salt to your cream before whipping it it cuts the sweetness of the pie perfectly.
If you’re hosting a big gathering and want variety, consider serving these alongside individual [Mini Pumpkin Pies: The Handheld Spiced Fall Dessert Recipe]. It's always a hit when guests can grab a tiny version for themselves.
For drinks, nothing pairs better than a strong, slightly bitter coffee, or a splash of good bourbon on the side.
If you are looking for a complete change of pace and want to try a fruit dessert next, I highly recommend diving into my recipe for [Apple Pie: The Perfect Deep and Dish Recipe with Flaky All and Butter Crust] it uses similar crust techniques but offers a wonderful tart contrast to the creamy custard pies!

Recipe FAQs
Why did my creamy pumpkin pie filling crack while cooling?
Cracking is typically caused by overbaking, which causes the outer edges to set firmly before the center is done, leading to shrinkage and stress cracks. To prevent this, remove the pie from the oven when the center shows only a slight jiggle, and let it cool slowly on a wire rack away from drafts.
How can I guarantee a flaky crust and avoid a soggy bottom?
The key to preventing a soggy bottom is proper blind baking of the crust, as specified in the recipe. Ensure you use pie weights and fully cook the crust until it is light golden brown before adding the wet filling.
For extra insurance, brush the hot, par-baked crust with a thin layer of beaten egg white, which creates a waterproof seal.
Can I use heavy cream or whole milk instead of evaporated milk?
While you can use heavy cream for a richer flavor, evaporated milk is preferred because its reduced water content creates the signature dense, silky texture of the custard. If substituting, use slightly less heavy cream or whole milk, and be aware that the final set may be slightly less firm or custard like.
Can I use fresh roasted pumpkin puree instead of canned?
Absolutely, but you must take care to dry the fresh puree thoroughly, as it holds much more water than canned versions. Strain the puree through cheesecloth overnight or press it firmly with paper towels to eliminate excess moisture, otherwise, the pie will fail to set properly and remain watery.
How do I know the Ultra Creamy Spiced Pumpkin Pie is perfectly baked?
The pie is done when an instant read thermometer inserted one inch from the crust registers 175°F (80°C). Alternatively, give the baking pan a gentle tap; the edges should be completely set, and only the very center (about the size of a quarter) should show a slight, delicate wobble.
What is the best way to store leftover pumpkin pie?
Because this recipe contains eggs and dairy, it is considered a perishable custard pie and must be refrigerated after cooling. Store the pie loosely covered with plastic wrap or foil in the refrigerator for optimal freshness and food safety for up to 3 to 4 days.
Can I make this recipe completely vegan?
While challenging due to the custard base, you can substitute the evaporated milk with a full fat canned coconut milk and replace the eggs with commercial egg replacers or a cornstarch/arrowroot slurry. Be aware that the baking time and the final silky texture will be slightly different than the traditional version.
Creamy Pumpkin Pie No Soggy Bottom
Ingredients:
Instructions:
Nutrition Facts:
| Calories | 772 kcal |
|---|---|
| Protein | 7.9 g |
| Fat | 36.7 g |
| Carbs | 102.8 g |
