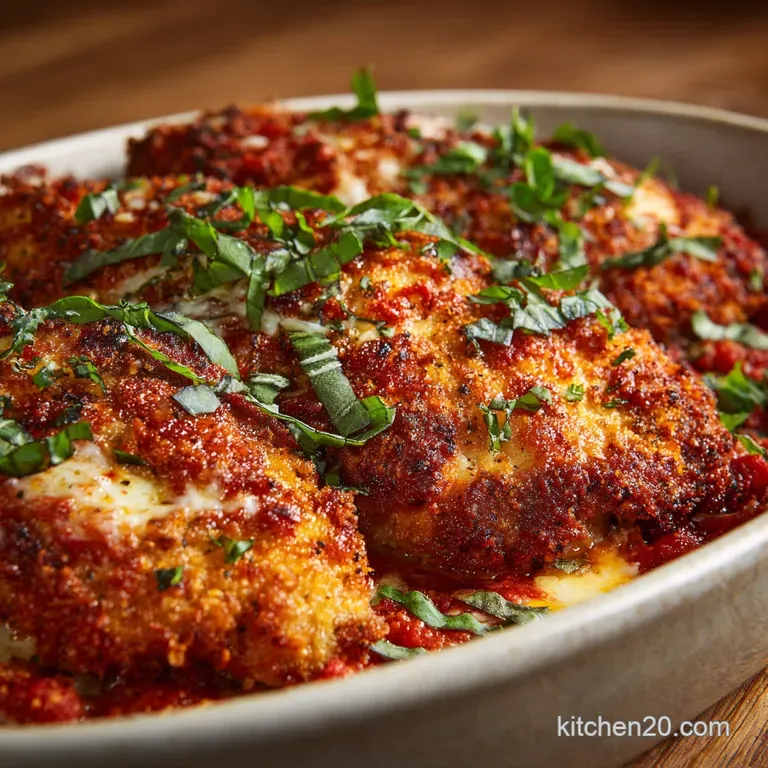
The Crispy Crown Jewel Chefs Classic Chicken Parmesan
- Beyond the Takeout: Achieving Bakery-Level Crispness at Home
- The Secret to Tender Chicken Parmesan: Pounding and Panko
- Gathering Your Heroes: Essential Components for Perfect Chicken Parm
- Equipment Check: Tools That Guarantee Success
- The Technique Toolkit: Step-by-Step Mastery
- Building the Crispy Foundation: Preparing the Cutlets
- Expert Notes and Frequently Asked Questions (FAQs)
- Serving Suggestions and Troubleshooting the Crust
- Recipe FAQs
- 📝 Recipe Card
Beyond the Takeout: Achieving Bakery Level Crispness at Home
store-bought Chicken Parmesan often disappoints with a tragically soggy crust and inconsistent meat texture. We eliminate this issue by utilizing a precise, multi stage cooking method that guarantees maximum texture.
This comprehensive approach focuses on building structural integrity, ensuring the Breaded Chicken Breast stays wonderfully crisp, even under rich marinara and melted cheese. The result is a truly superior dish that rivals any high end Italian restaurant experience.
The Secret to Tender Chicken Parmesan: Pounding and Panko
Achieving truly tender results starts before the breading phase even begins. Pounding the chicken ensures a quick cooking time and guarantees a consistent, fork tender texture throughout the meat. We pair this thin cutlet with robust Panko breadcrumbs, which are the non-negotiable components for true crispness.
This combination ensures that every single bite offers a satisfying contrast between the moist chicken interior and the crunchy exterior of this classic Chicken Parmesan .
Why We Skip the Buttermilk Brine (And What We Do Instead)
Brining can actually complicate the breading process by adding unnecessary surface moisture that hinders adhesion. Instead of using a wet brine, we rely completely on the rapid cooking time achieved by pounding the cutlets thin.
This efficient method locks in the chicken’s natural juices while minimizing surface moisture, which is absolutely crucial for perfect breading adherence in this Chicken Parmesan Recipe Easy .
Shallow Fry Magic: The Path to Golden Brown Perfection
Deep frying the cutlets can make the final dish feel overly heavy and unnecessarily greasy. A quick shallow fry, however, achieves a critical goal: setting the Panko crust instantly and building that beautiful golden color.
This initial searing action acts like a protective shell, ensuring the Breaded Chicken Breast maintains its structure before it transitions to the oven.
The Evolution of Cotoletta: Our Approach to the Classic Dish
The original Italian "Cotoletta alla Parmigiana" typically involves frying only and uses different regional cheeses. Our technique perfects the Italian American evolution, embracing the comfort of rich marinara and ample, bubbling mozzarella.
We deliver a remarkably Easy Baked Chicken that honors traditional flavors while streamlining the preparation process for the modern home cook.
Achieving Optimal Moisture: The Quick Rest
After breading, many cooks skip the vital 15-minute refrigeration period, leading to frustration when the coating slides off during cooking. This brief rest allows the proteins in the egg and flour mixture to fully hydrate the Panko, effectively cementing the crust to the meat.
This simple step is non-negotiable for anyone attempting this excellent Chicken Parmesan Recipe Easy .
Why Skip the Deep Fry?
Deep frying requires significant volumes of oil and presents major cleanup challenges, which often deters home cooks from attempting the dish. By opting for a strategic shallow fry, we use substantially less oil while still achieving the necessary structural integrity for the crust.
Finishing this Baked Chicken Parmesan in the oven ensures the meat cooks gently without absorbing excess grease.
Gathering Your Heroes: Essential Components for Perfect Chicken Parm
Success starts with ingredient quality, especially when making a dish with so few, yet critical, components. high-quality Panko breadcrumbs are absolutely essential; standard breadcrumbs simply lack the textural airiness needed for a light, crisp foundation.
Choosing a flavorful, low-acidity prepared marinara sauce also greatly simplifies the process, making this a genuinely enjoyable Chicken Parmesan Recipe Easy to master. We must also use finely grated, dry aged Parmesan to mix into the Panko, as it adds depth and helps the crust brown beautifully.
Equipment Check: Tools That Guarantee Success

While the technique for making Chicken Parmesan is straightforward, having the correct tools prevents unnecessary mess and guarantees consistent results. A few key pieces of equipment make the entire process much smoother, especially when handling raw meat and hot oil.
Using an instant read thermometer is highly recommended for confirming both oil and internal meat temperatures, ensuring safety and precision in every batch.
Tools for a Seamless Process:
- Meat mallet or heavy rolling pin for creating uniform cutlets.
- Three wide, shallow dishes for setting up the optimal breading station.
- An oven safe skillet (cast iron is perfect) to transition smoothly from stovetop to oven.
Selecting the Ideal Cutlets and Thickness
Start with boneless, skinless chicken breasts weighing around six ounces each, which should be sliced horizontally to yield two uniform, thinner cutlets. These pieces are then pounded down to approximately a half inch thickness before breading.
Pounding to this specific dimension ensures that the chicken cooks quickly and maintains remarkable tenderness during the short oven bake cycle.
The Tripartite Breading Setup: Seasoning Secrets
The final flavor profile of the crust relies heavily on how we season the Panko mixture itself. We combine the Panko with fine, aged Parmesan, garlic powder, and dried oregano for an authentic, robust Italian American taste.
Crucially, remember to generously season the flour layer and the chicken directly, as the final coating should not bear the sole responsibility for necessary salinity.
Sauce and Cheese Selection: Elevating Flavor Profiles
For maximum richness and flavor depth, select a high-quality jarred marinara or use your best homemade version, ensuring it is thick enough to cling to the crust. When topping the Baked Chicken Parmesan , opt specifically for low-moisture mozzarella, which melts cleanly without releasing excessive water onto the crispy crust.
Adding thin slices of fresh mozzarella later in the process offers a delightful milky textural contrast.
Pounding Matters: Choosing Your Meat Mallet
Using the flat side of a meat tenderizer or a heavy rolling pin is essential for gently but effectively evening out the chicken thickness. Avoid using the spiked or serrated side of a mallet, as this can tear the delicate muscle fibers and result in a dry, stringy texture.
Consistent and careful pounding is the foundational step for achieving a perfect Breaded Chicken Breast that cooks evenly.
Oven Ready: Recommended Baking Dish Material
If you do not utilize a large, oven safe skillet for the entire process, transfer the fried cutlets to a standard 9x13 inch ceramic or glass baking dish. Cast iron, which retains heat beautifully, is ideal because it helps keep the bottom of the cutlet exceptionally crispy during the final baking stage.
Regardless of your dish choice, spreading a thin layer of sauce on the bottom prevents the cutlets from adhering to the surface.
Related Recipes Worth Trying
- Creamy White Chicken Chili Ready in Under an Hour Easy Stovetop — This easy White Chicken Chili recipe is a proper hug in a bowl We use cream cheese and toasted spices to create a rich velvety soup base in just 50 minutes...
- The Ultimate Oven Fried Chicken ButtermilkBrined and Perfectly Crispy — Get truly crispy oven fried chicken without the deepfry fuss This buttermilkbrined method uses Panko for an incredible crunch delivering juicy chicken...
- Speedy Garlic Parmesan Zucchini Noodles Pasta Ready in 15 Minutes — Forget heavy carb crashes This Garlic Parmesan Zucchini Noodles Pasta delivers buttery creamy flavour in a lowcarb package Perfect Keto Zucchini Noodles...
The Technique Toolkit: step-by-step Mastery
Mastery of this dish involves careful execution of each step, ensuring proper crust adhesion and controlled temperature throughout the cooking process. The sequence moves quickly, transitioning from raw preparation to deep seasoning, a brief searing, and finally, the essential oven finish.
This structured flow ensures that your Chicken Parmesan Recipe yields maximum flavor and texture contrast in every component.
Building the Crispy Foundation: Preparing the Cutlets
Thorough preparation minimizes unnecessary mess and maximizes the adherence of the Panko crust. This stage includes precisely portioning the breasts, carefully pounding them to uniform thinness, and setting up an organized breading station.
Taking the necessary time here pays massive dividends in the final quality and professional appearance of the finished Baked Chicken Parmesan .
Pounding Thin: Creating Uniform Tenderness
Always place the halved chicken cutlets between two sheets of plastic wrap before you begin pounding them. This technique prevents tearing of the meat fibers and keeps raw chicken away from your mallet and kitchen surfaces.
Aim diligently for that uniform half inch thickness, which is the exact sweet spot for rapid, even cooking under high heat.
Mastering the Breading Station: The Dry Hand/Wet Hand Rule
To prevent your hands from becoming hopelessly encased in sticky, lumpy crust a common kitchen frustration assign one hand as the 'wet hand' (eggs) and the other as the 'dry hand' (flour and Panko).
The dry hand handles the initial flour coating and the final pressing into the Panko mixture, while the wet hand only touches the egg wash. This simple organizational rule keeps the process clean and the breading smooth and lump free.
Temperature Control: Achieving the Perfect Shallow Fry Sear
Heat your standard olive oil to approximately 350° F ( 175° C) before you introduce the chilled cutlets to the pan. The immediate goal of this shallow fry is strictly to achieve a golden, fully set crust, not to cook the meat through entirely.
Fry each cutlet for just 2- 3 minutes per side, working swiftly in small batches to prevent the oil temperature from dropping drastically.
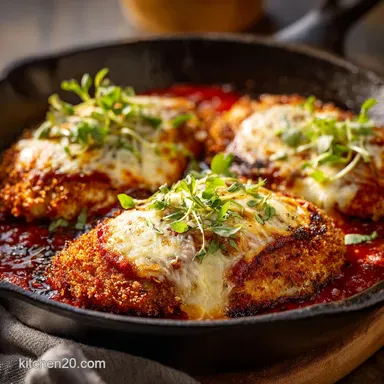
Layering for Glory: Final Assembly of the Chicken Parmesan
Begin the crucial assembly by spreading a thin layer of marinara on the bottom of the baking dish, which acts as a protective shield for the bottom crust. Place the seared cutlets over this sauce base, followed by a judicious amount of sauce spooned over the top, and then a generous blanket of mozzarella.
This preparation ensures everything melts together perfectly during the final, quick Chicken parmesan recipe oven time.
Expert Notes and Frequently Asked Questions (FAQs)
Home cooks frequently worry about the crust surviving the oven process, but utilizing proper technique minimizes this risk significantly. By ensuring the initial sear is robust and the chilling step is rigorously adhered to, the resulting Breaded Chicken Breast stands up well to the heat and the moisture from the sauce.
Always check the internal temperature to guarantee safety and confirm optimal texture before removing the dish from the oven.
Serving Suggestions and Troubleshooting the Crust
A truly great Chicken Parmesan is fundamentally defined by the textural contrast between its hot, bubbly toppings and its crisp foundation. If your crust ever seems dull, soggy, or oily, it almost always indicates the frying oil was not hot enough initially, leading to excessive oil absorption.
Serve this rich dish with something pleasantly acidic and light to cut through the richness, such as a sharp, simple arugula salad.
Can I Make This gluten-free? Simple Substitutions
Creating a gluten-free version of this dish is incredibly straightforward and yields surprisingly excellent results without compromising on texture. Simply substitute standard all-purpose flour with a quality gluten-free blend in the dredging station.
Crucially, swap the traditional Panko for certified gluten-free Panko crumbs, which retain the essential airy, jagged texture needed for a perfect crust.
| Standard Ingredient | gluten-free Substitute |
|---|---|
| All-Purpose Flour | 1:1 gluten-free Blend |
| Panko Breadcrumbs | Certified GF Panko |
Prepping Ahead: Freezing and Refrigeration Guidelines
You can easily prepare the breaded cutlets up to 24 hours in advance; simply store them raw on a wire rack uncovered in the refrigerator to keep the coating dry.
For longer storage, freeze the raw, breaded cutlets on a sheet pan until they are solid, then transfer them to a freezer bag for up to two months. It is vital that you do not fry or bake them until you are ready to serve for the ultimate crispness.
The Optimal Internal Temperature Check
The ultimate measure of safety and tenderness is achieving an internal temperature of 165° F ( 74° C) in the thickest part of the chicken.
Use an instant read thermometer inserted horizontally into the center of the largest cutlet, avoiding the bones or the pan bottom. This crucial check confirms that your Chicken parmesan recipe oven time was perfect, successfully preventing both undercooked and dried out meat.
Pairing Perfection: Sides That Complement Chicken Parm
Because the main dish is inherently rich and hearty, the best side dishes offer necessary textural or acidic contrast. A light, oil-and-vinegar dressed side salad balances the deep savory notes beautifully and cleanses the palate.
Alternatively, a classic comfort pairing involves serving the cutlets over linguine or spaghetti, ensuring you toss the cooked pasta lightly with reserved marinara.
Reheating Tips: Keeping the Crust Intact
Never reheat leftover Chicken Parmesan in the microwave, as this guarantees a rubbery texture and a soggy crust from trapped steam. For the best reheating results, use a chicken parmesan air fryer set to 350° F ( 175° C) for about 5– 7 minutes until warmed through.
If using a conventional oven, place the cutlets on a wire rack over a baking sheet and heat until the cheese is bubbling again.

Recipe FAQs
Crikey, how do I stop my Chicken Parmesan from going soggy under all that lovely sauce?
The secret is two-fold: always use Panko breadcrumbs for maximum crunch, and critically, do not skip the 15-minute chill time after breading, which acts like a proper seal to lock the crust onto the chicken.
Can I prep the breaded Chicken Parmesan cutlets early for a quicker dinner later on?
Absolutely, they are brilliant for prepping ahead! You can fully bread the cutlets and store them on a plate or wire rack, uncovered, in the fridge for up to 24 hours; just make sure to fry them right before you want to bake and serve.
I’ve run out of Panko, will regular breadcrumbs do the trick, or am I asking for trouble?
While standard breadcrumbs will technically work in a pinch, they are much finer and absorb moisture faster, meaning you’ll lose that beautiful, robust crunch that makes this recipe a true "Crispy Crown Jewel."
This looks a bit rich for a weeknight are there any healthier hacks to cut the fat down?
Yes, rather than shallow frying the cutlets, use the air fryer method: lightly spray the breaded cutlets with oil and air fry until golden, which significantly reduces the oil absorption while keeping the crust crisp.
If I have leftovers, what’s the best way to store and reheat them without making the crust soft?
Store leftovers in an airtight container for 3 4 days, but for reheating, skip the microwave and use the oven or a toaster oven set to 350°F (175°C) for 10 15 minutes until piping hot, which helps revive that satisfying crispiness.
Crispy Baked Chicken Parmesan
Ingredients:
Instructions:
Nutrition Facts:
| Calories | 4441 kcal |
|---|---|
| Protein | 53.2 g |
| Fat | 63.4 g |
| Carbs | 128.6 g |
| Fiber | 14.8 g |
| Sugar | 56.9 g |
| Sodium | 2082 mg |
