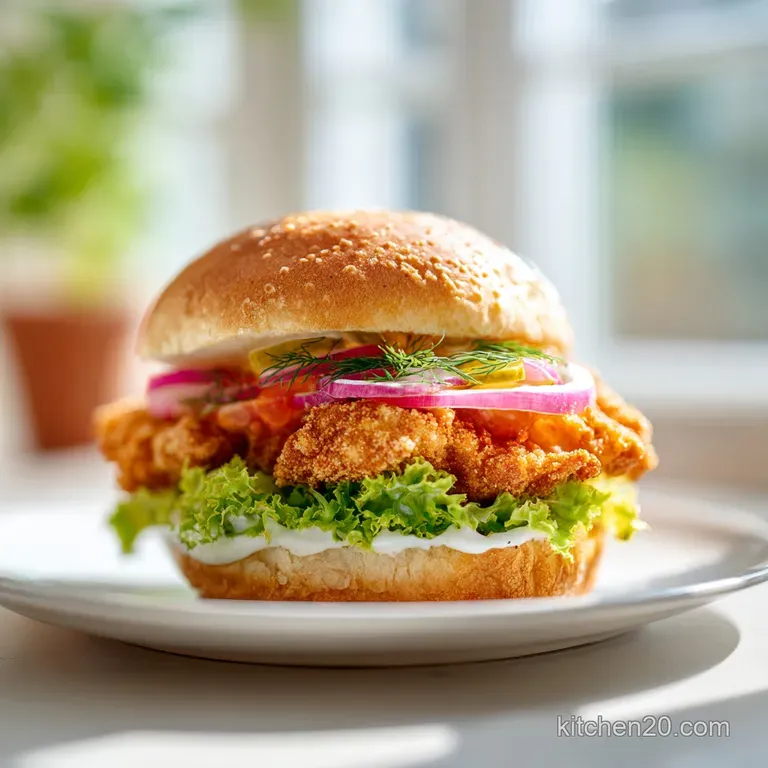
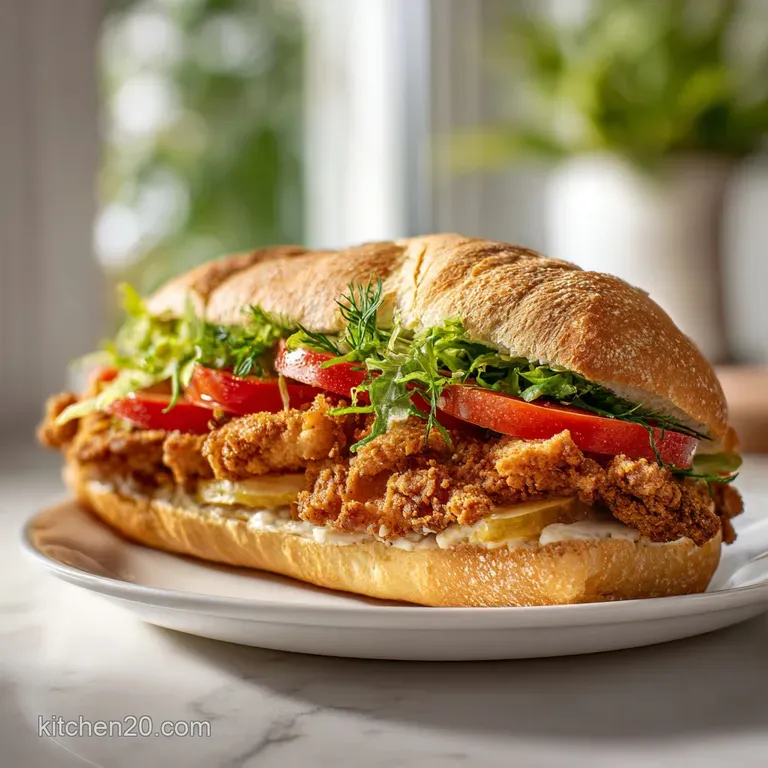
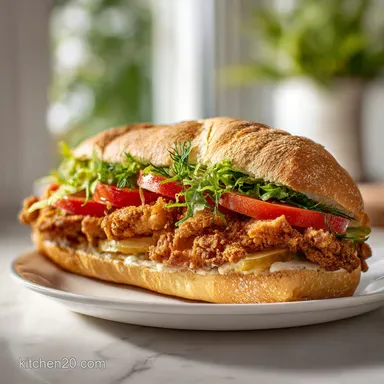
Crispy Dill Chicken Sandwich: Ultra-Crispy Crust
- Time:20 minutes active + 4 hours 15 mins chilling/cooking = 4 hours 35 mins total
- Flavor/Texture Hook: Shatter crisp crust with a tangy, vinegar punch center
- Perfect for: Weekend lunch or a better than-takeout family dinner
- Making the Perfect Crispy Dill Chicken Sandwich
- Essential Timing and Precision for Your Sandwich
- Choosing the Right Ingredients for Crunch
- Simple Kitchen Tools for Easy Frying
- The Step-by-Step Method for Crispy Results
- Fixing Common Breading and Frying Problems
- Adding Heat and Flavor Variation Ideas
- Proper Ways to Store and Reheat
- Essential Sides That Pair With Chicken
- Debunking Fried Chicken Misconceptions
- Scaling for Different Group Sizes
- Critical Level High in Sodium
- Recipe FAQs
- 📝 Recipe Card
Making the Perfect Crispy Dill Chicken Sandwich
The first time I bit into a real Southern style pickle brined sandwich, I actually stopped chewing. It was at a tiny roadside shack where the air smelled like hot oil and vinegar. You could hear the chicken hit the grease from twenty feet away that violent, beautiful sizzle that promises a world class crunch.
I realized then that the "secret" wasn't some complex spice blend, but a humble jar of pickle juice. It's a cultural staple that turned cheap cuts of meat into something legendary for generations of cooks who knew how to stretch a dollar and a jar of preserves.
We’re recreating that exact magic today. This isn't just about frying chicken; it's about the interaction between the acid in the brine and the starch in the crust. When you pull that golden brown piece of chicken out of the skillet, it should have those little crags and bumps that trap the sauce.
If you’ve ever wondered why your homemade fried chicken feels a bit flat compared to the big names, it's usually because of the dredge technique. We’re going to fix that with a few simple flicks of a fork.
Trust me, once you smell that smoked paprika hitting the hot oil, you’ll never go back to the drive thru. We aren't looking for "good enough" here. We want a sandwich that makes a loud, audible crack when you take a bite.
Let’s get your kitchen smelling like the best diner in town and make a Crispy Dill Chicken Sandwich that actually lives up to the name.
Essential Timing and Precision for Your Sandwich
The magic happens during the wait. While you might want to rush straight to the frying pan, the four hour soak in pickle juice and milk is doing all the heavy lifting for you. It’s a classic technique that relies on the acidity of the vinegar to break down the muscle fibers, ensuring you never end up with a "rubbery" bite.
Acidic Tenderization: The vinegar in the pickle juice breaks down tough proteins, while the milk proteins help mellow out the sharp tang.
Starch Hydration: Resting the dredged chicken for 5 minutes before frying allows the flour to bond with the meat, preventing the crust from sliding off.
Thermal Momentum: Frying at exactly 350°F (175°C) ensures the outside crisps at the same rate the inside reaches its safe temperature.
Steam Release: Using a wire rack or resting the chicken briefly prevents the bottom from getting soggy from trapped steam.
| Thickness | Internal Temp | Rest Time | Visual Cue |
|---|---|---|---|
| 1/2 inch | 165°F (74°C) | 3 mins | Bubbles slow down significantly |
| 1/4 inch | 165°F (74°C) | 2 mins | Crust turns deep mahogany gold |
| 3/4 inch | 165°F (74°C) | 5 mins | Juices run clear when pierced |
Getting the temperature right is the difference between a greasy mess and a clean, crisp finish. If the oil is too cold, the breading acts like a sponge for the fat. If it's too hot, you'll have a burnt exterior and a raw middle.
Stick to the 350°F (175°C) mark and you'll be golden literally.
Choosing the Right Ingredients for Crunch
| Component | Science Role | Pro Secret |
|---|---|---|
| Cornstarch | Prevents gluten development | Mix it 1:3 with flour for a glass like crunch |
| Pickle Juice | Denatures proteins | Use the juice from "refrigerated" pickles for more snap |
| Milk | Adds natural sugars | The lactose helps the crust brown faster in the oil |
| Smoked Paprika | Adds color and depth | Toasted paprika provides an "outdoor grill" aroma |
Each ingredient in this list has a specific job. For example, the cornstarch is our secret weapon against sogginess. While all purpose flour provides the bulk, cornstarch doesn't develop gluten when wet, which means the crust stays "shatter crisp" even after it sits for a few minutes. If you want to see this science in action with other proteins, you might enjoy my Fried Chicken with Parmesan Crust which uses cheese to create a similar barrier.
For the Brine and Chicken
- 1 cup dill pickle juice Why this? The vinegar and salt act as a quick brine.
- 1/4 cup whole milk Why this? Adds fat and helps the dredge stick.
- 1 lb chicken breasts, pounded to 1/2 inch thickness
- 2 cups vegetable oil for frying
For the "Shatter" Dredge
- 1.5 cups all purpose flour
- 0.5 cup cornstarch Why this? Creates a crispier, lighter crust than flour alone.
- 1 tbsp black pepper, coarsely ground
- 1 tsp garlic powder
- 1 tsp smoked paprika
- 2 tbsp reserved pickle brine (for the flour mix)
For the Sauce and Assembly
- 1/3 cup mayonnaise
- 1 tbsp sour cream
- 1 tsp ranch seasoning powder
- 1 tbsp fresh dill, finely chopped
- 1 tbsp dill pickles, minced
- 2 brioche buns, buttered
- 4 large dill pickle chips
- 1 cup iceberg lettuce, shredded
Simple Kitchen Tools for Easy Frying
You don't need a fancy deep fryer to make a restaurant quality sandwich. In fact, most pros prefer a heavy skillet because it allows for better temperature control and easier cleanup.
A cast iron skillet (like a Lodge) is my go to because it holds heat so well; when you drop the cold chicken in, the temperature of the oil won't plummet as much as it would in a thin pan.
A simple meat thermometer is your best friend here. Don't guess if the chicken is done by poking it with a fork. Checking for that 165°F (74°C) internal mark ensures the meat stays juicy while being perfectly safe to eat. You'll also want a wire cooling rack.
If you put fried chicken directly onto a paper towel, the steam coming off the bottom of the meat gets trapped against the paper and makes the breading soggy. A rack allows air to circulate around the entire piece.
Finally,, grab a pair of long tongs. You want to be able to flip the chicken without getting your hands too close to the oil. If you’re looking for a faster way to handle the buns, a simple toaster or even a flat griddle works wonders.
We want everything ready so that the second the chicken is done, it goes onto a warm, buttered bun.
The step-by-step Method for Crispy Results
- Brine the chicken. Place 1 lb of pounded chicken breasts into a zip top bag with 1 cup pickle juice and 1/4 cup whole milk. Note: This tenderizes the meat from the inside out.
- Refrigerate and wait. Seal the bag and let it rest in the fridge for 4 hours.
- Mix the dry dredge. In a shallow bowl, whisk 1.5 cups flour, 0.5 cup cornstarch, pepper, garlic powder, and smoked paprika until evenly blended.
- Create the crags. Drizzle 2 tablespoons of brine into the flour mixture and flick with a fork. Note: This creates small dough clumps that become the "crunchy bits" on the crust.
- Double dredge the meat. Remove chicken from the brine, press firmly into the flour, dip back into the brine, then press into the flour again until heavily coated.
- Rest the breading. Let the coated chicken sit on a plate for 5 minutes. Note: This helps the coating "set" so it doesn't fall off in the pan.
- Heat the oil. Pour 2 cups vegetable oil into a heavy skillet and heat to 350°F (175°C) until a pinch of flour sizzles instantly.
- Fry until golden. Carefully place chicken in oil and fry for 4–5 minutes per side until the crust is deep golden brown and the internal temp is 165°F (74°C).
- Whisk the sauce. Combine 1/3 cup mayo, sour cream, ranch powder, fresh dill, and minced pickles until velvety and smooth.
- Assemble and serve. Toast buttered brioche buns, spread sauce on both sides, and layer with shredded lettuce, the hot chicken, and pickle chips.
Fixing Common Breading and Frying Problems
Frying can be intimidating, but most issues come down to temperature or moisture control. If your breading is sliding off like a loose sweater, it usually means the chicken was too wet when it hit the flour, or you didn't give it that crucial 5 minute rest.
The rest time allows the flour to hydrate and form a "glue" with the proteins in the meat.
Why Your Crust Is Soggy
If the sandwich feels greasy rather than crispy, your oil temperature was likely too low. When the oil is hot enough, it creates a steam barrier that pushes out against the fat. If the oil is cool, the fat just soaks in.
Always use a thermometer to check that you are at 350°F (175°C) before the chicken touches the pan.
The Dark Crust Raw Center
This happens when the heat is too high. The outside sugars in the flour and milk caramelize and burn before the heat can penetrate the center of the 1/2 inch thick breast. If this happens, lower the heat slightly and finish the chicken in a 350°F (180°C) oven for a few minutes.
| Problem | Root Cause | Solution |
|---|---|---|
| Breading falls off | Surface was too wet | Press flour firmly into meat and let rest 5 mins |
| Greasy texture | Oil temp too low | Ensure oil reaches 350°F before adding chicken |
| Bland flavor | Flour wasn't seasoned | Add more black pepper and smoked paprika to the dredge |
Common Mistakes Checklist
- ✓ Pound the chicken to an even 1/2 inch thickness (ensures even cooking)
- ✓ Don't skip the cornstarch (it's the key to the glass like crunch)
- ✓ Never crowd the pan; fry one or two pieces at a time to keep oil temp up
- ✓ Use a wire rack for cooling, not just paper towels (prevents sogginess)
- ✓ Wait the full 4 hours for the brine to actually work its magic
Adding Heat and Flavor Variation Ideas
If you’re someone who needs a little kick, the "Nashville Dill" variation is a personal favorite. Just take a tablespoon of the hot frying oil and mix it with a teaspoon of cayenne pepper and a pinch of brown sugar.
Brush that over the finished chicken for a spicy, glossy coating that pairs perfectly with the cool dill sauce. It transforms the flavor profile without requiring extra tools.
For those who want a lighter option, you can adapt this for the air fryer. If you choose the air fryer route, make sure to spray the breaded chicken liberally with oil spray so it can actually brown. It won’t be quite as "shatter crisp" as the skillet version, but it’s a solid weeknight shortcut. You can also swap the brioche for a sourdough roll if you want a heartier bite. For more sandwich inspiration, check out my Grilled Chicken Sandwich with A1 Sauce, which offers a completely different savory profile.
| Method | Time | Texture | Best For |
|---|---|---|---|
| Stovetop | 15 mins | Ultimate crunch | Classic diner experience |
| Air Fryer | 12 mins | Crispy but lighter | Health conscious quick meal |
| Oven Baked | 20 mins | Firm and golden | Large batches for groups |
Proper Ways to Store and Reheat
Fried chicken is always best the moment it leaves the pan, but life happens. If you have leftovers, store the chicken and the buns separately. The moisture from the sauce and lettuce will turn your crispy crust into mush within an hour if they stay assembled.
- Fridge Storage
- Keep the fried chicken in an airtight container for up to 3 days.
- Freezer Guidelines
- You can freeze the fried chicken (after cooling) for up to 2 months. Wrap each piece in foil and place in a freezer bag.
- Reheating
- Never use the microwave! It will make the breading rubbery. Instead, put the chicken in a 350°F (180°C) oven or air fryer for 5
Zero Waste Tip: Don't toss the remaining flour dredge! If you have extra, you can use it to coat sliced pickles or onions for a quick "fried pickle" side dish. Also, the leftover brine can be used to flavor potato salad or even as a secret ingredient in a bloody mary.
Essential Sides That Pair With Chicken
When you have a sandwich this tangy and rich, you want sides that provide a bit of contrast. A creamy coleslaw is the traditional partner, but I also love serving this with sweet potato fries. The sweetness of the potatoes balances the sharp vinegar of the dill brine perfectly.
If you want to keep the "minimal tools" theme going, a simple cucumber and red onion salad with a splash of vinegar and sugar is refreshing and requires no cooking. It cleans the palate between those big, crunchy bites of chicken.
Whatever you choose, make sure it has enough structural integrity to stand up to the main event. This sandwich is the star, but every star needs a good supporting cast.
Debunking Fried Chicken Misconceptions
One of the biggest myths is that you need a gallon of oil to fry chicken. You only need about an inch of oil in a heavy skillet. As long as the bottom half of the chicken is submerged, you can flip it to get both sides perfectly golden.
This "shallow frying" is actually easier to manage for home cooks and uses much less waste.
Another common belief is that the brine will make the chicken "too salty." Because we're using pickle juice and milk, the salt is diluted. The brine actually draws moisture into the cells of the meat through osmosis.
Instead of being salty, the chicken just tastes more "chicken y" and stays incredibly moist even if you accidentally overcook it by a minute. Searing doesn't "seal in" juices, but this brine definitely helps retain them!
Scaling for Different Group Sizes
Scaling Down (1 serving): If you only need one sandwich, beat one egg and use half of it with the milk for the brine. You can halve the flour and spices easily, but keep the oil amount the same to ensure the pan stays at the right depth for frying.
Scaling Up (4-8 servings): When cooking for a crowd, work in batches. If you put six pieces of chicken in a skillet at once, the oil temperature will drop 50 degrees and your breading will fall off.
Fry two at a time and keep the finished pieces on a wire rack in a 200°F (95°C) oven to stay warm and crisp while you finish the rest. For the spices, only increase the salt and pepper to 1.5x the original amount to avoid over seasoning.

Critical Level High in Sodium
1480 mg 1480 mg of sodium per serving
(64% 64% of daily value)
The American Heart Association recommends limiting sodium intake to no more than 2,300mg per day, with an ideal limit of less than 1,500mg per day for most adults.
Tips to Reduce Sodium
-
Dilute Pickle Juice-30%
The 1 cup of dill pickle juice is a major sodium contributor. Try diluting it with 1/2 cup water and 1/2 cup unsalted vegetable broth. This can significantly lower the sodium in your brine.
-
Reduce Pickle Brine-20%
The 2 tbsp of reserved pickle brine in the chicken coating adds unnecessary sodium. Omit this entirely or replace with a few drops of low-sodium vinegar for acidity.
-
Ranch Seasoning-15%
The 1 tsp of ranch seasoning powder is often high in sodium. Look for a low-sodium or 'no salt added' version of this seasoning.
-
Boost Spices and Herbs
Enhance flavor without salt by increasing the use of black pepper, garlic powder, smoked paprika, fresh dill, and minced dill pickles. These aromatics can add complexity and zest.
-
Low-Sodium Dill Pickles-10%
If possible, opt for low-sodium dill pickles for both the juice and the minced pickles. This will directly reduce the sodium content from these items.
Estimated Reduction: Up to 60% less sodium
(approximately 592 mg per serving)
Recipe FAQs
Why is it necessary to brine the chicken for 4 hours?
Brining is essential for flavor penetration and moisture retention. Waiting the full 4 hours allows the pickle juice and milk to tenderize the fibers, ensuring the final result is as succulent as our perfectly juicy roast chicken.
Can I skip the cornstarch in the flour mixture?
No, the cornstarch is vital for the texture. It works to create a light, glass like crunch on the crust that flour alone cannot achieve.
How to ensure the crust doesn't get soggy after frying?
Place the fried chicken on a wire rack immediately after cooking. Resting the chicken on paper towels traps steam, which quickly softens the crust you worked so hard to create.
How to prevent the oil temperature from dropping during frying?
Fry only one or two pieces at a time. Crowding the pan causes the oil temperature to plummet, leading to a greasy crust instead of a crispy, golden brown finish.
Is it true I can use a different frying temperature to speed up the process?
No, this is a common misconception. You must maintain the oil at exactly 350°F (175°C) to ensure the chicken reaches an internal temperature of 165°F (74°C) without burning the exterior.
How to get those small, crunchy dough clumps on the chicken?
Flick 2 tablespoons of brine into the flour mixture with a fork before dredging. These tiny bits of hydrated flour create the signature craggy texture that makes the crust extra crispy.
How to tell when the chicken is fully cooked?
Use a meat thermometer to confirm an internal temperature of 165°F (74°C). Because the breasts are pounded to an even 1/2 inch thickness, they typically require 4 5 minutes per side in the hot oil to finish safely.
Crispy Dill Chicken Sandwich
Ingredients:
Instructions:
Nutrition Facts:
| Calories | 748 calories |
|---|---|
| Protein | 44g |
| Fat | 38g |
| Carbs | 56g |
| Fiber | 3g |
| Sugar | 6g |
| Sodium | 1480mg |
