Roast Turkey: the Ultimate Herb-Butter Recipe for Crispy Skin
- Mastering the Crispy-Skin, Herb-Butter Roast Turkey
- The Science Behind a Truly Juicy Roast Turkey
- Ingredients Checklist and Prep Notes
- Step-by-Step: Preparing and Roasting Your Ultimate Turkey
- Chef's Pro Tips and Troubleshooting Your Roast Turkey
- Storage, Reheating, and Freezing Leftovers
- Complementary Sides and Serving Suggestions
- Recipe FAQs
- 📝 Recipe Card
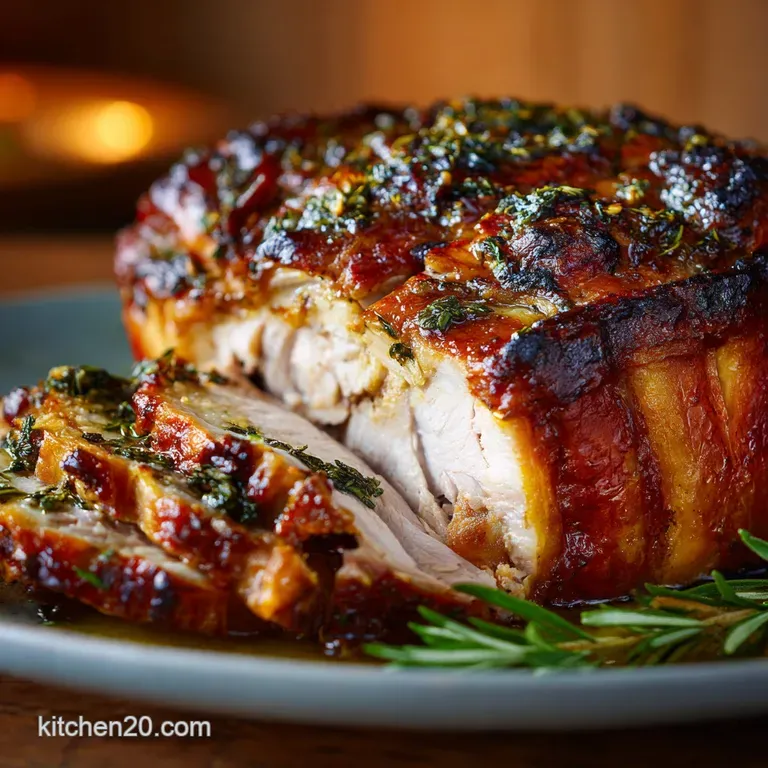
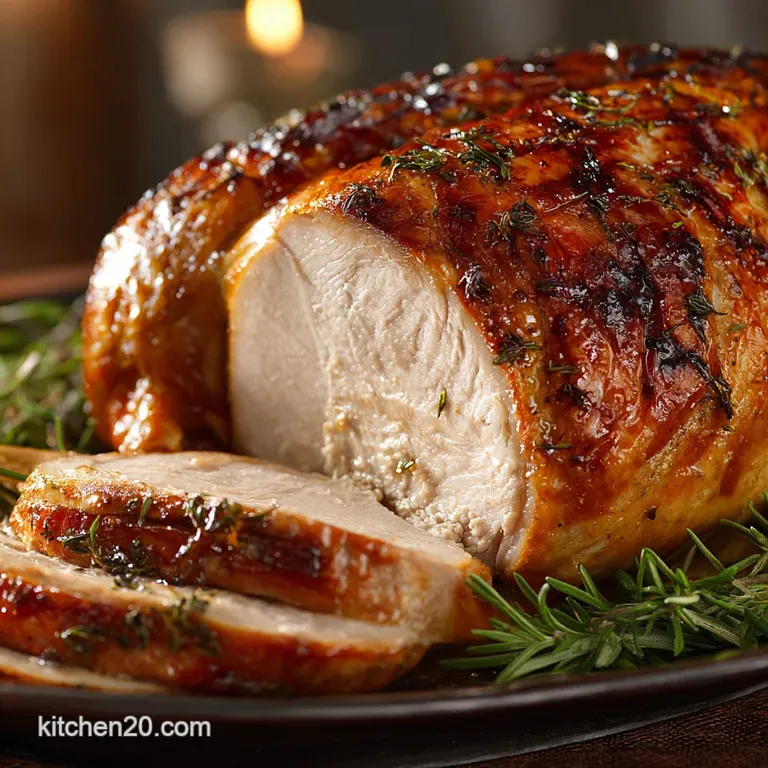
Mastering the Crispy Skin, Herb Butter Roast Turkey
The ultimate moment of any holiday dinner is pulling that golden, glorious bird out of the oven. Seriously, nothing beats the smell of roasting sage and thyme hitting you the minute the oven door opens. Then you hear the crack when the carving knife hits that unbelievably crispy, mahogany skin.
That is the texture we are chasing here.
For years, I believed that cooking a Roast Turkey had to be stressful and overly complicated. I used to spend hours basting with wine and broth, only to end up with wet, pale skin and dry breast meat. What a waste of effort.
This method is the secret weapon: minimal fuss, maximum flavor, and an absolutely guaranteed juicy result if you follow one simple rule use a thermometer.
Stop stressing about the bird already. We are ditching the complicated basting and focusing on two simple, game changing techniques: dry brining for the skin, and herb butter under the skin for moisture.
This is the only Roast Turkey recipe you will ever need, so grab your apron and let's crack on.
The Science Behind a Truly Juicy Roast Turkey
The Showstopping Centerpiece: What Makes This Recipe Special
This recipe works because it tackles the two biggest turkey problems simultaneously: flavorless meat and rubbery skin. We deal with the skin first by dry brining it, which is just rubbing the bird with salt and letting it air-dry in the fridge for two days.
This process draws out moisture from the skin, concentrating the flavor and allowing it to crisp beautifully when roasted.
We handle the flavor and moisture issue by sneaking fragrant, softened herb butter right under the skin. This insulates the delicate breast meat and melts into the fibers while cooking.
It’s the secret to moist turkey, distributing flavor deep inside the meat instead of just washing off the exterior like traditional basting does.
Essential Equipment Checklist for a Perfect Roast
You don’t need much fancy gear, but a couple of things are non-negotiable. You absolutely must have a reliable instant read digital thermometer; cooking a turkey without one is pure guesswork, and nobody wants that risk.
A sturdy roasting pan is also essential, along with a V-rack or simple wire rack to lift the turkey off the bottom. This allows hot air to circulate completely underneath the bird, ensuring crispy skin everywhere, even on the underside.
Approximate Timeline: Planning Your Turkey Day Roast
Planning is everything, especially with a large Roast Turkey . Remember that a 14lb bird needs at least 3 4 days just to thaw safely in the fridge. Active prep is fast, but the brining time is passive and mandatory.
I always aim to have the dry brining salt applied by Tuesday evening for a Thursday dinner, giving it maximum drying time.
Chef's Note: If you miss the 48 hour brine window, 36 hours is okay, but 24 hours is the bare minimum. Don't skip the refrigeration rest!
Dry Brining vs. Wet Brining: Why Salt is the Secret to Crispy Skin
I tried wet brining for years, wrestling a massive bird into a bucket of salty water every single time. It made the meat moist, sure, but the skin was always soggy and hard to crisp up. Dry brining (or salting) achieves the deep seasoning penetration of wet brining without adding any excess surface moisture.
It guarantees that desirable, crunchy texture because the salt pulls moisture out of the skin, evaporating it away as the bird rests uncovered in the fridge.
Compound Butter Magic: Infusing Flavor Directly into the Breast
Compound butter is just softened butter mixed with herbs and aromatics. We use rosemary, sage, and thyme because those classic savory flavors are just meant to be paired with turkey.
By pushing this fragrant mix right under the skin, we bypass the problem of the exterior burning before the flavor has a chance to soak in. It’s like a built-in basting agent that works from the inside out, creating the most flavorful, herb butter turkey ever.
The Critical Role of Resting Temperature
If you slice into a turkey immediately after pulling it from the oven, all those hard earned juices rush right out onto the cutting board. Resting the turkey allows the meat fibers, which tightened during cooking, to relax and reabsorb those precious juices.
If you remove the breast at 160°F (70°C), it will safely climb to 165°F (74°C) during the rest, resulting in perfectly cooked, wonderfully moist meat. Never skip the 45 minute rest.
Ingredients Checklist and Prep Notes
Selecting Your Bird: Size, Quality, and Thawing Instructions
A general rule of thumb is to calculate 1 to 1.5 pounds (0.45 0.68 kg) of turkey per person. Always buy the best quality bird you can afford; the difference in flavor is huge. Remember the golden rule of thawing: allow 24 hours in the fridge for every 5 pounds of frozen turkey.
Seriously, start thawing a 14lb bird on Sunday night if you need it on Thursday morning.
Crafting the Aromatic Herb Butter Base (Sage, Thyme, Rosemary)
The butter base needs to be completely soft, like mayonnaise, so you can easily push it under the skin without tearing anything. Make sure your herbs are freshly chopped, not dried flakes. The fragrance of fresh rosemary, sage, and thyme makes all the difference here, bringing that signature holiday smell.
Essential Aromatics for the Cavity (Onions, Citrus, Garlic)
We are NOT using bread stuffing inside the bird, which can prevent even cooking and is a food safety risk. Instead, we fill the cavity with rough aromatics. These onions, celery, lemon, and garlic steam inside the cavity, adding subtle background flavor and, crucially, flavoring the pan drippings for your gravy.
Simple Substitutions for Dairy or Herbs
Sometimes you run out of something important, and that's okay. Here are my favorite fixes:
| Ingredient | Viable Substitution |
|---|---|
| Unsalted Butter | high-quality plant based butter stick or clarified duck fat. |
| Fresh Thyme/Rosemary | Use half the amount of dried herbs, rubbed between your hands to release flavor. |
| Coarse Sea Salt | Kosher salt works perfectly. Avoid using fine table salt, which is denser and far saltier. |
| Chicken Stock (Pan) | Plain water mixed with a good quality bouillon cube. |
step-by-step: Preparing and Roasting Your Ultimate Turkey
Step 1: The Dry Brine Application and Resting Period
Remove all giblets and the neck, then pat the entire turkey completely dry with paper towels. Mix the coarse salt (3 Tbsp), brown sugar (1 Tbsp), and pepper (1 tsp) together. Rub this mixture vigorously over every surface, including the cavity.
Place the bird, breast side up, on a rack over a tray and refrigerate uncovered for 36– 48 hours. This step is non-negotiable for crispy skin!
Step 2: Preparing the Turkey and Applying Herb Butter Under the Skin
Take the turkey out of the fridge about 45 minutes before roasting. Mix your softened butter (1 cup) with all the herbs (2 Tbsp Rosemary, 2 Tbsp Thyme, 1 Tbsp Sage), minced garlic, salt, and zest.
Gently slide your hand between the skin and the breast meat to loosen it, being super careful not to tear the fragile skin. Spread two-thirds of the compound butter directly onto the meat under the skin, covering the breast and upper thighs. Use the remaining butter to coat the legs and wings lightly.
Step 3: Oven Temperatures and Achieving that Deep Mahogany Color
Preheat your oven to 425°F (220°C). Arrange the rough aromatics and stock (2 cups) in the bottom of your roasting pan. Place the turkey on the V-rack. Roast at this high temperature for exactly 30 minutes; this burst of heat sets the skin structure and starts that beautiful browning process.
Now, immediately reduce the heat to 350°F (180°C) and continue roasting until done.
Step 4: Monitoring Internal Temperatures for Peak Juiciness
Check the temperature starting an hour before the estimated finish time. Insert your instant read thermometer into the thickest part of the thigh, making sure you don't touch the bone.
The turkey is finished when the thigh reaches 165°F (74° C) and the breast reaches 160°F (70° C) . Pull it out immediately, even if your dinner guests haven't arrived yet!
Step 5: The Crucial 30 Minute Rest (Why You Must Wait)
Carefully lift the turkey out of the roasting pan and transfer it to a large carving board; the pan drippings stay put for gravy magic. Tent the bird loosely with foil and then cover it with a thick, clean kitchen towel. Let it sit there, undisturbed, for a minimum of 45 minutes.
I know waiting is torture, but this rest is the single most important step for achieving that ultimate juicy meat.
Chef's Pro Tips and Troubleshooting Your Roast Turkey
Preventing Dry Breast Meat: The Aluminum Foil Tent Method
If you notice the breast skin browning much faster than the rest of the bird (usually after the first hour), you need the foil tent. Tear off a piece of heavy duty aluminum foil large enough to cover the breast, shaping it loosely into a shield.
Place it over the breast only, leaving the legs exposed so they can continue to cook and crisp up.
How to Fix Skin That Won't Crisp Up
You probably skipped the dry brining step, or maybe you basted it repeatedly during the cook time (which I warned you not to do!). Basting introduces moisture and lowers the skin temperature.
If you find the skin is still pale near the end of the cooking time, remove the foil tent entirely and increase the oven temperature back up to 450°F (230°C) for the last 10– 15 minutes, watching it closely so it doesn't burn.
Dealing with a Partially Frozen Turkey (Emergency Protocol)
Panic! Okay, don't panic too much. If you hit bone with your thermometer and it feels icy cold, you have a problem. If the bird is under 10lbs, you might be able to submerge it in a sink of cold water (changing the water every 30 minutes) to finish thawing rapidly.
For a larger bird, you must abandon the roast immediately and start breaking it down into parts the legs and breasts will cook more evenly separate from the still frozen center.
Achieving the Perfect Pan Drippings for Gravy
Don't discard those amazing, flavorful vegetables and drippings in the bottom of the pan! This is pure liquid gold for gravy. After removing the turkey, drain the liquid into a fat separator (or chill it to skim the fat later).
The roasted vegetables and browned bits in the pan are where all the complex flavor lives; use those with a splash of wine and stock to build your roux base.
Storage, Reheating, and Freezing Leftovers
Safe Refrigeration Timelines for Cooked Turkey
Cooked turkey stores beautifully! Once cooled completely, carve the meat off the bone and store it in airtight containers. It will last safely in the refrigerator for 3 to 4 days. If you still have meat remaining on day three, move it quickly into the freezer.
Best Techniques for Reheating Slices Without Drying Them Out
Reheating turkey breast is tricky because it loves to dry out. The best method is to reheat the slices gently in a pan with a splash of chicken stock or reserved gravy. Cover the pan and warm it over low heat just until the turkey is hot through.
Alternatively, microwave only small, single serving portions wrapped in a damp paper towel.
Complementary Sides and Serving Suggestions
This beautiful, herby Crispy Skin Roast Turkey deserves equally delicious sides. Don't let your star centerpiece be ruined by sad, watery mash!
I always recommend cooking your stuffing outside the bird for safety and crispness; my recipe for Homemade Stuffing: Crispy Sourdough Stuffing for Turkey Dinner is the perfect, crispy counterpoint to the moist meat.
For vegetables, try something bold and sweet. Instead of plain roasted carrots, make a batch of Maple Glazed Roasted Sweet Potatoes Sticky Never Burnt or my general guide to Thanksgiving Vegetable Side Dishes: Easy, Caramelized Maple Kissed Roasting which includes perfectly caramelized sprouts and carrots. These savory sweet elements contrast beautifully with the rich herb butter flavor of the turkey. Finally, a silky, thick gravy made from the pan drippings is mandatory. Enjoy!

Recipe FAQs
Why is my turkey breast still dry, even with the herb butter?
Dryness often occurs because the turkey breast reaches 165°F before the dark meat, leading to overcooked white meat. To prevent this, tent the breast loosely with foil once it hits 150°F, allowing the darker, fattier meat to catch up.
Ensure you allow a full 30-minute resting period, as this crucial step allows the muscle fibers to relax and redistribute the internal juices.
How do I ensure the skin is truly crispy and not rubbery?
The key to achieving the ultimate crispiness is dryness and high initial heat. Ensure the turkey is patted bone dry before starting the dry brine, and strictly avoid basting, as adding liquid during roasting will prevent the skin from developing a crust.
The dry brining technique is essential here, as it pulls moisture out of the skin over the 24-48 hour period.
Can I skip the dry brining process if I don’t have time?
While you can roast the turkey immediately after seasoning, skipping the dry brine is highly discouraged as it compromises the core results of this recipe. Brining is necessary for achieving deep seasoning throughout the meat and is the primary mechanism for that crucial crispy skin texture.
If time is severely limited, ensure the bird is extremely dry and use the herb butter immediately before roasting.
What is the safe internal temperature for roast turkey?
The safe internal temperature for poultry is 165°F (74°C), measured in the thickest part of the thigh, avoiding the bone. For optimum texture, aim for the breast to register 160°F right before resting, as carryover cooking will bring it up to 165°F.
Dark meat is best when cooked to 175°F to 180°F to fully break down connective tissues.
How long can I safely store leftover roast turkey?
Properly stored leftover roast turkey should be refrigerated within two hours of cooking and is safe to consume for 3 to 4 days when kept in an airtight container. For longer storage, freeze the meat in freezer safe bags or containers within 2 days of cooking.
Frozen turkey maintains peak quality for about 2 to 3 months.
I don't have a roasting rack. What can I use instead?
A roasting rack is important as it allows hot air to circulate completely around the turkey, preventing the bottom skin from steaming. If you don't have one, you can create a sturdy natural base by laying a thick layer of roughly chopped root vegetables across the bottom of the pan.
Carrots, onions, and celery work perfectly, acting as a trivet while infusing the roasting drippings with flavor.
Can I use this recipe to cook a stuffed turkey?
It is strongly recommended that you bake any stuffing separately rather than inside the turkey cavity. Stuffing slows down the cooking process significantly and must reach 165°F itself, which almost always results in an overcooked and dry breast.
If you prefer the flavor profile, bake the stuffing separately and baste it generously with the reserved turkey pan drippings.
Crispy Skin Herb Butter Roast Turkey

Ingredients:
Instructions:
Nutrition Facts:
| Calories | 336 kcal |
|---|---|
| Protein | 7.0 g |
| Fat | 14.0 g |
| Carbs | 46.0 g |
