Sweet Potato Fries: Oven-Baked Secret Recipe

- Proper Crispy Sweet Potato Fries: The Oven-Baked Secret
- Achieving the Perfect Crunch: An Introduction to Crispy Sweet Potato Fries
- The Science of Crispness: Why Precision Baking Matters
- Essential Components for Your Golden Batches
- The Method: Precision Steps to Truly Crispy Results
- Troubleshooting Your Bake: Pro Tips for Perfect Texture
- Keeping Your Batches Fresh: Storage and Reheating
- Creative Ways to Serve Your Crispy Potato Side
- Recipe FAQs
- 📝 Recipe Card
Proper Crispy Sweet Potato Fries: The Oven Baked Secret
Achieving the Perfect Crunch: An Introduction to Crispy Sweet Potato Fries
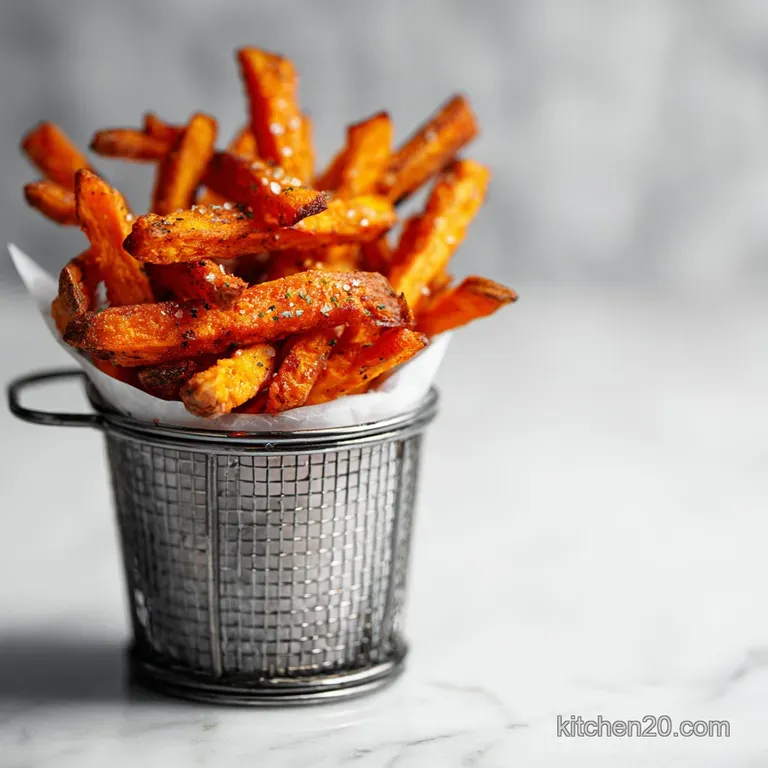
Few things are more disappointing than pulling a tray of flabby, pale fries from the oven. You crave that satisfying, shatteringly crisp exterior and the soft, almost creamy interior.
This lifelong search for texture perfection is exactly why I obsessed over this oven baked Sweet Potato Fries recipe.
Look, we all know deep frying is messy, expensive, and frankly, a hassle. This method is a total lifesaver because it uses simple oven heat, turning the soft, starchy sweet potato into something truly spectacular without demanding a deep fryer.
It’s fast, cheap, and a thousand times better than the sad, frozen bags you buy at the store.
I used to fail constantly. My first few batches of homemade Sweet Potato Fries were tragic, sticking to the pan, turning black prematurely, and steaming instead of roasting.
But I figured out the critical steps and now I’m handing over the secret to truly crispy, high ranking Sweet Potato Fries to you.
The Science of Crispness: Why Precision Baking Matters
Why Most Homemade Fries Go Limp
It’s a moisture war, plain and simple. Sweet potatoes are naturally higher in water and sugar than standard Russet potatoes. When you toss them straight with oil and bake them, the internal moisture immediately turns to steam, essentially steaming the fries inside your oven. Steam = Soggy.
That’s precisely why many rushed attempts at Sweet Potato Fries end up tasting boiled and floppy, not baked and crispy. If you’ve struggled to get that signature crunch, I promise this is the root of the problem.
The Two-Step Secret: Soaking and Starching
This is the non-negotiable duo that separates the pros from the amateurs. First, soaking removes excess surface starch and sugar that cause sticking and gummy textures. Second, the cornstarch coating acts like a magical desiccator, pulling away residual moisture and creating a fragile, hard shell.
This shell is what crisps so dramatically in the high heat. You absolutely need this structural integrity if you want truly crunchy Sweet Potato Fries at home.
Equipment Check: What You Need Before You Start
Don’t skimp on equipment! You absolutely need two large, rimmed baking sheets. Crowding is the enemy of crispness. If you’re making a full batch, using two trays is mandatory to allow adequate breathing room.
You also need quality parchment paper; it prevents sticking and aids in the caramelization process, making the final flip much easier. A good, sharp chef’s knife is also necessary for uniform slicing.
Reducing Surface Moisture (The Soak)
I learned this the hard way: skipping the soak means guaranteed failure. Just 30 minutes in cold water works wonders for the internal chemistry of the potato. It helps draw out the external starch molecules that would otherwise gelatinize and become gummy when heated.
This crucial step is also great for preventing your fries from burning too quickly before they are cooked all the way through.
Leveraging Cornstarch for Structural Integrity
This is where the magic happens for achieving the very best oven baked Sweet Potato Fries . Cornstarch is almost pure amylopectin, which creates a highly stable, non-gummy lattice when baked with oil. It adheres beautifully to the perfectly dry surface and creates a formidable moisture barrier.
We’re essentially building armor for our fries. Tapioca starch works too, but I swear by cornstarch for this specific job because it yields a more consistent, brittle crunch.
Controlling Oven Temperature for Maillard Reaction
We are running the oven HOT, my friend. We need 220°C (425°F) minimum. Sweet potatoes have a naturally high sugar content, which means they caramelize beautifully that glorious Maillard reaction! but they also burn easily.
The high, dry heat achieves maximum crispness quickly, ensuring the outsides are crunchy before the insides turn to mush. If you’re attempting to make a low-calorie version of Sweet Potato Fries , ensure you keep the heat consistent for the best texture.
Essential Components for Your Golden Batches
Selecting the Best Sweet Potatoes (Yams vs. Orange Flesh)
Always look for the firm, orange fleshed varieties that are often mistakenly labeled as yams in North American grocery stores (specifically, Garnet or Jewel varieties). Their texture is denser and their sugar content is balanced, which holds up far better to the rigorous cutting and high heat needed for proper Sweet Potato Fries .
Avoid the paler, white or purple varieties; they tend to be too soft and starchy, often leading to a disappointing, mushy center.
Spice Blend Recommendations for Flavor Depth
Simple is definitely best when roasting. My ultimate go-to is a combination of fine sea salt and smoked paprika that’s all you need. The paprika adds a welcome layer of complexity and depth without overwhelming the natural sweetness of the potato.
The biggest flavor booster for simple oven baked Sweet Potato Fries is often forgotten: a final pinch of finishing salt right when they come out of the oven.
| Ingredient | Role | Substitution |
|---|---|---|
| Smoked Paprika | Smoky depth | Swap for Chili powder or a mild Cajun seasoning blend |
| Fine Sea Salt | Necessary seasoning | Kosher salt (use 1.5x the amount) |
| Garlic Powder | Adds umami background | Use Onion powder or 1/2 tsp dried Italian herbs |
Oil Choices: High Smoke Point is Key
Since we are blasting these at a scorching 425°F (220°C), you absolutely need an oil that can handle the heat without breaking down or tasting burnt and bitter. Grapeseed oil, refined coconut oil, or standard vegetable/canola oil are all perfect, reliable choices.
Be cautious with extra virgin olive oil or flavored oils, as they often have a low smoke point. Mistake I once made: Using melted butter. It tastes great, but the milk solids immediately burn at this temperature, giving you tiny black, bitter specks all over your otherwise gorgeous Sweet Potato Fries .
Troubleshooting: Starch Substitutes (Alternative Flours)
Need a sub for cornstarch? Potato starch is your best friend here; it behaves almost identically and creates that same brittle crust. Tapioca starch is also a viable option. Use them in the exact same quantity as listed. Do not use all-purpose flour.
It contains gluten and traps moisture, resulting in a soft, cakey coating instead of the crisp exterior we are after. Trust me, I tested this tragic scenario multiple times when trying to perfect this Sweet Potato Fries recipe.
The Method: Precision Steps to Truly Crispy Results
Phase 1: Uniform Cutting and Preparation (The Shape)
Cut, cut, cut! The goal here is uniformity batons roughly 1 cm (3/8 inch) thick. Consistency matters because a skinny fry will be charred to dust while its thicker neighbor is still half raw inside.
I always visualize the length of the ideal restaurant style Sweet Potato Fries when I’m slicing. If you happen to have a mandoline, use it for perfect consistency, but please be careful with your fingers!
Phase 2: The Starch Bath and Tossing Technique
After the required 30 minute soak and the crucial drying step seriously, dry them until they squeak! toss the fries first with the cornstarch alone in a large bowl. This ensures the starch adheres to the slightly textured potato surface. Then, and only then, add the oil and seasoning.
Tossing in this two-part order guarantees the starch sticks to the potato, not just the oil, preventing a sticky mess.
Phase 3: Single Layer Baking (Crowding Prevention)
This is the most crucial piece of advice for crispy success and where most people fail when making homemade Sweet Potato Fries in Oven . You must, absolutely must, use two trays and spread them out so they are not touching each other. If the fries touch, they will sweat, which creates steam.
If you only have one baking sheet, cook the batches sequentially. Don't risk overcrowding the tray for the sake of speed.
The Crucial Final Flip and High Heat Finish
Bake for 10 minutes, remove the trays, and flip the fries. I like to use tongs to ensure every piece is turned. Rotate the trays (moving the top tray to the bottom shelf and vice versa) for even browning.
Bake for another 10 to 15 minutes, or until the edges are dark golden brown and look properly caramelized. If they look pale and sad after 20 minutes, turn the heat up to 450°F (230°C) for the last three minutes, keeping a hawk eye on them until they achieve maximum crispness.
Troubleshooting Your Bake: Pro Tips for Perfect Texture
Preventing Pale and Doughy Centers
Pale, doughy centers usually mean you skipped the soak, didn’t dry them thoroughly enough, or your oven runs cool. If your Sweet Potato Fries are still soft after 25 minutes, they have been steaming themselves.
Fix: Crank the heat up immediately, ensure the trays are rotating, and give them 5 more minutes. If they are terribly crowded, you may have to accept the loss, but next time, use two sheets.
How to Fix Sticky or Clumped Fries
Sticky or clumped fries are a sign of severe overcrowding or insufficient starch coating. If they’re clumped together, separate them gently with a spatula and try to turn them individually.
Next time, make sure you properly separate them onto two trays, ensuring enough space for that necessary air circulation so moisture can escape. This simple step is key for success when mastering your Sweet Potato Fries recipe .
The Importance of Resting After Baking
When they come out of that ferocious oven, don't rush them onto the plate. Let the Sweet Potato Fries rest on the hot tray for 2– 3 minutes. The residual heat will continue to evaporate any tiny amounts of surface moisture that might still be lingering.
This short resting period is critical to preventing that immediate flop that happens when crispy fries hit a cold plate and quickly lose their crunch.
Keeping Your Batches Fresh: Storage and Reheating
Best Practices for Short Term Storage
Honestly, Sweet Potato Fries are always best eaten immediately. But if you have leftovers, cool them completely before even thinking about storage. Place them loosely in a paper towel lined, airtight container and store in the fridge for up to 3 days.
The paper towel absorbs the humidity that will inevitably form inside the container.
Freezing Unbaked Fries for Future Use
Yes, you can prep these ahead! Complete the soaking, drying, starch, and oil coating steps (Phase 1 and 2). Spread the coated fries in a single layer on a parchment lined sheet pan and freeze until they are completely solid (about 2 hours).
Transfer the now-frozen Sweet Potato Fries to a zip-top freezer bag. Bake directly from frozen, adding about 5– 8 minutes to the overall cook time. This shortcut makes quick weeknight sides possible.
Reheating Methods to Restore Crispness
Never microwave them you will create pure sadness. The best methods for reheating are the oven or, even better, an air fryer. To reheat, spread the cold fries on a baking sheet and bake at 400°F (200°C) for 5 to 7 minutes until they are sizzling and restored.
For a quick fix, if you follow a dedicated Sweet Potato Fries Air Fryer Recipe for reheating, they'll be perfectly crisp in about four minutes.
Creative Ways to Serve Your Crispy Potato Side
Let’s talk dipping sauces. A classic homemade Sweet Potato Fries Dipping Sauce is mandatory here to contrast the sweetness. I love a simple lime cilantro yogurt dip, or if I’m feeling fancy, a smoky chipotle aioli is always a winner.
If you’re looking for other potato sides that require over high heat crispy techniques, you might love my recipe for Crispy Smashed Potatoes: The Ultimate Recipe for Shattering Crunch . That one uses a remarkably similar starch trick! You could also sprinkle them with Parmesan cheese and Italian herbs right after baking for a savory twist. When planning your side dishes, homemade Sweet Potato Fries in oven are always a guaranteed crowd pleaser.
Chef’s Note: For maximum visual appeal, sprinkle the finished fries with a pinch of fresh, brightly colored chopped parsley or chives just before serving. It adds brightness and cuts through the richness of the oil.
We did it! No more floppy disappointments. By mastering the soak, the dry, and the starch, you’ve truly unlocked the secret to oven baked perfection. These aren't just sides; when they are this crunchy, they’re definitely the star of the plate.
Go forth and make the ultimate Sweet Potato Fries !

Recipe FAQs
Why do my sweet potato fries always come out soggy or floppy?
Sweet potatoes have a higher sugar and water content than traditional white potatoes, making them prone to steaming rather than crisping. To counteract this, you must complete the two crucial steps: the cold water soak to remove surface starch, and the cornstarch coating to create a protective, moisture absorbing barrier.
Is the 30-minute cold water soak absolutely necessary for crispness?
Yes, the soak is one of the most important steps and should not be skipped. This process draws out excess surface starch that would otherwise turn gummy or sticky during baking, inhibiting the creation of a truly crunchy exterior.
Can I substitute arrowroot powder or tapioca starch for cornstarch?
You can successfully use arrowroot powder or tapioca starch as a substitute for cornstarch, using the same measurements. These starches perform a similar function, creating a thin, crisp shell around the fries that locks moisture inside while ensuring the exterior browns beautifully.
When is the best time to add salt and seasonings to the fries?
It is essential that you wait to salt the fries until they are fully cooked and have just come out of the oven. Salting them before baking draws moisture to the surface during cooking, which will inhibit the crisping process and make your fries damp.
How can I prevent the fries from sticking badly to the baking sheet?
The best way to prevent sticking is to line your sheet pan with parchment paper or a silicone baking mat before adding the oiled fries. If using just a sheet pan, ensure it is preheated with the oil in the oven for five minutes before placing the fries on the surface.
Can I air fry these sweet potato fries instead of baking them?
Absolutely, air frying works excellently and significantly cuts down on cooking time. Follow the exact preparation steps (soak, dry, and cornstarch coat), and air fry at 400°F (200°C) for 12 15 minutes, ensuring the basket is not overcrowded and shaking halfway through.
How should I store leftover cooked sweet potato fries?
Store any leftovers in an airtight container in the refrigerator for up to 3 days. To reheat, spread them on a baking sheet and bake at 400°F (200°C) or place them back in the air fryer until they are hot and re-crisped.
Crispy Sweet Potato Fries Secret

Ingredients:
Instructions:
Nutrition Facts:
| Calories | 250 calories |
|---|---|
| Fat | 8 g |
| Fiber | 6 g |
