Apple Crisp: the Quintessential Autumn Crumble
- The Quintessential Autumn Apple Crisp (A Proper Crumble)
- Embracing the Season: What Makes This Autumn Dessert Essential
- The Science of Texture: Achieving the Perfect Filling and Topping
- Essential Pantry List for the Best Apple Crisp Recipe
- Mastering the Method: Step-by-Step Guide to Your Crisp
- Troubleshooting Your Bake: Expert Tips and Fixing Flaws
- Keeping It Fresh: Storing and Freezing Apple Crisp
- Elevating the Experience: Serving Suggestions
- Recipe FAQs
- 📝 Recipe Card
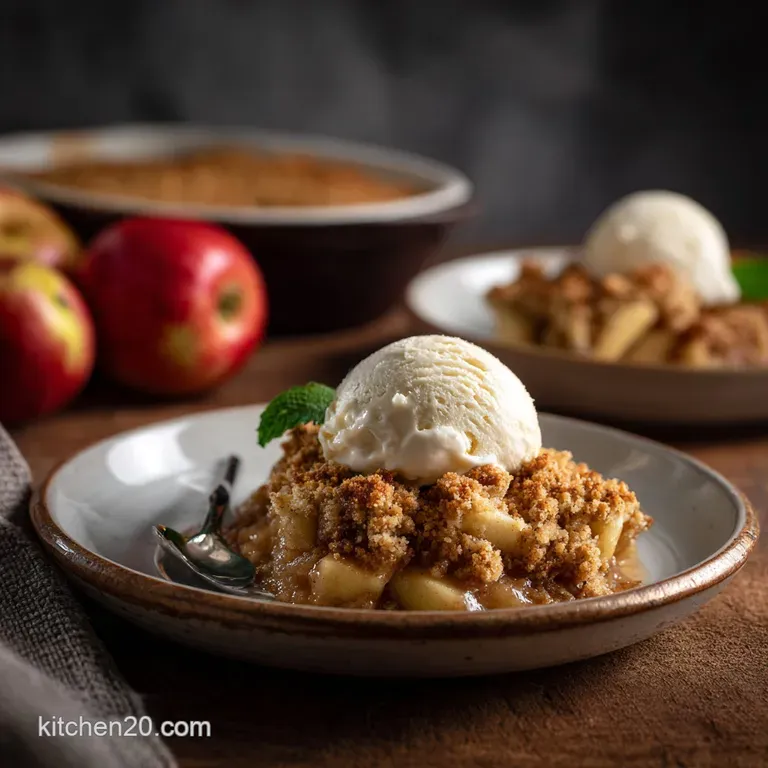
The Quintessential Autumn Apple Crisp (A Proper Crumble)
Is there anything better than walking into a kitchen where apples and cinnamon are hugging the air? I swear, the minute that scent hits, the world feels instantly cozy. This truly is the best Apple Crisp recipe you will ever make, delivering maximum crunchy topping and a filling that stays syrupy, not runny.
It’s pure dessert magic.
I used to think baking was intimidating, but desserts like this saved me. You get the incredible aroma and comfort of a pie without the stress of making pastry. It’s fast, incredibly forgiving, and frankly, much cheaper than buying one of those fancy bakery tarts.
It’s perfect for a weeknight but special enough for the holidays.
Forget what you know about lackluster, mushy fillings and floury tops. We’re digging into the science of why this version works from cold butter techniques to the absolute best apple combination. Let's make an Apple Crisp that demands a second serving.
Embracing the Season: What Makes This Autumn Dessert Essential
Fall is the season of comfort baking. The minute the air turns crisp (ironically, like this dessert), my brain immediately registers: must bake something warm and spicy . This particular Apple Crisp is my staple because it requires almost zero fuss.
You literally chop, mix, top, and bake. It’s the ultimate payoff-to-effort ratio, which, let’s be honest, is what every busy cook needs.
I often pair this with a hearty main dish, something rich and savory, and then finish with this sweet, warm dish. It’s the perfect way to transition from dinner to fireside lounging. The combination of sweet, tart, and crunchy is deeply nostalgic for me.
The Science of Texture: Achieving the Perfect Filling and Topping
The difference between a "good" Apple Crisp and an incredible one is structural integrity. It's not just about flavor; it's about the contrast between the tender, spicy apples and that aggressively crunchy, buttery topping. If either texture fails, the whole dessert falls flat.
We are aiming for complexity here.
The Difference Between a Crisp and a Crumble (Setting Expectations)
Okay, let’s clear up the semantics, because I’m a stickler for historical accuracy in my baking. In the US, the terms "crisp" and "crumble" are often used interchangeably, but traditionally, there’s one key difference.
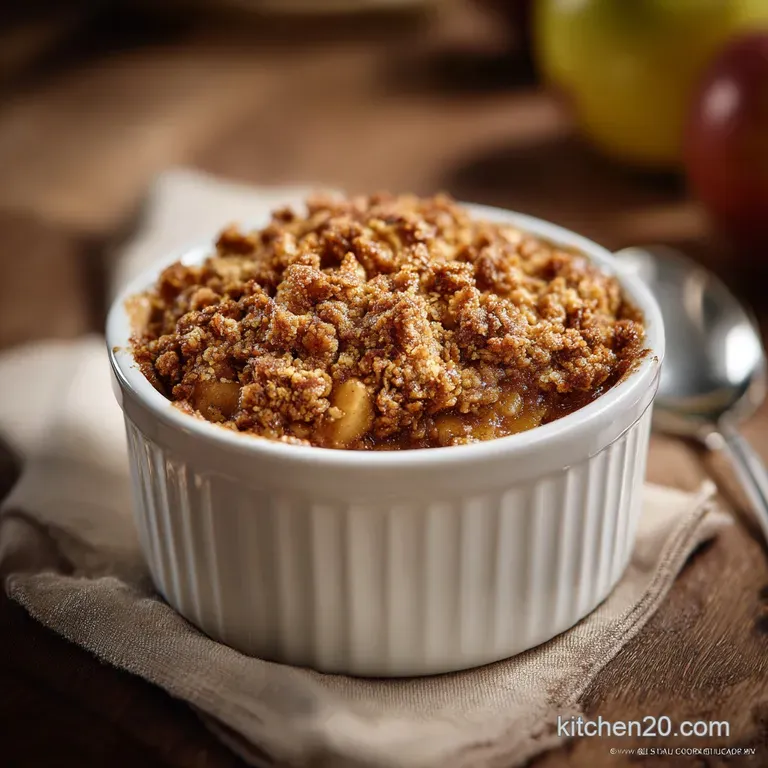
A crisp, like this one, specifically includes oats in the topping, which helps it become ultra crispy as it bakes. A crumble is typically just flour, sugar, and butter, creating more of a streusel texture.
This recipe has those essential oats, making it officially an Apple Crisp Recipe with Oats , though I often call it a crumble when I'm feeling fancy.
Why We Use Rolled Oats for Maximum Crunch
This is non-negotiable. Rolled oats are the backbone of the topping structure. They hold their shape beautifully, provide that distinct rustic look, and create incredible textural contrast against the soft filling. Warning: Do not, under any circumstances, use quick cooking oats.
Quick oats turn soft and mushy immediately when baked, robbing your topping of all its glory. We need the rugged, chewy texture of the old-fashioned kind to make the perfect Apple Crisp .
A Recipe That Works Every Time: Ease and Reliability
I know you want an Easy Apple Crisp Recipe that you don't have to stress over. The secret here is simply the ratio. I’ve tested this particular ingredient balance dozens of times to ensure the filling thickens properly and the topping doesn’t burn before the apples soften.
We are relying on both the flour in the filling and the brown sugar in the topping to create that wonderful caramelization.
Balancing Act: The Crucial Role of Tart and Sweet Apples
If you use only sweet apples (like Gala or Fuji), the final dish tastes flat, cloyingly sweet, and often turns into mush. If you use only tart apples (like Granny Smith), it can be too sour. The solution is always a 50/50 mix.
Use Granny Smith for its wonderful tart structure it holds its shape and provides the acid needed for balance. Then, use a sweeter, firmer variety like Honeycrisp or Braeburn for sweetness and softer tenderness. This mix gives the ultimate, complex flavor to your homemade Apple Crisp .
Maximizing Flavour: Pre-Tossing the Apples in Spices and Acid
I made this mistake for years: I would chop the apples, sprinkle some cinnamon on top, and call it a day. Rookie move! The apples need to be fully coated in the sugar, flour, and spices before baking. This achieves two things.
First, the lemon juice brightens the flavor, preventing the dish from tasting heavy. Second, the small amount of flour coats every apple slice, guaranteeing the liquid that pools up during baking thickens into a glossy, beautiful syrup, rather than a thin, watery mess.
The Secret to a Golden, Buttery Crumble
The butter must be cold, cold, COLD. If you use melted or soft butter in the topping, you’re essentially starting the gluten development too early. The result is a dense, chewy crust that bakes into a sheet rather than delicate crumbles.
When you use cold, cubed butter and cut it into the dry ingredients, those tiny pieces of butter melt slowly in the oven, releasing steam and creating those signature pockets of air that make the topping wonderfully crispy and irresistible.
That’s the magic behind the best Apple Crisp Topping Recipe .
Essential Pantry List for the Best Apple Crisp Recipe
Every great dessert starts with stellar ingredients. You can’t hide inferior quality here, so try to use fresh spices and good butter. I always suggest weighing your ingredients, especially the flour and oats, for maximum accuracy.
Picking the Perfect Apples: Recommendations for Baking
As noted above, a mix is best, but here are the non-negotiables:
| Type | Best For | Substitution If Needed |
|---|---|---|
| Granny Smith | Structure, Tartness | Cortland, Empire |
| Honeycrisp/Braeburn | Sweetness, Tenderness | Fuji, Gala |
Chef's Note: If you can only find one type, use Granny Smith and increase the brown sugar in the filling by 1/4 cup (50g) to compensate for the tartness. This simple Apple Crisp technique still yields great results.
Sweeteners and Spices: Achieving Optimal Depth of Flavor
I rely heavily on brown sugar here, both in the filling and the topping. Granulated sugar provides crispness, but brown sugar brings that rich, molasses depth that screams autumn. It helps the apples achieve a beautiful, caramelized coating.
For the spices, always use fresh cinnamon and nutmeg they make a huge difference. If you have it, add a tiny pinch of cardamom for an unexpected warmth.
gluten-free and Vegan Topping Swaps
This recipe is incredibly versatile! You absolutely can make this a stunning, inclusive dessert.
- For gluten-free (GF): Substitute the all-purpose flour in both the filling and the topping with a 1:1 GF blend (I recommend King Arthur or Bob’s Red Mill). Ensure your rolled oats are certified gluten-free.
- For Vegan: Swap the standard butter in the topping for a high-quality, solid plant based butter (like Miyoko’s or Earth Balance sticks). Crucially: Ensure it’s cold before cutting it into the dry mix. This is how you achieve a fantastic, dairy-free Apple Crisp texture.
Essential Equipment for a Perfect Bake
You don't need fancy tools for this. A 9x13 inch dish is great for feeding a crowd, but a 9 inch square dish works just as well; you just might have a slightly thicker layer of apples. The only thing I highly recommend is a pastry blender.
It makes integrating the cold butter into the flour mixture so much cleaner and faster than using your fingertips (which are often too warm).
Mastering the Method: step-by-step Guide to Your Crisp
Follow these steps carefully, and you will have a jaw-dropping Apple Crisp Recipe with Oats ready in just over an hour. Pay attention to the temperatures!
Preparing the Apple Filling: Sizing and Mixing
First, preheat your oven to 375°F (190°C). Peel the apples and slice them to a uniform thickness, about 1/4 inch thick. Uniformity is key for even cooking. My first few attempts resulted in some apples being mushy and others being raw, and it was solely because I sliced them inconsistently.
Toss the sliced apples immediately with the lemon juice, then sprinkle over the sugars, flour, spices, and salt. Give it a good, gentle toss until every piece of apple is glistening and coated.
Crafting the Proper Crumble Topping
In a separate bowl, whisk together the flour, oats, sugars, cinnamon, and salt. Now, drop in those cubes of cold butter. Work quickly. Use your pastry blender or fingertips to cut the butter into the flour mixture until it looks like coarse sand mixed with pea-sized pebbles.
Remember: The largest pieces of butter are what melt last, creating the most incredible flavor and crunch in this Apple Crisp . If you overmix and it becomes paste like, stick the whole bowl in the freezer for five minutes to re-chill.
Assembly and Layering Techniques
Lightly butter your baking dish this prevents sticking and adds an extra layer of flavor. Pour the apple filling into the dish and spread it evenly. Next, sprinkle the crumble topping over the apples. Critical Tip: Do not press the topping down! Keep it loose and airy.
Pressing it down will inhibit airflow, leading to a denser, chewier topping rather than a crisp one.
Baking Temperature and Times: Knowing When It’s Done
Bake the Apple Crisp at 375°F (190°C) for 45– 50 minutes. How do you know it’s done? First, the topping will be a deep, gorgeous golden brown not just pale yellow.
Second, you must see the filling bubbling vigorously around the edges of the dish. That bubbling means the sauce has reached the proper temperature to thicken. If the topping is golden but the filling isn't bubbling, cover the top loosely with foil and continue baking for another 5– 10 minutes until the apples are fork tender.
Troubleshooting Your Bake: Expert Tips and Fixing Flaws
Baking is a science, and sometimes things go sideways. Here are the most common hiccups when making an Apple Crisp and how to avoid them.
Why Is My Filling Watery? (Preventing Liquid Pooling)
This is the number one complaint! Watery filling happens for two reasons: You didn't use enough thickening agent (flour), or you didn't let the Apple Crisp rest after baking. The flour in the filling needs time after baking to finish gelatinizing and set the sauce.
If you cut into it too soon, the hot, thin liquid immediately runs out. Trust me on this.
Getting a Deeply Golden, Evenly Baked Topping
If your topping looks pale after 45 minutes, move the crisp up one rack position for the final 5– 10 minutes. If the topping is browning too quickly, use my emergency trick: loosely tent the baking dish with aluminum foil.
This deflects the heat from the top, allowing the apples underneath to finish cooking without burning the oatmeal crust.
The Crucial Importance of Resting Time
I know, you want to dive in immediately when it comes out of the oven. But you absolutely must wait 10– 15 minutes. This cooling time is essential for the thickening agents to fully set the beautiful apple syrup. Cutting it too early results in a messy, liquidy plate.
The best Apple Crisp rewards patience.
Keeping It Fresh: Storing and Freezing Apple Crisp
We often make a big batch of Apple Crisp because leftovers are just as good, especially served cold for breakfast (don’t judge!). Proper storage ensures both safety and, more importantly, maximum crunch preservation.
Shelf Life: How Long Does Homemade Apple Crisp Last?
If stored properly, fully baked Apple Crisp will last for about 3 days in the refrigerator. Make sure you cover it tightly with plastic wrap or transfer it to an airtight container once it has cooled completely. Storing it warm creates condensation, which is the enemy of a crispy topping.
Best Way to Reheat Leftovers Without Losing Crunch
Microwaving is convenient, but it turns the topping to sadness. The only way to revive that incredible crunch is to use dry heat.
- Preheat your oven or toaster oven to 350°F (175°C).
- Place the leftover Apple Crisp slices directly on a baking sheet.
- Reheat for 10– 15 minutes until the apples are warm and the topping is crackling again.
You can also use an air fryer, if you have one! I love using my air fryer for reheating things that need to stay crispy, like leftover fried snacks or, in this case, the topping of the Apple Crisp . It achieves that perfect crunch much faster than a standard oven similar to how it perfectly crisps Air Fryer Zucchini Chips: Ultra Crispy, No-Soggy Keto Recipe !
Freezing Guidelines for Baked and Unbaked Crisp
Yes, this freezes beautifully!
- Unbaked: Assemble the crisp completely in a foil lined baking dish. Cover tightly with two layers of plastic wrap and one layer of foil. Freeze for up to 3 months. When ready to bake, remove the plastic wrap, replace the foil, and bake directly from frozen at 375°F (190°C). You'll need to add about 20– 30 minutes to the total baking time.
- Baked: Bake completely and let it cool. Wrap it tightly and freeze. Thaw overnight in the fridge and reheat as described above.
Elevating the Experience: Serving Suggestions
While this Apple Crisp is delicious all on its own, it practically begs for something creamy and cold on top. You have options!
The classic scoop of high-quality vanilla ice cream is mandatory, providing that hot-cold dynamic everyone loves. For something a little different, try serving it with a dollop of thick Greek yogurt or crème fraîche. The slight tanginess cuts through the sweetness and spice wonderfully.
If you’re having a baking marathon, this pairs perfectly with a scoop of custard and maybe a side of my Baked Apples Recipe Easy: Classic Cinnamon Dessert in 45 Minutes if you want to double up on the fruit. Making Baked Apple Recipes and crisps in the fall is my favorite tradition. Enjoy every single bite of this sensational, homemade Apple Crisp !

Recipe FAQs
Which apple varieties work best for this crisp?
The ideal crisp uses a blend of apple types. We recommend using tart apples like Granny Smith or Cortland for structure, balanced with sweeter varieties such as Honeycrisp or Fuji for flavour depth. This mix ensures the filling isn't overly sweet and the apples maintain some integrity during the long bake.
Why is my apple filling watery after baking?
A watery filling usually means the apples released too much liquid during baking, or there wasn't enough thickener (like flour or cornstarch) used. Ensure you coat the sliced apples thoroughly with the specified thickener and sugar mix before adding them to the baking dish.
If using particularly juicy apples, you may need to add an extra teaspoon of flour.
Can I make this Apple Crisp vegan or gluten-free?
Yes, the recipe adapts easily to dietary needs. For a vegan version, simply substitute the butter with a firm, high-quality plant based butter alternative, ensuring it is kept cold when making the crumble.
To make it gluten-free, replace the all-purpose flour in the topping with a 1:1 gluten-free blend, or use finely ground oat flour.
My crisp topping turned out soggy instead of crunchy. What went wrong?
Sogginess often occurs if the topping is spread too thinly or if steam released from the apples gets trapped underneath. Ensure the oven is preheated properly and bake the crisp until the topping is a deep golden brown, which signifies sufficient moisture evaporation.
Try sprinkling a little extra rolled oats over the topping before baking for enhanced crunch.
How far ahead can I prepare this crisp, and what is the best way to store leftovers?
You can assemble the filling and topping separately up to 24 hours in advance. Store the chopped, seasoned apples in an airtight container in the fridge, and the dry topping mix in the freezer.
Leftovers should be covered and kept refrigerated for up to four days; reheat in a 350°F (175°C) oven to restore the topping’s texture.
Can I freeze the Apple Crisp?
Yes, you can freeze the crisp either baked or unbaked. If freezing unbaked, wrap the assembled crisp dish tightly in plastic wrap and then foil; bake directly from frozen, adding 15-20 minutes to the baking time. If freezing baked leftovers, cool completely, wrap well, and reheat gently until the filling is bubbling.
What is the benefit of using rolled oats in the topping?
Rolled oats are essential for achieving that characteristic rustic "crisp" texture, offering a chewier and more substantial bite than flour alone. They also absorb some of the butter during baking, creating wonderfully clustered crumbs.
Do not substitute quick oats, as they tend to absorb too much moisture and become gluey.
Easy Apple Crisp Recipe With Oats 2

Ingredients:
Instructions:
Nutrition Facts:
| Calories | 375 kcal |
|---|---|
| Fat | 16 g |
| Fiber | 4 g |
