Set It and Forget It Golden Dinner Rolls the Easiest Way to Perfect Bread Machine Bread
- Ditch the Dough Drama: Introducing Effortless Golden Dinner Rolls
- Why This Bread Maker Recipe Reigns Supreme for Weeknights
- Laying the Foundation: What Goes Into These Easy Bread Machine Dinner Rolls
- Precision Measurement for Superior Results
- From Liquids to Loaf: The Quick Assembly Sequence
- Baking and Finishing Touches for That Golden Sheen
- Troubleshooting and Creative Variations for Your Rolls
- Frequently Asked Questions
- 📝 Recipe Card
Ditch the Dough Drama: Introducing Effortless Golden Dinner Rolls
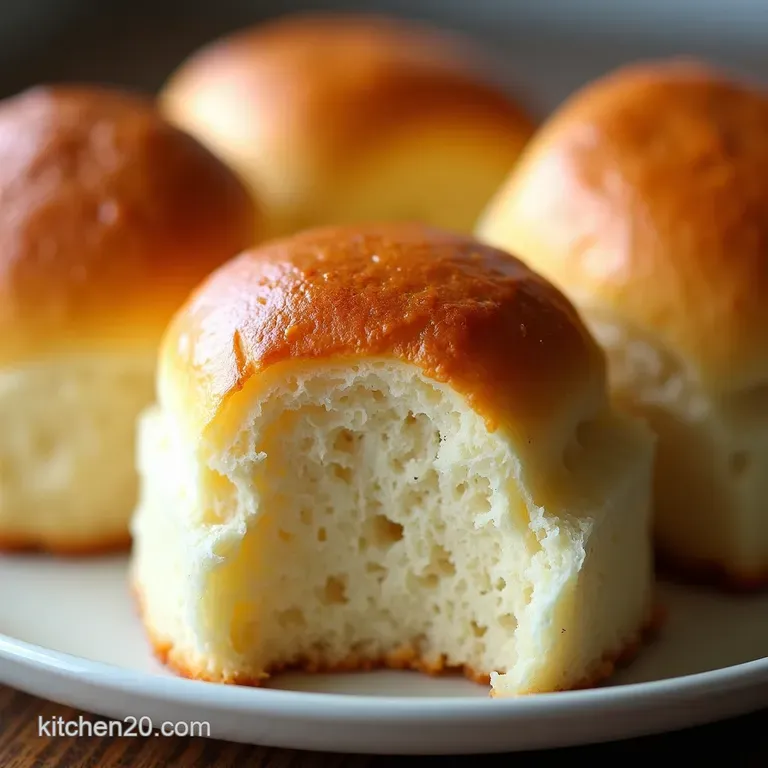
There’s something deeply comforting about a basket overflowing with warm, fluffy dinner rolls. They represent hospitality, comfort, and the perfect accompaniment to any substantial meal.
Yet, the traditional process of mixing, kneading for what feels like an eternity, and then patiently waiting for the first rise often pushes making them from "weeknight friendly" to "reserved only for holidays." That is, until you harness the power of your countertop bread machine.
We are here today to reveal the secrets to crafting the "Set It and Forget It" Golden Dinner Rolls they are utterly divine, slightly sweet, and so incredibly light, yet the effort required is almost criminal given the reward.
If you’ve ever dreamed of achieving that cloud like texture without touching a speck of flour on your counter, this Easy Bread Machine Dinner Rolls recipe is your new best friend.
Why This Bread Maker Recipe Reigns Supreme for Weeknights
Weeknights demand efficiency without sacrificing quality, and this Bread Maker Dinner Rolls Recipe delivers exactly that balance. We leverage the automated power of the machine for the most time consuming parts of the process, leaving you with the simple, satisfying tasks of dividing and baking.
These aren't just quick; they are consistently perfect, providing that authentic, buttery taste we associate with hours spent over a kitchen island.
The Secret to Foolproof Fluffiness Every Time
The key to achieving truly Fluffy Dinner Rolls Bread Machine perfection lies in the ratio and the machine’s precise temperature control during the initial proof.
By using warm milk (between 105– 115° F) and ensuring your yeast is fresh, you give the dough the optimal environment to develop strong gluten structure during the machine’s kneading phase, trapping the gases that create that wonderful airy interior.
Perfectly Portioned Rolls: Ideal for Gravy Mopping
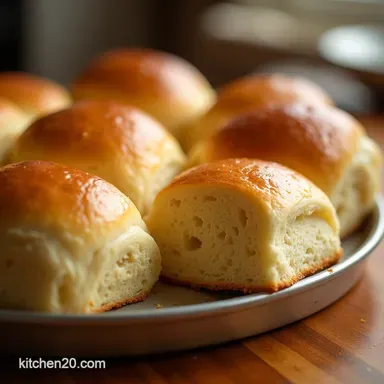
These rolls yield between 12 to 16 medium-to-large portions, depending on how you divide them. This sizing is critical: they are substantial enough to stand up to a hearty shepherd's pie or a generous serving of Sunday roast gravy, yet tender enough to pull apart effortlessly with just a gentle tug.
Zero Kneading Required: Harnessing Bread Machine Magic
The beauty of this method transforms what could be a 30-minute kneading session into a 15-minute measuring exercise. Once the ingredients are correctly layered into the pan, the machine manages the entire mixing, kneading, and primary rising process.
This means the resulting Quick Bread Machine Dinner Rolls require minimal hands-on time, truly embodying the essence of convenience.
Laying the Foundation: What Goes Into These Easy Bread Machine Dinner Rolls
Creating exceptional Homemade Bread Machine Dinner Rolls begins not with a fancy technique, but with selecting the right components and ordering them correctly.
For this recipe, we aim for richness and softness, utilizing whole milk and a touch of melted butter to provide depth that standard water based recipes simply lack. We combine 3 cups of all-purpose flour, which should be spooned and leveled to avoid compaction, with 2 tablespoons of granulated sugar to feed the yeast and add a subtle sweetness characteristic of great dinner rolls.
Crucially, we incorporate 1 teaspoon of salt for flavour and structure, alongside one large, lightly beaten egg for extra richness and binding power.
Related Recipes Worth Trying
- Foolproof Cake Mix Dinner Rolls Quick Fluffy Yeast Rolls — These are the softest easiest dinner rolls youll ever make Using yellow cake mix cuts prep time delivering fluffy dinner rolls perfect for any meal
- Easy Fudgy Peppermint Bark Truffles Christmas Candies — Upgrade your holiday baking with these decadent Fudgy Peppermint Bark Truffles A foolproof take on classic Christmas candies that tastes like Grandma made...
- Easy Biscoff Tiramisu Recipe NoBake Lotus Dream — Meet your new favourite dessert This Easy Biscoff Tiramisu swaps coffee for spiced biscuits in a rich nobake format Get the foolproof recipe for this...
Precision Measurement for Superior Results

While the bread machine does the work, its accuracy hinges entirely on your preparation. Treat the measuring process with respect, especially when dealing with flour and yeast, as slight deviations can radically alter the outcome of your dough texture.
The Core Components for Rich Dough
To achieve those superior results in our Easy Bread Machine Rolls Recipe , the foundation rests on warmth and fat. Ensure your milk is genuinely warm, hitting that 105– 115° F sweet spot.
If you use whole milk, you are guaranteed the creamiest texture, complementing the 4 tablespoons of melted (but slightly cooled) unsalted butter. These fats tenderize the crumb, ensuring the final product isn't dry or tough.
Selecting the Correct Bread Machine Cycle
For these rolls, you will exclusively select the "Dough" setting on your machine. This cycle is designed to perform all the mixing, kneading, and the initial long rise (usually about 1.5 to 2 hours total).
Avoid running a full "Basic Bread" cycle, as that incorporates a second rise and potentially a short bake inside the machine, which we do not want for shaping purposes.
Elevating Flavor: Suggested Dairy and Fat Choices
While we recommend whole milk and butter for peak flavour, feel free to experiment slightly. Substituting half the milk with heavy cream will result in an even more decadent, brioche like dough.
If you are aiming for Easy Bread Machine Rolls Recipe Crusty exterior without sacrificing the interior softness, stick to the recommended butter amount, as this fat content aids in tenderness during baking outside the machine.
From Liquids to Loaf: The Quick Assembly Sequence
The order in which ingredients enter the bread machine pan is not arbitrary; it's vital for preventing the yeast from activating prematurely or coming into direct contact with the salt, which inhibits its action.
We begin by pouring the liquids first: the warm milk, the melted butter, and the lightly beaten egg go into the pan base. Next, pile in all the dry components: the measured flour (gently spooned in), the sugar, and the salt, ensuring they are layered neatly.
The final, crucial step is creating a small depression or "well" in the centre of the mound of flour. This well is where you will sprinkle the 2 1/4 teaspoons of yeast. By keeping the yeast isolated from the liquids and salt during the initial loading, you guarantee a successful start to your Bread Machine Yeast Rolls .
Baking and Finishing Touches for That Golden Sheen
Once the dough cycle concludes signaling a perfectly kneaded and proofed mass ready for shaping your involvement shifts from precise measurement to tactile creation, leading to a beautiful final bake.
Loading the Pan: The Crucial Ingredient Order
As discussed, the layering sequence in the pan is non-negotiable: liquids first, dry ingredients layered on top, and yeast delicately placed last into a flour well. This method ensures smooth operation of the kneading paddle from the start.
Initiating the Dough Cycle: Monitoring Initial Mixing
Start your machine immediately after loading, setting it to the Dough cycle. It is worthwhile to check the dough consistency after the first 15 minutes of kneading.
If it looks exceptionally shaggy or sticky, add a teaspoon of flour; if it seems dry and won't come together, add a teaspoon of milk. This minor adjustment ensures the dough is perfectly elastic before it enters its primary proofing stage within the machine.
Shaping and Second Proofing Outside the Machine (If Applicable)
When the cycle finishes, gently deflate the dough and turn it out onto a lightly floured surface. Divide it evenly into 12 or 16 pieces and roll each portion tightly into a smooth ball. Arrange these balls snugly in a greased 9x13-inch baking dish or on a parchment lined baking sheet.
Cover them loosely and let them undergo their second, shorter proof (about 30– 45 minutes) in a warm, draft free area until they look puffy and nearly doubled.
The Post Bake Butter Bath: Achieving Peak Moistness
Preheat your oven to 375° F ( 190° C). Before baking, brush the tops lightly with an egg wash (one egg whisked with a tablespoon of water). Bake for 18 to 22 minutes until deeply golden.
The secret weapon for achieving irresistible softness is the final step: as soon as the rolls emerge, immediately brush the tops generously with melted butter. This infuses the exterior with flavour and locks in moisture, ensuring they remain luscious for serving.
Troubleshooting and Creative Variations for Your Rolls
Even with an automated system, dough can sometimes be temperamental. Knowing how to adjust or enhance your standard recipe can save the day and lead to exciting flavour profiles for your next batch of make-ahead Bread Machine Dinner Rolls .
Transforming Your Easy Bread Machine Dinner Rolls (Flavor Twists)
To move beyond the classic, consider integrating flavour during the shaping stage. For a savoury treat, whisk dried rosemary, garlic powder, and Parmesan cheese into your melted butter before brushing them post bake.
Alternatively, for a slightly sweeter, richer dough reminiscent of brioche, substitute half of the all-purpose flour with bread flour and add one extra tablespoon of sugar to the initial dry ingredients.
Troubleshooting Common Bread Machine Dough Failures
If your dough comes out too wet, it likely needs more flour; the next time you make Easy Bread Machine Rolls Recipe , measure your flour using the spoon and-level method.
If the dough is stiff and tearing during the machine’s kneading, it’s too dry add liquid sparingly during the first 15 minutes of mixing. A sunken roll after baking usually indicates over proofing during that second rise; watch them closely and bake them just as they become puffy.
Shelf Life and Optimal Reheating Methods
These rolls are best enjoyed the day they are made, offering peak softness. Store leftovers tightly wrapped at room temperature for up to two days. To revive their Fluffy Dinner Rolls Bread Machine texture, wrap them in foil and reheat in a 350° F oven for 8- 10 minutes, or microwave them briefly (about 15 seconds) wrapped in a damp paper towel to restore moisture before serving hot.

Frequently Asked Questions
Why are my Easy Bread Machine Dinner Rolls coming out dense instead of fluffy?
Nine times out of ten, a dense roll is due to inaccurate flour measurement you might be using too much. Always spoon your flour into the measuring cup and level it off, rather than scooping directly.
Also, check your yeast; if it’s old or was killed by liquid that was too hot, the dough won't rise properly, and the rolls will be bricks!
Can I skip the shaping step and just bake the dough directly from the bread machine?
While you technically can, you really shouldn't if you want proper rolls. The machine's dough cycle is just for mixing and the first proof. Shaping the dough into tight balls creates necessary surface tension which ensures they rise upwards in the oven, giving you that lovely, light texture we’re after.
Think of it as giving them a good pep talk before the bake!
How should I store leftovers, and how do I reheat them to taste fresh again?
Store leftover rolls in an airtight container at room temperature for up to three days; they don't fare well in the fridge as they dry out quickly. To bring them back to life, wrap them loosely in foil and warm them in a 300°F (150°C) oven for about 8-10 minutes that mimics the original baking heat beautifully.
I’m not a fan of milk; what is the best substitute for making these Easy Bread Machine Dinner Rolls?
If you need to swap the milk, unsweetened soy or oat milk are generally the best dairy-free alternatives as they have a higher fat and protein content than plain almond milk, keeping the rolls tender.
If you use water instead, the rolls will be significantly less rich, so consider adding an extra teaspoon of melted butter to compensate for the flavour loss.
My recipe calls for yeast, but I only have active dry yeast; can I use that in the bread machine?
Yes, absolutely, but you must 'proof' the active dry yeast first! Before loading the machine, dissolve the yeast in a tablespoon of the required warm milk (make sure it’s between 105-115°F) along with a pinch of the sugar, and let it sit for 5-10 minutes until foamy.
If it doesn't foam, your yeast is dead, and you’ll need a fresh packet.
Easy Bread Machine Rolls
Ingredients:
Instructions:
Nutrition Facts:
| Calories | 163 kcal |
|---|---|
| Protein | 4.2 g |
| Fat | 6.1 g |
| Carbs | 19.0 g |
| Fiber | 1.9 g |
| Sodium | 67 mg |
