Southern Style Biscuits: Flaky and Tender
- Time: Active 20 minutes, Passive 15 minutes, Total 35 minutes
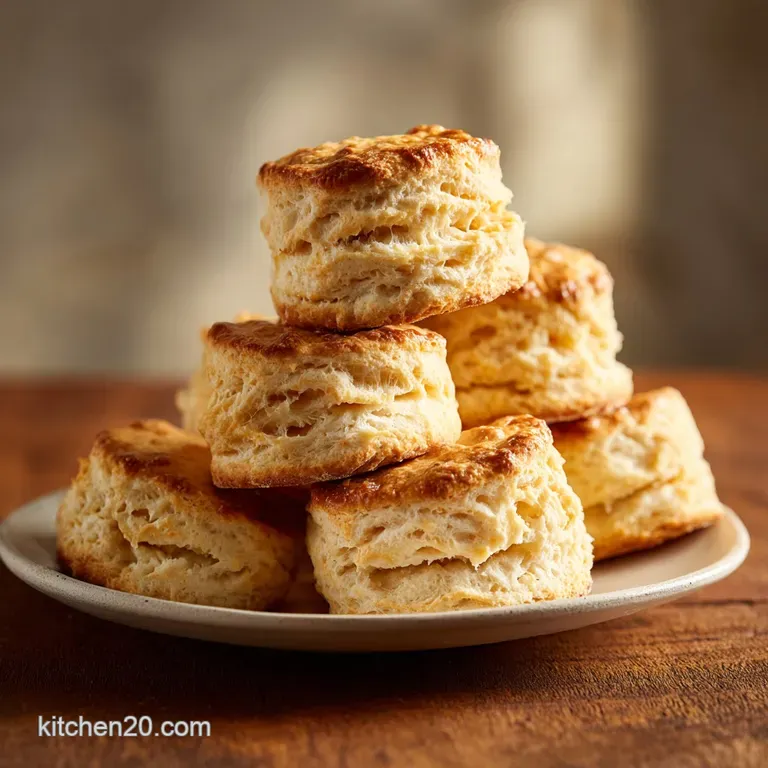
- Flavor/Texture Hook: A buttery, salty exterior that gives way to a tender, cloud like interior.
- Perfect for: Slow weekend mornings or a quick side for a hearty weeknight stew.
- How This Golden Southern Style Biscuit Recipe Redefines Comfort Food
- Why Your Biscuits Are Hockey Pucks Instead of Flaky Clouds
- Precision Checkpoints for Achieving the Ultimate Vertical Biscuit Rise
- The Budget Friendly Alchemist Guide to Essential Biscuit Components
- Streamlining Your Kitchen Workflow with These Smart Biscuit Tools
- Step by Step Guide to Perfecting Your Homemade Dough Technique
- Troubleshooting Your Biscuit Recipe to Prevent Tough and Heavy Crumb
- Smart Ingredient Substitutions That Keep Your Grocery Bill Low
- Practical Meal Prep Systems for Storing and Reheating Leftover Biscuits
- Perfect Pairings to Turn Your Fresh Biscuits Into a Meal
- Summary of the Perfect Biscuit System
- Recipe FAQs
- 📝 Recipe Card
How This Golden Southern Style Biscuit Recipe Redefines Comfort Food
Biscuits aren't just a side dish in the American South; they're a cultural anchor, a edible piece of history that tells a story of resourcefulness and community. Growing up, the smell of flour and cold lard (or butter, if it was a good week) hitting a hot oven was the universal signal that breakfast was served.
The tradition of the "biscuit recipe" dates back to an era where expensive leaveners like yeast were a luxury, leading to the development of chemically leavened quick breads that could be whipped up in minutes before the farm work began.
In my own kitchen, I've found that the best biscuits come from a place of efficiency and respect for the ingredients. We often think of these as intimidating, but they were originally designed to be fast and cheap.
It’s about that specific moment when the cold fat hits the hot air, creating a steam powered rise that makes the top of the biscuit shatter when you bite into it. I remember my grandmother telling me that the "soul" of the biscuit was in how little you touched the dough.
Every second your warm hands spend pressing into that flour, you're melting the very thing that makes them light.
We're aiming for that specific velvety crumb that sops up honey or gravy without falling apart. This isn't just about baking; it's about a systematic approach to temperature and texture. By using frozen butter and cold buttermilk, we’re essentially building a thermal engine inside the dough.
When that heat hits the 425°F mark, the water in the butter evaporates instantly, pushing the flour layers apart like a bellows. It's a beautiful, efficient process that results in a stack of golden discs that feel far more expensive than the few cents of flour and fat they actually cost.
Why Your Biscuits Are Hockey Pucks Instead of Flaky Clouds
Most people fail at the "biscuit recipe" because they treat the dough like bread or pizza crust. They knead it, they let it get warm, and they use a dull knife. To get that legendary rise, you have to think like a thermal engineer, not a baker.
- The Steam Engine Effect: Tiny chunks of cold butter are your best friend. When they hit the hot oven, the water content in the butter turns to steam, physically lifting the dough from the inside out.
- Gluten Management: Gluten is the enemy of tenderness here. Over mixing creates a rubbery web of proteins that traps the air and results in a tough, chewy biscuit instead of a flaky one.
- The Lamination Hack: By folding the dough over itself multiple times, we’re creating physical layers of fat and flour. This is the secret to those "pull apart" layers that make Southern biscuits famous.
- Vertical Expansion: If you twist the cutter when pressing down, you seal the edges of the dough. This effectively "welds" the layers shut, preventing the biscuit from rising. You must press straight down and pull straight up.
Quick Decision Guide for Different Thicknesses
Before you even touch the flour, you need to know what kind of result you're looking for. The thickness of your dough determines the final texture and the cook time.
| Dough Thickness | Internal Temp | Rest Time | Visual Cue |
|---|---|---|---|
| 0.75 inch | 200°F | 2 minutes | Golden edges, quick crisp |
| 1 inch (Standard) | 210°F | 3 minutes | Tall sides, mahogany base |
| 1.25 inch | 212°F | 5 minutes | Extra fluffy center, soft top |
Getting the height right is the first step toward success. If you want a more "crusty" biscuit, go thinner. For those massive, meal sized biscuits, hit the 1 inch mark and don't look back.
It's all about how much surface area you want exposed to the dry heat of the oven versus how much steaming you want happening in the center.
Precision Checkpoints for Achieving the Ultimate Vertical Biscuit Rise
To get consistent results every time, you need to hit specific numeric markers. This isn't a "vibe" based recipe; it's a precision based system. I’ve found that even a few degrees of difference in your butter can ruin the structural integrity of the crumb.
If your kitchen is particularly hot, stick your flour in the fridge for 15 minutes before you start. Efficiency in baking comes from controlling the environment before the ingredients ever touch each other.
The first checkpoint is your butter temperature. It shouldn't just be "cold" it needs to be frozen. I keep a few sticks in the freezer specifically for my "biscuit recipe" days. When you grate frozen butter, it creates tiny shards that stay solid much longer than cubes.
This gives you a wider window of time to work the dough before the fat starts to soften. If the butter turns into a paste, you've lost the battle for flakiness.
Second, the oven temperature must be verified. Most home ovens are notoriously inaccurate. A setting of 425°F might actually be 400°F or 450°F.
If the oven isn't hot enough, the butter will melt slowly and leak out of the dough rather than turning into steam. This results in a greasy puddle on your baking sheet and a flat, sad biscuit.
Use an oven thermometer to ensure you’re hitting that 425°F (218°C) mark exactly before the tray goes in.
Component Deep Dive and Functionality
Understanding the role of each ingredient allows you to troubleshoot on the fly. We aren't just tossing things in a bowl; we are building a structural matrix.
| Ingredient | Science Role | Pro Secret |
|---|---|---|
| Baking Powder | Primary Leavening | Ensure it's under 6 months old for maximum lift. |
| Frozen Butter | Steam Creation | Grate it to ensure uniform distribution without overworking. |
| Cold Buttermilk | Gluten Control | The acid softens flour proteins for a velvety crumb. |
When you look at it this way, you realize that the salt and sugar aren't just for flavor; they affect how the proteins in the flour bond. Salt strengthens the structure, while sugar helps with the browning process, giving us that mahogany colored base we’re after.
The Budget Friendly Alchemist Guide to Essential Biscuit Components
Making a world class "biscuit recipe" doesn't require high end specialty flours or artisanal fats. In fact, some of the best biscuits I've ever made were during tight months using store brand staples. The "budget smart" angle here is that technique beats price every single time.
You can buy the most expensive European butter, but if you melt it with your warm hands, your biscuits will still be heavy.
- 2.5 cups all purpose flour (315g): This is the backbone. AP flour has the right balance of protein. Why this? Provides enough structure to rise without becoming as tough as bread flour.
- 2 tbsp baking powder: This seems like a lot, but it’s necessary for that aggressive lift. Why this? It reacts twice once when wet and once when heated ensuring height.
- 1 tsp fine sea salt: Don't use coarse salt here; it won't dissolve evenly. Why this? Enhances the buttery notes and regulates the chemical leavening process.
- 1 tbsp granulated sugar: Just enough to help with the Maillard reaction. Why this? Provides the sugar molecules needed for that gorgeous golden brown crust.
- 0.5 cup unsalted butter, frozen (115g): This is our steam source. Why this? Frozen fat creates distinct layers that "shatter" when bitten.
- 1 cup cold buttermilk (240ml): The tang is essential for flavor and tenderness. Why this? Its acidity breaks down gluten, ensuring the interior remains silky.
If you find yourself without buttermilk, don't panic. You can make a quick substitute using regular milk and a tablespoon of white vinegar or lemon juice. Let it sit for 5 minutes until it curdles.
While it won't have the exact thickness of real cultured buttermilk, the acidity will still perform the necessary chemical work to keep the biscuits tender. This is a great way to save a trip to the store and keep your grocery budget in check.
Streamlining Your Kitchen Workflow with These Smart Biscuit Tools
To keep things efficient and modern, I rely on a few specific tools that minimize the "human touch" on the dough. If you have a food processor, you can pulse the butter and flour, but honestly, a box grater is faster to clean and gives better texture.
I'm all about streamlining the process so that biscuits can be a 35 minute reality, not an all morning project.
The most important "gadget" in your arsenal for a "biscuit recipe" is actually just a chilled stainless steel bowl. Metal conducts heat away from the ingredients faster than ceramic or glass.
By popping your bowl in the freezer for 10 minutes before you start, you create a cold microclimate that protects your butter from the ambient heat of your kitchen. It’s a small, zero cost hack that makes a massive difference in the final flakiness.
You also need a sharp 2.5 inch round cutter. If you don't have one, don't use the rim of a glass. A glass has a dull, rounded edge that pinches the dough together, sealing the layers. A sharp metal cutter slices through the gluten and fat cleanly, leaving the layers exposed and ready to expand upward.
If you’re really in a pinch, use a sharp chef's knife to cut the dough into squares. Square biscuits rise just as well and result in zero wasted dough scraps!
| Stovetop vs. Oven | Prep Time | Resulting Texture | Best For |
|---|---|---|---|
| Cast Iron Oven | 35 mins | Crispy base, tall rise | Traditional Southern style |
| Stovetop Griddle | 20 mins | Flat, English muffin style | Quick breakfast sandwiches |
| Air Fryer | 25 mins | Very crunchy exterior | Small batches (2-4 biscuits) |
While the oven is the gold standard for this recipe, knowing your options helps when you’re trying to save on utility bills or cooking for just one or two people. The air fryer is surprisingly effective for a quick "biscuit recipe" fix, though you’ll lose a bit of the even vertical rise you get from the consistent surrounding heat of a traditional oven.
step-by-step Guide to Perfecting Your Homemade Dough Technique
- Whisk the dry base. Combine the 2.5 cups all purpose flour, 2 tbsp baking powder, 1 tsp salt, and 1 tbsp sugar in a chilled stainless steel bowl. Note: This ensures the leavening is perfectly distributed before the liquid hits.
- Grate the frozen butter. Use the large holes of a box grater to shred the 0.5 cup frozen butter directly into the flour. Note: Grating creates uniform "petals" of fat that are easier to distribute than cubes.
- Toss the shreds. Gently move the butter through the flour with a fork until every piece is coated. Look for a texture like coarse sand with visible butter flakes.
- Add the cold buttermilk. Create a well in the center and pour in the 1 cup of buttermilk all at once.
- Form a shaggy dough. Use a spatula to stir just until the flour is moistened. Stop as soon as it clumps together; it should look messy and uneven.
- Laminate the dough. Turn it onto a floured surface and fold it over itself 5-6 times. Note: This creates the physical layers required for that "shatter" texture.
- Shape and cut. Pat the dough to a 1 inch thickness and use a sharp 2.5 inch cutter to press straight down. Do not twist the cutter, or you'll seal the edges.
- Arrange and bake. Place the 10 biscuits on a parchment lined sheet so they are just touching. Bake at 425°F (218°C) for 15 minutes until the tops are golden and the bottoms are a deep mahogany brown.
If you are looking for a slightly different texture, perhaps something even more effortless, you might want to try a Southern drop biscuit recipe which skips the lamination entirely for a more rustic, craggy exterior. It's a great "intro" recipe if you're worried about handling the dough too much.
Troubleshooting Your Biscuit Recipe to Prevent Tough and Heavy Crumb
When things go wrong with a "biscuit recipe", it's usually a temperature or handling issue. The most common complaint is that the biscuits didn't rise. Usually, this means the baking powder was old or the oven wasn't hot enough. But sometimes, it's the dough itself.
If the dough felt "tight" or elastic while you were patting it out, you likely over mixed it, developing too much gluten.
Another common issue is "slumping" or "leaning" biscuits. This happens when the dough is too soft or if the cutter was twisted during the shaping process. If your butter started to melt before the tray hit the oven, the structure won't be strong enough to support the vertical rise.
If you see the biscuits start to tilt in the oven, it's usually a sign that the heat distribution is uneven or the dough wasn't folded consistently.
Why Your Biscuits Are Dense and Heavy
This is the ultimate frustration. You follow the steps, but you end up with a puck. This usually boils down to three specific factors: heavy handed mixing, warm ingredients, or "dead" leavening agents.
| Problem | Root Cause | Solution |
|---|---|---|
| No Rise | Expired baking powder | Replace your leavener every 6 months. |
| Tough Texture | Over worked dough | Mix until just combined; stop immediately. |
| Greasy Bottoms | Butter melted before baking | Keep ingredients frozen until the last second. |
Common Mistakes Checklist
- ✓ Never use a rolling pin; your hands are gentler and preserve the air pockets.
- ✓ Ensure the oven is fully preheated for at least 20 minutes before baking.
- ✓ Don't skip the "just touching" placement on the pan; they help each other rise.
- ✓ Avoid using "low-fat" buttermilk substitutes; you need the fat for the crumb.
- ✓ If the dough is too sticky, flour your hands, not the dough.
Smart Ingredient Substitutions That Keep Your Grocery Bill Low
Sometimes the pantry is bare, but the craving for a "biscuit recipe" is real. You can still get a fantastic result with a few smart pivots. The key is maintaining the fat to acid ratio. If you're looking for something sweet to pair these with, check out this Peach Cobbler recipe which uses a similar buttermilk based dough for its flaky topping.
| Original Ingredient | Substitute | Why It Works |
|---|---|---|
| Buttermilk (1 cup) | Plain Yogurt + Water | Similar acidity and fat content. Note: Thin yogurt to a milk like consistency. |
| Unsalted Butter | Salted Butter | No structural change. Note: Omit the 1 tsp of salt from the dry mix. |
| AP Flour | Self Rising Flour | Already contains leavening. Note: Omit the baking powder and salt. |
For an Easy Drop Biscuit Recipe
If you want to skip the folding and cutting, just add an extra 2 tablespoons of buttermilk to the dough. This makes it wet enough to "drop" by the spoonful onto the baking sheet. You’ll get a more craggy, crispy exterior with a very soft, moist middle.
It’s the ultimate "budget smart" hack for when you have five minutes to get dinner on the table.
For a dairy-free Alternative
You can swap the butter for frozen coconut oil (the solid kind) and the buttermilk for almond milk mixed with 1 tablespoon of apple cider vinegar. While the flavor will be slightly different nuttier and less tangy the physics of the steam rise remain the same.
Just make sure the coconut oil is truly frozen, or it will melt too quickly in the oven.
Practical Meal Prep Systems for Storing and Reheating Leftover Biscuits
Biscuits are undoubtedly best about 5 minutes after they leave the oven, but that doesn't mean they don't store well. Because this "biscuit recipe" is relatively high in fat, they stay moist longer than leaner breads. For a modern, efficient household, I recommend a "bake half, freeze half" system.
- Room Temp
- Keep in an airtight container for up to 2 days.
- Fridge
- Not recommended, as the starch undergoes retrogradation faster in the cold, making the biscuit feel stale and hard.
- Freezer
- This is the pro move. Frozen baked biscuits last 3 months.
Zero Waste Tips: Don't throw away those little scraps of dough left over after cutting your circles! Smash them together into one "Franken biscuit." It won't be the prettiest, but it will have the most crispy edges.
Alternatively, dice up leftover stale biscuits and toast them with a little garlic butter to make the best croutons you've ever had for a salad or soup.
Reheating for Efficiency: Never use the microwave. It turns the butter saturated flour into a gummy, rubbery mess. Instead, use a toaster oven or the main oven at 350°F (180°C) for about 5-7 minutes.
This recrisps the exterior while gently warming the center, restoring that "shatter" texture we worked so hard for.
Perfect Pairings to Turn Your Fresh Biscuits Into a Meal
A "biscuit recipe" is essentially a blank canvas for both sweet and savory applications. If you’re in a rush, a simple smear of salted butter and a drizzle of honey is perfection. But if you want to make it a meal, think about contrast.
The richness of the biscuit needs something sharp, salty, or sweet to cut through the fat.
- Savory: Top with a fried egg and a thick slice of sharp cheddar. The runny yolk acts as a natural sauce for the flaky layers.
- Sweet: Split them open and top with macerated strawberries and whipped cream for a classic shortcake.
- Classic Southern: White sausage gravy is the traditional partner. The peppery, creamy sauce soaks into the crumb without making it soggy.
If You Want a Sweet Treat
If you find yourself with extra dough or just want a sweeter variation of this technique, you can use the same folding method to make a Monkey Bread Recipe. Instead of cutting circles, you'd roll the dough into balls and coat them in cinnamon sugar. The lamination technique from this biscuit recipe translates beautifully into pull apart sweet treats.
Debunking Biscuit Misconceptions
One big myth is that you need "soft winter wheat" (like White Lily flour) to make a good biscuit. While it helps, you can achieve nearly identical results with standard all purpose flour by simply not overworking the dough. Another myth is that the "first cut" is the only good one.
While the re rolled scraps won't rise quite as high because the gluten has been worked more, they are still 90% as good as the first batch. Don't be afraid to use all your dough!
Summary of the Perfect Biscuit System
To wrap it up, the secret to this recipe isn't a hidden ingredient or a magical oven. It's a system of temperature control and minimal interference. Keep your butter frozen, your buttermilk cold, and your hands off the dough as much as possible.
If you follow the 425°F (218°C) baking rule and the "no twist" cutting rule, you’ll have a tray of 10 perfect biscuits in just 35 minutes. It’s the ultimate budget friendly way to bring a little bit of Southern comfort to your modern kitchen.

Recipe FAQs
What is the secret to a good biscuit?
Keep your ingredients and tools freezing cold. Using frozen butter and cold buttermilk prevents the fat from melting prematurely, which creates the steam pockets necessary for a high, flaky rise.
What are the ingredients for biscuits?
Combine 2.5 cups all-purpose flour, 2 tbsp baking powder, 1 tsp sea salt, 1 tbsp sugar, 0.5 cup frozen unsalted butter, and 1 cup cold buttermilk. Using chilled stainless steel bowls helps maintain the temperature required for proper texture.
What are some common biscuit mistakes?
Overworking the dough and twisting the cutter are the biggest errors. Handling the dough too much develops excess gluten, resulting in a tough crumb, while twisting the cutter seals the edges and prevents the layers from rising effectively.
What are the three ingredient butter biscuits?
False, this is a common misconception. A proper biscuit requires the chemical reaction between baking powder, salt, sugar, flour, and buttermilk to provide both lift and flavor; omitting these essentials will result in a dense, flavorless puck.
How to ensure flaky, high rising layers?
Fold the dough over itself 5-6 times during the lamination process. This creates the structural layers that expand in the 425°F oven. If you enjoyed mastering dough handling here, you will find similar lamination techniques useful for creating texture in other flour based recipes.
How to achieve the perfect mahogany base?
Arrange the biscuits so they are just touching on the baking sheet. This encourages the biscuits to rise upward rather than spreading outward, ensuring even heat distribution and a deeply browned, golden base.
How to tell if the biscuits are fully baked?
Check for a golden brown top and a mahogany colored base after 15 minutes. Avoid opening the oven door frequently during this time, as heat loss can disrupt the steam expansion needed for the final lift.
Flaky Homemade Biscuit Recipe

Ingredients:
Instructions:
Nutrition Facts:
| Calories | 214 kcal |
|---|---|
| Protein | 4.1 g |
| Fat | 9.9 g |
| Carbs | 26.8 g |
| Fiber | 0.9 g |
| Sugar | 2.5 g |
| Sodium | 495 mg |
