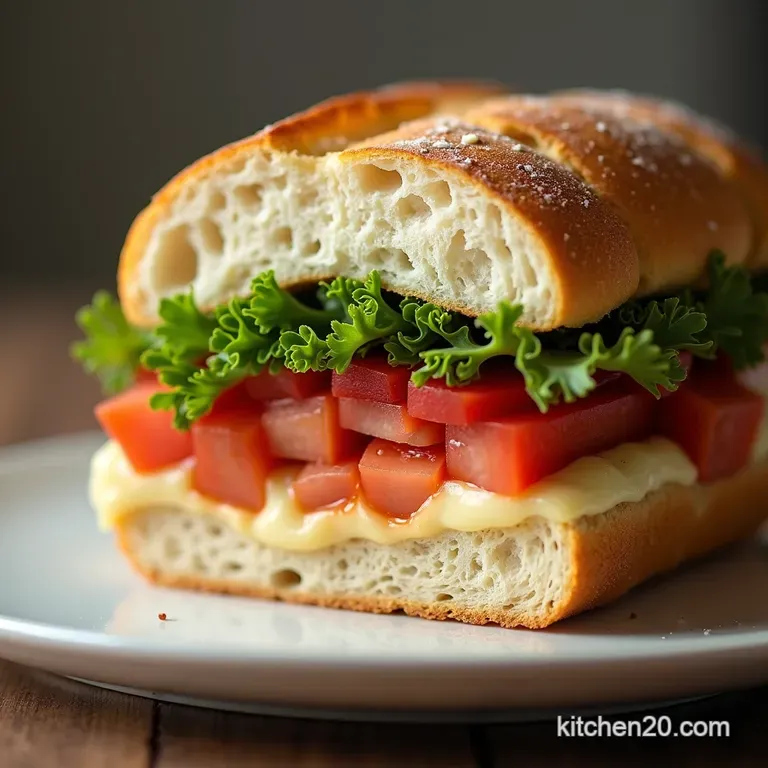
The Perfect Crumb Super Soft Fluffy Sourdough Sandwich Loaf
- Unlocking the Secret to Cloud-Like Sourdough Texture
- Why This Recipe Masters the Sandwich Loaf Format
- Mastering Your Dough Components: Detailed Ingredient Breakdown
- The Mixing and Strengthening Phase: Building the Gluten Network
- Guiding the Dough: Effective Bulk Fermentation Strategies
- Baking Science: Temperature Control for Maximum Loft
- Troubleshooting Common Hurdles in Soft Fluffy Sourdough Sandwich Bread Production
- Recipe FAQs
- 📝 Recipe Card
Unlocking the Secret to Cloud Like Sourdough Texture
For years, sourdough baking was synonymous with rustic, hearty loaves featuring open, irregular holes and a blistered, tough crust. While we adore those artisanal rounds, there’s a special place in every baker's heart for something softer a loaf that slices like a dream and cradles the most delicate fillings.
Achieving this elusive tenderness in a naturally leavened dough is often seen as contradictory, but it’s entirely achievable. This pursuit leads us directly to the Soft Fluffy Sourdough Sandwich Bread .
It’s a paradigm shift; we are trading extreme oven spring for consistent, uniform softness, using time tested techniques adapted for natural leavening. Forget the dense, heavy sourdough you might have struggled with; we are forging the Light Fluffy Sourdough Sandwich Bread Recipe right here.
Why This Recipe Masters the Sandwich Loaf Format
The sandwich loaf demands a specific internal structure: uniform, fine, and yielding. Unlike hearth loaves designed to breathe outward, the pan-baked sandwich loaf needs to rise upward, constrained by the tin.
Our approach focuses on gentle dough development and the inclusion of fat, two elements that directly combat the natural tendency of high protein flour and long fermentation to create a tougher structure.
This Easy Sourdough Sandwich Bread Recipe is specifically engineered for that soft mouthfeel that makes it the ultimate Homemade Sandwich Bread Sourdough .
Beyond Rustic: Our Quest for the Perfect Soft Fluffy Sourdough Sandwich Bread Crumb
To achieve a truly fluffy crumb, we must manage two key variables: moisture content and fat incorporation. Rustic sourdough often thrives on high hydration (75-85%), but for true fluffiness, we need a ratio that promotes pliability without causing collapse.
On top of that,, traditional sourdough relies solely on gluten and gas; our Soft Sourdough Sandwich Bread Recipe introduces a small amount of high-quality butter. Fat coats the flour proteins, inhibiting excessive gluten cross linking, which is the primary mechanism that creates chewiness.
This small addition is the difference between a standard loaf and a truly Soft Fluffy Bread Recipe .
Demystifying Sourdough: Approachable Steps for High Result Baking
Sourdough intimidation often stems from ambiguity. This method, designed as a Simple Sourdough Sandwich Bread , removes that guesswork by relying heavily on visual cues and simple mechanics.
We use a mature, active starter, ensuring vigorous lift, but we control the fermentation window through hydration and folding frequency, rather than guessing at the exact minute the dough is ready.
This structured approach makes it a surprisingly Basic Sourdough Sandwich Bread Recipe for those looking to move beyond beginners' guides.
The Tang Factor: Achieving Depth Without Overpowering Softness
The defining characteristic of sourdough is its flavour complexity derived from lactic and acetic acids. For a sandwich loaf, we want flavour, but not so much acidity that it clashes with mild fillings like turkey or cream cheese.
We achieve this balance by using a slightly warmer bulk fermentation temperature (aiming for 75° F/ 24° C) and ensuring the starter is fed and used when it is at its peak activity (the "float test" success stage).
This rapid, warm fermentation develops pleasant flavour while limiting the time available for excessive acid buildup, ensuring a beautifully balanced Soft Fluffy Sourdough Sandwich Bread .
Mastering Your Dough Components: Detailed Ingredient Breakdown
The quality and ratio of your ingredients are non-negotiable when aiming for this specific texture. For our loaf, we are working towards a hydration level of approximately 70%, which is manageable yet moist enough to feel supple after the addition of fat.
For the dough, you will begin by measuring 100g of active, bubbly sourdough starter (levain), 450g of high protein bread flour, and 50g of whole wheat flour though you can substitute that 50g entirely with bread flour if you prefer a whiter loaf.
The water requirement is 350g, mixed lukewarm (around 85° F/ 30° C) to encourage an active start. Finally, we incorporate 10g of fine sea salt for flavour and dough control.
The most crucial addition, reserved for later, is 20g of unsalted butter, softened completely to room temperature; this is our key to How to make soft fluffy sandwich bread .
The Starter Check: Ensuring Peak Activity Before Mixing
Before you even approach the mixing bowl, confirm your starter is ready. A starter fed 4- 6 hours prior to mixing, doubling or tripling in volume and passing the float test, is essential. A sluggish starter means a long, uncertain bulk fermentation and a flatter final product.
Peak starter ensures timely development of the gluten network required to support the crumb.
Hydration Hacks: Tweaking Ratios for Ultimate Fluffiness
While 70% hydration sounds moderate, remember that the added butter (which is nearly pure fat) contributes significantly to the finished dough’s perceived moistness and softness. If your flour is particularly thirsty, you might increase the water by 10g, but proceed cautiously.
This precise ratio is what guides us toward a Soft Fluffy Sourdough Sandwich Bread rather than a chewy artisan one.
Tools of the Trade: Pans, Scrapers, and Proofing Baskets
For this recipe, a standard 9x5 inch metal loaf pan is perfect. Metal conducts heat efficiently, helping to set the sides quickly. While you don't strictly need a banneton, a lightly floured bowl or large plastic container with straight sides is vital for monitoring the bulk fermentation rise accurately, which is a critical checkpoint in any Simple Sourdough Sandwich Bread approach.
Related Recipes Worth Trying
- The Proper Crumb Classic Rustic Sourdough Bread Recipe — Finally master that satisfying blistered crust and airy crumb with this straightforward sourdough bread recipe Perfect for using your starter
- Pillows of Perfection Ultimate Fluffy Homemade Potato Gnocchi — Stop buying the rubbery stuff Learn how to make truly pillowy soft potato gnocchi from scratch with our foolproof Italian recipe Perfect with sage butter
- Fluffy Kefir Pancakes Recipe Oladi Tangy Tender — Master authentic Fluffy Kefir Pancakes Oladi These arent floppy crêpes theyre thick fluffy delights with a tangy secret Get the foolproof recipe today
The Mixing and Strengthening Phase: Building the Gluten Network

The goal here is to develop strength gently. We are not looking for aggressive development; rather, we need just enough structure to hold the gases produced during proofing.
Autolyse Explained: Allowing Flour to Fully Hydrate
We initiate the process with an autolyse. Combine all the flours (500g total) and the 350g of water in your mixing vessel. Mix only until no dry flour remains. Cover this mass and let it rest for 30 to 60 minutes.
This resting period allows the flour to fully hydrate, kickstarting enzymatic activity that naturally weakens the gluten structure slightly, preparing it for enhanced extensibility a necessary step for a softer crumb.
The Gentle Stretch and Fold Sequence for Smooth Dough
After the autolyse, add the active starter and mix until incorporated. Wait 20 minutes, then add the salt. Dimple it in and mix until dissolved. Now begins the strengthening ritual.
Over the next 90 minutes (or until the dough starts feeling noticeably smoother), perform three sets of gentle stretch and folds, spaced 30 minutes apart.
This slow, gentle introduction of strength is preferred over vigorous machine kneading for achieving a Soft Fluffy Bread Recipe .
Guiding the Dough: Effective Bulk Fermentation Strategies
Bulk fermentation is where the magic happens flavour develops, and the dough gains life. Since we added butter later, we need to manage this phase carefully.
Monitoring Bulk Rise: Recognizing When Your Dough is Ready to Move On
The dough should increase in volume by 30-40%, feeling jiggly, pillowy, and showing visible signs of aeration, like small bubbles beneath the surface. This usually takes 4 to 6 hours at room temperature (72- 76° F or 22- 24° C), but always prioritize the dough’s appearance over the clock when aiming for this specific Light Fluffy Sourdough Sandwich Bread Recipe .
Sculpting the Final Form: Achieving Ideal Tension for Oven Spring
Once bulk fermentation is complete, gently turn the dough onto a very lightly floured surface. Pre-shape it into a relaxed round, allowing it to rest, covered, for 20 minutes (the bench rest). This relaxation allows the gluten to relax, preventing tearing during the final shape.
Precision Shaping: How to Create a Tight Seam for Sandwich Loaves
For the final shape, we aim for high tension. Gently stretch the dough into a rectangle. Fold the top third down to the middle, press the edge to seal. Fold the bottom third up over the first fold (like folding a business letter). Now, flip the dough seam side up.
Gently pull the far edge toward you, creating tension across the top surface. Flip it over, seam side down, and use your hands to roll the loaf gently to ensure it fits the 9x5 tin perfectly. Place this tightly shaped log into your prepared pan.
Baking Science: Temperature Control for Maximum Loft
The bake is where we lock in the soft texture achieved through careful mixing and proofing.
The Bake Day Schedule: Calculating Final Proofing Times Accurately
After shaping, the dough goes into its tin for the final proof, covered tightly to retain humidity and prevent a skin from forming. The dough is ready when it crowns about one inch over the rim of the pan. This typically takes 1 to 2 hours.
This final resting period directly influences how much spring you get when the dough hits the heat.
Temperature Sensitivity: Adjusting Bulk Time for Warmer or Cooler Kitchens
If your kitchen is cool (below 70° F/ 21° C), bulk fermentation might stretch to 7- 8 hours, and the final proof could take longer. Conversely, in summer heat, the entire process might compress into 5 hours total.
Always gauge dough readiness by sight and feel, not by the time on the clock, to master this Soft Fluffy Bread Recipe .
Troubleshooting Common Hurdles in Soft Fluffy Sourdough Sandwich Bread Production
Even with a detailed guide, minor issues can arise. Knowing how to fix them is key to consistently producing high-quality Soft Fluffy Sourdough Sandwich Bread .
Dealing with Flatness: Why Your Loaf Might Not Have Soared
Flatter loaves usually result from two errors: under proofing the final rise (leading to massive oven spring that collapses) or over proofing the bulk (where the gluten structure is too weak to hold the expanding gas).
Always check the dough’s visual indicators carefully during the final proof; the edge should look domed, not slack.
Preserving Freshness: Storing Your Heavenly Loaf
Because this loaf contains added fat, it stays moist longer than lean sourdoughs. Store it tightly wrapped in beeswax wrap or a bread bag at room temperature for up to 3 days. Do not refrigerate, as this accelerates staling.
From Toast to Tea Cakes: Creative Uses for Day-Old Bread
If your loaf does become slightly less than cloud like on day three, don't despair! This bread excels when transformed. It makes incomparable French toast due to its slight density, or use it cubed and dried for amazing croutons or bread crumbs.
This versatility proves why mastering this Basic Sourdough Sandwich Bread Recipe is worthwhile.

Recipe FAQs
Why is my Soft Fluffy Sourdough Sandwich Bread coming out dense instead of light and airy?
This usually boils down to two things: either your starter wasn't active enough, or you under proofed the dough. Ensure your starter is doubling robustly before mixing, and check that the dough achieved the required 30-40% rise during bulk fermentation don't just watch the clock!
I'm nervous about the butter addition; does it really make a difference to the sourdough crumb?
Absolutely, the butter is our secret weapon for that pillowy texture it coats the gluten strands, inhibiting their full tightening and resulting in a softer mouthfeel. Just make sure the butter is completely softened so it incorporates smoothly after the third set of folds without tearing the dough structure.
Can I make this Soft Fluffy Sourdough Sandwich Bread recipe without a stand mixer?
Yes, you certainly can, though it will require a bit more elbow grease! Focus on the gentle stretch and folds during bulk fermentation to build strength, as hand kneading the dough after incorporating the soft butter can be quite messy.
How should I store this fluffy loaf to keep it fresh for sandwiches all week?
Sourdough stales faster than yeasted bread, so avoid the fridge at all costs it’ll turn it into a brick! Keep it tightly wrapped at room temperature for 3 days, or slice it completely and freeze what you won't eat immediately; it toasts beautifully straight from the freezer.
My kitchen is quite cool; how long should I expect the bulk fermentation to take for this Soft Fluffy Sourdough Sandwich Bread?
If your kitchen is cool (say, below 70°F/21°C), you'll need to be patient, as fermentation slows right down. It could easily stretch to 7 or even 8 hours for bulk fermentation, so keep an eye on the dough volume increase rather than strictly adhering to the time estimates aim for that airy, jiggly texture.
What’s the best way to ensure I get those beautiful, even slices for my packed lunch?
The key to perfect slices is patience; you must let the loaf cool completely, ideally for 4 hours, on a wire rack so the steam dissipates evenly. Once cool, use a long, serrated bread knife and use gentle sawing motions rather than pressing down hard, which can compress that beautiful soft crumb.
Fluffy Sourdough Sandwich Loaf

Ingredients:
Instructions:
Nutrition Facts:
| Calories | 2076 kcal |
|---|---|
| Protein | 45.9 g |
| Fat | 39.8 g |
| Carbs | 97.8 g |
| Fiber | 10.6 g |
| Sodium | 40044 mg |
