Garlic Butter Bread Rolls: Golden, Pillowy Comfort for Every Meal
- Unlocking the Secret to Truly Pillowy Bread Rolls
- A Quick Look at the Perfect Garlic Butter Bread Rolls Journey
- Essential Provisions for the Ultimate Roll Dough
- Required Kitchen Arsenal: From Mixer to Baking Dish
- Mastering the Dough: Kneading for Maximum Gluten Development
- Achieving the Perfect Proof: Time, Temperature, and Technique
- Baking to a Golden Finish and Applying the Garlic Butter Glaze
- Troubleshooting Common Bread Roll Errors and Expert Tips
- Recipe FAQs
- 📝 Recipe Card
Unlocking the Secret to Truly Pillowy Bread Rolls
You know that feeling when you bite into a dinner roll and it’s somehow both airy and rich? That’s what we are chasing today. Forget the dry, sad rolls you sometimes get at restaurants. We are aiming for pure, soft comfort here.
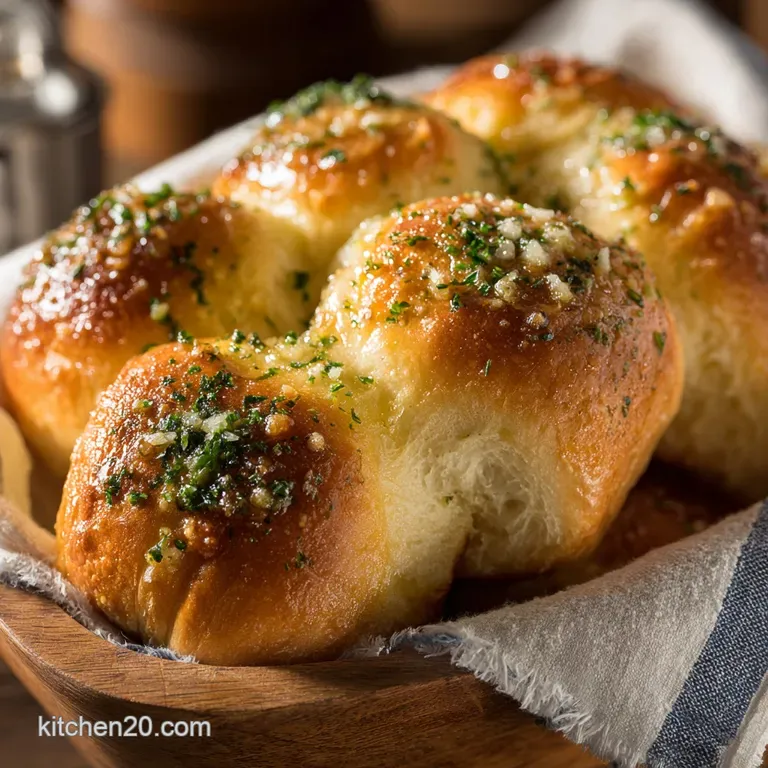
These aren't just Garlic Butter Bread Rolls; these are little golden pockets of happiness, designed to soak up maximum flavour.
I spent years making rolls that came out dense like edible hockey pucks and I finally figured out the key. It’s not just about the recipe, it’s about patience and an enriched dough. Right then, let’s crack on and talk about how we get these rolls so perfectly cloud and like.
A Quick Look at the Perfect Garlic Butter Bread Rolls Journey
This recipe is a proper two and part love story: first, achieving absolute, show and stopping softness in the roll itself, and second, hitting it hard with the most fragrant, fresh garlic butter imaginable.
The timing has to be precise; the butter goes on while the rolls are scorching hot, guaranteeing maximum absorption.
The Enriched Dough Advantage: Softness Science
If you want soft bread, you need fat. Plain French bread (like baguettes) uses flour, water, yeast, and salt. Our rolls use milk, butter, and an egg. This is what we call an enriched dough.
The dairy and fat hinder the gluten development just enough to keep the structure delicate, while the kneading process ensures it’s strong enough to trap the gas bubbles beautifully. Think of it like a slightly less fussy version of Japanese milk bread. It’s brilliant.
Elevating the Experience with Homemade Garlic Butter
Seriously, don’t skimp on the butter here. And for the love of all that is good in cooking, use fresh garlic. Garlic powder gives you flat, predictable flavour, but finely minced or grated fresh cloves mixed into melted, high and quality butter transform this side dish into the main event.
It’s the difference between "meh" and "OMG, pass me another."
What Makes This Recipe Beginner and Friendly?
The steps are super straightforward, even though we involve yeast. The main thing this recipe requires is attention, not skill. We are using clear visual cues for proofing (doubled in size) and a common baking dish (9x13 inch) which encourages the rolls to steam each other slightly, helping them stay moist.
If you can measure and you can wait, you can ace these Garlic Butter Dinner Rolls.
Essential Provisions for the Ultimate Roll Dough
If you only take one piece of advice from this entire blog post, please invest in a digital kitchen scale. It’s the only way to guarantee consistent results when baking. Too much flour is the number one killer of soft, pillowy bread.
When measuring flour, remember that three and a half cups of flour can weigh wildly different amounts depending on how you scoop it, but 420 grams is always 420 grams.
Required Kitchen Arsenal: From Mixer to Baking Dish
You absolutely do not need a stand mixer, but using one with a dough hook will save your arms about 10 minutes of heavy kneading. I usually use my mixer on weekdays, but if I’m having a therapeutic Sunday afternoon, I hand and knead.
You’ll also need a 9x13 inch baking pan (glass or metal is fine) so the rolls sit snugly together this is essential for that pull and apart softness.
Selecting the Right Flour and Yeast for Optimal Rise
All and purpose flour (plain flour) is perfect here. You don't need fancy bread flour unless you happen to have it already. Regarding yeast, I usually use Active Dry Yeast because I like the little reassurance of seeing it proof in the milk (the foam means it’s working!).
Instant yeast is also totally fine; you can just dump it straight in with the dry ingredients, but make sure it’s fresh. Old yeast is useless yeast.
The Role of Dairy and Eggs in Achieving Golden Richness
The egg we add needs to be room temperature. Why? Because a cold egg mixed into warm milk and melted butter will seize everything up, and you’ll end up with little buttery bits floating around. We want smooth incorporation.
The milk is what provides the necessary moisture and helps give the final roll that lovely golden colour when baked.
Ingredient Swaps for Dietary Needs (Dairy and Free Options)
If you have a dairy restriction, don’t worry, you can still absolutely make these delicious Homemade Garlic Butter Dinner Rolls!
| Ingredient | Dairy and Free Swap | Notes |
|---|---|---|
| Whole Milk | Oat or Soy Milk (full fat) | Ensure it is unsweetened. |
| Unsalted Butter (Dough) | High and quality Vegan Butter Sticks | Avoid margarines in tubs. |
| Unsalted Butter (Topping) | Vegan Butter or Olive Oil | Oil works, but butter substitute tastes better. |
CRITICAL WARNING: Your milk must be warm (about 105 115°F or 40 46°C). If it is too hot, you will kill the yeast instantly, and your rolls will refuse to rise. I’ve made this mistake, and it resulted in a very sad, dense lump.
Check the temperature with a thermometer; warm bath water temperature is a good visual guide.
Related Recipes Worth Trying
- Sweet Potato Casserole with Marshmallows The Best Brown Butter Pecan Streusel Recipe — Sweet Potato Casserole with Marshmallows is essential for the holidays This recipe features browned butter crunchy pecan streusel and roasted sweet potatoes...
- Garlic Knots The Chewy PubStyle Homemade Recipe You Need — These PubStyle Garlic Knots are chewy soft and drenched in pungent garlicbutter Learn how to make homemade garlic knots from scratch using pizza dough Total...
- Slow Cooker Honey Garlic Chicken Noodles Ultimate Sticky Glaze — Slow Cooker Honey Garlic Chicken Noodles is the ultimate weeknight savior This easy Honey Garlic Chicken And Noodles Recipe uses chicken thighs for tender...
Mastering the Dough: Kneading for Maximum Gluten Development
Kneading is where the magic happens. We need to wake up the gluten protein in the flour. Whether you use a mixer or your hands, the goal is the same: to transition from a sticky, shaggy mess to a smooth, elastic ball that just barely sticks to your hand.
When you push your finger into the dough, it should slowly spring back out. If it tears easily or feels lumpy, keep going.
Achieving the Perfect Proof: Time, Temperature, and Technique
Proofing is waiting, and honestly, waiting is the hardest part of making bread. The time needed depends entirely on the temperature of your kitchen. If it's a cold day, it could take 90 minutes. If it's summer, it might only take an hour. The indicator is not the clock; it’s the size.
We need the dough to double in size for the first proof, and then for the shaped rolls to look puffy and slightly touching (the second proof). A warm, draft and free spot is your best friend. My personal trick is to turn the oven light on and let the dough proof near the heat.
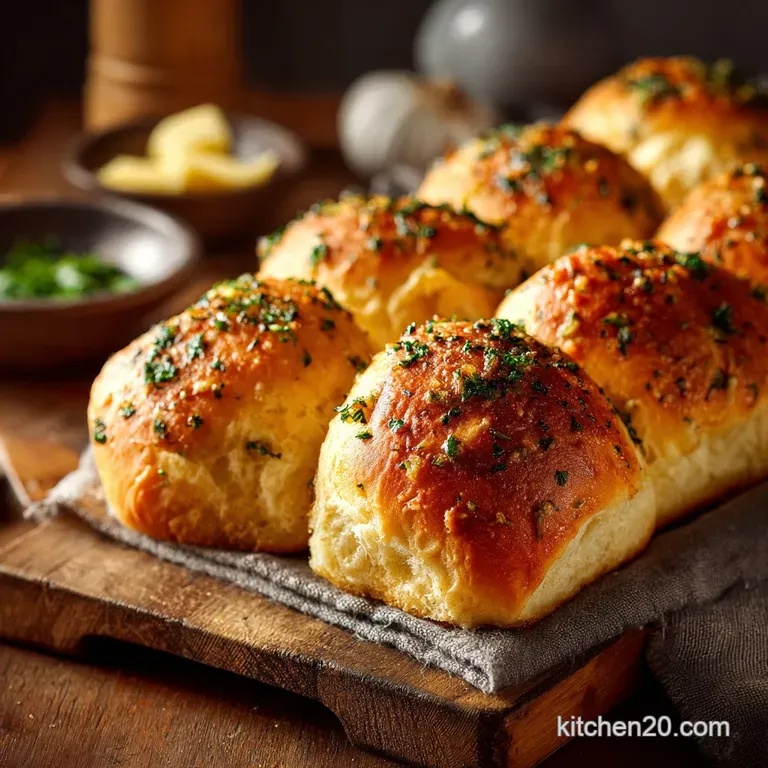
Baking to a Golden Finish and Applying the Garlic Butter Glaze
Once those rolls are puffed up and touching in the pan, they are ready for the heat. Baking at 375°F (190°C) is ideal hot enough to get a golden exterior without drying out the inside.
The Windowpane Test: Knowing When Your Dough is Perfect
How do you know when you’ve kneaded long enough? You perform the windowpane test. Pinch off a small piece of dough (about the size of a golf ball). Gently stretch it out between your fingers.
If you can stretch it thin enough to see light passing through it (like a translucent window pane) before it tears, your gluten is developed perfectly. If it tears instantly, knead for another minute or two and test again.
Stand Mixer vs. Manual Kneading: Time Estimates
This is rough guidance, but usually accurate for this kind of enriched dough:
| Method | Estimated Kneading Time |
|---|---|
| Stand Mixer | 6– 8 minutes on Medium and Low (Speed 2) |
| Manual Kneading | 10– 15 minutes of vigorous kneading |
Dividing and Shaping the Dough into Uniform Dinner Rolls
Once the dough has had its first rise, gently punch it down (it sounds satisfying!) and divide it into 12 equal pieces. Use the kitchen scale if you want them identical. To shape a tight, beautiful round roll, take one piece and pull the edges underneath itself, creating tension on the surface.
Then, cup your hand over the dough on the countertop and roll it quickly in a circular motion until you have a perfect sphere. Tight surface tension means a higher, loftier rise in the oven.
The Best Method for Evenly Browning the Tops
While many recipes use an egg wash, I find that for these Garlic Butter Dinner Rolls, simply brushing the tops with a touch of milk (or melted butter) right before they go in helps achieve that perfect golden brown finish.
But here is the critical part: Immediately upon pulling those hot rolls out, you hit them with the garlic butter. It should sizzle and melt into the warm crust, flavouring every single part of the roll.
Troubleshooting Common Bread Roll Errors and Expert Tips
Baking yeast bread is a skill you build, and we all make mistakes. Don't throw away a batch just because it didn't rise perfectly!
Why Your Dough Might Be Dense or Not Rising
There are three main culprits for a failure to launch:
- Yeast Death: Your milk was too hot (see warning above).
- Too Much Flour: You measured volumetrically and packed the cups too tightly, making the dough too stiff to expand.
- Not Enough Kneading: The gluten hasn’t built a strong enough structure to hold the gas created by the yeast. If it looks dense, knead longer next time.
Storing Leftover Garlic Butter Bread Rolls and Reheating
If you somehow manage to have leftovers (a rare feat in my house), they store well in an airtight container at room temperature for up to three days.
To reheat, the microwave makes them soft, but can sometimes make them chewy. I prefer to put them in a foil packet and warm them in a 300°F (150°C) oven for about 10 minutes. They come out almost as fresh as the moment they were baked.
They freeze beautifully too; let them cool completely, wrap tightly, and freeze for up to three months.
Adding Cheese or Herbs: Flavour Profile Enhancements
If you want to amp up the flavour of your Garlic Butter Bread Rolls even further, try these simple tweaks:
- Parmesan Perfection: Add 1/4 cup of freshly grated Parmesan cheese right into the dough mixture before the first proof for a slightly salty, cheesy base.
- Herb Twist: Instead of just parsley in the topping, substitute one teaspoon of dried oregano and a tablespoon of finely chopped fresh basil.
- The Cheesy Glaze: My favourite upgrade is mixing finely grated sharp cheddar (or Gruyère) into the garlic butter before brushing the tops. The cheese melts into the warm butter as it hits the hot roll. Absolutely decadent.
Nutritional Breakdown and Serving Suggestions
Yes, these are enriched rolls slathered in butter. They are not a diet food. They are comfort food, and that is absolutely fine! While the fat content is high (thanks, butter!), they are meant to be a special side dish.
They pair wonderfully with anything saucy think lasagna, rich mushroom stews, or a proper Thanksgiving spread. They are also the perfect weapon against a big bowl of creamy tomato soup. Just try to eat only one. I dare you.

Recipe FAQs
My dough seems a bit sluggish, almost flat as a pancake. What went wrong with the proofing?
If your rolls haven't doubled in size after the proofing time, the most likely culprits are milk that was too hot and killed the yeast, or a cold kitchen (a true British problem!). Try placing the covered dough in a slightly warm, turned off oven to ensure a warm, draught free spot for a successful rise.
Can I make these glorious Garlic Butter Bread Rolls ahead of time for a proper Sunday lunch, and if so, when should I add the butter?
Absolutely; you can prepare the dough, shape the rolls, arrange them in the pan, cover tightly, and refrigerate for up to 12 hours before the final second proof. Always add the fragrant garlic butter immediately after removing the hot rolls from the oven the heat allows the butter to absorb perfectly, guaranteeing the best flavour.
My rolls went a bit hard after cooling. How do I keep them as light and fluffy as a cloud for leftovers?
To maintain that coveted pillow soft texture, ensure the rolls are completely cooled before wrapping them tightly in foil or cling film, storing them at room temperature for up to two days.
If they feel a little stale, a quick 10-second blast in the microwave will bring back the freshness and softness before serving again.
I fancy adding cheese! What’s the best way to jazz these up a bit with a cheesy twist?
That's a cracking idea! Mix ½ cup of finely grated Parmesan or vintage Cheddar into the dough during the kneading stage, or, for maximum gooeyness, sprinkle the cheese over the tops of the rolls five minutes before the end of the baking time.
These are a total showstopper! What’s the best way to store leftovers for the long haul?
These rolls freeze brilliantly: let them cool completely, then store them in a sturdy airtight container or freezer bag for up to three months. To revive them, thaw them overnight and warm in a 350°F (180°C) oven until piping hot you may need a small extra brush of melted butter to freshen them up.
Garlic Butter Bread Rolls Recipe
Ingredients:
Instructions:
Nutrition Facts:
| Calories | 838 kcal |
|---|---|
| Protein | 4.3 g |
| Fat | 39.0 g |
| Carbs | 117.5 g |
