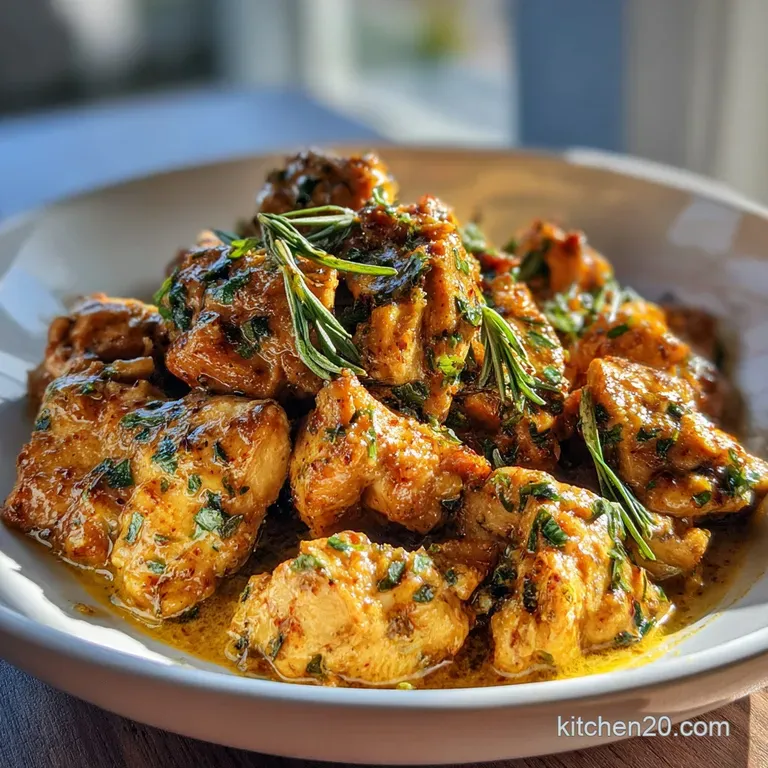
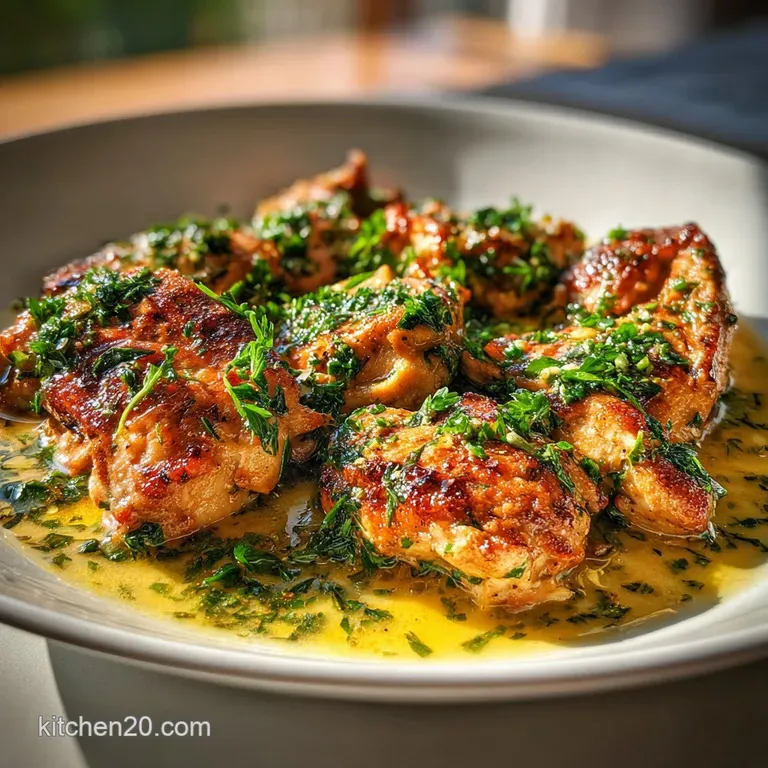
Garlic Butter Chicken: Restaurant Quality Glaze
- Time: Active 10 mins, Passive 10 mins, Total 20 mins
- Flavor/Texture Hook: Golden crusted chicken bites finished with a silky, velvet like garlic emulsion
- Perfect for: High speed weeknight dinners or a connective meal prep session
- Mastering the Most Flavorful Garlic Butter Chicken Ever
- Why This Pan Seared Chicken is Different
- Fast Results Versus Traditional Slow Methods
- The Component Analysis of a Perfect Sear
- High Quality Elements for Better Results
- Tools Needed for Seamless Kitchen Performance
- Executing the Perfect Pan Searing Technique
- Avoiding Common Mistakes in the Pan
- Creative Ways to Customize This Recipe
- Adjusting Portions for Groups Large and Small
- Debunking Searing and Garlic Myths
- Maximizing Freshness and Reducing Food Waste
- Complementary Pairings for a Balanced Meal
- Recipe FAQs
- 📝 Recipe Card
Mastering the Most Flavorful Garlic Butter Chicken Ever
Listen, we've all been there trying to get that perfect golden crust on chicken only to end up with something that looks like it was boiled in a pan. I remember my first few attempts at making Garlic Butter Chicken; the garlic would burn into bitter little black specks before the chicken was even halfway done.
It was frustrating, but it led me to rethink the whole process. By treating the pan like a platform for heat management, you can achieve that mahogany sear without sacrificing the aromatics.
We are revolutionizing how we look at simple stovetop meals. This isn't just about throwing things in a skillet; it's about a connected series of steps that build flavor layers. We're talking about a dish that feels like it came from a high end bistro but takes less time than ordering delivery.
It’s the kind of recipe you share with friends because you want them to experience that same "aha!" moment you had when the sauce finally clicked.
Trust me, once you see how the cold butter interacts with the chicken stock to create a stable, glossy glaze, you'll never go back to just melting butter over meat. This Garlic Butter Chicken recipe is a masterclass in balance the acidity of the lemon cutting through the richness of the butter, and the garlic providing that deep, savory backbone we all crave.
Why This Pan Seared Chicken is Different
The secret here isn't a hidden ingredient, but rather the sequence of the sear and the chemistry of the sauce. Most recipes tell you to sauté the garlic first, but that's a trap garlic has a high sugar content and burns at a much lower temperature than chicken sears.
We're flipping the script to ensure every element is cooked at its own ideal threshold.
- Maillard Reaction: High heat transforms surface proteins and sugars into a complex, savory crust that provides the base for our pan sauce.
- Cold Butter Emulsification: Whisking cold butter into hot liquid creates a suspension of fat droplets that thickens the sauce without needing flour.
- Aromatic Infusion: We add the fresh garlic only after the pan has been deglazed, protecting its delicate sulfur compounds from scorching.
| Thickness of Chicken | Internal Temp | Rest Time | Visual Cue |
|---|---|---|---|
| 1 inch (2.5 cm) bites | 165°F (74°C) | 3 mins | Opaque center, juices run clear |
| 1.5 inch (3.8 cm) chunks | 165°F (74°C) | 5 mins | Firm to the touch, no pink remains |
| Thin strips | 165°F (74°C) | 2 mins | Edges are golden and slightly curled |
Understanding these timing windows is the first step toward kitchen confidence. While the chicken rests, the carryover cooking finishes the job, ensuring the meat stays moist rather than turning into rubber. This connective approach to heat management is what separates a good cook from a great one.
Fast Results Versus Traditional Slow Methods
When we look at modern cooking, efficiency is our biggest asset. Comparing a quick sear method to traditional slow cooking reveals a lot about how we can optimize our time in the kitchen without losing any of that "all day" flavor depth we love.
| Method | Time | Texture | Best For |
|---|---|---|---|
| Fast Sear (This Recipe) | 20 mins | Shattering crust, juicy interior | Fast weeknight dinners |
| Classic Braise | 1 hours 30 mins | Falling apart, very soft | Cold weekends, tough cuts |
| Oven Roast | 45 mins | Evenly cooked, less crust | Meal prepping large batches |
The fast sear allows us to maintain the integrity of the chicken breast, which is a lean protein that doesn't benefit from long cooking times. If you are looking for a more "saucy" vibe, you might enjoy the technique used in my Creamy Dreamy Homemade recipe, which focuses more on dairy based emulsification.
The Component Analysis of a Perfect Sear
Before we start cooking, let's look at why these specific ingredients are the foundation of our success. Every element has a job to do, and understanding those roles helps you troubleshoot on the fly.
| Ingredient | Science Role | Pro Secret |
|---|---|---|
| Chicken Breast | Lean protein base | Pat it bone dry to avoid steaming in the pan |
| Unsalted Butter | Fat & Emulsifier | Keep it cold; it creates a smoother, thicker sauce |
| Chicken Stock | Deglazing agent | Use low sodium to control the final seasoning levels |
| Fresh Garlic | Aromatic backbone | Mince it finely to maximize the surface area for flavor |
Chef Tip: Freeze your butter for 10 minutes before cubing it. When you drop those ice cold cubes into the warm pan sauce, the temperature difference helps the fat molecules disperse evenly into the liquid, giving you a velvety finish rather than a greasy one.
high-quality Elements for Better Results
To make this Garlic Butter Chicken, you'll need a specific set of ingredients. Don't worry if you're missing something; there's almost always a way to adapt while keeping the soul of the dish intact.
- 1.5 lbs (680g) Chicken Breast: Cut these into uniform 1 inch bites. Why this? Uniformity ensures every piece finishes cooking at the exact same moment.
- Substitute: Chicken thighs (boneless) for a richer, more forgiving texture.
- 1 tsp Sea Salt: Why this? Coarser grains provide better coverage and a cleaner salty finish.
- Substitute: Kosher salt (use 1.5 tsp).
- 1/2 tsp Cracked Black Pepper: Freshly ground is non negotiable for that punchy heat.
- Substitute: White pepper for a more subtle, earthy heat.
- 1 tsp Garlic Powder: Why this? It creates a "dry base" of garlic flavor directly on the meat.
- Substitute: Onion powder.
- 2 tbsp Neutral Oil: Avocado or grapeseed oil works best here because of the high smoke point.
- Substitute: Ghee or clarified butter.
- 4 tbsp Unsalted Butter: Cubed and kept cold. Why this? Salted butter makes it too hard to control the final seasoning.
- Substitute: Plant based butter (ensure it has a high fat content).
- 6 cloves Fresh Garlic: Mince these just before using to keep the oils fresh.
- 1/2 cup (120ml) Chicken Stock: Why this? Provides the volume needed for the pan sauce.
- Substitute: Dry white wine (like Sauvignon Blanc) for a sophisticated acidity.
- 1 tbsp Fresh Lemon Juice: Brightens the entire profile.
- 2 tbsp Fresh Parsley: Adds a needed grassy note and color.
- 1/2 tsp Red Pepper Flakes: For a gentle, lingering warmth.
Tools Needed for Seamless Kitchen Performance
Having the right equipment is like having a reliable platform for your creativity. You don't need a kitchen full of gadgets, just a few high performing staples that can handle the heat.
A heavy bottomed skillet is your best friend here. A 12 inch stainless steel pan or a well seasoned cast iron skillet (like a Lodge) is ideal because they hold heat exceptionally well.
If you use a non stick pan, you won't get that beautiful "fond" the brown bits stuck to the bottom that makes the sauce so good. You'll also need a sturdy set of tongs to flip the chicken pieces individually and a sharp chef's knife for clean cuts on the protein.
Executing the Perfect Pan Searing Technique
Right then, let's crack on. This moves fast, so have all your ingredients prepped and ready by the stove before you turn on the heat.
- Season the chicken. Toss your chicken bites with sea salt, pepper, and garlic powder in a large bowl. Note: This creates a dry rub that aids in browning.
- Heat the pan. Add oil to your skillet over medium high heat. Wait until the oil shimmers and barely starts to smoke.
- Sear in batches. Place chicken in the pan, leaving space between pieces. Note: Overcrowding lowers the pan temp and causes steaming.
- Develop the crust. Cook for 3-4 minutes without moving them until the bottom is deep mahogany and releases easily.
- Flip and finish. Flip the pieces and cook for another 2-3 minutes until golden on all sides. Remove chicken to a plate.
- Deglaze the skillet. Pour in the chicken stock and lemon juice. Scrape the bottom until all the brown bits have dissolved.
- Sauté the garlic. Lower the heat to medium. Add the minced garlic and red pepper flakes, stirring for 1 minute until fragrant but not browned.
- Build the emulsion. Turn the heat to low. Whisk in the cold butter cubes one at a time until the sauce is thick and glossy.
- Combine and glaze. Return the chicken and any accumulated juices to the pan. Toss until every piece is coated in velvety sauce.
- Final Garnish. Sprinkle with fresh parsley. Note: The green color provides a necessary visual balance to the rich browns.
Avoiding Common Mistakes in the Pan
Even the best of us hit a snag sometimes. But what about the sogginess? Or the garlic that tastes like a burnt match? We'll get to that right now.
Why Your Chicken is Rubbery
This usually happens because the pan wasn't hot enough, or the chicken was cooked for too long. If you don't hear that aggressive sizzle the moment the meat hits the oil, pull it out and wait another minute.
Also, remember carryover cooking; if you cook it to 165°F in the pan, it might hit 175°F while resting, which leads to dryness.
Why the Sauce Broke
If your sauce looks oily and separated instead of creamy, the heat was likely too high when you added the butter. Butter is an emulsion of water and fat; if it melts too fast, those two components split.
| Problem | Root Cause | Solution |
|---|---|---|
| Burnt Garlic | Added too early or heat too high | Deglaze first to lower pan temp before adding garlic |
| Grey/Pale Chicken | Pan overcrowding | Sear in two batches to maintain high surface heat |
| Thin, Watery Sauce | Not enough reduction | Simmer the stock for an extra 2 minutes before adding butter |
Common Mistakes Checklist:
- ✓ Pat chicken completely dry with paper towels (moisture is the enemy of a sear)
- ✓ Let the pan preheat for at least 3 minutes before adding oil
- ✓ Use cold butter for the sauce, not room temperature
- ✓ Don't skip the lemon juice; the acid is vital for flavor balance
- ✓ Use fresh garlic cloves rather than the pre minced jarred stuff
Creative Ways to Customize This Recipe
Once you've mastered the base, this dish becomes a platform for your own culinary experiments. You can easily pivot the flavor profile based on what's in your pantry.
- Garlic Butter Chicken Pasta Twist: Double the sauce ingredients and toss with 250g of al dente linguine and a splash of pasta water.
- Lemon Herb Thigh Variation: Use boneless chicken thighs and swap the parsley for fresh thyme and rosemary for an earthier, rustic vibe.
- Hot Honey Garlic Version: Stir in 1 tbsp of honey and an extra teaspoon of red pepper flakes during the final glazing step.
For something with a bit more kick, you might want to try The Bayou Bomb recipe, which takes these garlic butter principles and injects some serious Cajun soul into the mix.
Adjusting Portions for Groups Large and Small
Scaling this recipe is straightforward, but you have to be careful with the physics of the pan. If you double the recipe, don't try to cook it all at once in the same skillet.
If you are scaling DOWN for one or two people, use a smaller 8 inch pan. The reduction of the stock will happen much faster, so keep a close eye on the liquid levels so it doesn't vanish before you add the butter. If scaling UP for a crowd, work in batches for the searing phase.
Keep the finished chicken in a warm oven (about 200°F) while you prepare the sauce in the main skillet, then combine everything in a large serving bowl at the end.
| Premium Ingredient | Budget Alternative | Flavor Impact | Savings |
|---|---|---|---|
| Fresh Lemon | Bottled Juice | Higher "metallic" notes | Save $1.00 |
| Organic Stock | Water + Bouillon | Slightly saltier | Save $2.50 |
| European Butter | Store Brand Butter | Less creamy mouthfeel | Save $3.00 |
Debunking Searing and Garlic Myths
There's a lot of "old school" advice floating around that actually hinders a modern cook. Let's clear some of that up so you can focus on what actually works.
One common myth is that searing meat "seals in the juices." Science tells us this is false; moisture loss happens regardless of the sear. The real purpose of the sear is the Maillard reaction, which creates hundreds of new flavor compounds that simply don't exist in un browned meat.
Another myth is that you should always sauté garlic first. As we discussed, garlic burns fast. Adding it to the liquid or at the very end of a sear is the revolutionizing move that keeps your dish from tasting bitter.
Maximizing Freshness and Reducing Food Waste
Proper storage ensures that your hard work doesn't go to waste. Garlic Butter Chicken holds up surprisingly well if you treat it right.
- Storage: Keep leftovers in an airtight container in the fridge for up to 4 days. When reheating, do it gently on the stovetop with a splash of water or stock to loosen the sauce. Avoid the microwave if possible, as it can make the chicken rubbery.
- Freezing: You can freeze this for up to 3 months, though the sauce may lose some of its creamy emulsion upon thawing.
- Zero Waste: Don't throw away those parsley stems! Finely chop them and add them to the pan along with the garlic for extra flavor. If you have leftover sauce but no chicken, use it to sauté mushrooms or drizzle it over a baked potato.
Complementary Pairings for a Balanced Meal
The richness of this dish calls for sides that can either soak up the sauce or provide a refreshing contrast. A bed of fluffy jasmine rice or some crusty sourdough bread is a classic choice for the "sauce soakers."
To balance the fats, consider a bright, acidic side like a vinegar based slaw or roasted asparagus with a heavy squeeze of lemon. If you're looking for a hearty pairing, this chicken goes beautifully with my How to Bake recipe for inspiration on roasted vegetables.
Color Balance Strategy: To make this dish visually stunning, focus on three specific accents. First, the fresh parsley (deep green) should be added just before serving.
Second, the red pepper flakes (bright crimson) provide a beautiful speckle against the golden chicken. Finally, serve with lemon wedges (vibrant yellow) on the side. This trio of colors ensures the plate looks as connective and professional as it tastes.

Recipe FAQs
What is the best way to sear chicken for Garlic Butter Chicken?
Sear chicken in batches over medium high heat until deeply golden brown. Pat the chicken completely dry before seasoning and ensure the pan is hot before adding the meat to achieve a good crust without steaming.
Can I use chicken thighs instead of chicken breast for this recipe?
Yes, boneless chicken thighs work well and offer a richer texture. They are more forgiving and less likely to dry out compared to chicken breast, making them a great alternative.
Why is my garlic butter sauce broken or oily?
The heat was likely too high when you added the butter. For a smooth, glossy sauce, add cold butter cubes gradually to the pan over low heat, whisking constantly to create a stable emulsion.
How do I prevent the garlic from burning in Garlic Butter Chicken?
Add the minced garlic towards the end of the cooking process. Sauté it for about a minute in the deglazed pan over medium heat until fragrant, ensuring it doesn't brown or burn before the sauce is built.
Is it necessary to deglaze the pan after searing the chicken?
Yes, deglazing is crucial for developing the sauce's flavor base. The brown bits (fond) stuck to the bottom of the pan contain concentrated savory flavors that dissolve into the liquid, enriching the final sauce.
What sides pair well with Garlic Butter Chicken?
Fluffy rice, crusty bread, or a bright salad are excellent pairings. Consider serving it with Easy Garlic Herb Mashed Potatoes in Instant Pot: A Comfort Food Classic for a hearty and comforting meal.
Can I make Garlic Butter Chicken ahead of time?
It's best enjoyed fresh, but leftovers can be stored for up to 4 days. Reheat gently on the stovetop with a splash of liquid to revive the sauce, avoiding microwaves which can toughen the chicken.
Garlic Butter Chicken

Ingredients:
Instructions:
Nutrition Facts:
| Calories | 452 kcal |
|---|---|
| Protein | 52.8 g |
| Fat | 25.1 g |
| Carbs | 3.2 g |
| Fiber | 0.4 g |
| Sugar | 0.6 g |
| Sodium | 645 mg |
