Oatmeal Bread the Softest Honey Loaf and Best Sandwich Bread Recipe
Why Scalding Oats is the Secret to the Ultimate Soft Sandwich Loaf
If you’ve ever bitten into a slice of homemade oatmeal bread and found it… well, dry you know the heartbreak. Bread should be soft. It should squish perfectly when you press down on it, ready to cradle a heavy slice of turkey or just some serious butter.
Most recipes skip the one crucial step that makes this loaf legendary: the scald. We are making Homemade Oatmeal Bread that is so tender, it completely changes the game. This isn't your grandma's hard, rustic loaf (unless your grandma was a moisture genius, in which case, cheers to her).
This is the Best Sandwich Bread Recipe you’ll ever make.
The Magic of the Scald: Unlocking Starches for Superior Moisture
The reason we scald the oats dumping boiling water or milk over them and letting them soak is pure kitchen science genius. Oats, specifically the rolled kind, are packed with starches. When those starches meet boiling liquid, they gelatinize.
Think about making oatmeal porridge; it turns thick and slightly gooey. That goo is the starch holding tight to the water.
When you add that cooled, thickened oat mixture to the dough, you are essentially pre and loading it with moisture that the flour normally can’t hold onto during the bake. This ensures the starches fully swell and hold onto every drop of moisture, which is what prevents that dreaded dry, dense texture later.
It’s brilliant. It's the whole reason this Oatmeal Honey Loaf stays fresh for days longer than its non and scalded counterparts.
Say Goodbye to Dry Crumb: Setting Expectations for the Perfect Loaf
Forget the idea that "healthy bread" has to taste like cardboard. Are you tired of that dry, crumbly texture that requires three cups of water just to swallow? Yeah, me too.
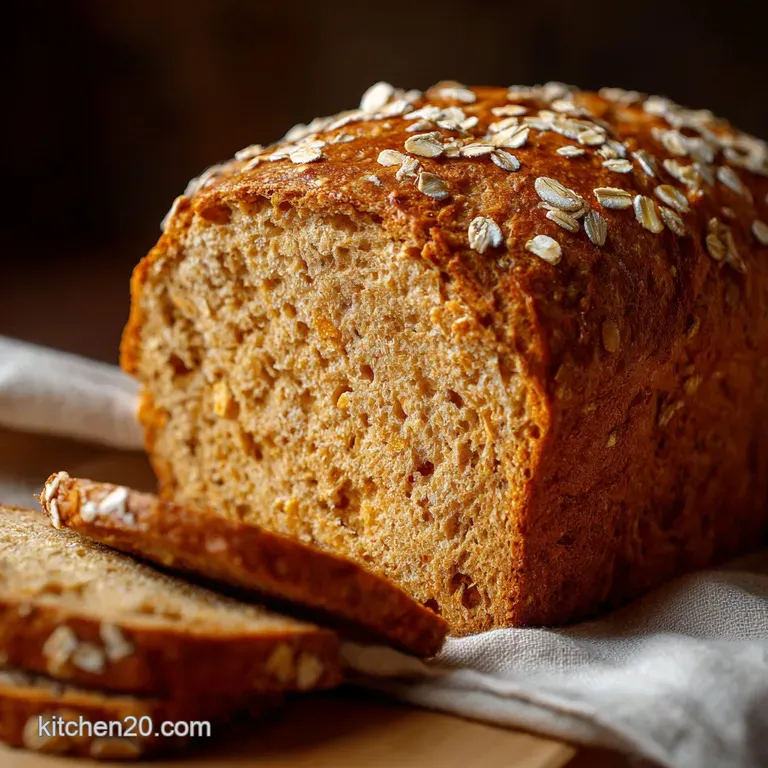
This Oatmeal Bread Recipe yields a crumb that is tight, even, and incredibly soft. Because we use a high and protein bread flour alongside the moisture and rich oats, we get incredible oven spring (that final burst of height in the oven) and structure, without any toughness.
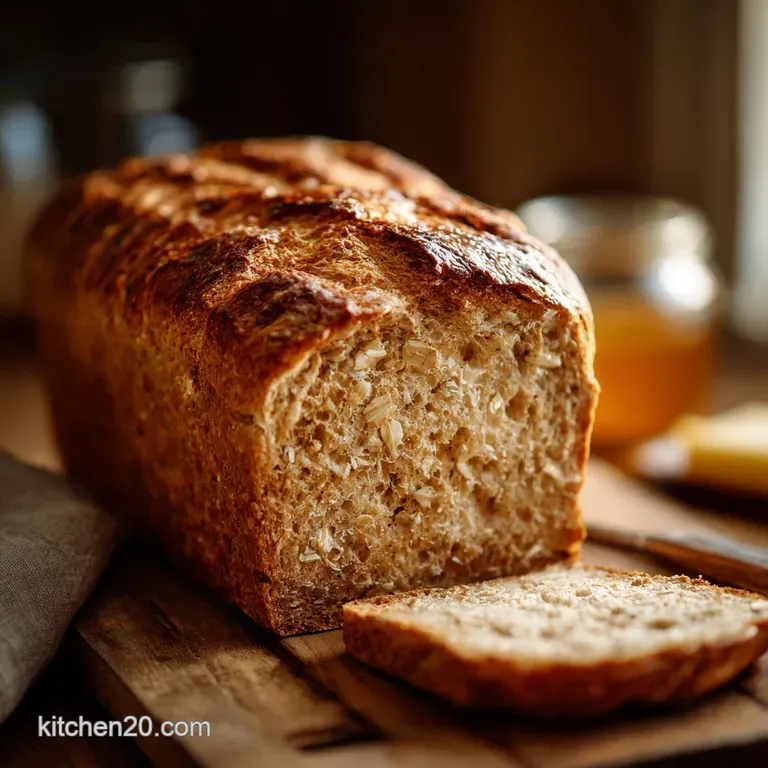
We’re aiming for a loaf that holds its shape when sliced but bounces back when squeezed. It should feel luxurious, slightly nutty from the oats, and subtly sweet thanks to the honey.
A Taste of Tradition: Why This Recipe Endures
My first encounter with proper Homemade Oatmeal Bread was at a friend's house, and honestly, I thought it was store and bought because it was so uniformly perfect. That’s the kind of confidence this recipe gives you.
This is an old and school staple the kind of bread that was prized because it actually felt filling and lasted the whole week.
Plus, incorporating whole grains like oats means we get a nice boost of fiber and nutrition compared to plain white bread. It’s a classic for a reason: it’s sturdy, reliable, and tastes profoundly comforting, whether toasted or used for the heftiest deli sandwich.
Medium Difficulty, Monumental Reward: What to Expect Before Starting
I’m going to be straight with you: this is not an Easy Oatmeal Bread recipe if you're comparing it to quick breads. We are dealing with yeast, which requires attention and patience. Yeast baking lives and dies by temperature, and the sticky oat addition can sometimes make the dough feel unwieldy at first.
If you have a stand mixer, use it. If you don't, be prepared for a good 12– 15 minutes of solid kneading. But the work pays off. By the time you pull that deeply golden, fragrant loaf out of the oven, you’ll be wondering why you didn't tackle this sooner.
Expect the total process to take about three and a half hours, mostly passive waiting time. The house will smell incredible for all of it.
Assembling Your Baker's Dozen: Essential Components for Hearty Oatmeal Bread
Okay, let’s get the ingredients lined up. Think of this as the foundational phase. Getting these elements right makes the rest of the bake go smoothly.
The Flour Foundation: Selecting the Ideal Protein Content
For a truly fantastic, lofty loaf, you need bread flour . Period. Bread flour has a higher protein content (typically 12 14%) than all and purpose flour (usually 10 12%). Why does this matter?
Protein equals gluten, and gluten is the structural network that traps the CO2 bubbles released by the yeast. Since the oats make the dough heavier, we need that extra gluten strength to lift the loaf high and proud.
You might be tempted to use all and purpose flour, but trust me, if you want that commercial and level softness and bounce, stick to the good stuff.
Yeast Activation: Proofing and Temperature Control Explained
This is where beginners often get nervous, but it’s actually really simple. We are using Active Dry Yeast, which needs a warm bath to wake up. That bath must be between 105°F and 115°F (40 46°C).
CRUCIAL WARNING: If the water is too hot (above 120°F/49°C), you will kill the yeast. If it’s too cool, the yeast won't activate properly, and your dough will sit there, stubbornly flat. You absolutely need a kitchen thermometer for this step.
If your yeast doesn’t get foamy and bubbly after 5– 10 minutes, start over. Your yeast was likely dead or your temperature was wrong. It happens!
Liquid Gold: The Role of Honey in Both Flavor and Texture
We are using honey not just for flavour, but because it’s excellent food for the yeast. Yeast loves simple sugars. Honey provides those sugars while also imparting a gorgeous, subtle sweetness that complements the earthiness of the whole grain oats.
It also contributes significantly to the final colour of the crust (it browns beautifully) and helps keep the finished crumb incredibly moist and slightly tacky (in a good way). Maple syrup is a fine substitute, but the depth of flavor from true honey is unbeatable in this specific Oatmeal Bread.
Tools of the Trade: Essential Equipment for Successful Yeast Baking
While you can absolutely make this by hand, a few tools will make your life dramatically easier and more consistent.
| Tool | Why You Need It |
|---|---|
| Digital Kitchen Scale | For precise flour and oat measurements (volume measurements can vary wildly). |
| Digital Thermometer | Non and negotiable for activating yeast correctly. |
| Stand Mixer + Dough Hook | Handles the long, sticky kneading phase like a dream. |
| 9x5 Inch Metal Loaf Pan | Gives the loaf the height and structure needed for a perfect sandwich slice. |
If you’re serious about baking, ditch the measuring cups for flour and grab a scale. It eliminates 90% of texture problems right out of the gate.
Related Recipes Worth Trying
- Low Carb Keto Banana Bread The Moist Truly sugar-free Recipe — Low Carb Keto Banana Bread finally achieved This keto friendly recipe uses almond flour and coconut flour to create a moist sugar-free loaf without the carbs
- Oatmeal Bread Recipe The Softest Moist Porridge Loaf — Oatmeal Bread is the ultimate soft sandwich loaf This best homemade oatmeal bread recipe uses the porridge method to ensure a supremely moist crumb that...
- Artisan No Knead Bread Crusty Dutch Oven Loaf 5Min Prep — This Artisan No Knead Bread recipe uses minimal effort to create the ultimate crusty Dutch Oven Bread The long slow fermentation develops complex flavor and...
Mastering the Bake: Step and by-Step Guide to Honey Oatmeal Bread
Let’s crack on with the hands and on part. Remember, patience is your main ingredient here.
The Initial Mixing and Scald: Combining Wet and Dry
First thing's first: the oats. Dump those old and fashioned rolled oats into a bowl and pour your boiling liquid over them. Stir it once and then walk away. Seriously. Give it at least 15 minutes.
This cooling time is vital because if the oat mixture is still hot when you add the honey or, worse, the yeast, you’ll damage the entire structure.
While the oats are cooling, activate your yeast. Once the yeast is bubbly and the oats are cool to the touch, combine the honey, salt, melted butter, and the active yeast mixture with the oat scald. Only then do you start introducing the flour gradually.
Kneading Dynamics: Achieving the Gluten Window Stage
Once you have a shaggy dough, it's time to knead. This is where we develop the gluten necessary to support the structure. Because of the added weight of the oats, this dough might feel a little heavy and sticky at the start.
If using a stand mixer: Use medium and low speed. Watch the dough. It should pull completely away from the sides of the bowl within 6– 8 minutes, wrapping itself around the dough hook.
If kneading by hand: This takes about 10– 12 minutes of hard work. The dough should eventually become smooth, less sticky, and highly elastic. To check if you're done, try the windowpane test: tear off a small piece of dough and stretch it gently.
If you can stretch it thin enough to see light through it without it tearing instantly, you’ve hit the sweet spot.
The Double Rise: Proofing Schedules and Visual Indicators
Yeast bread always needs two rises. The first rise (bulk fermentation) is where the majority of flavour development happens. Because the oatmeal makes the dough denser, this first rise can take 60 to 90 minutes, especially if your kitchen is cool.
Cover it well and stick it somewhere warm on top of the fridge or inside a slightly warmed and then and turned off oven works great. You want it doubled in size.
The second rise is crucial for the final shape. Gently deflate the dough, shape it into a tight log, place it in the greased pan, and let it rise again. This time, we are looking for the dough to look puffy, usually rising about an inch above the pan.
This rise is shorter, about 30– 45 minutes. If it rises too much, it risks collapsing in the oven.
Oven Spring Strategy: Setting Temperatures for Maximum Loaf Height
We want maximum height, and that means a high initial temperature. Preheat your oven to 375°F (190°C) during the last 15 minutes of the second proof. The hot oven creates a burst of rapid gas expansion inside the dough, which is what bakers call "oven spring."
Bake for about 15 minutes at 375°F, then if you notice the top getting too dark, feel free to drop the temperature slightly to 350°F (175°C) for the remainder of the baking time. The loaf is done when it’s deeply golden brown and sounds hollow when tapped.
But honestly, use the thermometer 200 210°F (93 99°C) internal temperature is the only way to be 100% sure.
Troubleshooting and Elevating Your Next Oatmeal Bread Loaf
Even seasoned bakers have problems sometimes. Here’s how we fix the most common issues and make this loaf even better.
Common Mistakes: Why Dough Fails to Rise and How to Fix It
Failure to rise is almost always tied to two things: yeast or temperature.
-
Problem:
Dough didn’t double after the first proof.
- Fix: Your kitchen might be too cold. Find a warmer spot (like a sunny windowsill). Alternatively, your yeast might have been dead (re and check the activation process next time).
-
Problem:
The crust is tough or dense.
- Fix: You either over and kneaded the dough, or you added too much flour. Start with the lower amount of flour next time and rely more on the scale than the measuring cup.
-
Problem:
The loaf collapsed in the oven.
- Fix: It was almost certainly over and proofed (risen too long or too high) during the second rise. Pull it out just before it looks "fully ready."
Storage Solutions: Extending the Life of Your Fresh Loaf
Homemade Oatmeal Bread lasts much longer than standard white bread, thanks to the moisture locked in by the oats and the preservation qualities of the honey.
- Countertop: Store the cooled loaf in an airtight container or a large zip and top bag at room temperature for up to 4 days.
- Freezing: This is the best method for long and term storage. Wait until the loaf is completely cool. Slice it first (this is key!), then wrap the entire loaf tightly in plastic wrap, followed by a layer of foil. Freeze for up to 3 months. You can pull out a slice or two at a time and toast directly from frozen.
Flavor Variations: Adding Seeds, Nuts, or Different Grains
You can easily adapt this base recipe. That’s the fun of baking your own Healthy Oatmeal Bread!
- Swap the Milk: Using buttermilk instead of regular milk gives the loaf a subtle tangy flavor and even more tenderness.
- Make it Seedy: Fold in a quarter cup of flax seeds, chia seeds, or sunflower seeds right before the final minutes of kneading. This bumps up the texture and nutritional value. For a beautiful topping, skip the egg wash and brush the loaf with a little water, then sprinkle heavily with pumpkin seeds.
- Sweet Spices: Add 1 teaspoon of ground cardamom or cinnamon to the flour mixture for a warmer, spicier flavour profile, especially nice if you plan on eating this as toast.
Nutritional Snapshot: Understanding the Benefits of Home and Baked Bread
Making this yourself means you control everything that goes in no high and fructose corn syrup, no weird preservatives, and definite assurance that you know exactly what kind of oats and honey you used.
Because we include the rolled oats, you get a good dose of soluble fiber, which is great for digestion and keeps you full longer. Homemade Oatmeal Bread provides a wholesome, complex carbohydrate foundation, making it a much better option for your daily sandwich than most store and bought options.
It’s comforting, nutritious, and absolutely worth the effort.

Recipe FAQs
What is the secret to getting such a wonderfully soft crumb in this loaf?
It’s all down to scalding the oats; pouring boiling liquid over them gelatinises the starches, which is absolutely key for locking in moisture and preventing a dry texture it keeps the crumb unbelievably soft for days.
My dough didn't rise much; what usually goes wrong with the yeast when baking this Oatmeal Bread?
The most common culprit is temperature; if the liquid is too hot (over 120°F), the yeast dies, and if it's too cold, it stays sluggish. Always use a digital thermometer to aim for that 105 115°F sweet spot, and ensure your yeast mixture foams nicely before proceeding.
Can I use wholemeal flour or make this honey loaf dairy-free for my vegan friends?
Certainly; you can substitute up to 50% of the bread flour with wholemeal for a nuttier, heartier texture, and swapping butter for oil and dairy milk for oat or soy milk makes this a smashing vegan Oatmeal Bread.
How long does this hearty loaf stay fresh, and what’s the best way to store it?
Thanks to the hydrating oats and honey, this bread stays beautifully fresh for 4 5 days stored tightly wrapped at room temperature; alternatively, slice and freeze the cooled loaf for up to three months for effortless toast.
The recipe requires a long proofing time; is there a quick trick if I’m in a bit of a rush?
You can create a warm proofing environment (a bread sauna!) by placing the covered dough in a barely warm oven (off, but heated to 80°F/27°C briefly) or inside a microwave alongside a large mug of boiling water.
Hearty Honey Oatmeal Bread Loaf

Ingredients:
Instructions:
Nutrition Facts:
| Calories | 160 kcal |
|---|---|
| Protein | 5.0 g |
| Fat | 2.5 g |
| Carbs | 31.0 g |
