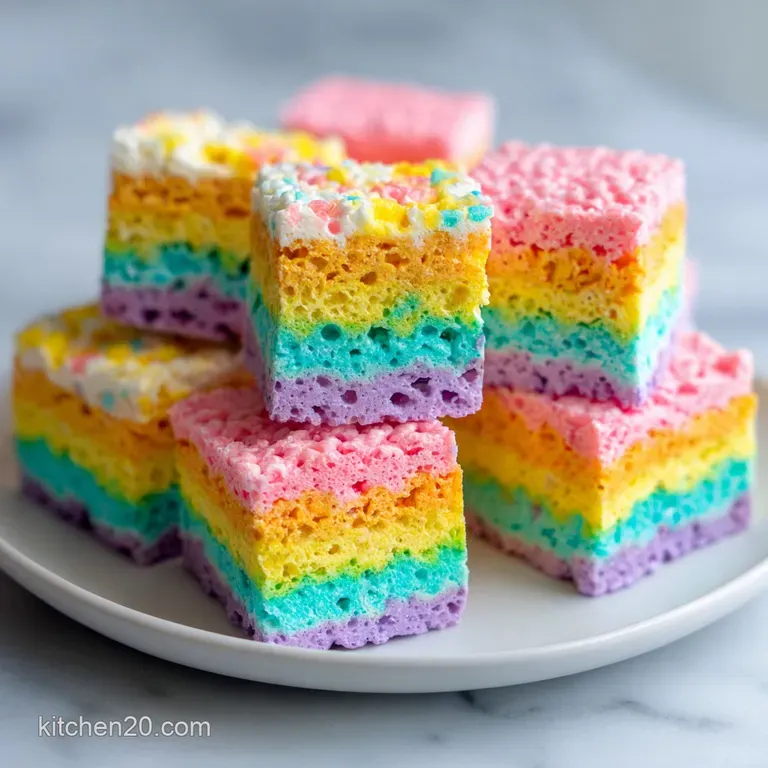
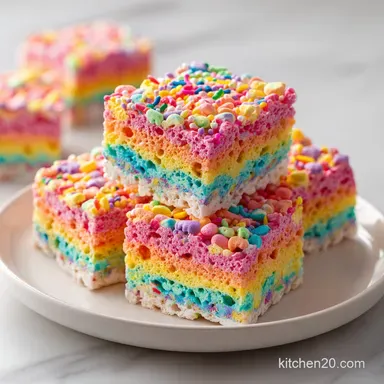
Layered Peeps Rice Krispie Treats: Vibrant and Crisp
- Time:15 minutes active + 15 minutes cooking + 30 minutes chilling = 60 minutes total
- Flavor/Texture Hook: Pillowy marshmallow chew with a crisp cereal shatter
- Perfect for: Easter brunch, spring bake sales, or rainy day kitchen projects with kids
Master This Layered Peeps Dessert
You probably think you need a rainbow's worth of food gels and a professional pastry degree to get those clean, vibrant neon stripes. Forget everything you know about traditional rice krispie treats; we aren't using those boring white marshmallows today.
Most people assume the sugar coating on Peeps will make these too grainy or that the colors will turn into a muddy mess the second heat hits them, but that is a total myth.
The smell of these hitting the microwave is a sensory trip it is like a carnival in your kitchen. When those little sugar coated chicks start to poof and expand, they release this toasted sugar aroma that smells way better than standard marshmallows.
I once tried to do this by just adding food coloring to regular marshmallows, and let me tell you, it was a disaster. The colors were muted, and the texture was soggy. This method gives you that punchy, electric glow that actually tastes like the holidays.
We're going for a specific kind of "pull" here. You want that long, sticky thread of marshmallow when you bite in, paired with a cereal base that still has a distinct shatter. It’s a fast paced process you’ve got to move quickly before the sugar sets but the result is a stacked, ombre style bar that makes people stop and stare.
We are making something that looks expensive but costs pennies, sticking strictly to the budget friendly genius of seasonal candy.
Key Recipe Specs
Heat Stability: The sugar crystals on the exterior of the Peeps act as a stabilizer, preventing the marshmallow from collapsing into a liquid too quickly. This allows for a thicker, more structured binder than plain marshmallows.
Lipid Barrier: Using 6 tablespoons of salted butter isn't just for flavor; it creates a fat slicked coating on every cereal grain, which prevents the moisture from the marshmallow from migrating into the cereal and making it stale.
Volumetric Balance: We are using exactly 2 cups of cereal per layer to ensure the structural integrity of the stack. If you eyeball it and add too much cereal, the layers won't bond; too little, and it becomes a sticky, un sliceable puddle.
| Method | Total Time | Texture | Best For |
|---|---|---|---|
| Microwave Melt | 15 minutes | Soft and pillowy | Speed and ease |
| Stovetop Melt | 25 minutes | Toasted/Chewier | Flavor depth |
| Double Boiler | 35 minutes | Super smooth | Controlling color bleed |
Choosing the microwave method is my go to because it keeps the colors vibrant. High heat on the stovetop can caramelize the sugars too much, which might turn your bright pink layer into a weird salmon color. By using short 30 second bursts, we keep the hues electric and the texture velvety.
Ingredient Selection Guide
| Component | Science Role | Pro Secret |
|---|---|---|
| Salted Butter | Temperature control and fat | Use cold butter to slow the initial sugar melt |
| Peeps | Gelatin and color source | Fresh, soft Peeps melt faster than stale ones |
| Pure Vanilla Extract | Flavor rounding | Add after melting to prevent alcohol evaporation |
If you use unsalted butter, make sure to double the sea salt to 1 teaspoon total. The salt is non negotiable here; without it, the 45 Peeps in this recipe will be cloyingly sweet. The salt provides the necessary contrast that makes you want to go back for a second bar.
Tools For Success
- 9x9-inch Square Pan: This specific size is crucial. A 13x9 pan will make the layers too thin to see the "ombre" effect, and a 8x8 pan makes them so thick they are hard to bite.
- Parchment Paper: Don't just grease the pan. You need the overhang to lift the entire block out. If you try to slice these inside the pan, the first one will always be a mangled mess.
- Heavy Glass Bowls: Use glass rather than plastic for melting. Glass retains heat better, which gives you an extra 30 seconds of "work time" to mix in the cereal before the marshmallow sets.
- Silicone Spatula: This is the only tool that won't give you a headache. Metal spoons will bond to the marshmallow like superglue.
Chef Tip: Keep a small bowl of water or a bit of extra butter on your counter. Lightly dampening your fingertips (or greasing them) allows you to press the top layer perfectly flat without the marshmallow sticking to your skin.
Foolproof Mixing Steps

- Line your 9x9-inch pan with parchment, ensuring a 1 inch overhang. Grease the paper lightly with butter to ensure a clean release later.
- Divide your 6 cups of crispy rice cereal into three separate 2 cup bowls. This setup prevents panicking while the marshmallow is hot and active.
- Place 15 pink Peeps and 2 tablespoons of butter in a glass bowl. Microwave for 30 seconds, stir, and repeat until the mixture is a puffy, cohesive cloud.
- Whisk in 1/3 of your vanilla and sea salt immediately. The salt needs to dissolve while the mixture is at its hottest point.
- Fold in the first 2 cup portion of cereal. Work from the bottom up to ensure every piece is coated in pink sugar.
- Press the pink mixture firmly into the bottom of the pan. Use the back of a greased spatula to create a level, edge to edge surface.
- Clean your melting bowl thoroughly (or use a fresh one) and repeat the process with 15 yellow Peeps, 2 tablespoons of butter, and the next cereal portion.
- Layer the yellow mixture directly onto the pink base. Press down firmly; this "compression" is what keeps the layers from sliding apart when sliced.
- Repeat one last time with the 15 blue or purple Peeps, the remaining butter, and the final cereal portion.
- Smooth the top layer and let the pan rest at room temperature for 30 minutes. If your kitchen is warm, pop it in the fridge for 15 minutes to firm up the gelatin.
Troubleshooting Sticky Treats
Why Your Layers Separate
If you find the layers are peeling apart like a deck of cards, it's usually because the previous layer cooled down too much before the next one was added. The heat from the fresh batch actually melts the "skin" of the layer below it, creating a fusion bond.
If you're working slowly, use a hair dryer for 10 seconds to warm the surface of the pan before adding the next color.
Dealing With Rock Hard Bars
If your treats feel like bricks, you likely overheated the Peeps. Sugar turns into hard candy when it gets too hot. Next time, stop the microwave when the Peeps are "puffy" but not fully liquid. The residual heat from the bowl and the stirring action will finish the job without scorching the sugar.
| Problem | Root Cause | Solution |
|---|---|---|
| Dull Colors | Overheating in microwave | Use 15 second intervals after the first 30 |
| Cereal Sogginess | Cheap off brand cereal | Use high-quality "crisp" rice for better structural cells |
| Sticky Hands | Lack of grease | Rub butter on your palms before pressing the top layer |
If you're in the mood for another vibrant spring treat that uses similar shortcut methods, you'll love this Strawberry Cheesecake Dump Cake. It uses that same logic of taking a basic store-bought item and turning it into something that looks totally bespoke.
Common Mistakes Checklist:
- ✓ Never skip the 30 minute rest period; slicing too early causes the layers to squish.
- ✓ Don't use a wooden spoon; the porous surface traps marshmallow and is a nightmare to clean.
- ✓ Avoid low-fat spreads; you need the high fat content of real butter to keep the cereal crispy.
- ✓ Measure the cereal precisely; extra cereal prevents the "glue" from holding the layers.
Fun Recipe Variations
For a Salty Sweet Twist
Swap out 1 cup of the rice cereal for 1 cup of crushed pretzels. The jagged edges of the pretzels provide a massive "crunch" factor that contrasts beautifully with the velvety marshmallow. Since Peeps are intensely sweet, the extra salt from the pretzels balances the flavor profile, making it taste more "grown up."
For a dairy-free Version
You can easily swap the 6 tablespoons of butter for a high-quality vegan butter stick or refined coconut oil. If using coconut oil, add an extra pinch of salt to mimic the savory notes of butter. The layers will set slightly firmer in the fridge but will soften quickly at room temperature.
| Original Ingredient | Substitute | Why It Works |
|---|---|---|
| Salted Butter | Refined Coconut Oil | Provides necessary fats for the moisture barrier. Note: Set time may be 10 mins longer. |
| Rice Cereal | Cocoa Rice Cereal | Adds a chocolate base. Note: Changes the ombre look to a "neapolitan" vibe. |
If you want a deep chocolate contrast to all this sugar, try my Mississippi Mud Cake. It’s a great way to use up any extra marshmallows you might have lying around after the Easter haul.
Myths About Peeps Baking
One huge myth is that Peeps are just "regular marshmallows with colored sugar." In reality, Peeps have a higher gelatin to sugar ratio than the stuff you find in the blue bag. This is why they hold their chick and bunny shapes so well on the shelf. When melted, this extra gelatin makes for a much sturdier treat.
Another misconception is that you have to remove the "eyes" of the Peeps or they will leave black specks in your dessert. Trust me, the eyes are so tiny that once they are melted and stirred into 2 cups of cereal, they completely disappear. Don't waste ten minutes performing surgery on marshmallow birds.
Storage And Freshness
Storage: These bars are best eaten within 3 days. Keep them in an airtight container at room temperature. If you put them in the fridge long term, they will become quite hard, so let them sit on the counter for 20 minutes before serving.
Freezing: You can freeze these! Wrap the individual bars tightly in plastic wrap and then place them in a freezer bag. They stay good for up to 2 months. To thaw, just leave them on the counter. Do not microwave them to thaw, or you'll end up with a sticky puddle.
Zero Waste: If you have leftover scraps from trimming the edges, don't throw them away. Chop them into small bits and fold them into vanilla ice cream or use them as a topping for a festive milkshake. You can also pulse the scraps in a food processor to create "sweet croutons" for a dessert salad.
Bright Presentation Ideas
To really make the "Layered Peeps Dessert" pop, use a very sharp chef's knife and wipe it clean with a damp cloth between every single cut. This prevents the colors from smearing onto each other, keeping those pink, yellow, and blue lines sharp and distinct.
If the knife gets sticky, a quick spray of non stick oil on the blade works wonders.
For a party, I like to cut these into long, thin "fries" instead of squares and serve them in a basket. It shows off the layers more effectively and makes them easier for kids to grab. If you want to go the extra mile, dip the bottom half of each bar in white chocolate and hit it with some pastel sprinkles.
It adds a "velvety" finish that ties all the vibrant colors together.
Right then, you're ready to tackle the ultimate Easter treat. Just remember: work fast, grease everything, and don't skimp on the salt. Your friends are going to think you're a kitchen wizard when they see those perfect neon stripes. Let's get cooking!

Recipe FAQs
How to prevent the marshmallow mixture from sticking to my hands while pressing layers?
Grease your silicone spatula and hands lightly with butter or non-stick spray. A well lubricated surface is the secret to pressing the layers firmly without the marshmallow pulling back up.
Why is my dessert turning out too hard after refrigeration?
Refrigeration causes the sugars in the marshmallow to crystalize and firm up significantly. If you need to chill them to set, let the bars sit on the counter for 20 minutes to soften before slicing and serving.
Can I microwave the bars to thaw them quickly from the freezer?
No, never use the microwave to thaw these treats. The heat will cause the marshmallow to melt instantly into a sticky puddle; always thaw them slowly on the counter.
How to ensure the distinct color layers stay separate during assembly?
Measure your cereal into three separate 2-cup portions before you start melting. If you enjoyed mastering this multi step layering technique, you can apply similar organizational skills to our Creamy Picnic Banana Pudding, which also requires precise layering for the best presentation.
Is it necessary to use a double boiler to melt the marshmallows?
No, this is a common misconception. You can achieve a smooth melt using the microwave in 30-second bursts, provided you stir thoroughly between each interval to prevent scorching.
How long will these stay fresh in an airtight container?
These treats are best consumed within 3 days. Keeping them in an airtight container at room temperature preserves the ideal chewy texture.
How to get clean, professional edges when cutting the bars?
Use a sharp, lightly greased knife to slice through the set bars. Wipe the blade clean between each cut to prevent the marshmallow from dragging and tearing the edges of the layers.
Layered Peeps Rice Krispie Treats
Ingredients:
Instructions:
Nutrition Facts:
| Calories | 208 kcal |
|---|---|
| Protein | 1.6 g |
| Fat | 5.8 g |
| Carbs | 37.8 g |
| Fiber | 0.1 g |
| Sugar | 25.5 g |
| Sodium | 290 mg |
