Luscious Garlic Aioli: the Creamy, Irresistible Dip You Never Knew You Needed!
- Luscious Garlic Aioli: The Creamy, Irresistible Dip You Never Knew You Needed!
- Essential Ingredients Guide for the Home Cook
- Mastering Professional Cooking: The Art of Preparation and Technique
- Pro Tips & Secrets
- Perfect Presentation
- Storage & Make-Ahead
- Creative Variations
- Complete Nutrition Guide
- Frequently Asked Questions
- 📝 Recipe Card
Luscious Garlic Aioli: The Creamy, Irresistible Dip You Never Knew You Needed!
Oh my gosh, let me tell you about the time i stumbled into the world of garlic aioli . i was hosting a small get-together, right? i thought i’d impress my friends with some homemade goodies.
After whipping up some fries, it hit me those fries needed a sauce that screamed “fancy but fun!” that’s when i decided to try my hand at homemade garlic aioli.
It was a game changer! honestly, just a drizzle of this creamy goodness took everything to the next level. and the best part? it’s super easy!
Now, garlic aioli isn’t just any ol’ sauce. it’s steeped in history, originally hailing from the catalan region of spain.
Back in the day, folks would whip it up as a flavorful dip for fresh bread or grilled seafood. fast forward to today, and this luscious dip is a hit across the foodie scene.
Whether you're dolloping it over roasted veggies, smearing it on a sandwich, or even using it for a fancy fry dip, it’s got a spot on every table.
How Long Does It Take?
Let’s be real; we want things quick and easy, right? this easy garlic aioli recipe only takes about 10 minutes to whip up zero cook time! you’ll need around that much time for prep, which means no chilling and no fuss.
If you’re new to emulsifying, don’t sweat it! it’s way easier than it sounds and totally worth it for that creamy texture.
As for costs, you’ll find the ingredients are pretty budget friendly. expect to get around 8 servings for just a handful of items you probably have sitting around.
Just think, you can serve a crowd without breaking the bank.
Why You Need This Aioli in Your Life
Alright, let’s talk about some of the key benefits of this delectable dip. first off, it’s packed with flavor without all the junk you often find in store-bought sauces with mayonnaise .
The combination of garlic and olive oil not only amps up the taste but comes with health perks too. olive oil is great for your heart and loaded with healthy fats, while garlic has those fantastic immunity boosting properties.
Double win!
And let me just say, this is perfect for any occasion. it’s classy enough for your next dinner party but chill enough for a backyard bbq.
Want to add flair? impress your friends with a garlic aioli recipe for sandwiches at your next picnic trust me, they’ll be talking about it for ages!
Plus, it stands out over other similar recipes because it’s all about making something special without having to be a culinary whiz.
Sure, there are other dips out there, but this one has that wow factor especially when you tell everyone you made it from scratch.
Ready to look into In?
Feeling inspired to whip up this homemade delight? i mean, who wouldn’t want to serve a luscious dip that’ll make people go “ooooh” and “aaaah”? seriously, once you taste this creamy aioli sauce , it’ll become a staple in your kitchen.
And if you want to turn up the heat, try a ranch aioli recipe or add some spices for fun.
In just a few moments, we’ll break down all the ingredients you’ll need to get started. but trust me on this once you get into the groove of making your own mayonnaise sauce recipe at home, you might never go back.
So, let’s get rolling with the ingredients and make this magic happen!
Essential Ingredients Guide for the Home Cook
Hey there, foodie friends! if you’re anything like me, you know that the right ingredients can make or break your dish.
You might be here looking for a way to make your meals pop, or maybe you want that luscious garlic aioli to take your bbq to the next level.
Either way, i’ve got you covered! let’s dive into the essentials and elevate your cooking game.
Premium Core Components: What You Need to Succeed
When you’re stocking your kitchen, consider these premium core components . It’s not just about having stuff in your pantry; it’s about having the right stuff.
Detailed measurements: Whether you’re American or using the metric system, measuring is key. For example, you’ll need 1 cup (240ml) of olive oil for that homemade garlic aioli .
Quality indicators: Not all oils are created equal! Look for a nice, green bottle that indicates high-quality olive oil. It should smell fruity and fresh, not rancid.
Storage guidelines: Keep your ingredients fresh by storing spices in a cool, dark place. Your oils? In a cupboard, away from the stove. Proper storage can extend shelf life dramatically.
Freshness tips: Always check your herbs! Fresh basil or parsley should be vibrant and fragrant. If it’s wilting, toss it. Seriously, there’s no place for sad herbs in your kitchen.
Signature Seasoning Blend: Spice it Up!
Now, let’s talk about flavors. Here’s where you can get creative.
Essential spice combinations: A pinch of smoked paprika , a dash of cumin , and suddenly your dishes have serious character.
Herb selections: Pair your basil with tomatoes for that classic Caprese vibe, or mix dill with your garlic aioli for a twist. Trust me, it’s magic.
Flavor enhancers: Don’t forget aromatics like garlic and onion . They’re the backbone of countless meals, from sautéed veggies to sauces with mayonnaise.
Regional variations: for a little flair, explore how different cultures season their dishes. ever tried a ranch aioli ? just blend your typical ranch stuff with some good olive oil - you won’t regret it.
Smart Substitutions: Be a Kitchen MacGyver
Sometimes, you just can’t find what you need, and that’s okay! Be a kitchen ninja with these smart substitutions.
Common alternatives: Out of mayonnaise? Sour cream can work wonders in sauces with mayonnaise .
Dietary modifications: Make your aioli vegan by swapping the egg yolk for silken tofu. Just blend it with the other ingredients, and you’re golden!
Emergency replacements: No lemon juice? A bit of vinegar can do the trick! Remember, cooking is all about improvisation.
Seasonal options: Use seasonal veggies to your advantage. Roasted corn in summer or sweet potatoes in fall can brighten up your homemade dips and sauces.
Kitchen Equipment Essentials: Tools of the Trade
Alright, let's chat about the gear that makes cooking easier.
Must have tools: A good whisk or immersion blender is crucial for creating that creamy texture in your garlic aioli recipe for sandwiches .
Alternative equipment options: Don’t stress if you don’t have a fancy mixer! A sturdy bowl and some elbow grease will get the job done.
Preparation tips: When you’re prepping, consistency is key. Aim for uniform cuts in your veggies for even cooking.
Storage solutions: Invest in airtight containers for your herbs and spices. They’ll thank you for it!
Wrap It Up: Elevate Your Cooking Experience
And there you have it, everything you need to amp up your kitchen game! whether you’re looking to whip up some easy garlic aioli recipes or trying your hand at perfecting that french fry aioli , these essentials will set you on the right path.
Next, we’ll get into the nitty gritty with step-by-step instructions for making that irresistible garlic aioli. once you’ve got your ingredients in order, you’ll be ready to impress friends and family, making meals that’ll have everyone raving!
trust me, once you make your own mayonnaise sauce recipe , you’ll never go back.
Let’s dive in!
Mastering Professional Cooking: The Art of Preparation and Technique
When you step into a kitchen, it’s like entering your own version of a cooking reality show. the drama, the excitement, and the food oh, the food! to nail that perfect dish, you gotta get your game on.
And that means mastering some essential preparation steps and techniques. grab your apron, because we are diving into the savory world of professional cooking!
Essential Preparation Steps
You’ve probably heard the fancy french term mise en place . it sounds chic, right? basically, it just means “everything in its place.
” before you even think about turning on the stove, take a moment to prep your ingredients. chop, measure, and organize everything you need.
This not only saves time but prevents that frantic “where's the salt?” moment mid-recipe. trust me, no one wants that chaos!
Now, let’s chat time management. set up a timeline for your cooking adventure. don’t underestimate the power of a good timer.
If you’ve got multiple dishes going, try to coordinate so things finish simultaneously. it’s all about flow , like a perfectly executed dance move.
Safety first! keep in mind basic kitchen safety. always handle knives carefully, and wash your hands after touching raw ingredients.
You don’t want your garlic aioli to be the centerpiece of a food safety lesson, trust me!
step-by-step Process
Ready to make some magic? Here’s a clear, numbered process to keep you on track:
Prepare Your Station : Keep your workspace clean and organized. This makes a HUGE difference when things heat up in the kitchen.
Control the temperatures : if you’re grilling or baking, aim for that perfect heat. for meats, 165° f is generally where you want to be when it's time to chow down.
If you’re frying, oil should be at 350° f for crispy goodness.
Timing is Key : Know how long each part of your dish will take. 20 minutes for sautéing? Check! 30 minutes for roasting? You got it!
Visual cues for doneness : look for color changes and textures. if your veggies are bright and al dente, you’re in the zone.
And for meats, don’t hesitate use a probe thermometer to ensure you nail that perfect cook.
Expert Techniques
Let’s get some pro tips under your belt. when making things like garlic aioli , it’s crucial to whisk properly to create that velvety emulsion.
Start with your base ingredients (garlic, egg yolk, dijon mustard), and slowly drizzle in your olive oil, whisking the entire time.
If it separates? just add a teaspoon of water and whisk like you mean it!
Regularly check your quality as you go. is that garlic fresh? is the oil good? fresh ingredients make all the difference.
If you find you’re struggling with flavors, try seasoning incrementally. you might just need a pinch more salt or a squeeze of lemon juice.
Success Strategies
Every cook, professional or amateur, has a slip-up here and there. avoid common mistakes like using too much garlic (unless you’re going for full-on vampire repellent!).
Stick to a balanced flavor profile. think about meals with mayonnaise in mind. your garlic aioli recipe for sandwiches should enhance flavors, not drown them.
Quality assurance is vital. taste as you go! if it doesn’t taste great before it hits the dish, it won’t magically change when it’s served.
And don’t be afraid to make things ahead. prep your aioli in advance, so it’s ready when friends come over for your next soirée.
Nobody hates waiting, right?
Wrapping It Up
So there you have it. by mastering these essential prep steps, a solid cooking process, expert techniques, and strategies for success, you’re now on your way to professional level meals.
And just think, the next time you whip up that easy garlic aioli recipe or a tangy ranch aioli , you’ll be vibing with confidence!
Stick around for more tips and tricks in the final section: Additional Information . You won’t want to miss out on those gems either! Happy cooking, friend!
Pro Tips & Secrets
Let me tell ya, making garlic aioli is like discovering the secret sauce to life. seriously! it’s creamy, dreamy, and all-around a game changer for your meals.
Here’s the scoop from my kitchen to yours.
Chef’s personal insights: the key to an unforgettable aioli is to use fresh ingredients . trust me, ditch that pre-minced garlic.
It just doesn’t do justice to the rich flavor of a freshly minced clove. your taste buds will thank you!
Time saving techniques: if you’re in a hurry, grab an immersion blender. i’m all about saving time in the kitchen. just toss all the ingredients in a tall container and blend until silky smooth! less fuss means more time for enjoying those tasty bites.
Flavor enhancement tips: want to kick it up a notch? add a pinch of smoked paprika or a squeeze of zest from a lemon.
It’ll spark some serious flavor fireworks! don’t be shy; taste as you go and adjust until it feels just right.
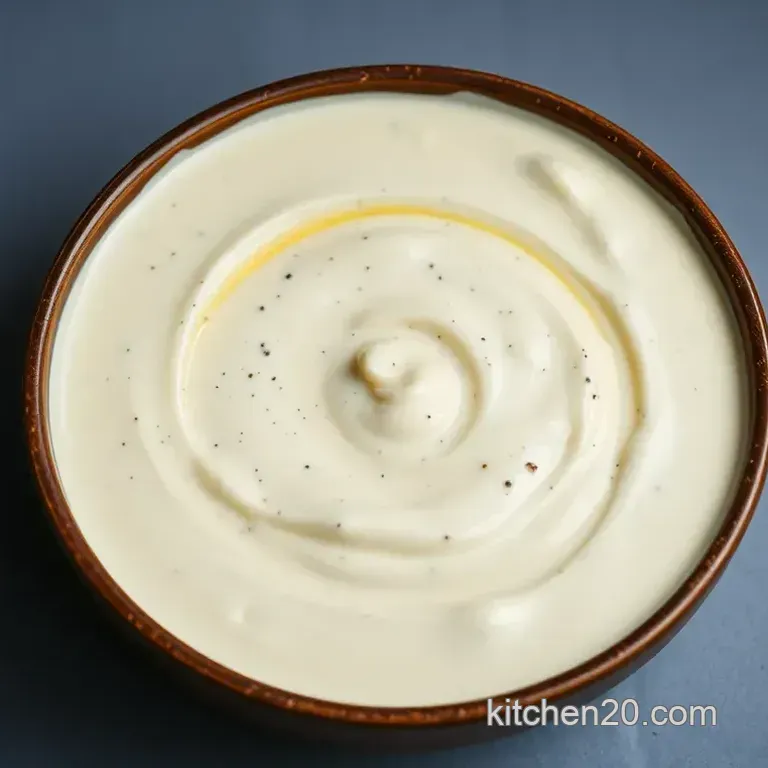
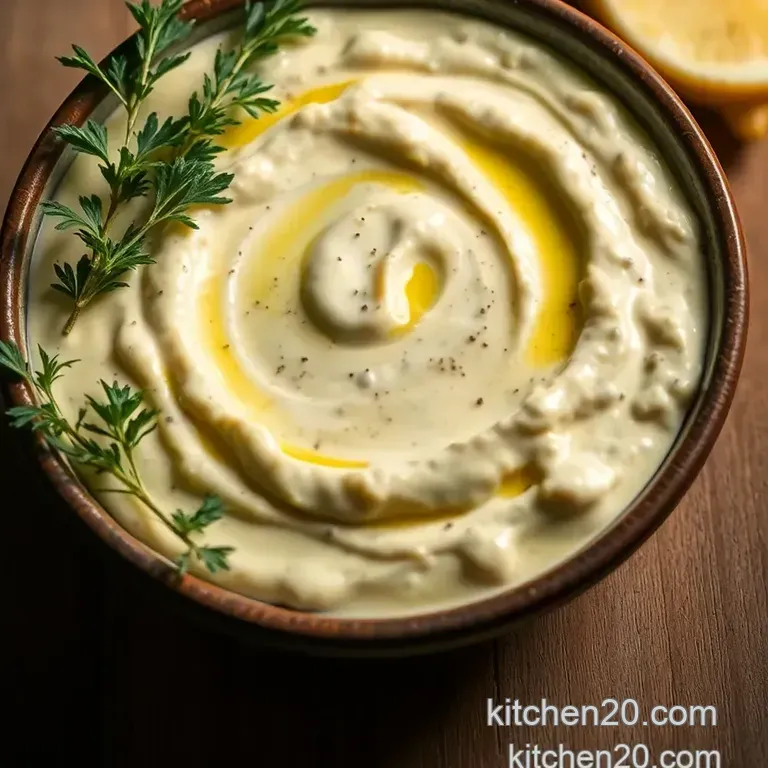
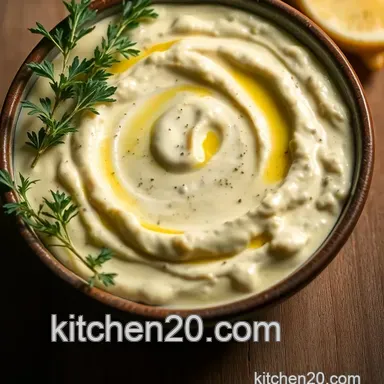
Presentation advice: to serve, transfer your luscious aioli into a small bowl and drizzle a little olive oil on top.
It not only looks fancy but makes for a great dipping experience. plus, you could sprinkle some fresh herbs on top for that instagram worthy vibe.
Perfect Presentation
Now that you’ve whipped up this fantastic dip, let’s talk about how to show it off!
Plating techniques: grab your favorite white plate (they make everything look better!). spoon the aioli in the center and use the back of a spoon to create a little vortex effect.
It’s all about making those insta friends drool!
Garnish ideas: a sprinkle of chives or parsley can make your dish pop with color. if you’re feeling fancy, some edible flowers would create a wow factor.
Remember, you eat with your eyes first!
Color Combinations: Pair your stunning aioli with vibrant veggies think bright red peppers and crisp green cucumbers. The bright colors will draw folks in faster than a puppy in a park!
Visual Appeal Tips: Consider serving it in small mason jars as individual portions. Not only does it look cute, but it also makes entertaining feel extra special!
Storage & make-ahead
Got leftovers? Don’t worry, I got ya covered!
Storage guidelines: transfer any remaining garlic aioli into an airtight container and refrigerate. it should last for about 3-4 days .
Just don’t expect it to last that long with how tasty it is!
Preservation methods: if you want to keep things extra fresh, you could freeze your aioli. just scoop it into ice cube trays.
When you need a little flavor boost for sandwiches or a dip, just pop one out of the freezer.
Reheating instructions: not really needed here since eating it cold is part of the charm! but if you want to warm it up a touch, just leave it out for about 10- 15 minutes before serving.
Freshness Duration: Ideally, enjoy your aioli within the week for the best flavor. If it starts looking funky, throw it out. It’s always better to be safe than sorry!
Creative Variations
Feel free to jazz up your aioli with these fun twists!
Flavor Adaptations: Swap regular garlic for roasted garlic for a sweeter vibe. Talk about a flavor game changer!
Dietary Modifications: If you’re looking for a lighter option, you can replace some of the oil with Greek yogurt. I call this the Ranch Aioli Recipe – creamy and dreamy!
Seasonal Twists: During summer, incorporate fresh herbs like basil or cilantro for a refreshing take. Fall? Try adding a dash of pumpkin spice to create a cozy, flavorful dip.
Regional Variations: Ever tried a French fry aioli with a hint of truffle oil? Trust me; it’s the perfect pairing for crispy fries!
Complete Nutrition Guide
You might be wondering: “What’s in this fab dip?” Here’s the scoop.
Detailed Breakdown: Each serving is around 100 calories . Not too bad for a creamy delight, right?
Health Benefits: Garlic is known to have immune boosting properties, which is a plus in my book. Plus, olive oil is packed with those heart healthy fats.
Dietary Considerations: Remember, if you have an egg allergy, you might want to skip this one or make a version without egg to match your needs.
Portion Guidance: A little goes a long way! Personally, I recommend about 2 tablespoons on sandwiches or veggie platters.
In conclusion, whether you're slathering this garlic aioli on sandwiches or serving it with fresh veggies, it's sure to elevate any meal! so get your cook on and impress your friends and family like the kitchen rockstar you are.
Let that garlic aioli take your taste buds on a wild culinary adventure! you got this!
Frequently Asked Questions
What is garlic aioli, and how is it different from mayonnaise?
Garlic aioli is a creamy Mediterranean dip made primarily from garlic, egg yolk, and olive oil. While it shares some similarities with mayonnaise both being emulsions aioli has a more pronounced garlic flavor and is often made without added vinegar. Think of it as a Mediterranean twist on your beloved mayo!
Can I make garlic aioli without raw egg?
Absolutely! If you're concerned about using raw eggs, look for pasteurized eggs to minimize risk. Alternatively, you can use a store-bought mayonnaise base as a shortcut, blending it with minced garlic and lemon juice for a quick aioli fix without the raw eggs involved.
How should I store leftover garlic aioli?
Any leftover garlic aioli should be stored in an airtight container in the fridge and consumed within 3-4 days for the best flavor and freshness. Just give it a gentle stir before using, as it may thicken slightly in the fridge. If it looks a little separated, no need to worry just whisk it back together!
What can I pair garlic aioli with? Serious ideas, please!
Garlic aioli is the perfect partner for grilled meats, roasted veggies, or simply as a dip for crisp vegetable sticks. It can elevate your sandwiches or burgers, and it's a fantastic match with crispy chips or fries. For a classic British twist, try it with your fish and chips instead of tartar sauce!
Can I tweak the recipe with different flavors?
Definitely! You can experiment with flavors by adding roasted garlic, fresh herbs like basil or dill, or even a dash of smoked paprika for a kick. If you fancy something a bit tangy, substituting some of the lemon juice with white wine vinegar can give your garlic aioli a delightful twist!
Is garlic aioli healthy?
Garlic aioli has a reasonable amount of fat due to the olive oil, which is a heart healthy fat. In moderation, it can be a tasty addition to your meals! Just keep in mind the calorie count and enjoy it as a flavourful condiment, especially alongside fresh veggies for a balanced bite!
Luscious Garlic Aioli The Creamy Irresistible Di
Ingredients:
Instructions:
Nutrition Facts:
| Calories | 100 |
|---|---|
| Fat | 11g |
| Fiber | 0g |
