Makeahead Thanksgiving Desserts: the Ultimate Stress-Free Sticky Toffee Tart

- Escaping the Oven War: The Ultimate MakeAhead Thanksgiving Dessert Strategy
- Essential Pantry Checklist for Your Sticky Toffee Tart Ingredients
- From Snap to Set: A Step-by-Step Guide to the Stress-Free Sticky Toffee Tart
- Troubleshooting Your Tart: Pro Tips for Perfect MakeAhead Thanksgiving Desserts
- Optimal Storage for MakeAhead Thanksgiving Desserts: Extending Tart Shelf Life
- Elevated Pairings: Serving the Sticky Toffee Tart
- Recipe FAQs
- 📝 Recipe Card
Escaping the Oven War: The Ultimate MakeAhead Thanksgiving Dessert Strategy
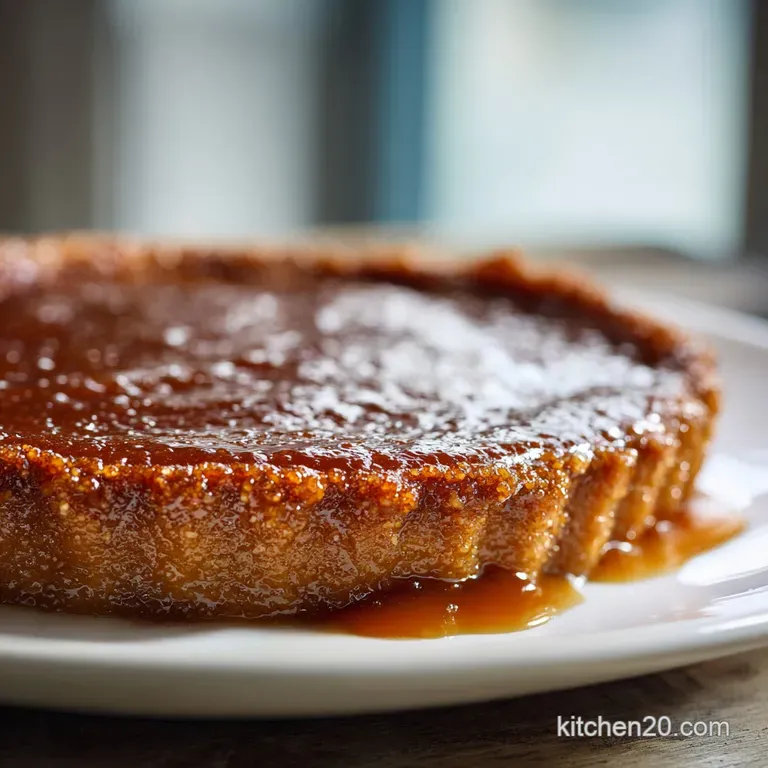
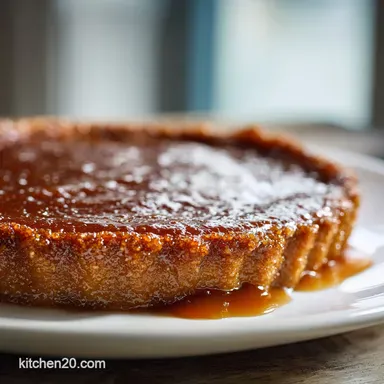
Introducing the Sticky Toffee Tart Showstopper
That spicy whiff of ginger mixed with deep, dark chocolate is exactly what the Thanksgiving table needs this year. It’s rich, a little edgy, and completely decadent. Forget flimsy pumpkin pie for a minute, we are talking about serious flavor complexity here.
The truly brilliant part is that this Sticky Toffee Tart must be made days ahead to truly set and mature properly. You save all that critical oven real estate for the turkey and those twelve different sides you swore you wouldn't make.
Seriously, easy make-ahead thanksgiving desserts are the only way to survive the holiday marathon.
This magnificent tart is my secret weapon for the Thanksgiving Dessert Buffet, consistently impressing everyone with zero last minute drama. Let’s crack on and talk about layers, stability, and getting the best flavor from simple thanksgiving desserts.
Why Your Oven Space is Sacred (And How This Tart Saves It)
The architecture of this cold thanksgiving dessert is genius because everything sets solid in the fridge, not the oven. We are building sophisticated flavor layers that don't rely on fussy baking times or steaming water baths (thank goodness).
You are already juggling too many hot dishes, so ditch the anxiety of timing the dessert perfectly with the dinner rush.
This dessert is all about patience and low temperatures, making it one of the best make-ahead thanksgiving desserts, hands down. That initial short bake on the ginger snap crust locks the butter in place. It creates a perfect moisture barrier so the base never goes soggy once the luscious fillings are added later.
The Four Layers of Stress Free Sophistication
This sticky toffee creation combines the warm, spicy crunch of ginger, the luxurious, non-fussy bitterness of dark chocolate, and the complex depth of homemade sea-salted caramel. The intense richness means your guests will be satisfied with a smaller slice, which is a major win for serving a big crowd.
It’s structurally sound, easily transportable, and actually gets better after 48 hours of refrigeration.
Essential Pantry Checklist for Your Sticky Toffee Tart Ingredients
Crust Component Breakdown: Beyond the Basic Graham Cracker
I adore ginger snaps here because they provide that necessary spicy bite to cut through the richness of the caramel. You need a crumb that packs down well and holds its shape. If you use generic tea biscuits, you might need an extra tablespoon of melted butter to help bind everything securely.
| Ingredient | Role | Viable Substitute |
|---|---|---|
| Ginger Snap Biscuits | Spicy, firm base | Graham crackers or Vanilla Wafers (add ½ tsp cinnamon) |
| Melted Unsalted Butter | Binder | Coconut oil (solid, then melted) or high-quality vegetable shortening |
| Granulated Sugar | Sweetness/structure | Light brown sugar for a deeper molasses note |
Choosing the Right Chocolate for Maximum Velvety Richness
The ganache layer is half of the flavor profile, so please do not skimp on the quality here. Using a 70% cacao dark chocolate provides the necessary bitterness to balance the hyper sweet caramel. Cheaper chocolates often contain waxes or stabilizers that can make your ganache greasy or gritty.
Chef’s Note: Use baking bars, not chocolate chips! Chips are designed not to melt perfectly, which is the exact opposite of what we need for a smooth, velvety ganache.
Sourcing the Best Sea Salt Flakes (And Why it Matters)
Forget fine table salt for the caramel; we want flaky sea salt like Maldon. Flaky salt provides little bursts of salty crunch that hit the palate as you bite into the tart. This momentary contrast is essential for achieving true salted caramel excellence.
Using fine salt just makes the entire caramel taste uniformly salty, which is less exciting.
Quick Swaps: Dairy Alternatives for the Caramel Base
If you are dealing with dairy sensitivities, this recipe is surprisingly flexible. For both the caramel and the ganache, you need a high fat liquid that will emulsify properly. Full fat canned coconut cream is your best friend.
Chill the can overnight, scrape the thick cream layer from the top, and use that in place of heavy cream. Use a good vegan butter substitute for the standard butter component.
From Snap to Set: A step-by-step Guide to the Stress Free Sticky Toffee Tart
Phase 1: Blending and Pressing the Ginger Snap Crust
Preheat your oven to 350°F (175°C) and line a baking sheet with a 9 inch loose bottom tart pan. Pulse your ginger snaps, sugar, and salt in the food processor until they look like coarse sand. Now, pour in the melted butter and pulse until the mixture holds its shape when squeezed.
This is crucial; if it crumbles, add one more teaspoon of melted butter. Press the mixture firmly into the pan, making sure the edges are neat and thick. Bake for 10– 12 minutes until you get that lovely, nutty aroma. Cool this completely before moving on.
Phase 2: Mastering the Deep, Non-Crystallizing Salted Caramel
The secret to fall thanksgiving desserts is deep flavor. Combine your sugar and water in a heavy bottom saucepan and heat, swirling occasionally, but never stirring once the mixture boils. Watch it change from clear syrup to pale gold, then to a rich, deep amber color. You need that deep color.
Pull the pan off the heat instantly when it hits that deep copper tone. Whisk in the slightly warmed heavy cream; it will bubble violently, so be ready. Finally, whisk in the butter and the flaky salt until perfectly smooth. Let this cool and thicken for 15 minutes.
Phase 3: The Dark Chocolate Ganache Layer (No Tempering Required)
Place your finely chopped dark chocolate in a large bowl. Gently heat the cream until it just simmers you should see small bubbles forming around the edges. Pour the hot cream over the chocolate and walk away for five minutes. This resting time allows the heat to fully penetrate the chocolate.
Now, add the cubed butter and vanilla. Start whisking slowly in the very center, gradually moving outwards until the mixture transforms into a single, glossy, magnificent ganache.
Phase 4: The Crucial Chilling and Setting Timeline
Pour about two-thirds of the warm ganache into the cooled crust. Spread it gently. Now, here is where patience pays off: stick the tart in the fridge for 30– 45 minutes. This initial chill makes the first ganache layer tacky and firm.
If you skip this, the warm caramel will sink right through the chocolate, and your beautiful layers will merge into a muddy mess. Once set, gently spoon the slightly cooled, thickened caramel on top. Finish by pouring the remaining ganache over the caramel.
Return the entire tart to the fridge and chill for a minimum of 6 hours, but 24– 48 hours is truly optimal for the best make-ahead thanksgiving desserts texture.
Troubleshooting Your Tart: Pro Tips for Perfect MakeAhead Thanksgiving Desserts
Preventing a Soggy Crust: The Critical Pre-Chill Step
If your tart base tasted moist and soft instead of crispy and structured, you made one of two mistakes. Either you skipped the initial 10 minute bake, or you added the warm filling too quickly. Always cool the crust completely after baking.
Once baked, the crust can even benefit from a 15 minute chill before the first layer of ganache goes in.
Why Your Caramel Didn’t Set (And How to Fix It)
If you sliced into the tart and the caramel oozed everywhere, it means you didn't cook the sugar long enough or you added too much liquid after the sugar stage. The key is reducing the water content.
The only way to fix runny caramel is to return it to a clean saucepan and cook it down again until it thickens sufficiently. You want it firm, but still pliable, like a soft taffy when cold.
Clean Slicing Techniques for a Pristine Finish
I learned this trick the hard way after destroying a dozen perfect tarts. Take your tart out of the fridge about 15– 20 minutes before serving. Heat a long, sharp knife under very hot running water. Wipe it perfectly dry.
Slice quickly, then repeat the heating and wiping process before every cut. This ensures clean, sharp layers every single time.
Optimal Storage for MakeAhead Thanksgiving Desserts: Extending Tart Shelf Life
Refrigeration Best Practices (Up to 5 Days)
Because this tart is meant to be eaten cold, storage is incredibly easy. Once fully set, you can keep the tart covered loosely in the refrigerator for up to 5 days. I usually cover the entire tart pan with plastic wrap, trying not to touch the top surface.
Keep it toward the back of the fridge where the temperature is most consistent. It’s perfect for that busy week leading up to the holiday!
Can I Freeze the Tart? A Detailed Freezing and Thawing Guide
But does it freeze well? You bet. This chocolate based make-ahead Desserts For Thanksgiving freezes beautifully. Once the tart is fully chilled and set ( 24 hours minimum), lift it off the tart pan base. Wrap the tart tightly in plastic wrap, followed by a layer of aluminum foil. Label it!
It can be frozen for up to 2 months.
To thaw, move the completely wrapped frozen tart directly to the refrigerator and let it thaw slowly overnight (8– 12 hours). Do not thaw at room temperature, as this can cause condensation on the surface and disrupt the layers.
Transporting Your Tart to the Holiday Dinner
If you are carrying this Thanksgiving dish dessert to someone else's house, keep it on the metal tart pan base until arrival. Transport it in a sealed cake carrier or a sturdy box, keeping it as level as possible.
Because it must be served cold, I sometimes slip a frozen ice pack beneath the box if the journey is longer than 30 minutes.
Elevated Pairings: Serving the Sticky Toffee Tart
Since this tart is so deeply rich and satisfying, you need something light and acidic to cleanse the palate between bites. My favorite pairing is a spoonful of plain, slightly tart crème fraîche right on the side. The cooling tang is magical against the dense caramel.
For a drink pairing, you need something refreshing but seasonally appropriate. Skip the heavy wines and go for a vibrant, palate cleansing punch. The non-alcoholic version, the Thanksgiving Punch: The Non-Alcoholic Cranberry Ginger Sparkler , works perfectly because its sharp cranberry and ginger mirror the flavors already in the crust. If you want another great make-ahead dessert option that is lighter, my Thanksgiving Desserts: Maple Pecan Cheesecake Bars (Easy No-Fuss Recipe) are always a hit too!

Recipe FAQs
How far in advance can I truly make this sticky toffee tart?
You can comfortably prepare this tart up to 4 days ahead of Thanksgiving, which is why it is "stress free." Since the filling contains rich caramel and ganache, the flavors actually deepen and the texture improves significantly after 48 hours of chilling.
Always keep the tart tightly covered in the refrigerator until ready to serve.
My ginger snap crust crumbled when I tried to slice it. What went wrong?
The most common culprit is either not using enough melted butter or not compacting the crust firmly enough into the pan before baking. Ensure the mixture feels like wet sand, and press it down using the flat bottom of a measuring cup or glass for maximum density. Also, ensure the tart is fully chilled before slicing.
The salted caramel layer seems too runny, even after chilling. How do I fix it?
A runny caramel usually means it did not reach a high enough temperature (108°C / 226°F is ideal) or that too much cream was introduced too quickly. If the tart is already assembled, unfortunately, you cannot fix it, but next time, ensure you boil the caramel mixture longer to achieve the firm, sticky consistency needed for stability in the fridge.
Using fewer tablespoons of cream during the caramel preparation can also help.
Should I serve this tart straight from the fridge or at room temperature?
While the tart must be stored refrigerated, serving it immediately makes the ganache and caramel too firm for optimal enjoyment. For the best texture velvety smooth ganache and slightly yielding caramel remove the tart from the fridge 45 to 60 minutes before serving time.
This allows the richness of the dark chocolate to truly shine.
Can I substitute a different cookie for the ginger snap crust?
Yes, the crust is highly adaptable, though the ginger snaps provide unique autumn warmth. You could substitute Biscoff cookies for a caramelized flavor, or use standard graham crackers mixed with a pinch of cinnamon and ground pecans for added depth.
Ensure the total weight of the cookie crumbs remains the same for proper structure and binding.
Can the dark chocolate ganache be made dairy-free or vegan?
Absolutely. For a successful dairy-free ganache, simply replace the heavy cream with full fat canned coconut milk, ensuring you scoop only the thick cream layer from the top of the can.
Pair this with high-quality dairy-free dark chocolate chips or chopped baking bars that contain 70% cacao or higher for the best flavor payoff.
Is it safe to freeze the finished Sticky Toffee Tart?
Freezing the finished tart is possible, but it may slightly compromise the smooth texture of the caramel upon thawing. If you must freeze it, wrap the entire tart securely in plastic wrap followed by aluminum foil, and thaw it slowly overnight in the refrigerator.
For best results, it is preferable to consume the tart within 4 days of assembly.
Makeahead Sticky Toffee Tart
Ingredients:
Instructions:
Nutrition Facts:
| Calories | 480 calories |
|---|---|
| Fat | 35 g |
| Fiber | 3 g |
