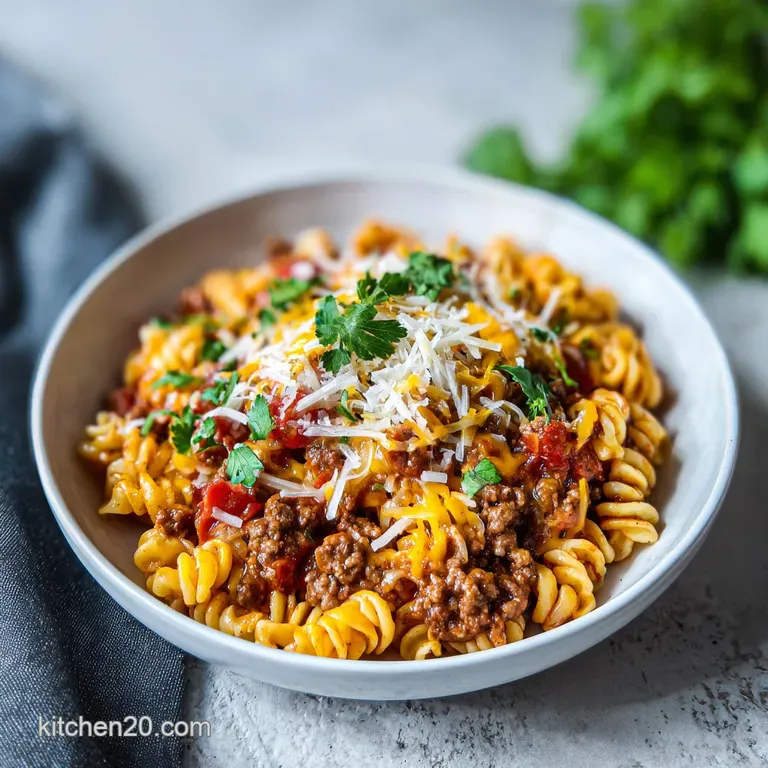
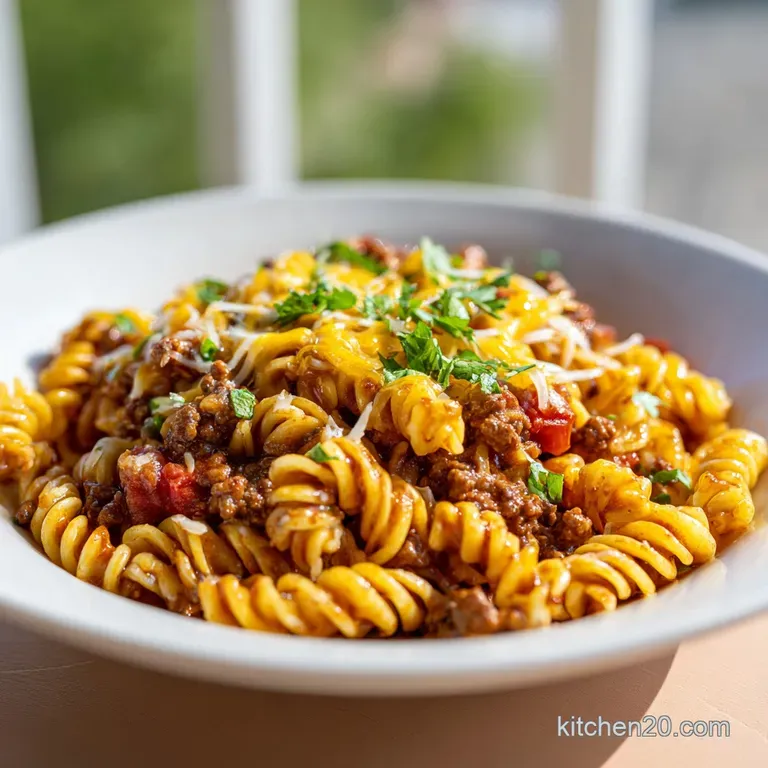
One Pot Taco Pasta
- Time: Active 10 minutes, Passive 15 minutes, Total 25 minutes
- Flavor/Texture Hook: Velvety cheese sauce with a spicy kick
- Perfect for: Busy weeknights and hungry families
- Unlocking the Secrets to the Best Taco Pasta
- The Crucial Metrics for Your Weeknight Success
- Sourcing Components for a Flavor Revolution
- Essential Tools for Your Kitchen Platform
- Master the Process with This Systematic Guide
- Solving Common Textural Issues and Flavor Slumps
- Adapting the Foundation for Creative Palates
- Professional Presentation for Every Home Table
- Preserving the Integrity of Your Leftovers
- Complementing the Dish with Strategic Side Pairings
- High in Sodium
- Recipe FAQs
- 📝 Recipe Card
Unlocking the Secrets to the Best Taco Pasta
The sound of lean ground beef hitting a preheated skillet is basically the universal signal that a good night is starting. You know that specific aroma when the taco seasoning hits the fat and starts to bloom? It’s intoxicating.
I’ve spent years experimenting with different ratios, and there is something uniquely satisfying about watching a few humble ingredients transform into a cohesive, connected meal in under half an hour.
I used to be a person who relied on those pre packaged box mixes because they felt easier, but honestly, the texture was always a letdown either too soupy or weirdly gummy. This version is my solution to the "sad weeknight dinner" problem.
We’re taking a modern approach where everything cooks in one pan, meaning the pasta actually absorbs the beef broth and tomato juices instead of just sitting in plain water. This creates a flavor profile that is deeply integrated rather than just layered on top.
We've all been there staring at the fridge at 6:00 PM with zero motivation and a mounting list of chores. But trust me, this recipe is a total revolution for your kitchen rotation.
It’s fast, it’s punchy, and it’s going to make you feel like you've mastered a professional platform of flavor without the mountain of dishes. Right then, let’s crack on and look at why this specific method works so well.
The Crucial Metrics for Your Weeknight Success
Starch Suspension: By cooking the pasta directly in the broth, the released starches act as a natural thickener, creating a silky bond between the cheese and the sauce. This creamy texture is similar to my Broccoli Pasta Recipe.
Maillard Depth: Searing the beef until a deep brown crust forms creates complex flavor compounds that simple boiling cannot replicate.
Acid Balance: The lime juice and salsa provide necessary acidity to cut through the richness of the sharp cheddar and beef fat, keeping the palate refreshed.
Emulsion Stability: Adding the sour cream off the heat prevents the proteins from tightening and curdling, ensuring a smooth finish every time.
| Meat Thickness | Cook Time | Rest Time | Visual Cue |
|---|---|---|---|
| 1 cm (Crumbled) | 5-7 minutes | 2 minutes | No pink remains, deep brown edges |
| 2 cm (Chunky) | 8-10 minutes | 3 minutes | Internal steam is visible throughout |
| Ground Turkey | 6-8 minutes | 2 minutes | Opaque and slightly matte finish |
Setting the foundation with the right meat texture is the first step in revolutionizing this dish. If you prefer a chunkier sauce, don't break the beef down too small during the initial sear.
Sourcing Components for a Flavor Revolution
| Ingredient | Science Role | Pro Secret |
|---|---|---|
| 1 lb Lean Ground Beef | Protein and Fat Base | Pat dry before browning for a better sear |
| 8 oz Shell Pasta | Starch Provider | Use shells to scoop up the tiny beef bits |
| 1.5 cups Cheddar | Emulsifier and Flavor | Grate it yourself; pre shredded has waxy coatings |
| 0.5 cup Sour Cream | Fat and Acid Stabilizer | Stir in at the very end to prevent curdling |
To get the most out of your Taco Pasta, pay attention to the quality of your cheese. Sharp cheddar provides the bite needed to stand up against the bold spices.
- 1 lb Lean Ground Beef (90/10) Why this? Keeps the sauce from getting excessively greasy while providing enough fat for flavor.
- 1 medium Yellow Onion, finely diced Why this? Provides the aromatic base and subtle sweetness for the beef.
- 3 cloves Garlic, minced
- 2 tbsp Taco Seasoning
- 8 oz Medium Pasta Shells Why this? The cup like shape acts as a vessel for the sauce and meat.
- 10 oz Diced Tomatoes with Green Chiles, undrained
- 2 cups Beef Broth, low sodium
- 0.5 cup Mild or Medium Salsa
- 1.5 cups Sharp Cheddar Cheese, freshly shredded
- 0.5 cup Sour Cream
- 0.25 cup Fresh Cilantro, chopped
- 1 medium Lime, cut into wedges
| Fresh Option | Shortcut | The Outcome |
|---|---|---|
| Hand grated Cheddar | Bagged Shreds | Fresh melts into a much smoother emulsion |
| Fresh Garlic | Jarred Minced | Fresh has a sharper, more pungent bite |
| Homemade Seasoning | Packaged Taco Mix | Homemade lets you control the salt levels precisely |
Using fresh ingredients whenever possible creates a more connected flavor profile. However, high-quality shortcuts can still result in a fantastic meal if you're short on time.
Essential Tools for Your Kitchen Platform
You don't need a professional kitchen to pull this off, but a few key pieces of equipment make the process much smoother. A deep skillet or a Dutch oven is non negotiable here because we need enough surface area to brown the beef, but enough depth to hold all that simmering broth.
If you're using a stainless steel pan, make sure it's properly preheated to prevent the beef from sticking. I personally love using a heavy cast iron skillet such as a Lodge, which retains heat beautifully and gives the onions a lovely char.
Chef's Tip: Use a wooden spoon with a flat edge. This allows you to scrape up all those browned bits (the fond) from the bottom of the pan, which is basically concentrated flavor gold.
Master the Process with This Systematic Guide
Phase 1: The Maillard Sear
- Heat your large skillet over medium high heat for 3 full minutes.
- Add 1 lb Lean Ground Beef and let it sit undisturbed for 2 minutes until a deep brown crust forms.
- Crumble the beef with your spoon and add 1 medium Yellow Onion.
- Sauté 3 minutes until the onion is translucent and soft.
Phase 2: Building the Infusion
- Stir in 3 cloves Garlic and 2 tbsp Taco Seasoning. Note: Toasting the spices in the residual fat for 60 seconds unlocks their oils.
- Pour in 10 oz Diced Tomatoes (with their juices), 2 cups Beef Broth, and 0.5 cup Salsa.
- Add 8 oz Medium Pasta Shells and stir to ensure they are mostly submerged.
Phase 3: The Controlled Simmer
- Bring the mixture to a boil, then reduce heat to low and cover.
- Simmer 10-12 minutes until the pasta is tender and most liquid is absorbed.
Phase 4: The Emulsion Finish
- Remove the pan from the heat entirely.
- Stir in 1.5 cups Sharp Cheddar Cheese in three batches until completely melted and silky.
- Fold in 0.5 cup Sour Cream gently. Note: This creates the final velvety texture.
- Garnish with 0.25 cup Fresh Cilantro and serve with 1 medium Lime wedges.
Solving Common Textural Issues and Flavor Slumps
Why is my pasta mushy?
This usually happens if the heat was too low, causing the pasta to sit in lukewarm liquid for too long. It can also happen if you use a very thin walled pot that doesn't distribute heat evenly. To fix this next time, ensure you have a vigorous boil before dropping to a simmer.
What if the sauce is too thin?
Don't panic! If you find the sauce is looking more like soup at the end of the timer, simply remove the lid and turn the heat up to medium for 2 minutes. The agitation and evaporation will quickly thicken the starch heavy liquid. If you're in the mood for something different, you might enjoy this Creamy Dreamy Simple recipe.
| Problem | Root Cause | Solution |
|---|---|---|
| Grainy Sauce | Added cheese while boiling | Remove from heat before stirring in dairy |
| Lack of Flavor | Not enough salt/acid | Add a splash more salsa or an extra squeeze of lime |
| Stuck Pasta | Not enough stirring | Give it a quick toss halfway through the simmer |
- ✓ Pat the beef dry with paper towels before browning (prevents steaming).
- ✓ Grate your own cheese to avoid the grainy texture of anti caking agents.
- ✓ Don't drain the canned tomatoes; that liquid is essential for cooking the pasta.
- ✓ Let the dish sit for 3 minutes after stirring in the cheese to let the sauce set.
- ✓ Always use low sodium broth to maintain total control over the seasoning.
Adapting the Foundation for Creative Palates
The Taco Pasta Casserole Twist
If you want that bubbly, golden top, transfer the finished pasta to a baking dish. Top with an extra half cup of cheese and broil for 3 minutes until the cheese is spotted brown and sizzling. This adds a textural contrast that is purely addictive.
The Taco Pasta Crock Pot Recipe
For a slow cooker version, brown the beef and onions first. Place them in the crock pot with the tomatoes, broth, spices, and salsa. Cook on low for 4 hours. Add the dry pasta during the last 30 minutes of cooking, then stir in the cheese and sour cream at the very end.
The Lean Turkey Swap
You can easily swap the beef for ground turkey or chicken. Since these meats have less fat, I recommend adding 1 tablespoon of olive oil to the pan before browning to prevent sticking and to help the spices bloom.
- If you want it spicier, add a chopped jalapeño with the onions.
- If you want it heartier, stir in a can of rinsed black beans with the pasta.
- If you want a crunch, top individual bowls with crushed corn chips just before eating.
Professional Presentation for Every Home Table
Plating is where you can truly show off your style. Even a simple weeknight meal can feel like a revolution when presented with intention.
| Level | Key Element | Effect |
|---|---|---|
| Simple | Wide Shallow Bowl | Distributes heat and shows off the sauce |
| Polished | Concentric Cheese Layer | Focuses the eye on the creamy texture |
| Restaurant | Micro Garnish and Oil | Adds height and professional contrast |
For the "Simple" look, just go with a hearty scoop and a sprinkle of cilantro. For a "Polished" vibe, save a bit of the shredded cheese to melt perfectly on top of the hot pasta, then add a neat dollop of sour cream in the center.
If you're going for the "Restaurant" feel, use a microplane to zest lime over the top, add very thinly sliced radishes for a peppery crunch, and finish with a drizzle of your favorite hot sauce in a zig zag pattern. This creates a connected visual experience that matches the complexity of the flavors.
Preserving the Integrity of Your Leftovers
Storage Guidelines
Store any leftovers in an airtight container in the fridge for up to 3 days. Because the pasta continues to absorb moisture as it sits, the sauce will thicken significantly. When reheating, add a tablespoon of water or milk per serving to loosen the sauce back to its original velvety state.
Freezing and Reheating
This dish freezes surprisingly well for up to 2 months. Thaw it overnight in the fridge before reheating on the stovetop over low heat. Avoid the microwave if possible, as it can cause the cheese oils to separate, leaving you with a greasy texture.
Zero Waste Tips
Don't throw away those cilantro stems! Finely mince them and sauté them with the onions; they hold even more flavor than the leaves. If you have leftover salsa or taco meat, they make a great base for a quick breakfast omelet the next morning.
Complementing the Dish with Strategic Side Pairings
Since this is a heavy, comfort forward meal, I love pairing it with something bright and crisp. A simple slaw made with shredded cabbage, lime juice, and a touch of honey is the perfect counterpoint to the rich cheddar sauce.
If you want to stick with the theme, a side of Mexican street corn (elote) or just some simple grilled zucchini seasoned with cumin and salt works beautifully. And of course, a cold beverage with a bit of acidity like a lime sparkling water or a light lager helps reset the palate between bites.
Chef's Note: Searing meat does not "seal in juices." Moisture loss occurs regardless of searing. The crust adds flavor through the Maillard reaction, which is why we prioritize that deep brown color before adding our liquids. Trust the science!

High in Sodium
985 mg mg of sodium per serving (43% % of daily value)
The American Heart Association recommends limiting sodium intake to about 2,300mg per day for adults.
Tips to Reduce Sodium
-
Broth Swap-30%
Ensure you're using a no-sodium beef broth. This can significantly reduce the sodium content, potentially by up to 30%.
-
DIY Taco Seasoning-25%
Make your own taco seasoning! Pre-made mixes are often high in sodium. Control the ingredients by creating your own blend using chili powder, cumin, paprika, garlic powder, onion powder, oregano, and a pinch of salt (or none!). This change can cut out 25% of the sodium.
-
Rinse & Reduce-20%
Rinse the diced tomatoes with green chilies before adding them to the recipe. Rinsing removes excess sodium, reducing it by up to 20%.
-
Less Cheese, More Flavor-15%
Reduce the amount of cheddar cheese by a quarter cup and use a stronger flavored cheddar if possible. This will help you use less while maintaining the cheesy flavor, decreasing sodium by 15%.
-
Salsa Savvy-10%
Choose a salsa labeled 'low sodium' or 'no salt added'. Alternatively, you can make your own homemade salsa to control the sodium content. This swap can lower sodium by 10%.
-
Herb Power
Enhance the flavor with fresh herbs and spices! Increase the amount of cilantro and consider adding other herbs like oregano or a pinch of red pepper flakes to boost flavor without adding sodium. No sodium reduction but flavor boost.
Recipe FAQs
What exactly is taco pasta?
It is a one-pot skillet meal combining seasoned ground meat, taco spices, pasta shells, and a creamy cheese sauce. The pasta cooks directly in the seasoned broth, creating a velvety sauce that clings to the shells rather than a traditional layered casserole.
What kind of noodles go best in Taco Spaghetti?
Medium pasta shells are highly recommended. Their cup-like shape perfectly captures the ground beef and the rich, creamy sauce, ensuring every bite is balanced.
What kind of pasta works best for Mexican flavors?
Shells, rotini, or elbow macaroni work best. These shapes are great at trapping highly seasoned, thick sauces, similar to how they suspend cheese in a classic mac and cheese dish, ensuring great flavor delivery.
What can I use instead of taco shells for tacos?
You can use corn chips, rice, or lettuce wraps instead of traditional hard shells. For this specific pasta dish, the shell requirement is replaced by using pasta shells to absorb the sauce.
Is it true you must use low-sodium broth in this one-pot method?
No, this is a common misconception, but low sodium is safer. Because the pasta absorbs all the liquid, using regular broth can make the final dish too salty after the cheese and seasoning are added. Control the salt by starting low.
How do I ensure the sauce stays creamy and doesn't curdle?
Remove the entire skillet from the heat before stirring in the cheese and sour cream. Applying residual heat, rather than direct heat, allows the dairy proteins to melt slowly and emulsify smoothly, preventing separation.
How do I boost the deep, savory flavor in the beef base?
Brown the ground beef aggressively until a dark crust forms on the bottom of the pan. Scrape up these browned bits (the fond) when you add the broth, as this technique transfers complex, roasted flavor into the entire sauce base, a principle we use when developing the base for our Homemade Spaghetti Sauce recipe.
One Pot Taco Pasta

Ingredients:
Instructions:
Nutrition Facts:
| Calories | 442 kcal |
|---|---|
| Protein | 29.4 g |
| Fat | 19.5 g |
| Carbs | 37.2 g |
| Fiber | 2.8 g |
| Sugar | 4.1 g |
| Sodium | 985 mg |
