Perfectly Crispy Roasting Green Beans in Oven
- Roasting Green Beans in the Oven: A Simple Delight
- Why Roasted Green Beans?
- What’s in It for You?
- The Ingredients You’ll Need
- Your Essential Ingredients Guide to Roasting Green Beans in the Oven
- Mastering the Art of Roasting Green Beans in the Oven
- Pro Tips & Secrets for Roasting Green Beans in the Oven
- Perfect Presentation: The Visual Wow Factor
- Storage & Make-Ahead: Prepare Like a Pro
- Creative Variations: Spice Things Up
- Complete Nutrition Guide: Eat Right and Feel Great
- Wrap it Up
- Frequently Asked Questions
- 📝 Recipe Card
Roasting Green Beans in the Oven: A Simple Delight
Oh my gosh, let me tell you about the first time i roasted green beans in the oven. picture this: i'm having friends over for dinner, trying to impress them with my culinary skills.
I whip up this fancy main dish and think, “wow, what can i do for a side?" then it hits me green beans! i grab a bag from the fridge, toss 'em with olive oil and some spices, and slide those bad boys into the oven.
The aroma that wafted through my kitchen? pure heaven. my friends couldn't get enough, and honestly, neither could i.
So, if you're wondering why roasting green beans in the oven is a game changer, stick around! these green beans side dishes are not just quick and easy; they elevate any meal from boring to brilliant.
Why Roasted Green Beans?
Roasting has been around forever, and let me tell you, there's a reason why! it takes the natural sweetness of the green beans and brings it to life, giving it a deliciously nutty flavor.
Originating from various culinary traditions, this technique has found its way into modern kitchens everywhere. nowadays, you can find roasted green beans sprucing up dinner tables or even potlucks.
They're perfect for any occasion whether it's a casual family dinner or a holiday feast.
Now, let's break down the nitty gritty. this is an easy recipe that anyone can conquer. it’ll only set you back about 30 to 35 minutes total, including prep, and can serve up to four people! seriously, who wouldn’t want a quick side dish that’s both healthy and satisfying?
Plus, they’re wallet friendly fewer than 10 bucks can get you a lovely pound of fresh green beans.
Score!
What’s in It for You?
When you think of veggies, green beans may not be your first love, but trust me they pack a nutritional punch! each serving is rich in fiber and low in calories, making them quite a wise choice on your plate.
You can feel good about filling up on these crisp tender beauties!
But wait, there’s more. roasted green beans are super versatile! you can serve them alongside any main dish from grilled chicken to creamy pasta.
They steal the show without stealing your time. whether it’s thanksgiving or just another tuesday, roasted green beans add that special touch.
Now, let’s be real for a moment. why choose roasted green beans over steamed or sautéed ones? well, the roasting process creates a delightful char that brings out flavors you just can’t get with other cooking methods.
Plus, nobody wants to eat soggy veggies, am i right?
The Ingredients You’ll Need
Ready to get cooking? Before we dive into the step-by-step process, let’s chat about what you’ll need.
- 1 lb fresh green beans, trimmed
- 2 tbsp extra virgin olive oil
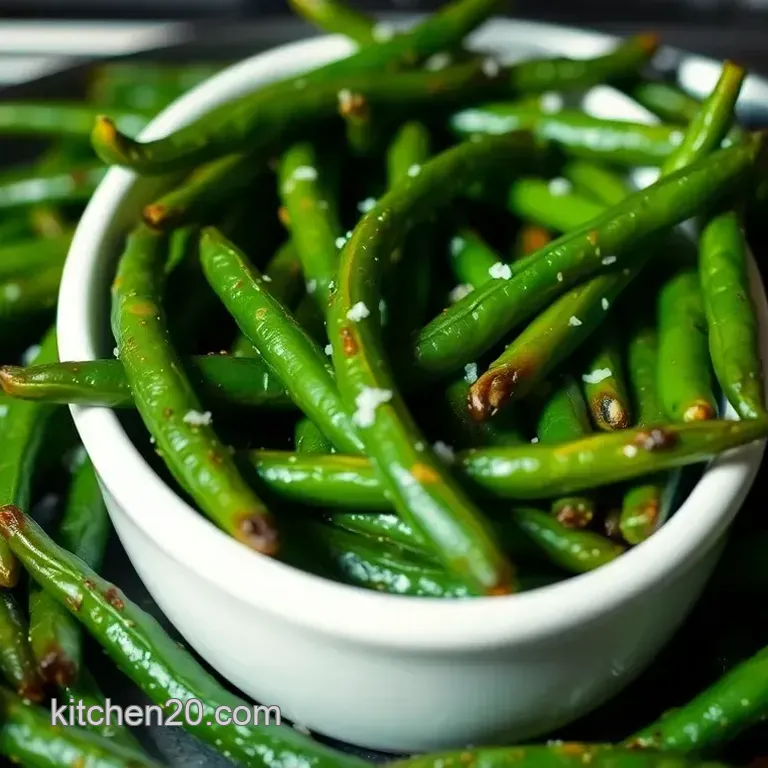
- 1 tsp sea salt
- 1/2 tsp black pepper (freshly ground is best!)
- Optional: garlic powder, red pepper flakes, and lemon zest for added flair
If you want to jazz it up, feel free to add some grated Parmesan for that extra touch of deliciousness.
Okay, so you’re prepped and ready. Next up, let’s get into how to actually roast these stunning green beans!
Whether you're hosting a fancy dinner or just looking for a comforting vegetable side, you'll see that roasting green beans is the way to go!
Your Essential Ingredients Guide to Roasting Green Beans in the Oven
Cooking can feel like a scavenger hunt sometimes, right? you're hunting for the perfect ingredients to make something magical. one of my go-to tricks is roasting green beans in the oven.
It’s super easy and always impresses! here’s how to prep like a pro with my essential ingredients guide so you never miss out on making these delightful green beans side dish next time.
Premium Core Components: Bring on the Basics!
Alright, let’s jump into the premium essentials that make those green beans pop!
Measurements matter : for this dish, you’re gonna want 1 lb (450 g) of fresh green beans . remember to trim those bad boys! for the oil, 2 tbsp (30 ml) is just right.
Trust me, it’s the perfect amount for that crispy texture we love.
Quality indicators : when picking your green beans, look for bright, vivid green coloring . if they’re looking dull or wilting, skip them! fresh beans snap when bent.
That’s how you know they’re good to go!
Storage guidelines : store fresh green beans in the fridge, ideally in a bag that breathes like a loosely tied plastic bag.
They can hang out in there for about 5-7 days before their glory days are over.
Freshness Tips : Always choose the ones that are firm to the touch and avoid beans with blemishes or soft spots. When you pick 'em fresh, you eat 'em better!
Signature Seasoning Blend: Spice It Up!
Bringing flavor isn’t rocket science; it’s about a signature touch!
Essential spice combinations : basic salt and pepper do the trick, but why not jazz it up? add a sprinkle of garlic powder or a pinch of red pepper flakes if you like it spicy.
Talk about a flavor explosion!
Herb Pairings : Fresh herbs like thyme or rosemary complement your green beans beautifully. Just chop 'em up and throw them in. Simple!
Flavor Enhancers : If you’re feeling fancy, a drizzle of balsamic glaze or a generous sprinkling of Parmesan cheese elevates those parmesan green beans to another level!
Smart Substitutions: Get Creative!
Not everything needs to be strictly by the book. There are always alternatives!
Common Alternatives : No green beans? No problem! Try asparagus or broccoli —same roasting technique, different veggie star!
Dietary Modifications : If you’re keeping it plant based, ditch that cheese and lay on the herbs.
Emergency Replacements : Forgot the olive oil? Use any neutral oil. Not gonna lie; I’ve even used melted coconut oil in a pinch.
Kitchen Equipment Essentials: Gear Up!
You don’t need fancy tools to whip up these green beans, but some basics never hurt.
Must Have Tools : All you really need is a baking sheet , a mixing bowl, and some tongs for tossing. Simple, right?
Preparation Tips : Cover that baking sheet with parchment paper for an easier cleanup later. Trust me; you'll thank me!
Storage solutions : if you end up making extra, store those leftover roasted beauties in an airtight container. they’ll stay fresh in the fridge for up to 3 days , and you can give them a quick roast to reheat.
Wrapping it Up: Time to Get Cooking!
With all this in mind, you’ll be ready to serve up fresh green bean recipes that will leave your friends and family begging for more.
Whether you're planning a big family dinner or just a quick side dish , these roasted green beans are here to shine!
Now, let's dive into those step-by-step instructions to make your Roasting Green Beans in Oven a delicious reality! Grab those ingredients and let’s get cookin’!
Mastering the Art of Roasting Green Beans in the Oven
Oh my gosh, if you haven’t tried roasting green beans in the oven , you’re totally missing out! it’s one of those kitchen trickery things that feels fancy but is really quite simple.
No culinary school needed, just some fresh beans and a hot oven. let me take you through the essentials and i promise, you’ll be whipping these up like a pro in no time!
Essential Prep: Why Mise en Place is Your Best Friend
First off, how many times have you scrambled around the kitchen, searching for that missing spice you swore you had? yeah, i’ve been there it's like a mad scavenger hunt, and not the fun kind! that's why i’m all about mise en place .
It sounds fancy but is simply having everything in its place before you start cooking.
Lay out your fresh ingredients: 1 lb of trimmed green beans , 2 tbsp of olive oil , and your seasonings.
This not only saves time but reduces kitchen chaos. trust me, your sanity will thank you!
Speaking of time management, I’ve learned to keep a timer handy. This way, I can focus on the fun parts of cooking rather than checking the clock every five minutes.
The Clear Path: step-by-step Process
Preheat the oven: set that baby to 425° f ( 220° c) . it’s always a good idea to preheat so those beans get crispy and not soggy.
Nobody wants soggy green beans , right?
Prep the Beans: Rinse the green beans under cold water after trimming. Just give them a little shower.
Season like a pro: toss those bad boys in a mixing bowl with your olive oil, 1 tsp sea salt , 1/2 tsp black pepper , and if you're feeling adventurous, add some garlic powder or red pepper flakes.
Yum!
Spread ‘Em Out: Lay the beans on a baking sheet. No crowding! Give them a chance to breathe. A good roast needs space!
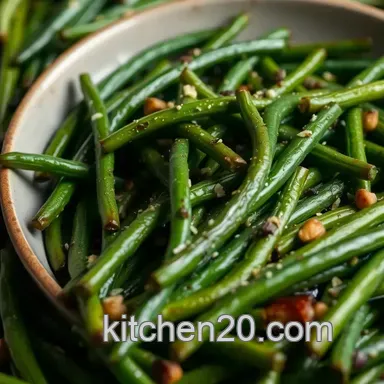
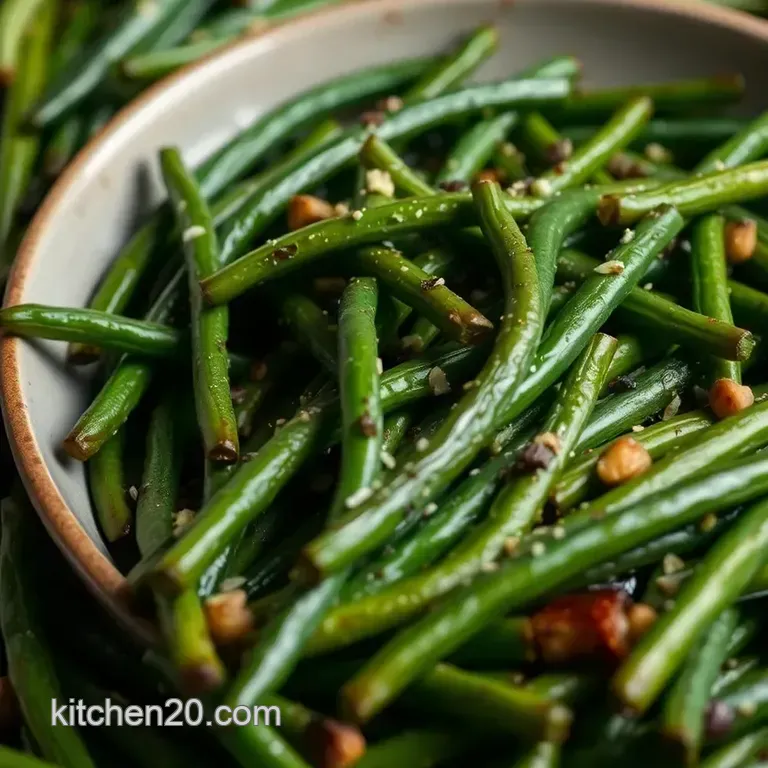
Roast Away: Slide them into that oven and roast for 20- 25 minutes , flipping halfway through. You want them crispy tender and just a bit browned think of those visual cues!
Serve with Flair: Remove from the oven and sprinkle with lemon zest if you wish. They’re gonna look so good, your friends will think you’re a chef!
Expert Techniques: Getting It Just Right
Now, let’s talk about the expert touches. keep an eye on your beans. ovens can be sneaky. if your beans start to look a tad bit burnt, whip them out a minute or two early.
Quality checkpoints? i always look for that slightly blistered look the golden brown edges are what you’re aiming for. and if you’ve burnt a few, no worries.
Just toss those aside and nobody needs to know!
Troubleshooting time: If your beans are looking sad rather than crispy, you might’ve overcrowded your baking sheet. Lesson learned, right?
Success Strategies: Nail It Every Time
Avoid common mistakes like skipping the preheat. Seriously, no preheating? That’s just asking for soggy veggies.
For quality assurance, taste your beans as you roast. A tiny nibble can tell you if they need more salt or if they’re ready to come out!
You might be thinking ahead can I make ‘em in advance? Absolutely! Roast them and store them in the fridge. They’ll last a day or two, but fresh is always better.
Wrapping It Up
So there you have it your ultimate guide to roasting green beans! it’s one of those quick side dishes that goes with almost anything.
Serve it next to a hearty piece of grilled meat or toss them into a fresh salad for some crunch.
And remember, roasted green beans are just the beginning. once you get the hang of it, explore other vegetable side dish recipes .
How about parmesan green beans or mixing in some other veggies for a fun twist?
Stay tuned! Next up, we’ll dive into additional information that’ll inspire you to expand your roasted vegetable repertoire. Happy cooking!
Pro Tips & Secrets for Roasting Green Beans in the Oven
Roasting green beans in the oven can be an absolute game changer. trust me, once you try it, you'll wonder why you were ever steaming those poor beans! here are some pro tips and secrets i’ve picked up along the way.
First off, don’t rush it! take the time to trim your fresh green beans right. it’s super easy, just pinch the ends and snap them off.
And if you're short on time? use that quick side dish magic and prep them in advance! you can wash and trim them a day earlier.
Just keep them in a zip-lock bag in the fridge.
And here’s a little flavor enhancement tip: toss in some garlic powder or even better, mincing fresh garlic. oh my gosh, it adds this killer aroma, and believe me friends, your kitchen will smell like a gourmet restaurant!
If you’re feeling a little adventurous, add a pinch of red pepper flakes for a touch of heat.
Just a pinch, you know? we’re not trying to blow anyone’s socks off here!
When it comes to presentation, let’s chat about that. after roasting, squeeze some lemon juice over those bad boys. not only does it amp up that flavor, but it also brings out this gorgeous, vibrant color.
You wanna snap a picture of that dish before it’s gobbled up!
Perfect Presentation: The Visual Wow Factor
Speaking of presentation, plating can make or break a dish. make sure to spread your roasted green beans across the plate in a single layer for that “wow” factor.
No one wants to dig through a mound of beans, am i right?
You can also sprinkle some parmesan cheese (if you’re into that!) on top at the end for a little extra flair.
The cheesy, salty goodness combines with the sweet, nutty flavor of roasted green beans to create pure magic. and don’t forget your garnishes! fresh herbs like parsley or dill can add that splash of color.
Choose your color combinations wisely! bright green beans with vivid sliced red peppers or juicy cherry tomatoes make for an eye-popping side dish.
Your dinner guests (or family, let’s be real) will be swooning over your skills!
Storage & make-ahead: Prepare Like a Pro
Let’s face it. sometimes life gets in the way, and you need to whip up some vegetable side dishes recipes fast.
Roasted green beans are great as a make-ahead option. store them in an airtight container in the fridge ideally, they’ll last about 3-4 days .
You can reheat them in the oven at 350° f for about 10 minutes or toss them in the microwave for a super quick fix.
But if you're going for that crispy goodness, the oven's the way to go. and just a heads up, the longer they sit, the softer they get, so enjoy them fresh if you can!
Creative Variations: Spice Things Up
Look, i get it. sometimes you want to mix things up a bit. that’s where creative variations come into play.
Want to take it to another level? drizzle some balsamic glaze on top right before serving. it’s a game changer.
And if you’re into seasonal flavors, think about tossing in cranberries or nuts around thanksgiving. just add a little zing! there’re also benefits to including more veggies.
Try mixing in asparagus or broccoli for a roasted vegetable medley.
If you’re keeping things plant based, switch out the parmesan for nutritional yeast or simply load up on those herbs and spices.
You do you, and make those green beans side dishes into a vibrant celebration of flavors!
Complete Nutrition Guide: Eat Right and Feel Great
Now, let's discuss the healthy stuff. with just 120 calories per serving, these baked green beans are packed with vitamins and fibers.
They’re low in calories but high in flavor what more could you want? plus, they give you a good dose of vitamin k, which helps keep your bones strong.
Eating more veggies can also help with gut health. talk about a win-win! make sure to check portion sizes if you’re serving this up as a side to a hearty main dish.
Generally, about 1 cup is perfect.
Wrap it Up
So there you have it, folks! roasting green beans in the oven is not only easy but downright delicious. you can jazz them up or keep it classic; either way, they’re sure to be a hit at your table.
From clever tips and classy presentations to storage strategies and creative twists, you’ve got everything you need. don’t be afraid to make this your own.
So what are you waiting for? get roasting those green beans and turn that ordinary side dish into a culinary superstar! happy cooking!
Frequently Asked Questions
What is the best temperature for roasting green beans in the oven?
The best temperature for roasting green beans in the oven is around 425°F (220°C). This high heat allows the beans to cook quickly, resulting in a crisp tender texture with delightful caramelization. Just remember to toss them halfway through for even roasting!
How long should I roast green beans in the oven?
Roast your green beans in the oven for about 20-25 minutes. Keep an eye on them during the last few minutes of cooking; you want them to be vibrant, blistered, and slightly browned without burning. Ovens can vary, so it’s always good to check!
Can I add other seasonings while roasting green beans in the oven?
Absolutely! Roasting green beans in the oven provides a fantastic base for a variety of seasonings. Consider adding garlic powder, lemon zest, or even a sprinkle of Parmesan cheese for an extra punch. Don’t be shy to get creative!
How do I store leftover roasted green beans?
To store leftover roasted green beans, let them cool completely, then place them in an airtight container. They can be kept in the fridge for up to 3 days. For best results, reheat them on a baking sheet in the oven to restore their crispness before serving again.
Can I use frozen green beans instead of fresh?
Yes, you can use frozen green beans, but you may need to change your roasting approach slightly. It’s best to thaw and dry them before seasoning to achieve that crispy texture. They may also need a bit longer cooking time, so keep an eye on them!
Are roasted green beans healthy?
Roasted green beans are indeed a healthy side option! They are low in calories, rich in fiber, and packed with vitamins and minerals. Plus, roasting them with a drizzle of olive oil can add healthy fats, making them not only nutritious but delicious too!
Perfectly Crispy Roasting Green Beans In Oven