Proper Peach Cobbler with Buttermilk Biscuits: a Cracking Classic
- The Proper Buttermilk Peach Cobbler: Why This Classic Endures
- Culinary Science: Mastering the Balanced Flavor and Texture
- Essential Kit and Ingredients for Your Peach Cobbler
- Method: Crafting the Filling and Assembling the Cobbler
- Troubleshooting and Pro Tips for the Perfect Cobbler Bake
- Storage, Reheating, and Make-Ahead Planning
- Serving Suggestions: The Ultimate Peach Cobbler Pairings
- Recipe FAQs
- 📝 Recipe Card
The Proper Buttermilk Peach Cobbler: Why This Classic Endures
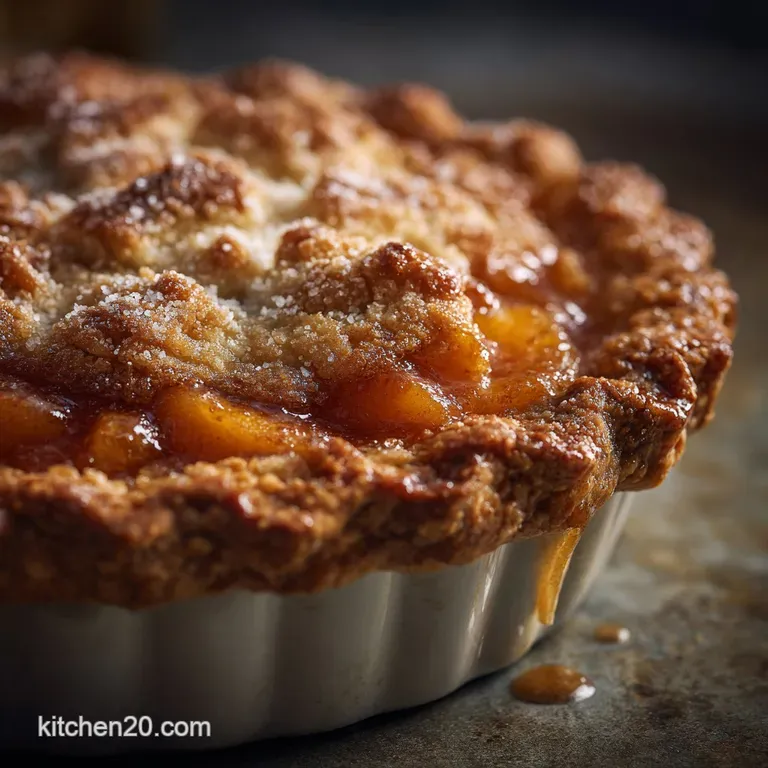
You know that aroma? The moment the scent of warm cinnamon and caramelized peaches hits you, everything else stops. It smells exactly like my childhood kitchen, and honestly, the texture contrast here is everything: soft, gooey fruit filling beneath that gloriously rough, golden biscuit topping.
It’s pure comfort.
This peach cobbler recipe is my absolute lifesaver when I need a spectacular dessert without spending all day fiddling about. It uses basic pantry ingredients, it’s relatively cheap even when using fresh fruit, and it comes together faster than almost any pie.
This is a showstopper that requires zero technical pastry skills, which is a massive win in my book.
Forget the overly sweet, runny versions you might have tried before. We are using buttermilk to create a topping that’s miles better than standard cobbler dough, giving us that perfect scone like lift and a tender crumb. Let’s crack on and talk science, shall we?
Culinary Science: Mastering the Balanced Flavor and Texture
Cobbler vs. Crumble: Defining the Essential Difference
People mix these up all the time, and it drives me bonkers. A crumble, or a crisp, has a streusel topping made of flour, butter, and sugar, which scatters over the top. A true cobbler is different. It is topped with drop biscuits or small mounds of simple pastry dough.
This topping bakes into a delightful, uneven cobblestone road look, hence the name. It needs to be fluffy, buttery, and slightly resilient to hold up against the bubbling fruit.
The Buttermilk Advantage: Achieving the Scone Like Topping
Buttermilk is your secret weapon here. The acidity breaks down the gluten in the flour just slightly, resulting in an incredibly tender biscuit topping every single time. Plus, that subtle tang balances the overwhelming sweetness of the peaches perfectly.
If you don't use buttermilk, you usually end up with a denser, more bread like topping, which is really not the vibe we’re going for in a proper homemade peach cobbler fresh peaches recipe.
A Seasonal Treat: Choosing the Right Peaches
Look, if fresh peaches are ripe, plump, and deeply fragrant, use them. Nothing beats a truly ripe, locally sourced peach for maximum flavor. When they're not in season, don't feel guilty about reaching for high-quality frozen peaches.
Do not attempt this recipe with canned peaches; they are too soft and usually packed in sugary syrup, which will ruin the delicate thickening balance we're aiming for. If you happen to have too many peaches, you should definitely try my recipe for The Ultimate Summer Sipper Fresh Peach Lemonade .
The Filling’s Thickening Agent: Achieving the Perfect Consistency
We rely heavily on corn starch (or cornflour, if you're in the UK) to thicken the filling. This is non-negotiable for a perfect peach cobbler. Unlike flour, corn starch thickens transparently, keeping the filling bright and glossy, not cloudy or pasty.
The lemon juice and the high heat of the oven work together to activate the corn starch fully. You need that aggressive bubbling to happen in the oven, or the filling will be runny, and that is a disaster.
Cold Butter Secrets: Flaky Topping Chemistry
The key to a flaky, layered biscuit topping is keeping the butter incredibly cold. When those tiny pieces of chilled fat hit the hot oven, they melt and release steam. This rapid steaming creates little air pockets and layers within the dough.
If your butter is warm, it just mixes into the flour like shortening, resulting in a dense, cookie like crust. We want lift, not density!
Acid and Leavening: How Buttermilk Creates Lift
Buttermilk, being acidic, supercharges your baking powder. This immediate reaction produces maximum carbon dioxide gas, which then translates directly into maximum rise. It’s a very simple chemical reaction, but it’s what gives the biscuit topping its characteristic height and lightness.
I once mistakenly used plain milk and watched my topping deflate into a sad, flat pancake. Always use the cold buttermilk!
Essential Kit and Ingredients for Your Peach Cobbler
Filling Focus: Fresh vs. Frozen Peaches
As I mentioned, fresh is the dream for the best homemade peach cobbler. But if you must use frozen, use them straight from the freezer. Do not thaw them on the counter. Tossing the frozen slices directly with the sugar and corn starch prevents them from releasing too much liquid too early, which would absolutely destroy your thickness.
| Ingredient | Substitution Tip |
|---|---|
| Fresh Peaches | Frozen, unsweetened peach slices (do not thaw!) |
| Corn Starch | 4 Tbsp All-Purpose Flour (Filling will be slightly cloudy) |
The Optimal Fat: Why Cold Butter is Non-Negotiable
We use unsalted butter because we control the salt content. It provides the best flavor and texture combination for the biscuit topping. Seriously, there is no substitute that delivers the rich taste of butter.
If you absolutely hate cutting in butter, you can use vegetable shortening, but the flavor will suffer. Use the same weight measure, and make sure it’s also chilled.
Flour Power: The Best Type for a Tender Biscuit Topping
Standard all-purpose flour works perfectly for this easy peach cobbler recipe. It provides just enough structure without making the biscuits tough. The buttermilk does most of the heavy lifting regarding tenderness.
If you want an even lighter crumb say, if you are nervous about overmixing you could substitute 1/4 cup of the all-purpose flour with cake flour.
Flavor Enhancers: Cinnamon, Vanilla, and Optional Nutmeg
Cinnamon is classic, but vanilla extract is the secret weapon that deepens the flavor of the peaches themselves. Use a high-quality vanilla extract; the cheap stuff tastes like chemicals and will dull the whole dessert.
A pinch of freshly grated nutmeg in the filling is totally optional but incredibly warming. Sometimes I throw in a cheeky teaspoon of almond extract instead of vanilla for a more sophisticated, almost cherry like depth.
Chef’s Note: Using a tablespoon of Demerara or turbinado sugar on top is not just for looks. It creates a crunchy, beautiful shell that locks in moisture and provides perfect textural contrast. Do not skip this step!
Method: Crafting the Filling and Assembling the Cobbler
Step 1: Preparing and Seasoning the Peach Filling Base
Get your peaches sliced quickly and uniformly (about half an inch thick). Toss them immediately with both sugars, the corn starch, salt, lemon juice, and spices. The acid in the lemon juice and the sugar will start drawing water out of the fruit fast, so you need to transfer this mixture to the baking dish promptly.
Don’t forget to dot the top of the fruit with those small cubes of butter. Those melt into the juice, adding richness and preventing the filling from boiling over too aggressively.
Step 2: Mixing the Buttermilk Biscuit Batter (The Drop Biscuit Method)
Combine your dry ingredients first flour, salt, baking powder, and sugar. Then, quickly cut in the cold butter until it looks like coarse sand mixed with some pea-sized crumbs. I use a pastry blender, but two forks crossed together work too.
The moment you add the buttermilk, mix only until the dough loosely comes together. This is a drop biscuit method, meaning we are aiming for a shaggy, wet dough that you can scoop, not a dough you can knead or roll.
If you mix for too long, you activate too much gluten, and you’ll end up with a hockey puck topping.
Step 3: Layering and Baking: The Critical Assembly Order
Pour the filling into your 9x13 dish; make sure it's spread evenly. Now, use an ice cream scoop or a big spoon to drop the dough haphazardly over the peaches. This is the beauty of the cobbler: it should look rustic and uneven.
Never try to smooth the dough or cover every inch of fruit. Leaving gaps allows the filling to bubble up and caramelize around the edges of the biscuits, which is essential for texture.
Step 4: The Golden Finish: Knowing When Your Cobbler is Done
Bake it low and slow 45 to 50 minutes at 375°F (190°C) is ideal. The topping should be deep golden brown, and when you peek at the edges, the fruit filling should be bubbling violently.
This violent bubbling is how you know the corn starch has done its job and fully thickened the mixture.
Pull it out of the oven and let it rest for at least 15 minutes before serving. That resting time allows the filling to cool slightly, thicken completely, and avoid being an instant, molten lava mess when you serve it.
Troubleshooting and Pro Tips for the Perfect Cobbler Bake
Preventing a Soggy Bottom: The Temperature Trap
A soggy bottom almost always happens because the filling wasn't thick enough, or the oven wasn't hot enough initially. Make sure you truly pack in that corn starch and don't reduce the sugar content, as sugar helps draw out moisture initially, which then thickens effectively.
Also, ensure the dish goes immediately into a preheated oven. If you let it sit out while the oven is warming up, the fruit will release too much juice, guaranteeing a sad, watery base.
Dealing with Runny Filling: Quick Fixes and Prevention
If you pull your cobbler out and it looks liquidy (you’ll know because it won’t be bubbling thickly), put it back in! Increase the heat to 400°F (200°C) for another 5 to 10 minutes. This will force the temperature up high enough to activate the corn starch.
Prevention is better though: always ensure the fruit mixture is mixed thoroughly with the corn starch before assembly.
Achieving Uniform Golden Brown Color
The secret to that gorgeous, crunchy gold top? Egg wash and coarse sugar. The egg wash helps the topping turn a deep, even brown, and the coarse sugar (like turbinado) provides sparkle and crunch.
If the top starts browning too fast (before 30 minutes), simply tent the dish loosely with foil and continue baking until the fruit is bubbling.
Storage, Reheating, and make-ahead Planning
Best Practices for Refrigerating Leftovers
Peach cobbler actually holds up incredibly well. Once fully cooled, cover the baking dish tightly with foil or plastic wrap and store it in the refrigerator for up to 4 days. The biscuit topping will soften a bit, but the flavor remains amazing.
Freezing Unbaked vs. Baked Cobbler
I strongly recommend freezing unbaked cobbler if you want to prep ahead. Assemble the entire dish (without the egg wash/sugar topping) and wrap it tightly in two layers of foil. Freeze for up to 3 months.
When ready to bake, remove the foil, add the egg wash/sugar, and bake from frozen at 375°F (190°C) for about 65– 75 minutes.
Freezing already baked cobbler makes the biscuit topping quite dry and crumbly upon reheating, so avoid it if possible!
Reheating for Maximum Freshness and Crispness
To reheat leftovers, the microwave is quick, but it makes everything soft and steamy. For a truly fresh experience, transfer a portion to an oven safe dish and bake at 350°F (175°C) for 10– 15 minutes.
The edges of the biscuits will crisp right back up, and the filling will be perfectly warm and bubbly again.
Serving Suggestions: The Ultimate Peach Cobbler Pairings
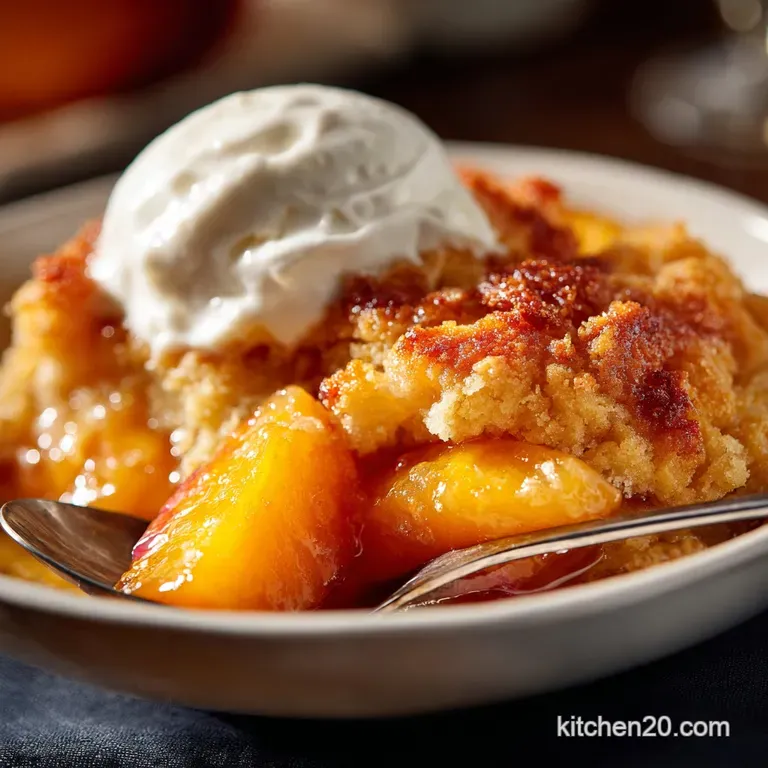
Look, you can serve peach cobbler plain, but why would you? It begs for contrast. I always insist on a scoop of good quality vanilla bean ice cream; the cold, creamy vanilla melting into the warm, spiced peaches is a classic pairing for a reason.
If you are feeling extra cozy, a heavy drizzle of thick, homemade crème anglaise (custard) is traditional, especially for a proper British style pudding. If you are baking for someone who needs to watch their sugar intake, this recipe works beautifully with sugar substitutes, much like my popular The Best Diabetic SugarFree Peach Cobbler Recipe . Serve it up, enjoy the compliments, and don’t forget to save me a corner piece!

Recipe FAQs
Why is my cobbler topping tough or dry?
This usually means you overmixed the dough or your butter was not cold enough. The key to a tender cobbler topping is handling the dough minimally after adding the buttermilk; stop mixing as soon as the dry ingredients are just combined.
Overmixing develops the gluten, resulting in a tough, scone like texture rather than the intended flaky tenderness.
My peach filling is too watery how can I thicken it?
A watery filling often results from the peaches releasing too much juice, especially if they are very ripe. Ensure you are using the specified amount of thickening agent (like cornstarch or flour) and toss the peaches thoroughly before baking.
If your fruit is exceptionally juicy, consider adding an extra teaspoon of cornstarch to the mixture to bind the liquid effectively.
Can I use frozen or canned peaches instead of fresh?
Absolutely, but adjustments are necessary for both substitutions. If using frozen peaches, do not thaw them first; mix them straight into the filling and add about 5-10 minutes to the baking time.
If using canned peaches, drain them thoroughly and reduce the amount of added sugar in the recipe, as canned fruit is often packed in heavy syrup.
How should I store leftover Peach Cobbler, and can I freeze it?
Store leftover cobbler, covered tightly, in the refrigerator for up to 3 days. To reheat, warm individual servings in the microwave or place the whole dish back in a 350°F (175°C) oven until warmed through.
Freezing is not recommended once baked, as the biscuit topping tends to become dry and the texture degrades significantly upon thawing.
Can I make this Buttermilk Peach Cobbler recipe vegan or dairy-free?
Yes, substitute the regular butter with a high-quality, solid vegan butter stick or shortening for the topping. Replace the buttermilk with one cup of non-dairy milk (such as oat or soy) combined with one tablespoon of white vinegar or lemon juice, allowing it to sit for five minutes to "curdle" and create a vegan buttermilk substitute.
How can I tell if the cobbler is perfectly cooked?
The cobbler is done when the topping is deeply golden brown, baked through the center, and no longer appears wet or doughy. Crucially, look for the peach filling around the edges to be actively bubbling, which indicates that the thickener has fully activated and the fruit is piping hot throughout.
Can I prepare the cobbler filling ahead of time?
You can slice the peaches and prepare the dry spice/sugar mixture up to 24 hours in advance and store them separately. However, only combine the peaches, sugar, and thickener right before you intend to bake.
Combining them too early will draw out excessive moisture, resulting in a thin, soupy filling beneath your topping.
Proper Buttermilk Peach Cobbler Recipe

Ingredients:
Instructions:
Nutrition Facts:
| Calories | 936 kcal |
|---|---|
| Protein | 10.3 g |
| Fat | 32.0 g |
| Carbs | 145.8 g |
