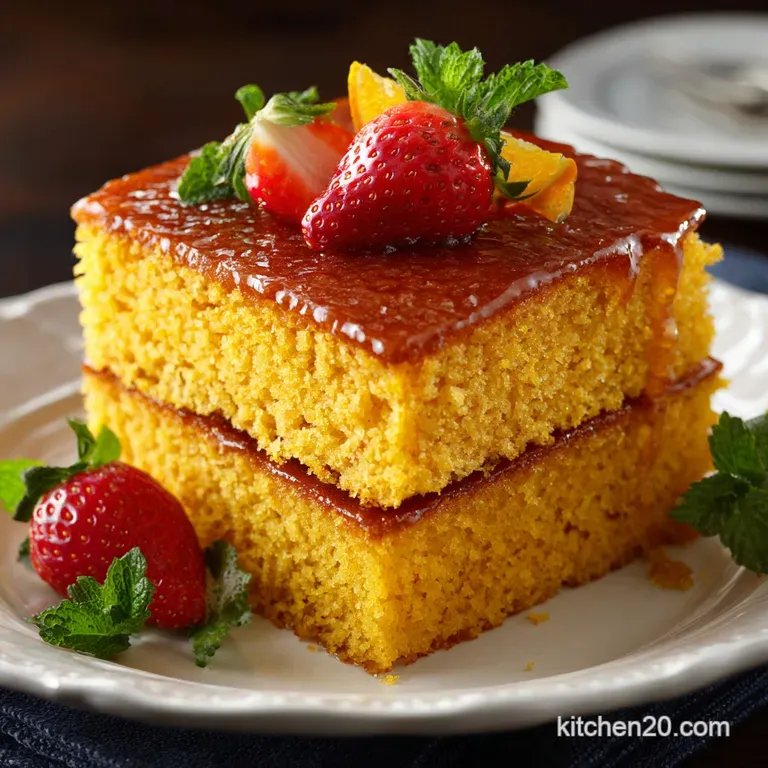
The Proper Golden Yellow Cake Rich Tender and Ready for a Celebration
Unlocking the Secret to a Truly Golden Yellow Cake
Right, let’s talk cake. Not just any cake, but the true, honest and to-goodness Yellow Cake —the kind that transports you straight back to childhood birthday parties, smeared with a thick layer of proper chocolate frosting.
I’ve probably baked a hundred versions of this trying to find the perfect texture. For years, my cakes were fine. They were edible. But they weren't tender . They were a bit tough, a bit pale.
It wasn't until I started treating this recipe like a science experiment (a fun, buttery one) that I realized the golden ticket. It's all in the ingredients' temperature and the ratio of yolks to whites. Trust me, once you nail this, every other boxed mix will taste like cardboard.
Why We Use Extra Yolks for Superior Crumb
When we talk about a Moist Yellow Cake Recipe , we’re usually talking about fat content. Standard vanilla sponges use whole eggs, which contain both the fat (yolk) and the drying structure (white).
This recipe throws in two extra yolks, and that simple step changes everything . Why? Because the yolks are pure richness. They add saturated fat and natural emulsifiers, preventing the cake from drying out. They also give the cake that gorgeous, deep yellow hue without needing any artificial coloring.
It’s brilliant. The resulting crumb is almost velvety, melting instantly in your mouth. If you skip the extra yolks, you end up with a paler, drier cake. Don’t do it.
Defining the Difference: Yellow Cake vs. Standard Vanilla Sponge
People often confuse a Yellow Cake with a standard white or vanilla cake. They are not the same thing. The simplest way to distinguish them is by looking at the fat source and the egg type.
White cake relies primarily on shortening and uses only egg whites (no yolks allowed, hence the pure white color). Yellow cake, however, is intensely buttery. It relies entirely on butter for flavor and texture, which naturally gives it a richer, darker colour, amplified by those extra yolks.
If you want a vanilla cake that can stand up to heavy fillings and still taste rich, the Yellow Cake wins every time. It’s richer, warmer, and way more celebratory.
The History and Institutional Status of This Classic Bake
This cake is basically the unsung hero of American baking institutions. It was the backbone of every deli counter, every grocery store bakery, and almost every birthday celebration for decades. It's sturdy enough to travel, yet flavorful enough to feel special.
We're talking about the platonic ideal of the Birthday Cake From Scratch . My Nana used to make this specific version, always covering it with a sickeningly sweet seven and minute frosting (which I hated, sorry Nana). But the cake underneath was perfection.
It holds a serious place in baking history, simply because it’s the most universally loved, classic flavour profile you can achieve.
The Essential Provisions for Your Tender Yellow Cake

Baking is a game of precision, and for a Homemade Moist Yellow Cake , the ingredients need to be prepped exactly right. We can’t just grab things straight from the fridge and hope for the best. That’s how you get lumpy, dense disappointment.
Dry and Dairy: Measuring the Foundation Correctly
Listen up: if you’re scooping flour directly out of the bag with your cup measure, you are unknowingly compressing the flour and adding way too much. Too much flour means a heavy, dry cake. You simply must weigh your flour. Get a kitchen scale.
They cost the same as two pints of decent beer, and they will transform your baking. We need 300g of sifted all and purpose flour for this. Sifting, by the way, isn't just for show. It helps the baking powder distribute evenly and prevents heavy pockets in the batter.
The Baker's Tools: Essential Equipment for Perfect Layers
While you can make this with a hand mixer, I really encourage using a stand mixer with a paddle attachment if you have one. The creaming stage (when butter and sugar meet) is extensive, about five minutes of continuous beating, and your arm will thank you.
For layers, two 9 inch round pans are the standard. Make sure they are at least two inches deep.
Crucial Note: Never rely solely on greasing the pans. Always cut rounds of parchment paper for the bottom. This prevents the baked cake from sticking and tearing when you flip it out. A torn cake layer is the ultimate tragedy.
Achieving Room Temperature: The Golden Rule of Cake Baking
This is the hill I will die on. The butter, the eggs, and especially the whole milk must be at true room temperature. I mean soft butter that yields easily when pressed, not butter that’s still cold in the middle.
If your ingredients are cold, they will refuse to properly combine with the fat during the creaming stage. They won’t emulsify. This leaves you with a separated, curdled and looking batter, which translates directly to a dense, sad cake.
If you forget, try this trick: place the eggs in a bowl of warm (not hot) water for 10 minutes, and microwave the milk for 10 seconds. Hurry up!
Sourcing the Right Extract: Why Quality Vanilla Matters
Since this cake only has a few main flavors (butter and sugar), the vanilla extract has to pull its weight. Skip the cheap imitation stuff. It tastes chemical and fake. Invest in a good quality pure vanilla extract. I keep mine stocked up, buying the big bottles when I see them on sale.
It’s such a small ingredient, but it contributes massively to the overall warmth of this particular Yellow Cake Recipe From Scratch . Don’t skimp here.
Related Recipes Worth Trying
- Hersheys Perfectly Chocolate Cake The Easiest Most Ridiculously Moist Recipe — Master the classic Hersheys Perfectly Chocolate Cake using the simple hot liquid secret for intense flavor and a super moist crumb This easy Hersheys...
- Low Carb Keto Pound Cake Cream Cheese Almond Flour Luxury — This Low Carb Keto Pound Cake recipe delivers the moist dense crumb you crave We use cream cheese and almond flour to create the ultimate gluten-free pound...
- Foolproof GlutenFree Keto Crab Cakes with Zesty Aioli — Skip the heavy fillers Our authentic GlutenFree Keto Crab Cakes are naturally low carb perfectly crisp and loaded with jumbo lump crab Try this elegant...
Mastering the Technique: A Step and by-Step Baking Protocol
Okay, we’ve gathered the supplies. We’ve checked the temperature. Let's crack on with the mixing.
Proper Creaming: Aerating Butter and Sugar for Maximum Rise
This is where the magic happens. We’re essentially whipping air into the fat and sugar crystals. You need to cream the soft butter and sugar for a full four to five minutes on medium speed. It should look pale yellow, almost white, and fluffy like a cloud. It should be visibly expanded.
Stop and scrape down the bowl constantly that sticky sugar residue hiding at the bottom needs to be incorporated. If you rush this step, your cake will be dense and won't rise properly.
The Gentle Alternation: Incorporating Wet and Dry Mixes Smoothly
Once the eggs and vanilla are mixed in, the batter usually looks a bit split (curdled). Don’t panic. We fix this by introducing the dry mix and the milk alternately. We start and end with the dry ingredients. This ensures the fat is properly emulsified and prevents gluten from overdeveloping.
Keep the mixer on low speed! We are aiming for just combined. As soon as the last of the flour goes in, stop the machine. You’ll want to finish stirring by hand with a spatula, scraping the bottom of the bowl to catch any stray flour pockets.
Overmixing right now is the fastest way to a tough cake.
Checking Doneness: Identifying the Perfect Moment to Remove from the Oven
A properly baked Yellow Cake will pull away slightly from the sides of the pan when it’s done. The top will be golden brown and spring back lightly when you gently touch the centre. Yes, you can use the toothpick test, but look for the edges pulling away first.
If you wait until the toothpick is bone dry , you’ve likely overbaked it by a minute or two, which is enough to dry out the crumb. Better slightly underdone than dry.
Cooling and Handling: Prepping Layers for Decoration
Patience is required here. When the cakes come out, they are fragile. Leave them in the pan on a cooling rack for exactly 15 minutes. This allows the structure to set enough to be handled.
After 15 minutes, flip them out, peel off the parchment, and let them cool completely on the rack about an hour. Trying to frost a warm cake leads to sliding layers and melted frosting. Nobody wants that messy nightmare.
Expert Insights: Elevating Your Final Yellow Cake Results
Solving Common Baking Fails: Troubleshooting a Sunken Middle
Oh, the dreaded sunken middle. It happens to the best of us! When your Easy Yellow Cake Recipe turns into a crater, it’s usually one of three things:
- Oven Door Abuse: You opened the oven too early (before 20 minutes) causing the temperature drop to deflate the structure.
- Too Much Leavener: Did you accidentally double the baking powder? If the cake rises too rapidly, it collapses because the structure can’t support the height. Always measure leavening agents accurately.
- Batter Temperature: If your butter was too cold, the batter was structurally weak from the start, leading to an eventual collapse in the heat.
Storage Solutions: Keeping Your Cake Fresh for Days
To keep your cake supremely moist, you need to minimize air exposure.
- If the cake is unfrosted: Wrap the completely cooled layers tightly in plastic wrap (I often double and wrap) and keep them at room temperature for up to two days. You can also freeze them like this for up to two months.
- If the cake is frosted: Store the finished cake under a glass dome or in an airtight container on the counter. Frosting acts as a sealant, keeping the cake fresh for 3 4 days. Do not put a buttercream and frosted cake in the fridge unless you have to; the cold air dries out the cake.
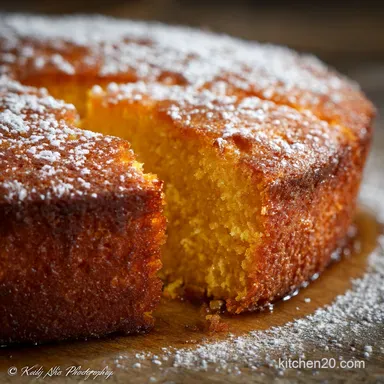
Variations: Pairing This Yellow Cake with the Right Frosting
This buttery cake is sturdy enough to hold up to heavy, intense flavors. While I adore the classic pairing, there are other great options:
| Frosting Type | Flavor Profile | Best For |
|---|---|---|
| Chocolate Fudge | Rich, dense, deep cocoa | Classic Yellow Cake With Chocolate Frosting (The ultimate birthday vibe) |
| Vanilla Bean Buttercream | Light, creamy, sweet | Wedding showers, refined gatherings |
| Cream Cheese | Tangy, slightly rustic | Paired with lemon zest in the batter |
Nutrition Snapshot: Understanding Serving Sizes
Look, we are making a proper cake here. It’s got butter, sugar, and lovely egg yolks. It’s a treat. It’s not a health food smoothie. This recipe yields 12 generous slices. Don't worry about the calorie count too much when you're celebrating a life event or just enjoying a quiet afternoon cuppa.
This cake is meant to nourish the soul, not just the body. Enjoy your slice, and maybe walk an extra block tomorrow.

Recipe FAQs
Why did my Yellow Cake turn out a bit dense and rubbery, instead of light and fluffy?
Ah, a common conundrum! It’s usually down to either cold ingredients or overmixing the flour; ensure your butter, eggs, and milk are truly room temperature before starting, and stop mixing as soon as the flour is just combined to avoid developing tough gluten.
Can I bake these layers ahead of time, and how should I store them properly?
Absolutely, prepping ahead is a proper job! Store unfrosted, cooled cake layers wrapped tightly in cling film at room temperature for up to two days, or freeze them wrapped in foil for up to three months just defrost overnight before attempting to frost.
I’m having a gluten dilemma; can I use a gluten-free flour blend in this recipe?
Yes, you can! Use a good quality 1:1 blend containing xanthan gum, but be prepared to add an extra tablespoon or two of room temperature milk, as gluten-free flours are often thirstier than standard all-purpose flour.
Why does this recipe call for extra egg yolks? Is it just for the yellow colour?
The extra yolks are the secret to this cake’s success, delivering that beautiful deep golden hue and, crucially, adding a velvety, rich tenderness that a standard whole egg cake simply can't achieve; they are essential for the classic, luxurious crumb.
What sort of frosting or filling goes best with this classic sponge?
This sturdy, slightly rich cake is spot on for holding heavier frostings; traditionalists usually opt for a thick, dark chocolate fudge or a silky vanilla buttercream, often coupled with a layer of tart raspberry jam in the middle for a lovely contrast.
Proper Golden Yellow Cake Recipe
Ingredients:
Instructions:
Nutrition Facts:
| Calories | 400 kcal |
|---|---|
| Fat | 18g |
| Fiber | 1g |
