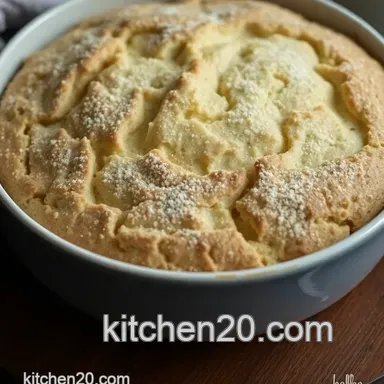
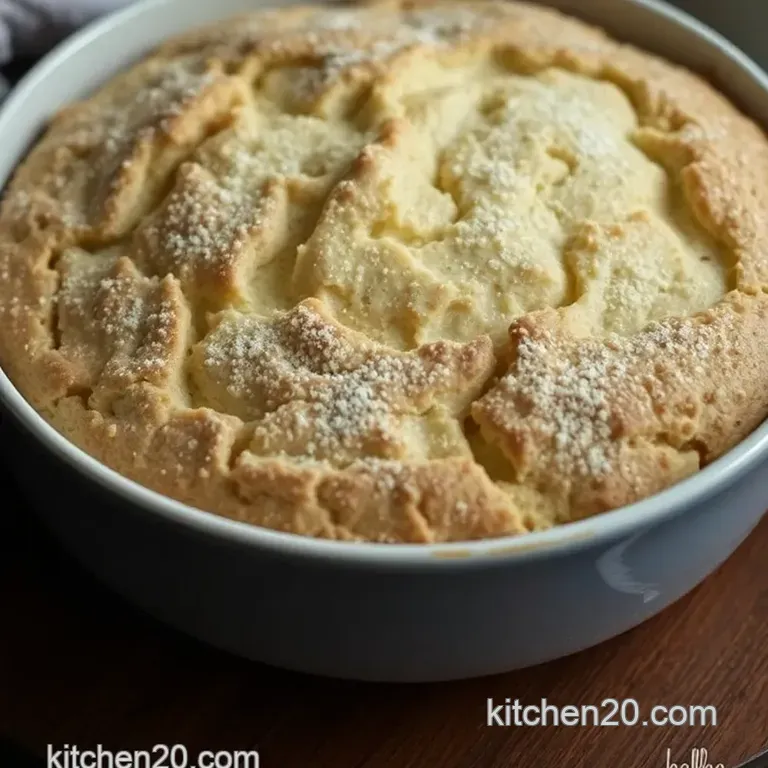
Quick & Easy Gluten Free Soda Bread

Breaking the Bread: My Quick & Easy gluten-free Soda Bread Story
Let me tell you something. i’ve got a love affair with bread. i mean, who doesn’t? there’s just something about that freshly baked loaf that makes your home feel cozy.
Like, oh my gosh, picture this: i was at my friend’s house the other day, and she served her family’s traditional soda bread.
Everyone was digging in, and my heart sank a little because, you know, gluten. i thought, “why not create my own version?” so, here we are, with this quick & easy gluten-free soda bread recipe that’ll make your taste buds dance.
This bread doesn’t just stop at being scrumptious; it’s got a backstory too. irish soda bread has roots spread across the green hills of ireland, often made with basic ingredients and that classic soda bread undertone.
Fast forward to now, and it’s taken the gluten-free world by storm! people are loving it, and for good reason.
It’s super easy to whip up, demands only simple ingredients, and hey, you don’t even need yeast! yep, you heard that right.
The best part? you can have a warm, crusty loaf ready in just 40 minutes . talk about a busy weeknight miracle!
Quick Overview: What’s Cooking?
Now, here’s the deal. this recipe is classified as easy , welcoming everyone from kitchen novices to seasoned pro bakers.
And let's not forget about cost. you can make 12 slices of this yummy bread for not much cash, especially when using gluten-free flour alternatives .
Oh, and if you’re wondering about the prep and cook time, it’s smooth sailing! we’re talking about just 15 minutes of prep and 25 minutes in the oven .
No tricky kneading involved, rejoining my love affair with no yeast bread once again. so put on some tunes and enjoy the experience!
Health in Every Slice
Now let’s get a bit real. healthy bread options can be hard to come by, especially when dealing with dietary restrictions.
But don’t fret! this soda bread packs it all in. it’s made with simple, wholesome ingredients. plus, if you swap out milk for your fave dairy-free alternatives , you can cater to those with lactose sensitivities.
Folks love this recipe for more than just its taste. it’s nutritious, too! each slice is about 115 calories , with a balanced count of protein and fiber.
Honestly, my heart skips a beat when i think about cooking with apple cider vinegar for that extra fluffiness.
Serving gluten-free bread at family gatherings or special occasions is also a hit. imagine bringing out a freshly baked soda bread to join in on your barbecue, and everyone digging in without a second thought about gluten.
You’ll be the star of the show and forever known as the “bread artist.”
Why You’ll Love This Recipe
So why should this irish soda bread recipe be on your go-to list? well, let’s just say it’s practically a superstar.
It’s versatile enough to be paired with soups, enjoyed alongside a salad, or even served as the perfect base for your favorite spread.
Not to mention, the shelf life of gluten-free bread is pretty decent if you freeze it right. plus, you can jazz it up with sweet or savory variations.
Throw in some herbs or dried fruit, and boom next-level soda bread!
And for my fellow beginners out there, I promise I’ll share all my baking tips for beginners along the way. Just remember to keep it simple and have fun with it!
So, without further ado, let’s dive into the ingredients section and get that oven preheating. Trust me, your kitchen is about to smell like a dream!
Let’s get cracking on making this homemade soda bread that’s perfect for any occasion! You’ll love the way it comes together, and I can’t wait for you to taste it.
The Essential Ingredients Guide for gluten-free Baking
So, you're ready to dive into the world of gluten-free recipes , huh? you’re not alone! whether you’re dealing with an allergy or just want to try easy bread recipes , having an essential ingredients guide at your fingertips can make all the difference.
Let's get into some real good stuff!
Premium Core Components
First things first let's talk measurements . you need to know what you're working with, right? for those in the u.
S., grab that measuring cup because you’ll want about 2 ¾ cups of gluten-free flour or 350 grams if you’re feeling adventurous with the metric system.
Next up, the quality indicators. Not all gluten-free flour is made equal! Look for a fine texture and a good blend check the ingredients. You want pure stuff without too much added starch.
When it comes to storage guidelines and shelf life , keep your gluten-free flour in a cool, dark place. ideally, it'll last about 6 months in the pantry and longer in the freezer.
Stock up for your future quick baking recipes , and trust me, you won’t regret it!
And don’t forget about freshness tips . give your flour a little sniff before using it. if it smells even slightly off, toss it! fresh ingredients make the best dairy-free bread options .
Signature Seasoning Blend
Spice it up! for that perfect flavor blend in your gluten-free bakery, you can’t skip seasoning. think about essential spice combinations like baking soda and a pinch of salt .
These are your friends. they add texture and just the right amount of kick to your bread.
Herb selections? dried rosemary or thyme can be game changers! toss in herbs that pair well with your baking, turning a basic bread into something special.
Want to please a crowd? make flavored soda bread using interesting mixes!
Each region has its spin on seasonings, too. for instance, some might throw in a touch of garlic powder or even some chili flakes.
Get creative, folks! don’t be afraid to make adaptable baking recipes work for your taste buds.
Smart Substitutions
Now, let’s get real about substitutions. if you're out of milk, you can easily go for almond milk or coconut milk.
These are what i call easy dairy-free alternatives . and hey, if you’re in a pinch for baking soda , use baking powder though you’ll need to adjust the measurements.
There are also some super handy emergency replacements. Got applesauce lying around? It can work wonders in bread, adding moisture without extra fat.
If seasonal ingredients are your jam, use fresh herbs when they’re in bloom! it’s like a mini garden party in your loaf.
Celiac friendly recipes are easier when you've got the right options lined up.
Kitchen Equipment Essentials
Okay, gear up people! you’ll need some key tools. a large mixing bowl is your starting point. and a non-stick baking tray is a must for effortless transfer and clean-up.
Don’t have a baking pan? no sweat! use a cast iron skillet instead.
When it comes to prep, here’s a tip: keep your tools organized. you want to grab that wooden spoon easily without a treasure hunt.
And for the dough, a sharp knife for scoring is crucial don't skip that step! cut a deep cross on the top before baking; it’s not just for show it helps the bread cook evenly.
Last but not least, make sure you've got storage solutions in place. storing your homemade bread properly can help maximize its shelf life.
Speaking of which, keep that gluten-free bread in an airtight container and you’re golden for about 3 days at room temperature.
Now that you’ve got the right ingredients and gear in your arsenal, you're all set to whip up that quick & easy gluten-free soda bread .
It’s really a breeze! just follow those step-by-step instructions, and soon you’ll be enjoying warm, homemade soda bread. trust me, you’re gonna want to serve that bread straight out of the oven nothing compares to that fluffy, warm texture!
Ready to get baking? Let’s jump into the instructions!
Unlocking Your Inner Chef: The Professional Cooking Method
Oh my gosh, have you ever thought about how the pros churn out meals that not only taste great but look stunning? whether you’re an aspiring chef or just someone who loves to whip up some quick baking recipes on a busy weeknight, adopting a professional cooking method can do wonders for your culinary skills.
Let’s break it down step by step!
Essential Preparation Steps
Mise en place is french for “everything in its place,” and trust me, it’s not just a fancy term. before you even think of turning on the oven, gather all your ingredients .
This means measuring out your 350 g gluten-free plain flour , ½ teaspoon salt , and 1 teaspoon baking soda , so you’re not scrambling halfway through mixing.
Now, let’s chat about time management . set aside 15 minutes for prep. it's amazing how much smoother everything feels when you’re not running around like a chicken with its head cut off.
During those minutes, focus on chopping and arranging everything.
Organization goes hand in hand with this. a tidy workspace is a happy workspace! wipe down your counters, and keep those flour bags and measuring cups handy.
Trust me, the cleaner your area, the more inspired you’ll feel.
And then there’s safety . always read through your recipe, and know that 200° c / 400° f is the temperature range you’ll want for our quick and easy gluten-free soda bread.
Stay aware of hot surfaces and sharp objects. seriously, nobody wants to spend a saturday night in the er!
Step-by-step Process
Let’s get to the fun part the actual cooking! Here’s your trusty guide to make delicious Irish soda bread you can be proud of:
Preheat Oven: Start by preheating that bad boy to 200° C / 400° F . You’ll want a hot oven for that perfect crust!
Mix Dry Ingredients: In a large bowl, combine the 3 ingredients like a pro flour, salt, and baking soda. Stir until mixed!
Combine Wet Ingredients: In a separate jug, mix 200 ml milk and 1 tablespoon apple cider vinegar . It's science, folks!
Combine Mixtures: Pour that lovely milk mixture into your dry ingredients and stir until just combined. No overmixing!
Rest the Dough: Let it sit for 5 minutes . This is a crucial step, as it lets the magic happen!
Shape the Dough: This is where you bring it all together. Form it into a ball; not too wet, not too dry.
Prepare for Baking: Flatten it slightly on your non-stick baking tray and, using a knife, score a deep cross on top. This isn’t just for looks; it aids cooking!
Bake: Place it into your preheated oven for 25- 30 minutes until it’s golden brown and cooked through.
Serve: Cut into that loaf while it’s warm. Trust me, it's heaven!
Expert Techniques
Let’s elevate that bread making game.
Quality Checkpoints: As the bread bakes, check that the aroma fills your kitchen. That’s your signal that something delicious is happening! Right before you take it out, tap the bottom if it sounds hollow, you’ve got a winner!
And if things don’t go as planned? Don’t freak out! If your dough seems a bit too sticky, a sprinkle of gluten-free flour should save the day.
Common Mistakes to Avoid: Forgetting to let the dough rest is a biggie. Make that step your BFF.
Success Strategies
Want a soft bread recipe that’s both nutritional and delicious ? here’s the key stick to high-quality gluten-free flour to avoid that gritty texture.
Plus, embracing dairy-free bread options with plant milk will give you flexibility for all kinds of guests!
And if you’re planning meals ahead of time? this quick bread recipe can easily be made ahead and then frozen.
Think of all the lazy sunday brunches you can have with your homemade soda bread.
Wrapping It Up
So there you have it, folks! with these professional cooking methods, you can whip up a delightful gluten-free soda bread that fits any dietary need.
Plus, with the right preparation steps and expert techniques , you'll be the star of any gathering.
Now, if you're curious about ways to use up that extra bread or new variations to explore, check out my next section on additional information .
There’s always more to learn and create in the kitchen!
Additional Recipe Information for Quick & Easy gluten free Soda Bread
Alright, my bread buddies! let’s break down everything you need to know about making this quick and easy gluten-free soda bread .
Seriously, if you’re in a pinch and need some homemade bread in no time, this is the way to go.
No fuss, no kneading just pure deliciousness! so buckle up, and let’s dive into the deets!
Pro Tips & Secrets
Chef's personal insights : to really nail this recipe, i swear by using high-quality gluten-free flour . trust me, it makes all the difference.
You want a nice, light texture, not that gritty stuff.
Time Saving Techniques : No need for fancy mixers or long waiting periods. This recipe is ready in 40 minutes flat! Just combine, shape, and bake. Easy peasy!
Flavor enhancement tips : for an extra oomph , toss in some fresh herbs or spices. i find that a little rosemary or even some chopped olives amps up the flavor beautifully.
Also, don’t skip the apple cider vinegar ! it really helps the dough come together.
Presentation advice : give your loaf a little dusting of gluten-free flour right before it goes in the oven. it adds a rustic vibe.
Plus, a nice deep cross cut on top not only looks awesome, but it helps in cooking evenly too!
Perfect Presentation
After your loaf is out of the oven, let’s make it look drool worthy.
Plating Techniques : Skip the boring plates! Get yourself a wooden board or a corny picnic blanket. The vibe changes everything!
Garnish Ideas : Fresh herbs go a long way. Maybe toss some sprigs of parsley or thyme around your sliced bread. It’s all about presentation, right?
Color Combinations : Pair your warm soda bread with vibrant salads or a bowl of soup . The colors really pop, and it makes the meal look gourmet!
Visual appeal tips : after cutting into your bread, don’t just leave it in a pile. fan out the slices like a deck of cards on your board.
Trust me, your friends will be impressed!
Storage & make-ahead
Let’s talk bread longevity!
Storage Guidelines : If there’s any leftover (which, let’s be real, is unlikely), wrap it up tight in plastic wrap or pop it in an airtight container.
Preservation Methods : This bread freezes beautifully. Slice it first so you can just grab pieces as needed. No one wants to defrost an entire loaf when you just want one slice.
Reheating instructions : to bring back the magic, pop a slice in the toaster or give it a quick warm-up in the oven.
Just a few minutes at 350° f will do the trick!
Freshness duration : you’ll enjoy the best flavor in the first couple of days, but stored right, it’ll last about a week.
Just be sure to check for that classic stale bread smell !
Creative Variations
Got a little creative spark? Let’s play around!
Flavor Adaptations : How about a sweet version? Dried cranberries or chocolate chips could be your new best friends.
Dietary Modifications : Make it dairy-free by switching the milk with almond or oat milk. Easy peasy!
Seasonal Twists : In fall, add pumpkin puree or spices like cinnamon. It’s like celebrating the season with every bite!
Regional Variations : Want to hint at different parts of the world? Try adding some Italian seasoning to give it a Mediterranean feel.
Complete Nutrition Guide
Who doesn’t love a wholesome profile?
Detailed Breakdown : This bread is about 115 calories per slice . Not too shabby, right?
Health Benefits : gluten-free bread can be a great option for those with Celiac or gluten sensitivities. Plus, the fiber from the gluten-free flour is good for digestion!
Dietary Considerations : It’s a versatile recipe, so easily adaptable for various diets. Just swap ingredients as needed.
Portion Guidance : A perfect serving size? One slice usually does it, but who are we kidding? Two or three won’t hurt!
Expert FAQ Solutions
Here’s where we answer those nagging questions.
Common Questions : “Can I use a different flour?” Absolutely! Just make sure it’s a gluten-free mix that includes xanthan gum.
Troubleshooting Guide : If your bread is too dense, it might need more moisture. Try adding a touch more milk next time.
Success Tips : Don’t skip resting the dough. It’s a game changer!
Variations Explained : Curious how to swap flavors? Mix and match! Just remember, balance is key.
Conclusion
And there we have it, folks! this quick & easy gluten free soda bread is so versatile and simple, even beginners can whip it up without a hitch.
Remember, cooking should be fun! so don’t stress. enjoy the process, try out different flavors, and savor the deliciousness. now go on, roll up your sleeves, and bake that bread! you got this!
Quick Easy gluten free Soda Bread