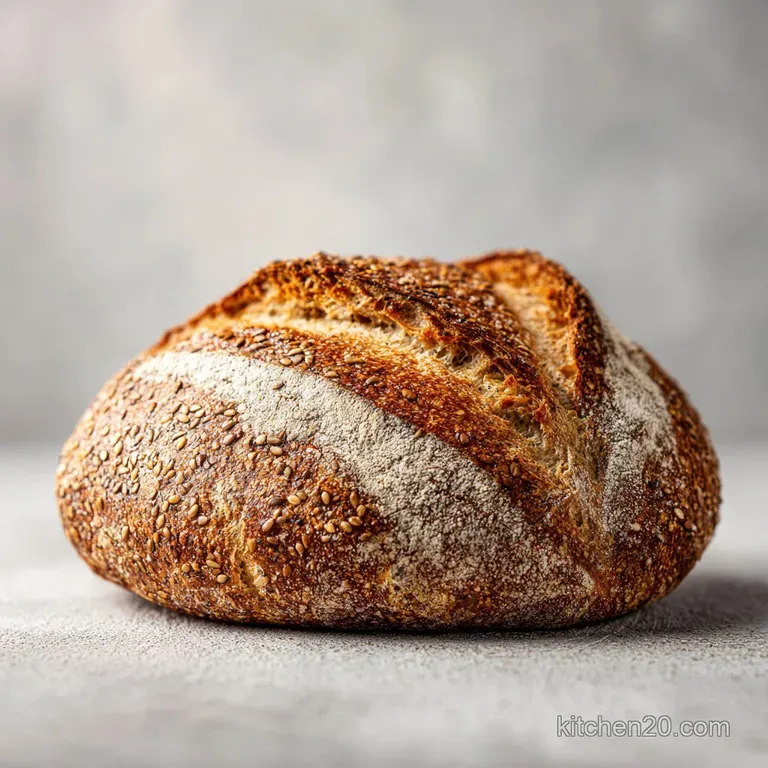
Seeded Whole Grain Bread: Tender and Hearty
- Time: Active 35 minutes, Passive 160 minutes, Total 195 minutes
- Flavor/Texture Hook: Nutty, shatter crisp crust with a velvety, tight knit interior
- Perfect for: High fiber meal prep and streamlining your weekday breakfast routine
- Simple Steps for Better Whole Grain Bread
- Vital Timing for the Perfect Loaf
- Choosing Your Whole Grain Bread Components
- Streamlining Your Kitchen Tool Selection
- Executing the Whole Grain Bread Method
- Fixing Crumb Density and Rising Issues
- Flavor Adaptations for Your Daily Toast
- Efficiency in Keeping Your Bread Fresh
- Smart Serving Suggestions for Every Meal
- Recipe FAQs
- 📝 Recipe Card
Simple Steps for Better Whole Grain Bread
Nothing beats the earthy, toasted aroma of a fresh loaf cooling on the counter, but let's be real, most homemade whole wheat attempts end up as heavy doorstops. I used to think the flour was just naturally stubborn until I realized the real problem was hydration management.
This specific version changes the game by focusing on the "soak," a simple streamlining step that prevents the dry ingredients from stealing moisture from the yeast's environment.
The hero of this Whole Grain Bread isn't actually the flour, but the seed and oat mixture we hydrate at the very beginning. When you pour that 120ml of boiling water over the 45g of rolled oats, 30g of sunflower seeds, and 20g of flaxseeds, you're essentially creating a moisture reservoir.
Without this step, those dry additions would act like tiny sponges inside your dough, sucking up the water intended for the gluten. The result of the soak is a loaf that stays soft for days, making it the perfect base for your morning toast or a hearty sandwich.
We've all been there: staring at a recipe that requires ten different specialty flours and a three day fermentation period. That doesn't fit into a modern, efficient lifestyle. This recipe is designed for the home cook who wants the nutritional benefits of a whole grain bread recipe without the fuss.
We're using standard whole wheat flour and a few pantry staples to get a result that rivals any artisanal bakery. It's about being smart with your ingredients, not spending six hours hovering over a bowl.
Vital Timing for the Perfect Loaf
Efficiency in the kitchen starts with understanding your timeline. While the total time is 195 minutes, most of that is passive waiting. You can easily fit this into a weekend morning while you're tackling other household tasks or catching up on emails.
The key is to respect the rising times, as whole wheat dough is heavier and takes a bit more effort for the yeast to lift compared to white bread.
| Thickness | Internal Temp | Rest Time | Visual Cue |
|---|---|---|---|
| 9x5 inch Loaf | 190°F (88°C) | 60 minutes | Mahogany brown crust that sounds hollow when tapped |
| Small Rolls | 190°F (88°C) | 15 minutes | Deep golden brown and firm to the touch |
| Sandwich Rounds | 190°F (88°C) | 20 minutes | Lightly browned and springy when pressed |
To keep things moving, I always recommend melting your 30g of unsalted butter right when you start soaking the seeds. By the time the yeast is foamy and ready, the butter will have cooled enough so it won't kill the temperature of your dough. This kind of streamlining ensures you aren't waiting on individual components. If you're looking for a different challenge once you've mastered this, you might enjoy the patience required for a rustic sourdough bread recipe which uses a natural starter instead of commercial yeast.
Choosing Your Whole Grain Bread Components
Understanding why we use specific ingredients is the difference between following a recipe and actually knowing how to bake. Whole wheat flour contains the entire grain, including the bran and germ. The bran is the hard outer shell, and in a dough, it acts like tiny shards of glass that can cut through gluten strands.
This is why we don't over knead and why we rely on the honey and butter to help soften that structure.
- Softening the Fiber
- The 45g of oats add a creamy texture to the crumb that balances the coarse nature of the 500g of whole wheat flour.
- Enrichment for Texture
- The 42g of honey provides food for the yeast but also acts as a humectant, which means it helps the bread retain moisture so it doesn't go stale by Tuesday.
- Elasticity Support
- Using fine sea salt instead of coarse salt ensures it dissolves quickly and evenly, which is crucial for controlling the fermentation rate of the 7g of active dry yeast.
| Component | Science Role | Pro Secret |
|---|---|---|
| Whole Wheat Flour (500g) | Structural base and fiber source | Sift it once to aerate if the bag has been sitting for a while |
| Boiling Water (120ml) | Gelatinizes starch in oats | Must be truly boiling to properly soften the flaxseed hulls |
| Honey (42g) | Tenderizer and browning agent | Spray your measuring spoon with oil first so the honey slides right out |
| Sunflower Seeds (30g) | Texture and healthy fats | Toast them for 3 minutes in a dry pan before soaking for more aroma |
The flaxseeds in this recipe are more than just a health add on. When flaxseeds meet water, they create a slight mucilage, a gel like substance that helps bind the crumb together. This is especially helpful in a simple whole wheat bread recipe where the gluten might be a bit weaker than in white bread.
It adds a subtle "bounce" to the slice that keeps it from being too crumbly.
Streamlining Your Kitchen Tool Selection
You don't need a counter full of specialized appliances to make a great healthy whole wheat bread. I prefer a large, heavy glass or ceramic mixing bowl for the dough because it retains heat better than metal, which helps the 90 minute first rise stay consistent.
A 9x5 inch metal loaf pan is the standard here, providing the right height for a classic sandwich slice.
If you have a stand mixer, by all means, use it to handle the kneading. It makes the process much more efficient and ensures a consistent stretch in the dough. However, doing it by hand is a great way to feel the changes in the dough's elasticity.
You'll notice it goes from a "shaggy" mess to a smooth, slightly tacky ball. For those who prefer a set it and forget it approach, many whole grain bread machine recipes follow similar ratios, though you would skip the manual shaping and let the machine handle the 40 minute bake.
Executing the Whole Grain Bread Method
Start by prepping your seed mix. Combine 45g oats, 30g sunflower seeds, and 20g flaxseeds in a small heat proof bowl. Pour 120ml boiling water over them. Note: This 15 minute soak is mandatory for a soft crumb. While that sits, we get the yeast moving.
In your main bowl, whisk 360ml warm water (keep it between 105°F and 110°F), 42g honey, and 7g active dry yeast. Wait 5-8 minutes until you see a foamy, frothy cap.
If it doesn't foam, your yeast might be dead; don't proceed or you'll end up with a flat cracker.
Now, stir in 30g of melted butter, 10g fine sea salt, and about 250g of the whole wheat flour. Stir this into a thick paste. Note: This partial mixing helps the flour hydrate before the heavy seeds are added. Fold in your soaked seed mixture along with any remaining water in that bowl.
Gradually add the remaining 250g of flour. Knead the dough for about 8-10 minutes by hand or 5-6 minutes in a mixer until it feels smooth and elastic. It should pull away from the sides of the bowl but still feel slightly tacky to the touch.
Managing the Rise and Bake
Place your dough in a lightly greased bowl and cover it with a damp cloth or plastic wrap. Let it rise in a warm, draft free spot for 90 minutes or until it has clearly doubled in size. Gently deflate the dough by pressing your fist into the center.
Shape it into a neat log and tuck it into your greased 9x5 inch pan. Let it rise again for 45 minutes; it should crown about an inch above the rim of the pan.
Heat your oven to 375°F (190°C). Slide the pan onto the center rack. Bake for 40 minutes until the crust is a deep mahogany brown. If you have an instant read thermometer, aim for an internal temperature of 190°F.
Remove the loaf from the pan immediately and let it cool on a wire rack for at least an hour. Cutting into hot bread releases the steam too quickly, which can result in a gummy, undercooked texture.
Fixing Crumb Density and Rising Issues
The most common complaint with homemade whole wheat bread recipes is that the loaf didn't rise enough. Usually, this comes down to the temperature of the water used for the yeast. If it's too hot (over 120°F), you'll kill the yeast. If it's too cold, they stay dormant.
Investing in a cheap digital thermometer is the best way to streamline your success and avoid wasted ingredients.
Why Your Bread Is Too Dense
A heavy, lead like loaf is often the result of using too much flour. Whole wheat flour is very absorbent, but it takes time for that absorption to happen. If you keep adding flour because the dough feels sticky, you'll end up with a dry mess. Trust the kneading process to develop the structure.
Another culprit is old yeast. Check the expiration date; yeast is a living organism, and it won't perform if it's past its prime.
| Problem | Root Cause | Solution |
|---|---|---|
| Loaf is heavy and flat | Water was too hot or yeast was old | Check water temp (105-110°F) and test yeast in sugar water first |
| Crust is too hard/thick | Oven was too cold or baked too long | Calibrate oven with a thermometer and check bread at 35 mins |
| Large holes in the crumb | Over proofing during the second rise | Limit the second rise to exactly 45 minutes or until it just crowns the pan |
Common Mistakes Checklist
- ✓ Never skip the seed soak; dry seeds will dehydrate your dough from the inside out.
- ✓ Use a scale for the 500g of flour; measuring by cups is wildly inaccurate and usually leads to using too much.
- ✓ Don't rush the cooling process; the bread continues to set its structure as it cools.
- ✓ Ensure your honey is at room temperature so it incorporates smoothly into the yeast mixture.
- ✓ Grease your loaf pan thoroughly, including the corners, to prevent the "shatter" of the bottom crust when removing.
Flavor Adaptations for Your Daily Toast
Once you've mastered the base version, you can start experimenting with substitutions. This is a very forgiving whole grain bread, provided you keep the ratios of dry to wet ingredients consistent.
If you want a seeded whole grain bread with a different profile, try swapping the sunflower seeds for pumpkin seeds (pepitas) or even chopped walnuts for a richer, more festive feel.
| Original Ingredient | Substitute | Why It Works |
|---|---|---|
| Honey (42g) | Maple Syrup (42g) | Similar sugar content and viscosity. Note: Adds a distinct autumnal flavor profile. |
| Melted Butter (30g) | Coconut Oil (30g) | Maintains the fat ratio. Note: Adds a very subtle tropical scent. |
| Sunflower Seeds (30g) | Toasted Sesame Seeds (30g) | Provides a smaller, crunchier texture and an intense savory aroma. |
If you're looking for a dessert style twist, you could even pair this with a classic buttery pecan pie recipe for a holiday spread. While they are very different bakes, the nutty notes in this bread complement the rich, caramelized flavors of the pecans beautifully. Just remember that adding heavy inclusions like dried fruit might require an extra 5-10 minutes of baking time.
Efficiency in Keeping Your Bread Fresh
Because this is a high fiber bread recipe without chemical preservatives, it won't last two weeks on the counter like a store-bought loaf. However, the honey and the seed soak give it a much longer shelf life than a standard white loaf.
Keep it in a paper bag for the first 24 hours to maintain the crust, then move it to an airtight container or a bread box to prevent it from drying out.
Stovetop vs Oven Comparison
While most of us default to the oven, you can actually bake bread in a Dutch oven on the stovetop if you're in a pinch (like during a renovation), though it's much harder to control.
| Method | Time | Texture | Best For |
|---|---|---|---|
| Standard Oven | 40 minutes | Even browning, consistent crumb | Everyday sandwich bread |
| Dutch Oven (Oven) | 45 minutes | Extra crispy "artisan" style crust | Soup dipping and toast |
| Stovetop (Dutch) | 50-60 mins | Irregular crust, softer top | Camping or emergency baking |
- Fridge
- Don't do it! The refrigerator actually accelerates the staling process (retrogradation) of bread.
- Freezer
- Slice the loaf first, then freeze for up to 3 months. You can toast individual slices directly from the freezer.
- Zero Waste
- If the end of the loaf gets too hard, don't toss it. Pulse it in a blender for the best whole grain breadcrumbs you've ever had, or cut it into cubes for savory croutons.
Smart Serving Suggestions for Every Meal
This bread is a workhorse. For breakfast, a thick slice toasted with almond butter and sliced bananas provides a slow release energy boost. For lunch, it's the ultimate vessel for a turkey and avocado sandwich, where the seeds provide a nice contrast to the creamy toppings.
If you're hosting a dinner, serve it warm with a high-quality salted butter or a dip of balsamic vinegar and olive oil.
The tight crumb also makes it excellent for French toast. Because it's a bit sturdier than white bread, it can soak up more of the egg mixture without falling apart. For a sophisticated snack, try it topped with ricotta cheese, a drizzle of honey, and a sprinkle of sea salt.
The earthiness of the whole wheat pairs beautifully with the tangy cheese.
Bread Myths Debunked
- "Kneading longer always means better bread": Not true for whole wheat. Because the bran can cut the gluten, over kneading can actually lead to a shorter, denser loaf. Stop once it's smooth and elastic.
- "Sugar/Honey is only for flavor": In this recipe, the honey is crucial for the 7g of yeast to produce enough CO2 to lift the heavy 500g of whole wheat flour. It's functional, not just a sweetener.
- "The crust is hard because I overbaked it": Often, a hard crust is actually caused by a lack of moisture in the oven. If you want a softer crust, you can brush the top with a little extra melted butter immediately after it comes out of the oven.
By focusing on these streamlining techniques like the seed soak and precise temperature control you’ll find that making your own Whole Grain Bread becomes a simple, rewarding part of your weekly routine.
It’s about working smarter in the kitchen to get those high-quality, healthy results we all want. Now, let's get that oven preheated and start baking!

Recipe FAQs
Which breads are actually whole grain?
Look for "whole wheat flour" as the first ingredient on the label. Avoid anything labeled "wheat flour" or "enriched flour," as these are typically refined and lack the nutrient dense germ and bran found in our whole grain recipe.
What bread is best for GERD?
Choose low-fat, simple whole grain breads without added seeds or excess oil. While this recipe uses butter and seeds, you can omit the sunflower and flaxseeds to create a simpler loaf that is gentler on the digestive tract.
What kind of bread can I eat on Daniel Fast?
Select breads made strictly from whole grains, water, salt, and natural leavening. Since the Daniel Fast prohibits sweeteners like honey and added fats like butter, you would need to omit those specific ingredients from our list to make the loaf compliant.
Is whole grain bread good for diabetics?
Yes, it is generally better than white bread due to the higher fiber content. The fiber from the whole wheat flour and seeds helps slow the absorption of glucose, leading to a more stable blood sugar response.
How to ensure the loaf isn't dry?
Soak the oats, sunflower seeds, and flaxseeds in boiling water for 15 minutes before adding them to the dough. If you enjoyed learning how to manage moisture through soaking here, you can see how we apply similar hydration logic to create the perfect texture in our Colombian Empanadas.
Is it true I must knead the dough for an hour to get it smooth?
No, this is a common misconception. Kneading the dough until it becomes smooth and elastic usually takes only 10 to 15 minutes by hand; over kneading can actually damage the gluten structure you are trying to build.
How to tell when the bread is done baking?
Check that the internal temperature reaches 190°F using a digital thermometer. The crust should also be a deep mahogany brown color, and the loaf should sound hollow when tapped on the bottom.
Seeded Whole Grain Bread
Ingredients:
Instructions:
Nutrition Facts:
| Calories | 181 calories |
|---|---|
| Protein | 5.8 g |
| Fat | 4.6 g |
| Carbs | 31.2 g |
| Fiber | 4.8 g |
| Sugar | 3.5 g |
| Sodium | 281 mg |
