Nobake Peanut Butter Pie: the Ultimate Recipe for Silky, Creamy Perfection

- Introducing the Ultimate Silky No-Bake Peanut Butter Pie
- Achieving the Velvet Texture: The Science Behind a Stable Peanut Butter Filling
- What You Need: Essential Ingredients for Your No-Bake Peanut Butter Pie
- Mastering the Method: Step-by-Step Guide to Assembling Your Pie
- Troubleshooting and Chef’s Secrets for the Best No-Bake Peanut Butter Pie
- Keep It Fresh: Storage and Freezing Instructions
- Perfect Presentation: Garnishes and Serving Suggestions
- Recipe FAQs
- 📝 Recipe Card
Introducing the Ultimate Silky No-Bake Peanut Butter Pie
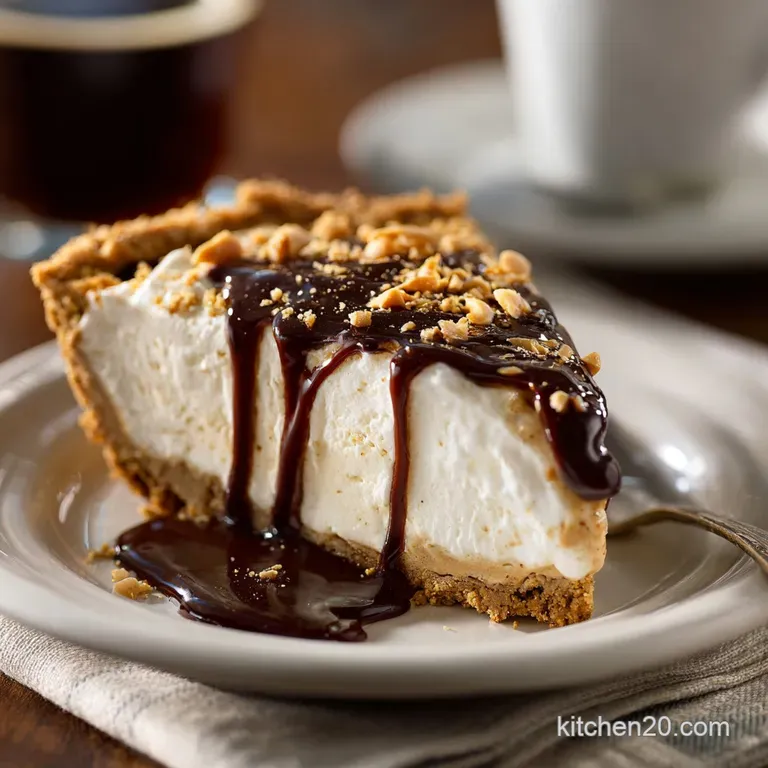
Oh my goodness, you guys. The moment you spoon into this Old Fashioned Peanut Butter Pie Recipe (No-Bake, Ultra Creamy) , you understand why this dessert is a legend. It’s that perfect trifecta: a deep, dark chocolate crust supporting an impossibly fluffy filling that tastes intensely of roasted peanuts.
The texture is key here; it needs to be light and airy, yet firm enough to hold a clean slice every single time.
This NoBake Peanut Butter Pie is the absolute summer lifesaver, genuinely. No need to heat up the house by turning on the oven, and the prep takes maybe 20 minutes if you’re moving slow.
It’s ridiculously easy, it’s cheap to make, and it delivers maximum nostalgia points at any gathering. Seriously, why bake when you can just chill?
I’ve made versions of this easy peanut butter pie with gelatin, with pudding, and even with weird meringue attempts but this formula, using stabilized cream cheese and real whipped cream, is the keeper. It delivers the ultra creamy, light fluffiness we crave.
Let’s crack on and get this stunning dessert chilling in the fridge, stat!
Achieving the Velvet Texture: The Science Behind a Stable Peanut Butter Filling
Why This Pie is the Perfect Summertime Dessert
When the humidity hits, the thought of standing in front of a hot oven makes me want to weep. That’s why a chilled dessert is the only way to go. This Easy Peanut Butter Pie manages to be rich and satisfying without feeling heavy, which is exactly what we need when the temperatures soar.
Plus, prepping ahead means zero stress on party day.
The History of the American Diner Peanut Butter Pie
This recipe screams classic American diner, doesn’t it? These types of no-bake desserts became popular post WWII, especially when iceboxes and refrigeration became common household items. They’re based on the simplicity of accessible ingredients: sugar, cream, and pantry staples like peanut butter and cookies. It’s comforting food history right there on your plate. If you love that old-school vibe, you might also enjoy my take on the Amish Peanut Butter Cream Pie Fluffy, Ultra Creamy No-Bake Recipe .
Quick Glance: Prep Time vs. Chill Time
Don't panic about the timeline. Your hands-on work is under 30 minutes, which is nothing. The magic happens during the chill time. Rushing this step is the number one rookie error. Be patient, please!
The Role of Cream Cheese vs. Stabilized Whipped Cream
Here’s the simple science: the heavy cream gives you that glorious airiness and fluffiness. But whipped cream on its own tends to weep and deflate quickly. We use full fat cream cheese as the anchor.
It contains stabilizers and solid fats that, once chilled, lock the air bubbles in place, ensuring the pie is perfectly scoopable, not runny. It’s the secret sauce for an amazing, set-up pie!
Choosing the Best Peanut Butter Consistency (Creamy vs. Natural)
Listen, I love natural, oily peanut butter as much as the next person, but it is the enemy of stability in this recipe. Natural peanut butter separates too easily and has a thinner consistency, making it harder for the fats in the cream cheese to bind to it.
Always choose classic, smooth, shelf stable peanut butter for the best structural integrity and creamiest finish.
Why a Dark Chocolate Crust Elevates the Flavor Balance
A plain graham cracker crust is nice, sure, but a dark chocolate sandwich cookie crust is a game changer. The subtle bitterness of the chocolate cuts through the intense sweetness and richness of the peanut butter filling. It adds depth and sophistication to this simple dessert.
What You Need: Essential Ingredients for Your No-Bake Peanut Butter Pie
Detailed Ingredient Notes: Full Fat Cream Cheese is Non-Negotiable
Seriously, skip the low-fat stuff. If you use reduced fat cream cheese, you’re sacrificing the essential fat content needed to stabilize the filling. It simply won’t set as firmly, and we want a sturdy slice. Ensure it is completely soft room temperature means room temperature .
Finding the Best store-bought or Homemade Chocolate Crust
While making the crust is easy, a high-quality pre-made chocolate crust works perfectly well in a pinch. If you make it yourself (and I recommend you do!), make sure those cookies are blitzed into super fine crumbs. Big chunks mean a crumbly, loose crust.
Smart Swaps: Substituting Whipped Topping for Heavy Cream
You absolutely can use an 8 ounce tub of store-bought whipped topping (like Cool Whip) instead of whipping heavy cream from scratch. It saves time and often adds even more stability to the filling due to its pre-stabilized nature. Just make sure it’s thawed completely before folding it in.
| Ingredient | My Recommendation | Viable Substitution |
|---|---|---|
| Cream Cheese | Full Fat, Block Style | Mascarpone Cheese |
| Peanut Butter | Smooth, Shelf Stable | Crunchy (if you don't mind texture) |
| Heavy Cream | Cold Double Cream | Thawed Whipped Topping (Cool Whip) |
| Crust Base | Chocolate Sandwich Cookies | Graham Crackers or Vanilla Wafers |
Mastering the Method: step-by-step Guide to Assembling Your Pie
Step 1: Blending the Crust Base (Avoiding Crumble Issues)
First, get your crust ready! Pulse your cookies into dust not pebbles, dust. Then mix in the melted butter until it looks like wet sand. The crucial step is pressing it firmly. Use the bottom of a measuring cup to compact it into the pie plate, especially up the sides.
A well pressed crust won't fall apart when you slice the pie later.
Step 2: Whipping the Peanut Butter Mixture Until Light and Fluffy
We need two stages here:
- Creaming: Beat the softened cream cheese and the peanut butter together until it is perfectly smooth. Any lumps here will remain lumps in the finished pie. Then beat in the sugar.
- Folding: Whip your heavy cream until stiff peaks form. Then, gently, gently fold the whipped cream into the peanut butter mixture using a rubber spatula. Don't stir aggressively! You’ll knock all the air out. You want to see the color change and no streaks of cream remaining. This folding action is what gives you the light, fluffy texture.
Chef's Note: I once aggressively stirred the whipped cream into the peanut butter base thinking it would save time. Nope. It resulted in a dense, sad, deflated pie that didn't slice well at all. Fold with patience.
Step 3: Achieving a Smooth Transfer and Clean Slice
Spoon the lightened filling into your prepared crust and smooth the top with an offset spatula. I like to use a clean spatula dipped in hot water to get a glassy smooth finish before chilling.
The Critical Importance of the Final Chill Time
If I could yell this through your phone, I would: DO NOT RUSH THE CHILL TIME. Four hours is the bare minimum, especially if using a glass or ceramic dish. Overnight is truly best.
The cold temperature is what causes the fats in the cream cheese and peanut butter to solidify, setting the pie structure. A properly chilled pie cuts cleanly, guaranteeing perfect slices every single time.
Troubleshooting and Chef’s Secrets for the Best No-Bake Peanut Butter Pie
Mistake to Avoid: Over Whipping the Cream
If you whip the heavy cream past the stiff peak stage, you risk turning it into butter, or at least a grainy mess. When you fold grainy cream into the filling, you lose that cloud like texture. Watch your mixer carefully; stop right when the peaks stand straight up.
Pro Tip: Scraping Down the Bowl is Crucial for Homogeneity
When creaming the peanut butter and cream cheese, stop the mixer and scrape down the sides of the bowl at least twice . This ensures every bit of cream cheese is incorporated, preventing hidden pockets of unmixed ingredients that result in a spotty texture.
How to Fix a Filling That Isn’t Setting Firmly
Did you pull it out after only three hours and it’s still jiggly? Pop it back in! Did you use low-fat cream cheese or natural peanut butter? If so, you might have to salvage it by freezing it solid and serving it frozen like an ice cream cake.
Next time, choose full fat ingredients and ensure your measurements are precise, especially the cream cheese.
Keep It Fresh: Storage and Freezing Instructions
Optimal Fridge Storage Duration
This NoBake Peanut Butter Pie holds up beautifully in the refrigerator. Cover it loosely with plastic wrap or a pie dome, and it will stay fresh and set for up to 5 days. After day five, the crust starts to soften noticeably, although the flavor is still great.
Can You Freeze No-Bake Peanut Butter Pie?
You bet! This is one of the best desserts to freeze. Make the pie exactly as directed, skip the final whipped cream garnish, and let it chill fully first. Then wrap the entire pie (in its dish) tightly in several layers of plastic wrap, followed by a layer of foil.
Thawing Frozen Pie for the Best Texture
It will keep in the freezer for about 1 to 2 months. To serve, transfer the frozen pie (still wrapped) directly to the refrigerator and let it thaw slowly overnight (about 8- 10 hours). Do not thaw it on the counter, as this results in condensation and a soggy crust.
Garnish with fresh whipped cream and peanuts only after it has fully thawed.
Perfect Presentation: Garnishes and Serving Suggestions
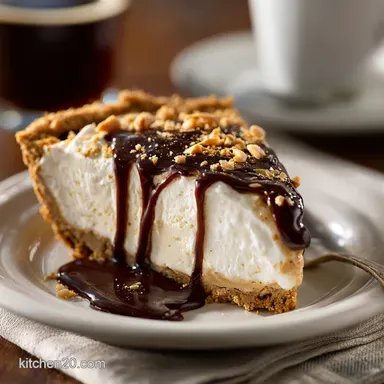
Presentation is key, even for an easy recipe like this! I always recommend an extra dollop of fresh whipped cream, which contrasts beautifully against the intense peanut butter filling.
- Chopped Salted Peanuts: Sprinkle these right before serving for a welcome salty crunch.
- Chocolate Drizzle: Melt a few squares of good dark chocolate or use a simple chocolate syrup for an artistic finish.
- Peanut Butter Cups: Halve mini peanut butter cups and arrange them around the edge for maximum visual appeal.
Serve slightly chilled, but not ice cold, so the flavor really pops. A little vanilla bean ice cream on the side never hurts either!

Recipe FAQs
Why is my peanut butter filling runny or weeping?
This is usually due to insufficient chilling time or not whipping the heavy cream to firm peaks before folding it into the peanut butter mixture. Ensure both the cream cheese and heavy cream are very cold before you start, and make sure the mixture chills for the full recommended time, ideally overnight.
Can I make this pie dairy-free or vegan?
Yes, absolutely. Substitute the cream cheese with a high-quality vegan cream cheese block and use chilled full fat coconut cream (the solidified layer from a can) in place of heavy whipping cream. Ensure your chocolate cookie crust uses vegan butter or vegetable oil as a binder.
How long does the pie truly need to set before slicing?
While the pie is generally set enough to slice after 4 hours, for the cleanest, most professional looking slices, allow it to chill for a minimum of 6 hours, or preferably overnight. This extended time fully stabilizes the whipped cream and fat structures within the filling.
Can I freeze the whole pie or leftovers?
Yes, this pie freezes exceptionally well due to the stable filling. Cover the pie tightly with plastic wrap, followed by a layer of aluminum foil, and it will keep well for up to two months. Thaw it slowly in the refrigerator for 8 12 hours before serving to maintain the creamy texture.
What type of peanut butter should I use for the best results?
We highly recommend using classic, shelf stable creamy peanut butter (like Jif or Skippy). Natural peanut butter that requires stirring often separates oils and moisture, which can prevent the filling from achieving that necessary thick, stable, and velvety consistency.
My filling tastes heavy or too sweet. How do I balance the flavor?
The rich flavors need acidity and salt for balance. If your filling is overly sweet, try adding a small pinch more salt to enhance the peanut flavor, or a tiny squeeze of fresh lemon juice to brighten the overall profile and cut the richness.
I don't like chocolate. Can I use a graham cracker crust instead?
Absolutely; graham cracker is a fantastic, classic pairing with peanut butter. Use the same basic binding ratio (melted butter and sugar) to ensure the crust is pressed firmly into the pan, and chill it completely before adding the pie filling.
Silky No Bake Peanut Butter Pie
Ingredients:
Instructions:
Nutrition Facts:
| Calories | 600 kcal |
|---|---|
| Fat | 48 g |
| Fiber | 4 g |
