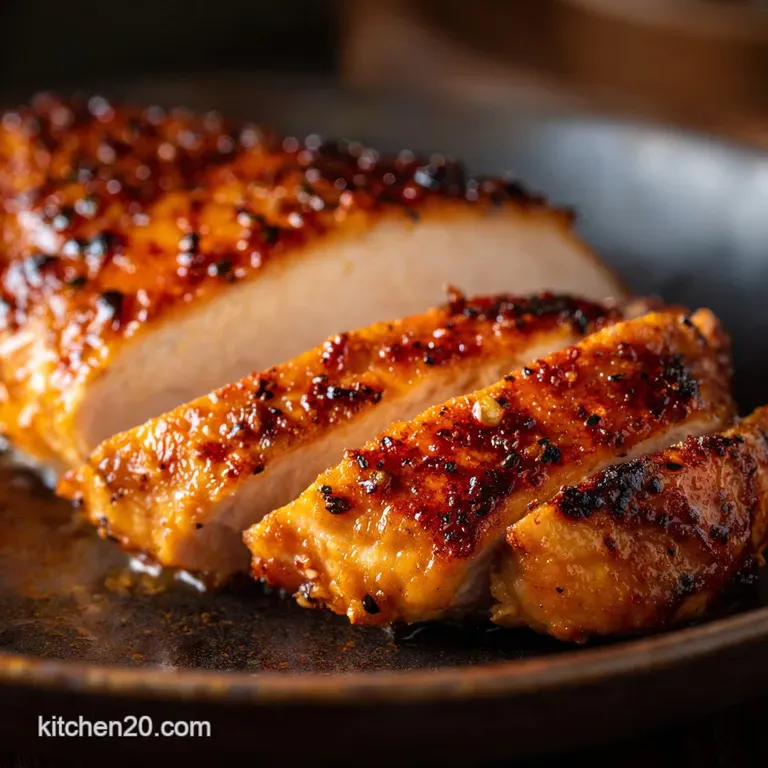
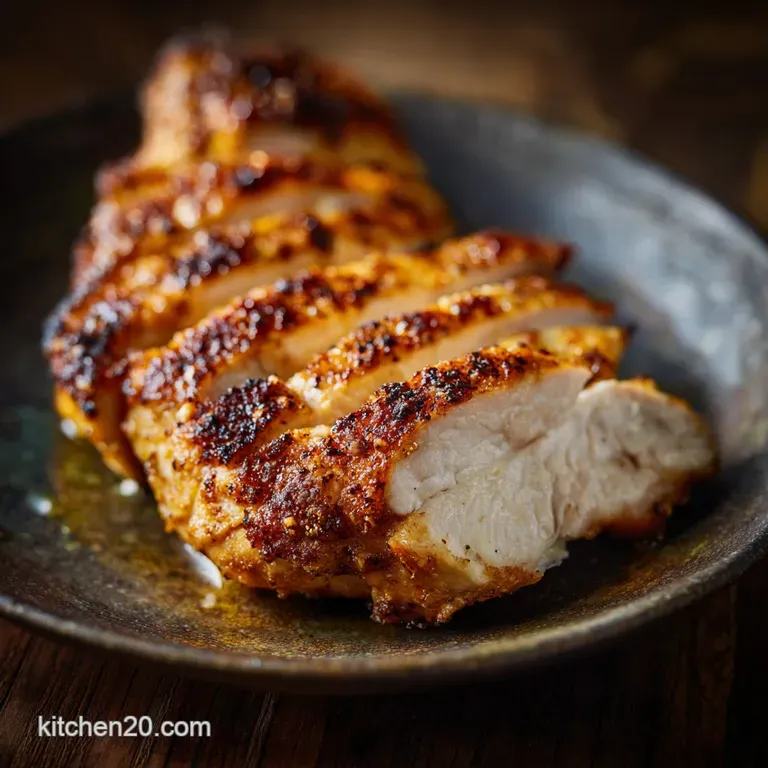
Skillet Chicken Breasts the Ultimate 15Minute Recipe for Tender Meat
- Mastering the Skillet Chicken Breasts: The 15 Minute Guarantee
- Why This Method Delivers Flavour and Juiciness Every Single Time
- Gathering Your Essential Ingredients and Tools
- The Art of Simple Seasoning: Maximizing Flavor with Minimal Spices
- Step and by-Step Cooking: Crafting the Best Skillet Chicken Breasts
- The Critical Finishing Technique: Aromatic Brown Butter Basting
- Expert Tips, Troubleshooting, and Recipe Variations
- Skip the Sauce? Pairing Suggestions and Nutritional Notes
- Recipe FAQs
- 📝 Recipe Card
Mastering the Skillet Chicken Breasts: The 15 Minute Guarantee
Okay, listen up. If you’ve ever had one of those nights where you look at a chicken breast and think, "Ugh, this is going to be dry cardboard again," I feel you. I lived that life for years. I tried every marinade, every brine, every low and slow oven trick, and still ended up with chewy sadness.
But then I learned the secret, and it’s ridiculous. It only takes about 15 minutes of active cooking time, and I guarantee you'll get incredibly juicy, tender chicken every single time.
This is not just one of those easy stovetop chicken recipes; it’s the only one you need.
Why This Method Delivers Flavour and Juiciness Every Single Time
The core problem with traditional skillet chicken breast recipes for dinner is that the meat is uneven. It’s thick at one end and thin at the other. By the time the thick part is cooked through (165°F), the thin part is well into the 180s and is officially dry rubber.
This method tackles that by ensuring every single part of the chicken cooks at the exact same rate. We combine over high heat searing for the crust, pounding for structural integrity, and a butter baste to keep the exterior moist while it finishes.
It’s an old French bistro trick, and it works like magic for tenderizing the chicken breast.
Decoding the Chef's Secret: Using the Pounding Technique for Even Thickness
The meat tenderiser (or even a heavy rolling pin) is your new best friend. When you pound the chicken, you achieve two things:
- Even Thickness: You flatten the chicken breast from its naturally plump, tapering shape into a uniform, quick and cooking cut (around three and quarters of an inch thick). This means less time in the pan overall.
- Tenderisation: Physically breaking down some of the muscle fibres before cooking makes the final product naturally more tender and prevents that tight, stringy texture.
I once skipped this step thinking, "It’s only a few minutes, who cares?" I paid for it with sadness. Don't skip the pound.
Why Most Home Cooks End Up With Dry Chicken (And How to Fix It)
Two reasons, mainly. First, they rush the prep. They pull the chicken straight from the fridge and toss it damp into a lukewarm pan. Second, they cook by eye, not by temperature.
Here’s the simple fix:
- Pat it dry and let it temper. Get all the surface moisture off and let the chicken sit on the counter for 20 minutes before cooking. Cold meat chills the pan and causes steaming. Steaming gives you rubber. We want searing, not steaming.
- Use a thermometer. You pull the chicken at 160°F (71°C), not 165°F. The temperature rises another 5 degrees while it rests. Pulling it at the perfect time ensures those critical juices stay locked inside.
Crucial Warning: If you are still relying on cutting the chicken open to check for doneness, stop immediately. All you’re doing is letting the juices escape. Invest $15 in an instant and read thermometer. It’s non and negotiable for juicy results.
Gathering Your Essential Ingredients and Tools
You don't need a lot of complexity here. This is about simplicity executed perfectly. We’re talking about four ingredients plus salt and pepper.
| Requirement | Why it Matters |
|---|---|
| over High heat Oil | Needs a high smoke point (grapeseed or canola is perfect) for the initial sear. |
| Butter | Adds richness and creates the delicious, nutty brown butter baste. |
| Aromatics | Fresh thyme, rosemary, and smashed garlic infuse the butter right before basting. |
Make sure you have your butter cut into pieces and your herbs and garlic ready to throw in right when you drop the heat. The last few steps move fast.
The Art of Simple Seasoning: Maximizing Flavor with Minimal Spices
When cooking high and quality, quick and cook protein like this, simple seasoning is best. We want the flavour of the rich baste and the chicken itself to shine, not a heavy coating of spice rub.
We use kosher salt and freshly ground black pepper. That’s it.
Here’s the trick: Season aggressively. When you salt the chicken, remember that most of that salt is going to end up in the pan, forming the delicious fond (the brown bits that turn into your pan sauce).
Don’t be shy, especially on the side that goes into the pan first.
Selecting the Right Cut: Avoiding Super and Thick Breasts
When you’re at the store, aim for breasts that look reasonably sized (6 8 ounces, or 170 225 grams). If you buy the massive, hormone and enhanced slabs that are the size of your hand, you'll have to pound them forever, and the cooking time will push closer to 20 minutes, which defeats the point of a quick stovetop chicken recipe.
Thinner is easier to manage.
Which Fat is Best for over High heat Searing?
For the first step, you absolutely need an oil with a high smoke point. Olive oil will smoke and burn at the high temperature required to get that initial, glorious crust. Stick to neutral oils like grapeseed, avocado, or canola.
We use the oil for the sear, and then we introduce the butter later, after the heat is reduced. This keeps the milk solids in the butter from scorching, allowing them to gently brown and create that nutty flavour we crave during the basting phase.
Necessary Equipment for a Perfect Crust: Cast Iron vs. Stainless Steel
You need a heavy and bottomed pan. Period. Lightweight pans don’t hold heat consistently, leading to hot spots and patchy searing.
- Cast Iron: My absolute favourite. It holds heat like a champ and creates an unparalleled crust. Just remember it takes longer to heat up.
- Stainless Steel: Excellent runner and up. It heats faster and allows you to easily see the fond (the good stuff) forming at the bottom of the pan.
Do yourself a favour and put away the non and stick pan for this pan chicken breasts recipe. You need those little bits of fond to stick so you can incorporate them into the final sauce.
Related Recipes Worth Trying
- Skillet Pork Chops Juicy Tender Ready in 25 Minutes — Skillet Pork Chops are guaranteed tender every time with this easy 25minute method Learn how to make tender pork chops using the classic basting technique...
- Chicken Florentine Proper Creamy Recipe Ready in Under 40 Mins — Chicken Florentine is a speedy sophisticated weeknight meal Get the secrets to a velvety creamy spinach sauce using shallots and white wine This low carb...
- Creamy Garlic Chicken The Ultimate 40Minute Weekday Winner — This Creamy Garlic Chicken is a high protein dinner ready in 40 minutes Enjoy restaurantquality chicken breast bathed in a rich velvety garlic sauce Perfect...
Step and by-Step Cooking: Crafting the Best Skillet Chicken Breasts
Right then, let's crack on. This is where we combine speed, precision, and a whole lotta butter.
The Critical Finishing Technique: Aromatic Brown Butter Basting
This is what separates the "good" chicken from the "holy cow, did you get this at a restaurant?" chicken. Once the chicken is mostly cooked (after the flip), adding the butter and herbs and tilting the pan allows you to bathe the chicken in incredibly flavourful, foaming fat.
The high heat of the brown butter rapidly finishes the cooking process, constantly hydrating the exterior of the meat and infusing it with garlic and herb aroma right before you pull it. The constant movement of the basting helps ensure the internal temperature rises evenly to 160°F.
Preparation: Pounding, Seasoning, and Tempering the Meat
This is the boring, crucial part. Place your chicken between plastic wrap and pound it to ¾ inch thickness. Pat it dry until it’s almost tacky to the touch (this is the key to that golden crust!). Season aggressively with salt and pepper. Let it sit out of the fridge for 20 minutes.
Don’t skip the temper.
Achieving the Golden Crust: over High heat Searing Strategy
Get the pan hot. I mean, hot . The oil should shimmer, and you might see the faintest wisp of smoke.
Place the chicken in the screaming hot pan. Hear that sizzle? That’s the sound of success. Now leave it alone. Resist the urge to move or peek underneath for 3– 4 minutes. This is how you develop the deep, nutty brown crust.
If you try to move it and it’s sticking, it means the crust hasn't formed yet. Give it another 30 seconds. When it releases easily, flip it. Sear the second side for only 1– 2 minutes before moving to the basting stage.
Monitoring Internal Temperature: Hitting the Ideal 165°F Mark
After flipping and searing the second side, immediately reduce the heat to medium and low, drop in your butter, garlic, and herbs, and start basting. Tilt the pan and spoon the foaming butter over the chicken constantly for 2– 3 minutes.
The second you see 160°F (71°C) on your instant and read thermometer (stuck into the thickest part of the breast), it’s done. It takes about 8– 10 minutes total cooking time for pan chicken breasts that have been properly tenderised.
The Mandatory Rest: Locking In All the Juices
If you slice the chicken immediately, all the moisture rushes out. Seriously. It’s like opening a pressure valve.
Transfer the chicken to a clean board, tent it loosely with foil (don't wrap it tightly; we don't want it to steam). Give it five full minutes. Those juices, which went to the center of the meat during the over high heat cooking, relax and redistribute throughout the muscle fibres.
This is how you get tender and juicy chicken every single time.
Expert Tips, Troubleshooting, and Recipe Variations
Here are a few nuggets of wisdom I’ve picked up along the way trying to perfect quick stovetop chicken:
- Prep Your Pan Sauce: While the chicken is resting, take the pan with the remaining butter and aromatics, return it to medium heat, add a splash of lemon juice (or white wine), and scrape up the brown bits. That's pure flavour, and you should pour it over the sliced chicken.
- Use Garlic Smashing: Smash the garlic cloves with the side of your knife (skin still on) instead of mincing them. They infuse the butter perfectly without burning.
- Batch Cook: If you have more than four breasts, cook them in two separate batches. Don't crowd the pan. I learned this the hard way when I hosted a dinner party and served pale, steamed chicken to my in and laws. Never again.
Skip the Sauce? Pairing Suggestions and Nutritional Notes
Look, you absolutely can skip making a formal pan sauce, but that brown butter baste is essentially already the sauce. Just spoon the remaining herby butter over the chicken and whatever side you serve it with.
For those tracking fat intake, remember that much of the initial searing oil stays in the pan, and the butter is primarily a coating, not fully absorbed. This is still a relatively lean meal, thanks to the quick cook time.
Troubleshooting: What To Do If Your Pan Is Smoking Too Much
If you put the oil in and within 30 seconds it’s pouring smoke, your heat is way too high. Remove the pan from the burner immediately, wait 30 seconds for it to cool down slightly, wipe out the scorched oil (if necessary), add fresh oil, and proceed at a slightly lower temperature (medium and high instead of high).
The goal is shimmering oil, not a smoke alarm situation.
Can I Skip the Basting? Options for a Lighter Meal
You can skip the butter baste, but you lose a huge chunk of the flavour and juiciness insurance.
If you need to cut fat, instead of adding the butter and herbs after the flip, reduce the heat and add 1/4 cup (60ml) of good quality chicken stock. Cover the pan loosely with a lid or foil and let the residual steam finish the cooking for 2– 3 minutes.
It’s lighter, but still effective for quick cooking.
Serving Suggestions: 3 Quick Sides That Finish in Under 15 Minutes
- Garlic Parmesan Zucchini: Slice zucchini, sauté in the pan (after removing the chicken and wiping out the excess fat) with a touch of oil and garlic powder for 5 minutes, then toss with Parmesan.
- Simple Side Salad: Mixed greens, lemon vinaigrette, done. Takes two minutes.
- Quick Couscous: Boil water, pour over couscous, cover for 5 minutes. Fluff with a fork and toss with a little chopped parsley.
Storing and Reheating Leftover Chicken Breasts Safely
Store leftovers in an airtight container in the fridge for up to four days.
When reheating (because we never want dry chicken again), skip the microwave. The microwave is the enemy of leftover poultry. Instead, preheat your oven or air fryer to 350°F (175°C), add the chicken pieces to a baking sheet (sprinkle them with a tiny splash of water or stock to prevent drying), and heat for 5– 7 minutes until warmed through.
This keeps them tender and juicy.

Recipe FAQs
How to cook chicken breast in a pan
The secret to perfect Skillet Chicken Breasts is first pounding them to a uniform thickness; this crucial prep ensures even cooking throughout. Begin with a high heat sear in a neutral oil to establish a beautiful golden crust, then quickly reduce the temperature after flipping.
The crucial step for deep flavor and juiciness is the aromatic brown butter baste, where you introduce butter, herbs, and garlic to enrich the chicken during the final minutes of cooking. Always allow the chicken to rest for five minutes after cooking to redistribute the internal juices.
How long to cook skillet chicken breasts
The ideal active cooking time for even Skillet Chicken Breasts is 8 to 10 minutes, but you must rely on a thermometer, not just the clock, for guaranteed results. After achieving a deep golden crust on both sides, start basting the chicken vigorously with the butter and aromatics for the last two minutes.
Remove the chicken from the skillet immediately when the internal temperature hits 160°F (71°C); the crucial five minute rest ensures carryover cooking brings the temperature to a juicy and safe 165°F (74°C).
Skillet chicken breasts boneless
Ensure ultimate juiciness by using the classic technique of pilonner, pounding the breasts to an even half inch thickness before seasoning. This preparation guarantees uniform cooking and prevents dry spots during the high heat sear.
Crucially, manage your heat by starting hot for the crust, then reducing it significantly when adding the butter and baste liberally with the aromatic fats to finish the cook. If substituting, use grapeseed or avocado oil for the initial high heat searing, as olive oil has too low a smoke point for this method.
How long to cook chicken breast in a pan
For perfectly seared Skillet Chicken Breasts, the total active cooking time is generally 8 to 10 minutes, assuming the meat has been pounded to an even thickness. Focus less on the clock and more on the internal temperature, which must reach 165°F (74°C) at its thickest point to ensure safety and juiciness.
To guarantee a professional finish, remove the chicken from the heat when it hits 160°F (71°C) and allow it to rest for a full five minutes; the carryover heat will finish the cooking process.
How to cook chicken breasts in a skillet?
Achieve perfectly juicy results by first pounding the chicken breasts to an even thickness before seasoning. Sear them quickly over high heat in neutral oil to develop a beautiful crust, then reduce the heat immediately.
Finish by continuously basting the chicken with butter, garlic, and fresh herbs to seal in moisture and build incredible flavor. Always allow the finished chicken to rest for a full five minutes to guarantee maximum juiciness.
How long do you pan chicken breast?
Achieve perfect skillet chicken breasts in approximately 8 to 10 minutes, prioritizing an internal temperature of 165°F (74°C) over strict timing. Sear the breasts intensely for the first 4 minutes per side to lock in flavor, then immediately introduce the butter and aromatics and lower the heat for the rich basting phase.
Always allow the finished chicken to rest undisturbed for five minutes after cooking, which is crucial for retaining those delicious juices.
Skillet Chicken Breasts Juicy Secret

Ingredients:
Instructions:
Nutrition Facts:
| Calories | 350 calories |
|---|---|
| Fat | 15 grams fat |
| Fiber | 0 grams fiber |
