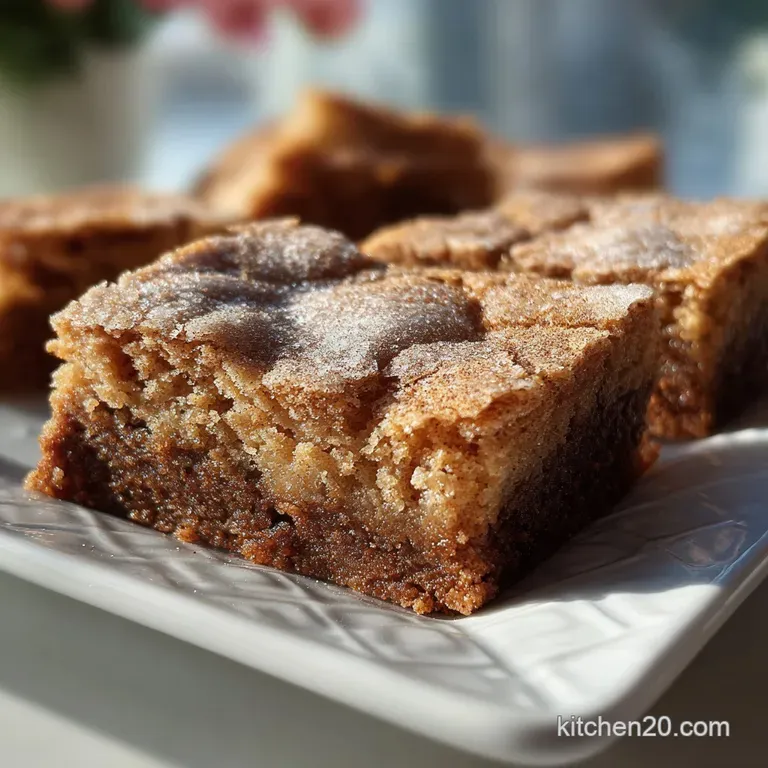
Snickerdoodle Brownies: Cinnamon Spiced

- Time: Active 10 minutes, Passive 25 minutes, Total 35 minutes
- Flavor/Texture Hook: Shatter crisp cinnamon crust with a velvety, buttery center
- Perfect for: Potlucks, cozy weekends, or anyone tired of boring blondies
- Baking the Perfect Chewy Snickerdoodle Brownies
- Why This Recipe Works
- Recipe Performance Metrics
- Choosing The Right Ingredients
- Essential Kitchen Tools
- Step By Step Baking Guide
- Fixing Common Baking Errors
- Customizing Your Batch
- Debunking Common Kitchen Myths
- Keeping Your Brownies Fresh
- Plating Levels For Impact
- Recipe FAQs
- 📝 Recipe Card
Baking the Perfect Chewy Snickerdoodle Brownies
The first time I pulled these out of the oven, the aroma hit me like a warm hug from a long lost friend. There is something about the way cinnamon and melted butter sizzle together that just feels right. I remember standing in my kitchen, watching that thin, sugary crust start to shatter as the knife glided through.
It wasn't just a dessert; it was a revelation in texture that I knew I had to share with our baking community.
We are revolutionizing the way we think about the classic cookie brownie hybrid. Most people settle for cakey bars that lack personality, but we're building a flavor platform that focuses on that specific, fudgy density.
Trust me, once you see that golden, crinkly top emerge from the heat, you'll never go back to the boxed stuff. We've taken the science of a snickerdoodle and connected it with the soul of a brownie.
Why This Recipe Works
The magic here isn't luck; it is pure chemistry working in your favor. By manipulating how the fats and sugars interact, we create a specific structural integrity that stays soft for days.
- The Sugar Shatter: High concentrations of granulated sugar migrate to the surface during baking, creating a thin, crisp lid.
- Tangy Tenderizer: Cream of tartar provides the classic snickerdoodle "zing" while preventing sugar crystallization for a smoother crumb.
- Fat Suspension: Using melted butter instead of creamed butter results in a denser, fudgy texture rather than a light, airy cake.
- Maillard Enhancement: Saigon cinnamon contains higher oil content than standard varieties, intensifying the aromatic profile when heated.
| Method | Time | Texture Result | Best For |
|---|---|---|---|
| Stovetop Butter | 5 minutes | Extra dense, chewy | Maximum fudginess |
| Microwave Butter | 2 minutes | Standard soft crumb | Quick weeknight fix |
| Browned Butter | 10 minutes | Nutty, toasted notes | Gourmet flavor profile |
Choosing the right method for melting your butter changes the entire moisture profile of the bar. While the microwave is fast, the stovetop allows for better heat control, ensuring the butter doesn't break its emulsion before hitting the sugar. This is very connected to the technique we use in The Fudgy Mochi recipe to ensure a consistent chew.
Recipe Performance Metrics
To get the most out of this baking platform, you need to hit specific precision checkpoints. Guesswork is the enemy of a perfect bake, so we focus on weight and temperature to ensure every batch is a success.
| Component | Science Role | Pro Secret |
|---|---|---|
| Light Brown Sugar | Adds moisture and chew | Pack it tight for consistent density |
| Cream of Tartar | Provides acidity and tang | Never skip it; it's the snickerdoodle DNA |
| Saigon Cinnamon | High impact aromatics | Use a fresh jar for the best "sizzle" |
| Large Eggs | Protein structure | Use room temp to avoid seizing the butter |
Using room temperature eggs is one of those small changes that yields a massive difference. Cold eggs will cause your melted butter to clump up, ruining that velvety emulsion we are trying to build. If you're looking for more ways to master your cocoa based bakes, check out this guide on How to Make recipe for those deep, dark notes.
Choosing The Right Ingredients
Every item on this list serves a purpose in our flavor architecture. We don't use fillers, only high performance components that ensure a velvety finish.
- Unsalted Butter (1 cup): Melted and cooled. Why this? Controls salt levels while providing the primary fat source.
- Light Brown Sugar (1 cup): Packed. Why this? Molasses content creates the essential chewy texture.
- Granulated White Sugar (1/2 cup): Plus 2 tbsp for topping. Why this? Creates the crackly, shatter crisp top surface.
- Large Eggs (2): Room temperature. Why this? Binds the fats and flour into a cohesive batter.
- Pure Vanilla Extract (2 tsp): high-quality. Why this? Rounds out the spice notes with floral sweetness.
- All Purpose Flour (2 cups): Spooned and leveled. Why this? Provides the structural framework for the bars.
- Cream of Tartar (1 tsp): Essential. Why this? Adds the signature tang and keeps the center soft.
- Baking Soda (1/2 tsp): Fresh. Why this? Reacts with the cream of tartar for a slight lift.
- Sea Salt (1/2 tsp): Fine grain. Why this? Balances the sugar and amplifies the cinnamon.
- Saigon Cinnamon (2 tsp total): Split between batter and topping. Why this? Stronger, sweeter flavor than standard Cassia cinnamon.
| Original Ingredient | Substitute | Why It Works |
|---|---|---|
| Unsalted Butter | Coconut Oil (refined) | Similar fat ratio; results in a slightly crispier edge. |
| Cream of Tartar | Lemon Juice (2 tsp) | Provides the necessary acid, though texture may be slightly softer. |
| Light Brown Sugar | Dark Brown Sugar | Increases molasses flavor; makes the bars significantly denser. |
Essential Kitchen Tools
You don't need a high tech lab, but having the right tools makes the process seamless. I always recommend using a metal baking pan rather than glass. Metal conducts heat more efficiently, giving you those crispy, chewy edges that everyone fights over.
A sturdy whisk is your best friend here. We aren't just mixing; we are building an emulsion. You want to see the batter transform from grainy to glossy. I once made the mistake of under mixing the sugar and butter, and the result was a greasy mess.
Don't be afraid to put a little muscle into it until that batter looks like liquid silk.
step-by-step Baking Guide
- Prep the Station: Preheat your oven to 350°F and line an 8x8 inch metal pan with parchment paper. Note: Leaving an overhang makes for easy removal.
- Mix the Topping: Combine 2 tbsp granulated sugar and 1 tsp Saigon cinnamon in a small bowl and set aside.
- Melt the Butter: Heat 1 cup butter until completely liquid and just starting to sizzle.
- Emulsify the Sugars: Whisk the melted butter with 1 cup brown sugar and 1/2 cup granulated sugar until the mixture looks glossy and pale.
- Add the Aromatics: Beat in 2 eggs and 2 tsp vanilla until the batter is velvety and smooth.
- Sift the Dry: Fold in 2 cups flour, 1 tsp cream of tartar, 1/2 tsp baking soda, 1/2 tsp salt, and 1 tsp cinnamon. Note: Stop as soon as the white streaks disappear.
- Transfer the Batter: Spread the thick batter into the prepared pan until it reaches all four corners.
- Apply the Crust: Sprinkle the cinnamon sugar mixture evenly over the top until the surface is fully coated.
- Bake the Bars: Bake for 25 minutes until the edges are golden and the center is set.
- The Final Rest: Cool in the pan for at least 30 minutes until the internal structure firms up.
Fixing Common Baking Errors
Even the most connected bakers run into glitches. If your bars aren't looking quite right, it's usually a small calibration issue with temperature or mixing time.
Why Your Brownies Turned Cakey
This is usually caused by over beating the eggs or using too much flour. When you whisk eggs too vigorously, you incorporate air, which turns a fudgy bar into a sponge. Also, always spoon your flour into the measuring cup rather than scooping directly from the bag to avoid packing it down.
Why the Cinnamon Topping Gritty
If the sugar on top feels like sand, it didn't have enough moisture to melt slightly during the bake. This happens if the batter is too dry or the oven temperature is too low. Ensure you aren't adding extra flour, and check that your oven is truly at 350°F using an external thermometer.
| Problem | Root Cause | Solution |
|---|---|---|
| Greasy surface | Butter was too hot | Let melted butter cool to 95°F before adding sugar. |
| Sunken center | Underbaked or old soda | Check for a 190°F internal temp and refresh your baking soda. |
| Hard edges | Overbaked | Reduce bake time by 3 minutes and use a light colored pan. |
Building a perfect batch requires a few preventive measures. Follow this checklist to ensure you avoid the most common pitfalls in the kitchen.
- ✓ Use a metal pan for better heat distribution and sharper edges.
- ✓ Tap the pan on the counter twice before baking to release trapped air.
- ✓ Let the butter cool slightly so it doesn't scramble the eggs.
- ✓ Check doneness with a toothpick; it should have a few moist crumbs.
- ✓ Resist the urge to cut them while hot; the carryover heat finishes the center.
Customizing Your Batch
Once you've mastered the base platform, you can start to innovate. The beauty of this recipe is how well it plays with other flavors. I love adding a handful of white chocolate chips to the batter for a creamy contrast to the spice.
- The Crunch Factor: Fold in 1/2 cup of toasted pecans for an earthy, textured upgrade.
- The Salted Twist: Sprinkle a pinch of flaky sea salt over the cinnamon topping before baking.
- The Double Down: Add a layer of dulce de leche in the middle for a gooey, caramel surprise.
| Ingredient | Adjustment | Impact |
|---|---|---|
| White Chocolate | Add 1/2 cup | Adds creamy sweetness and pockets of fat. |
| Pumpkin Spice | Replace cinnamon | Gives it an autumnal, complex flavor profile. |
| Espresso Powder | Add 1 tsp | Deepens the buttery notes without tasting like coffee. |
Adding espresso powder is a trick I learned for chocolate brownies, but it works surprisingly well here too. It acts as a flavor catalyst, making the cinnamon and vanilla pop even more.
Debunking Common Kitchen Myths
Many people think cream of tartar is just an optional leavener. That is simply not true. In this specific recipe, the cream of tartar provides the ionic charge needed to keep the sugar from crystallizing into hard clumps, which is what gives the center that iconic, "melt in-your mouth" feel.
Another common misconception is that you can't over mix a brownie batter because it doesn't have much lift. In reality, over mixing develops the gluten in the flour, which will turn your tender Snickerdoodle Brownies into something as tough as a piece of bread.
Mix until the flour is just incorporated, then put the spatula down!
Keeping Your Brownies Fresh
To maintain that perfect shatter crisp top, you need to store these correctly. If you toss them in a plastic bag while they are still warm, the steam will turn that beautiful crust into a soggy mess. Always wait until they are completely cool to the touch.
- Storage: Keep in an airtight container at room temperature for up to 5 days.
- Freezing: Wrap individual squares in parchment paper and then foil. They stay fresh for up to 3 months.
- Zero Waste: If they do get a bit stale, crumble them over vanilla bean ice cream or blend them into a "Snickerdoodle Shake." The dry bits add a fantastic crunch to frozen desserts.
Plating Levels For Impact
We want to transform these bars from a simple snack into a visual experience. Depending on your audience, you can scale the presentation to match the vibe of the room.
Simple: The Classic Square
Cut the pan into 16 even squares. Serve them stacked on a wooden board or a simple white plate. This is all about the "home baked" feel, highlighting the rustic crinkles on top.
Polished: The Spice Dust
Trim the edges for perfectly sharp lines. Place the square in the center of a plate and add a very light dusting of fresh cinnamon through a fine mesh sieve. Serve with a small dollop of whipped cream on the side.
Restaurant: The Deconstructed Sundae
Warm the brownie slightly and place it at the bottom of a wide bowl. Top with a scoop of salted caramel gelato, a drizzle of warm honey, and a few shards of cinnamon sugar tuile. The contrast between the cold gelato and the warm, spicy brownie is absolutely connected to high end dessert design.
| Level | Focus | Key Tweak |
|---|---|---|
| Simple | Flavor | Serve warm with a glass of cold milk. |
| Polished | Geometry | Use a ruler for exact 2 inch squares. |
| Restaurant | Contrast | Add a temperature element like frozen custard. |
Regardless of how you plate them, the most important part is the community you share them with. Baking is a way to stay connected, and these Snickerdoodle Brownies are the perfect vehicle for that. Let's get baking!

Recipe FAQs
What makes Snickerdoodle Brownies different from regular brownies?
The cinnamon sugar crust. Snickerdoodle Brownies feature a signature crackly, cinnamon sugar topping that gives them a distinct spiced flavor and a delightful textural contrast to the chewy interior.
Can I use dark brown sugar instead of light brown sugar?
Yes, but expect a denser texture. Dark brown sugar has more molasses, which will make the brownies significantly denser and may slightly alter the subtle snickerdoodle flavor profile. This is similar to how varying molasses impacts the chewiness in our Fudgy Sweet Potato Brownies.
How do I achieve the signature crackly top on my Snickerdoodle Brownies?
Use a high ratio of granulated sugar and ensure your oven temperature is correct. The granulated sugar migrates to the surface during baking and creates that thin, crisp lid. Make sure your oven is calibrated to 350°F for optimal sugar crystallization.
Why are my Snickerdoodle Brownies cakey instead of chewy?
Likely overmixing or too much flour. Overbeating the eggs incorporates too much air, leading to a cake like texture. Always spoon and level your flour to avoid packing too much into the measuring cup.
How should I store Snickerdoodle Brownies to keep them fresh?
In an airtight container at room temperature. Ensure they are completely cooled before sealing to prevent the steam from softening the signature crackly top. They should stay delicious for up to 5 days.
Can I make Snickerdoodle Brownies ahead of time?
Yes, the batter can be made up to 24 hours in advance. Chill the prepared batter in the refrigerator to allow flavors to deepen before baking. This make-ahead option is great for busy schedules, much like preparing components for our Achievable Dubai Chocolate Brownies with Fudgy Layers.
What is the role of cream of tartar in Snickerdoodle Brownies?
It provides the signature tangy flavor and aids in texture. Cream of tartar reacts with baking soda for a slight lift and, more importantly, it helps prevent sugar crystallization, contributing to a softer, chewier interior.
Snickerdoodle Brownies
Ingredients:
Instructions:
Nutrition Facts:
| Calories | 248 kcal |
|---|---|
| Protein | 2.6 g |
| Fat | 12.2 g |
| Carbs | 33.1 g |
| Fiber | 0.5 g |
| Sugar | 20.6 g |
| Sodium | 114 mg |
