Chocolate Peanut Butter Cake: Rich, Fudgy Layers and Creamy Frosting

- Indulge in The Ultimate Chocolate Peanut Butter Cake Dream
- Achieving Bakery-Quality Texture and Flavor: Why This Recipe Works
- Essential Ingredients for Your Layered Chocolate Peanut Butter Cake
- Step-by-Step Method: Baking and Assembly
- Expert Tips for a Flawless Chocolate Peanut Butter Cake
- Storing Your Cake: Keeping Layers Fresh and Moist
- Recipe FAQs
- 📝 Recipe Card
Indulge in The Ultimate Chocolate Peanut Butter Cake Dream
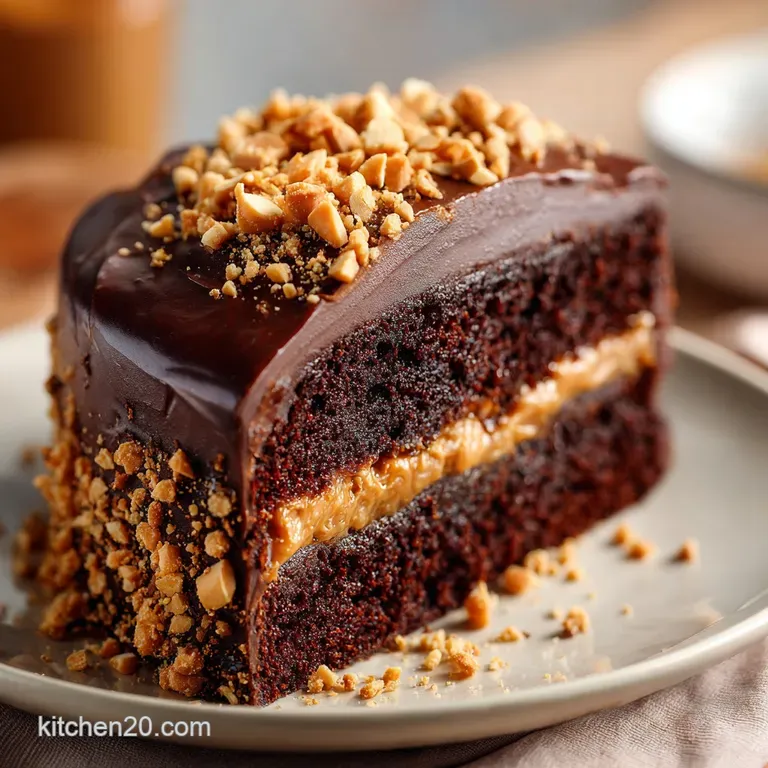
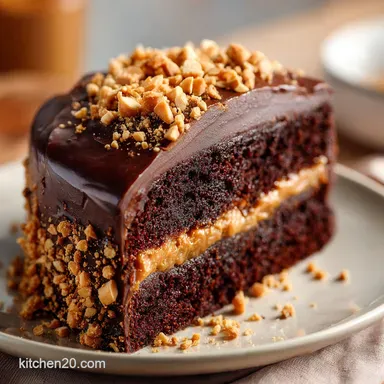
When this Chocolate Peanut Butter Cake comes out of the oven, the smell alone is enough to stop you dead in your tracks. It’s that deep, earthy scent of dark cocoa mingling with the rich, slightly salty aroma of toasted peanuts a combination that instantly signals true comfort food.
The sponge is so moist it practically melts on the tongue, providing the perfect dark foil for the creamy, fluffy frosting.
This isn’t one of those recipes that requires five hours of complicated layering and delicate cooling. It uses the reverse creaming method for the sponge (almost!) which means everything comes together ridiculously fast, making it my go-to when I need a spectacular centerpiece without the stress.
Honestly, the most difficult part is waiting for the cake layers to cool completely before you frost them, but patience truly is a virtue here.
If you’ve struggled with dry chocolate cake or runny frosting in the past, relax; I’ve made all those mistakes so you don’t have to. We are going to walk through the real tricks for achieving that perfect, structurally sound, deeply flavorful chocolate peanut butter cake right now. Let's crack on!
Achieving Bakery Quality Texture and Flavor: Why This Recipe Works
Overview: What Makes This Recipe Stand Out from the Rest?
This Chocolate Peanut Butter Cake Recipe delivers maximum flavour and incredible tenderness without any fussy techniques. We rely heavily on strategic liquid ingredients in the batter to ensure the cake stays moist for days.
Most importantly, we’re using a cream cheese base in the frosting, which stabilizes the peanut butter beautifully and prevents it from becoming a sickeningly sweet mess, giving you a proper, high ranking treat.
The Chemistry of the Perfect Chocolate Peanut Pairing
Why is chocolate and peanut butter such a glorious combination? It’s all about contrast! The natural bitterness and acidity in high-quality cocoa powder cut through the richness of the peanut fat and the sweetness of the sugar.
This perfect culinary tension means you can eat a large slice without feeling overwhelmed. It truly is a match made in snacking heaven.
The Buttermilk Secret: Ensuring a Deeply Moist Crumb
The magic ingredient in our chocolate sponge is buttermilk. Buttermilk’s acidity tenderizes the flour, minimizing gluten development and guaranteeing a soft, tender crumb that practically floats. It also reacts brilliantly with the baking soda, ensuring a lovely, even rise. If you adore that flaky, tender texture as much as I do, you might also be obsessed with my recipe for Peach Cobbler: Classic Buttermilk Recipe for a Flaky Topping .
Chef's Note: Using room temperature buttermilk is essential. Cold buttermilk hitting the rest of the batter can cause the fats to seize up slightly, affecting the final texture of the sponge.
Blooming the Cocoa: Maximizing Rich Chocolate Intensity
Do not, under any circumstances, skip the hot coffee. The coffee activates the cocoa, deepening the chocolate flavour immensely and ensuring the sponge is incredibly dark and moist.
This process, called "blooming," maximizes the flavour potential of the powder, making the final cake much richer than if you just used boiling water alone. It’s a tiny step that makes a massive difference in the final peanut chocolate cake.
Balancing the Salt and Sweetness in the Peanut Butter Frosting
The key to preventing your frosting from tasting like pure powdered sugar is salt. When making the Peanut Butter Chocolate Cake Recipe, always add a generous pinch of fine sea salt to the frosting mix.
This simple step enhances the inherent peanut flavour, taming the sweetness so that you get that signature salty sweet kick, just like your favorite candy cup.
Essential Ingredients for Your Layered Chocolate Peanut Butter Cake
Shopping List: Pantry Staples and Specialty Items
Most of what you need for this rich, dark chocolate cake with peanut butter frosting is already in your pantry. We need basic flour, sugar, baking soda, and eggs, but you should invest in good quality unsweetened cocoa powder for a deep chocolate flavour.
For the frosting, grab full fat cream cheese, butter, and your preferred smooth peanut butter no crunchy allowed here, please.
Choosing the Right Peanut Butter (Creamy vs. Natural)
When tackling a high layered cake like this, structural integrity is critical. You absolutely must use a commercial, homogenized smooth peanut butter for the frosting (think Jif or Skippy).
Natural peanut butter, the kind that separates with oil on top, is too unstable and oily; it will make your frosting weep, separate, and slide right off the cake layers.
Butter vs. Oil: Optimizing Moisture in the Sponge
We use vegetable oil in this chocolate cake recipe, and that's intentional. Butter delivers great flavour, yes, but oil stays liquid even when the cake cools down, meaning your sponge remains fantastically moist at room temperature.
We get all the delicious chocolate and peanut flavour from the frosting, so we can let the oil do the heavy lifting in the sponge for maximum moisture retention.
Ingredient Substitutions for Dietary Needs and Allergies
| Ingredient | Substitution | Notes |
|---|---|---|
| Buttermilk | 1 cup whole milk + 1 tbsp vinegar/lemon juice | Let it sit for 5 minutes until slightly curdled. |
| Hot Coffee | Boiling water or dark espresso | Water is fine for texture, but the coffee deepens the cocoa flavor. |
| All-Purpose Flour | gluten-free 1:1 baking blend | Check for Xanthan Gum inclusion; add 1/2 tsp if necessary. |
| Vegetable Oil | Melted unsalted butter (cooled) | Note that the cake may dry out slightly faster than with oil. |
step-by-step Method: Baking and Assembly
Stage 1: Preparing the Deep Chocolate Sponge Batter
First, preheat your oven to 350°F (175°C) and line two 8 inch round pans with parchment paper. Whisk your dry ingredients flour, sugar, cocoa, baking soda, and salt together in a large bowl.
Then, add the wet ingredients (eggs, buttermilk, oil, vanilla) and mix only until the dry streaks disappear; do not overmix . Finally, carefully pour in the hot coffee or boiling water and mix on low until the thin batter is perfectly smooth.
Divide it evenly and bake for 30– 35 minutes until a toothpick comes out clean.
Stage 2: Mastering the Velvety Peanut Butter Frosting
While the cakes are cooling, make the frosting. Using an electric mixer, beat the room temperature butter and the slightly chilled cream cheese together until they are light and perfectly smooth. Scrape down the bowl, add the smooth peanut butter, and beat again until well combined.
Gradually incorporate the sifted powdered sugar, the salt, and the vanilla. Add the heavy cream one tablespoon at a time until you reach a consistency that is pipeable but firm enough to hold its shape this is key for a stable layer cake.
Stage 3: Cooling, Leveling, and Crumb Coating Techniques
Once the cakes are fully cool (and I mean fully cool warm cakes melt frosting instantly), use a serrated knife to level the domes if needed. Place your first cake layer on your plate or stand, and apply a very thin layer of peanut butter frosting to the top and sides.
This is the crucial "crumb coat," which traps all those loose crumbs. If you skip this step, your final frosting will look messy, trust me. Pop the cake into the fridge for 20 to 30 minutes until the crumb coat is completely firm.
Stage 4: Achieving a Professional High Layered Finish
Remove the chilled cake. Carefully stack the second layer on top. Now, use the remaining frosting to cover the entire cake. Use an offset spatula to create a smooth, clean finish or just give it a nice, rustic swirl if you’re short on time.
For that extra dramatic look, I always like to leave some peanuts poking out around the base or the top edge.
Expert Tips for a Flawless Chocolate Peanut Butter Cake
Troubleshooting Common Baking Mistakes (Sinking, Dryness)
The most common failure in a cake like this is a sunken middle or a dry crust. A sunken cake usually means your leavening agent (baking soda) is old, or you pulled the cake out before it was fully cooked. Always check the expiration date on your baking soda. Dryness?
That’s almost always overbaking. Start checking five minutes before the recipe suggests. I once forgot the oil and ended up with a sponge that tasted like a dark chocolate brick. Don't be like past me.
The Best Way to Handle Softened Peanut Butter Frosting
If your kitchen is warm, or if you overbeat the frosting, it might get too soft and struggle to hold the layers. Don't panic! Simply place the entire bowl of frosting into the refrigerator for 10 to 15 minutes.
This chilling time will stiffen the butter and cream cheese, making it workable again. If it's still too loose, beat in another quarter cup of sifted powdered sugar.
Presentation Ideas: Garnishing with Ganache or Chopped Peanuts
To really make this Reeses Peanut Butter Cake Recipe shine, think texture and color contrast. A simple chocolate ganache drizzle (made by melting chocolate chips and heavy cream) looks stunning pouring down the sides. Alternatively, use finely chopped salted peanuts sprinkled only around the base for a defined edge. The dark chocolate sponge contrasts beautifully with the pale frosting. If you’re looking for rich, dark chocolate inspiration, check out the intense flavor of my German Chocolate Cake: The Authentic, Rich Pecan Coconut Frosting Recipe .
Storing Your Cake: Keeping Layers Fresh and Moist
Refrigeration vs. Countertop Storage Guidelines
Because this cake uses cream cheese in the frosting, it must be stored in the refrigerator. Left uncovered, the cake will dry out fast. Keep the cake in an airtight container or under a dome. It will last beautifully for 4 to 5 days, though I promise it won't be around that long.
Bring slices to room temperature (about 30 minutes) before serving for the best flavour and softest texture.
How to Properly Freeze Slices or Whole Cakes
But does it freeze well? You bet. If you want to freeze the entire cake, chill it until rock hard, then wrap it tightly first in plastic wrap and then in aluminum foil. It will last up to three months. To thaw, unwrap the foil and plastic, and let it thaw in the refrigerator overnight.
Individual slices can be frozen the same way.
Enhancing the Experience with Beverages (Coffee, Milk, Stout)
For the ultimate classic pairing, serve this Peanut Butter Chocolate Cake Recipe with a tall, cold glass of whole milk. If you prefer something darker, a strong cup of black coffee or espresso cuts through the richness beautifully. Feeling adventurous?
A dark, creamy stout or porter pairs surprisingly well with the deep chocolate notes.

Recipe FAQs
Why did my chocolate cake layers turn out dry or dense?
A dry cake is typically caused by overbaking or measuring flour incorrectly (packing it too tightly). A dense cake often results from overmixing the batter, which develops the gluten too much and makes the cake tough rather than tender. Ensure you stop mixing the batter immediately once the flour streaks disappear.
Can I use natural or chunky peanut butter for the frosting?
It is strongly recommended to use a conventional, stabilized creamy peanut butter (such as Jif or Skippy) for the frosting. Natural peanut butter contains oils that separate easily, which will break the emulsion and make the resulting frosting oily and too thin.
Chunky varieties will disrupt the smooth, velvety texture required for easy spreading and piping.
How long does this cake keep, and what is the best way to store it?
The cake can be stored in an airtight container at cool room temperature for up to 3 days. If your kitchen is warm or humid, refrigeration is recommended to keep the buttercream stable, extending the shelf life to about 5 days.
For the best flavour and texture, let refrigerated slices sit at room temperature for 15-20 minutes before serving.
Is it possible to freeze the cake layers or the fully frosted cake?
Yes, this cake freezes very well. Once the layers are fully cooled, wrap them tightly in plastic wrap and then aluminum foil, and they can be frozen for up to three months. To freeze the fully frosted cake, first flash freeze it uncovered until the frosting is firm, then wrap tightly in plastic wrap and foil.
How can I adapt this recipe for gluten-free or dairy-free dietary needs?
For a gluten-free version, simply substitute the all-purpose flour with a high-quality 1:1 gluten-free baking blend that includes xanthan gum. To make it dairy-free, replace the buttermilk with non-dairy milk mixed with 1 tablespoon of vinegar, and substitute the butter with vegan butter sticks or quality vegetable shortening in both the cake and the frosting.
Why does the recipe call for ‘blooming’ the cocoa powder with hot liquid?
Blooming the cocoa involves mixing it with boiling water or hot coffee before integrating it into the batter. This process dissolves the cocoa solids and releases aromatic compounds, dramatically intensifying the deep, rich chocolate flavour and resulting in a darker, more complex cake.
It also helps create an incredibly moist cake texture.
Can I bake this recipe as a sheet cake instead of a layer cake?
Absolutely, the recipe can be baked in a single 9x13 inch pan; however, the baking time will need to be adjusted. You should increase the baking time to approximately 35 45 minutes, checking frequently with a toothpick starting at the 30-minute mark. Ensure the center is firm and the toothpick comes out clean.
Ultimate Chocolate Peanut Butter Cake Recipe
Ingredients:
Instructions:
Nutrition Facts:
| Calories | 1369 kcal |
|---|---|
| Protein | 40.6 g |
| Fat | 55.3 g |
| Carbs | 177.5 g |
