Brownies Recipe the Ultimate Fudgy Squares with a Perfect Crinkle Top
Bypassing Cakey Imposters: Why These Brownies are Truly Ultimate
If I see one more recipe calling itself "fudgy" and delivering a dry, sad piece of chocolate cake masquerading as a brownie, I swear I’m going to lose it. Listen, we’ve all been there.
We spend 45 minutes baking, only to realize we accidentally made something that tastes suspiciously like box mix, even though we made it from scratch.
This recipe changes everything. It’s my absolute, tried and true blueprint for making those ridiculously dense, deeply chocolatey squares that have the perfect amount of chewiness and, most importantly, that flaky, shiny crinkle top. Forget baking powder or massive amounts of flour.
We are aiming for fat and sugar suspended by just enough structure. Think of this as a chocolate truffle you can cut with a knife.
The Pursuit of the Perfect Crinkle Top
The crinkle top. Ah, the holy grail of homemade brownies. This isn't decorative; it’s a non and negotiable sign that you did the sugar work correctly. That thin, flaky crust isn’t magic, it’s chemistry.
The secret? We have to ensure the sugar is almost entirely dissolved before the flour hits the bowl. Cold ingredients will kill this process instantly. That's why we warm the sugar with the melted butter and chocolate.
Whisking vigorously for 90 seconds (yes, set a timer) creates a stable, slightly meringue and like film on the surface as it bakes. It’s the surface tension, guys. It’s brilliant. If you skip this, you get cake. Plain and simple.
Defining the Ideal Fudgy Texture
Fudgy means dense. It means moist, and it means chewy. It doesn't mean fluffy.
The two main levers we pull to guarantee fudginess are the fat and to-flour ratio (ours is low on the flour side) and the baking time. We are essentially underbaking these slightly but in a controlled way. If a knife comes out clean from the center, you’ve gone too far.
You’ve evaporated too much moisture, and the resulting brownie will be brittle and cakey once cooled. We want moist, sticky crumbs on that toothpick. That’s the sign that the structure is set but the moisture is trapped.
A Deep Dive into Chocolate Intensity
We are using a two and pronged approach for maximum chocolate flavor. First, high and quality melted dark chocolate (at least 60%, please). This provides the creamy texture and deep, complex base. Second, Dutch Process cocoa powder.
Adding a touch of this unsweetened powder amplifies the cocoa flavor without adding extra fat or moisture, making these Homemade Brownies taste richer, darker, and more luxurious than if we relied on the chocolate alone. It's the difference between a decent chocolate flavor and a full and bodied experience.
If you’re making brownies from scratch, you deserve the best.
Essential Building Blocks for Decadent Brownies
You can’t build a strong house with cheap timber, and you can’t make the Best Brownie Recipe with subpar ingredients. This is a fat and heavy dessert. Respect the ingredients.
Choosing the Right Chocolate (Cacao Percentage Matters)
When I started out, I’d just grab whatever chocolate chips were on sale. Huge mistake. Those are often formulated to hold their shape and have stabilizers that inhibit that smooth, glossy melt we need.
For truly luxurious brownies, get a good bar of dark chocolate, ideally in the 60% to 70% range. Anything less than 60% will make the final product overwhelmingly sweet. Anything over 75% can sometimes be too bitter, especially combined with the cocoa powder. Chop it yourself; it melts faster and more evenly.
| Type of Chocolate | Best Use in Brownies |
|---|---|
| 60 70% Dark Bar | Mandatory for melting base (structure & depth) |
| Chocolate Chips | Optional mix and in (for pockets of gooey goodness) |
The Role of Melted Butter vs. Oil in Fudginess
This is a hot topic, but for me, butter wins every time. Why? Flavor. Oil (like vegetable or canola) might give you a slightly glossier result because it’s 100% fat and zero water, but it delivers nothing in the way of taste.
Butter delivers moisture, controls gluten development when warm, and gives that rich, dairy backbone that makes the chocolate taste complete.
We are melting the butter with the chocolate a technique that ensures our brownies are dense and fudgy rather than tall and cakey. If you use the creaming method (beating butter and sugar until light and fluffy), you incorporate too much air, which acts as a leavener. We don't want air. We want density.
Necessary Kitchen Gear and Prep Checklist
No electric mixer needed! In fact, please leave it in the cupboard. Overmixing is the enemy of the fudgy brownie. You’ll just need a good whisk and a rubber spatula.
Also, prep your pan properly. I learned the hard way that trying to scoop warm, sticky brownies out of a pan is a nightmare.
Crucial Prep Tip: Always use parchment paper and create a "sling" that overhangs two sides. This is how you lift the entire slab out cleanly once it’s cooled, guaranteeing those sharp, beautiful edges. I call it the "emergency handle." Trust me, you need the emergency handle.
Related Recipes Worth Trying
- Keto Brownies The Duchess of Fudge UltraFudgy Low Carb Dessert — Our classic Keto Brownies recipe delivers intense fudge flavor with zero sugar and minimal net carbs This Easy Keto Dessert uses almond flour for a moist...
- The Ultimate Fudgy Mochi Brownies Recipe Perfect Chew — Bake the ultimate Mochi Brownies that deliver a crisp top and an addictive bouncy chew This Mochi Brownies recipe is surprisingly simple to master
- Achievable Dubai Chocolate Brownies with Fudgy Layers — Get the viral Dubai Chocolate Brownies Recipe Achieve a perfectly fudgy base and creamy ganache layer at home A truly decadent chocolate dessert
The Blueprint: Mastering the Crinkle and Top Technique
This is the detailed instruction list, but infused with the why behind each step.
The Crucial Step: Warming the Sugar and Eggs
Remember that moment when the melted chocolate and butter are perfectly smooth and glossy? Don’t walk away. Add the sugars immediately. Whisk the entire mixture vigorously off the heat for 90 seconds.
You’ll feel the sugar crystals start to dissolve, and the mixture will cool slightly, going from piping hot to pleasantly warm.
When you add your eggs (one at a time, please, and ensure they are room temperature!), this warm, sweet, fatty mixture will emulsify beautifully. It turns into a thick, glossy ribbon. If your eggs are cold, the mixture will seize, and you’ll have a lumpy mess. Nobody wants lumpy Homemade Brownies.
Incorporating the Dry Mix Without Overdeveloping Gluten
Measure your flour correctly. Don't pack it into the cup. Spoon it in and level it off. We need exactly the right amount.
Now, gently pour your pre and whisked dry mix (flour, cocoa powder, salt) over the wet ingredients. Switch from the whisk to a rubber spatula. We are folding, not stirring. Mix only until the last streak of flour disappears. Stop. I mean it. Stop right there.
If you stir too long, you activate the gluten, and your brownies will gain elasticity and chewiness, but in a bad, tough and cookie way.
Achieving the Perfect Bake Time (Doneness Cues)
Ovens lie. They really do. Your 350°F (175°C) might be different from mine. Focus on visual cues and the toothpick test, starting checking aggressively at 30 minutes.
The edges should look set and slightly pulled away from the pan. The top will be uniformly crinkled and perhaps darker at the edges.
The gold standard for fudgy texture: A toothpick inserted 1 inch from the edge should come out mostly clean, but a toothpick inserted dead center should have thick, sticky, moist crumbs clinging to it. If it comes out covered in wet batter, give it 3 more minutes.
If it comes out bone dry, you’ve missed the window.
Cooling and Cutting for Maximum Density
This is where your patience is tested. I know you want to eat them warm (and trust me, a warm square with ice cream is godly), but if you try to cut them right away, they will fall apart. They will look messy and soft, and the texture won’t be dense.
The structure of the brownies needs time to set as the fats cool down. Leave the pan on a wire rack for a minimum of two hours. Seriously. If you can manage it, chill them in the fridge for 30 minutes before slicing.
Use a large, sharp knife, running it under hot water and wiping it clean between each cut. It’s extra work, but those clean, beautiful squares are worth the fuss.
Expert Baker Insights and Troubleshooting
I’ve made every brownie mistake known to humankind, so you don't have to.
Troubleshooting Common Brownie Fails (Why They Are Cakey)
| The Problem | The Likely Cause | The Fix |
|---|---|---|
| Too Cakey/Dry | Overbaked or used too much flour/leavening. | Reduce baking time (by 3- 5 minutes) and weigh your flour (90g is precise). |
| No Crinkle Top | Cold eggs or insufficient whisking of sugar/fat. | Ensure ingredients are warm enough to dissolve the sugar completely. |
| Gooey in Center | Not baked long enough OR tried to cut them warm. | Allow full cooling time. If texture is wrong when cool, bake slightly longer next time. |
Storage Solutions: Keeping Your Treats Fresh
Brownies keep incredibly well, which is great because this recipe makes 16 of them, and unless you live in a house full of teenagers, you probably won’t eat them all in one sitting.
Store them at room temperature in an airtight container for up to 4 days. If you keep them in the fridge, the fat solidifies and they get very dense which some people love, but they feel like little bricks.
Just let them warm up for 15 minutes before serving if they came from the cold.
They also freeze beautifully. Cut the cooled brownies and wrap individual squares tightly in plastic wrap, then place them in a freezer bag. They thaw out perfectly on the counter in about an hour. Great for emergency dessert cravings.
Decadent Flavor Variations and Mix and Ins
Once you master the base Brownies Recipe Easy, the world is your oyster. Don't go crazy with liquid additions (that ruins the texture), but dry mix and ins are welcome.
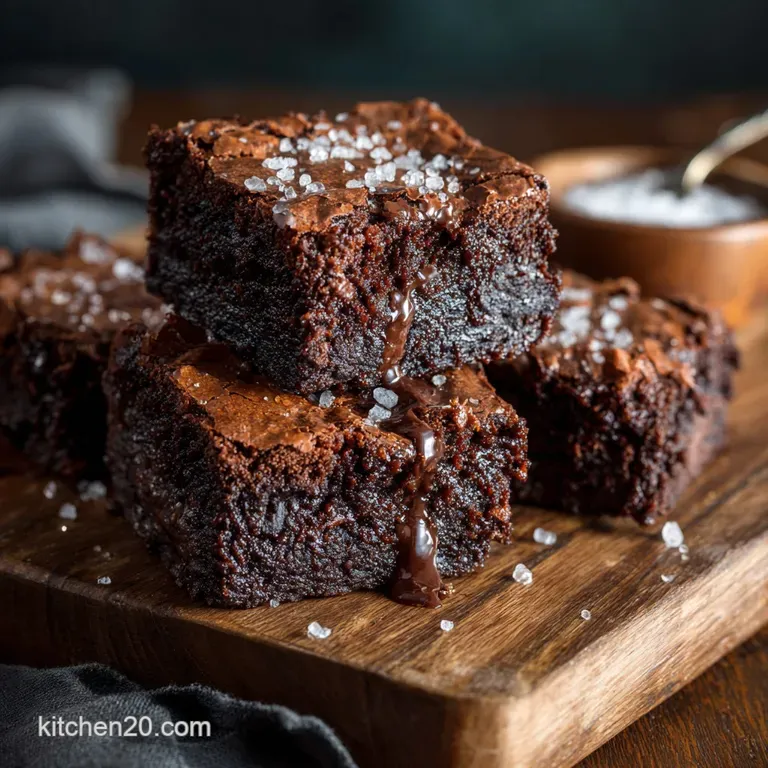
- Sea Salt Finish: Always sprinkle a light amount of flaky sea salt (like Maldon) right before they go into the oven. It perfectly balances the sweetness and deepens the chocolate flavor.
- The Espresso Kick: Add 1 tablespoon of instant espresso powder to the melted butter/chocolate mixture. It doesn't make them taste like coffee, but it seriously amps up the complexity of the cocoa.
- Peanut Butter Swirl: Before baking, melt 1/4 cup of smooth peanut butter with a tablespoon of powdered sugar. Drizzle over the top and gently swirl with a skewer.
- Nutty Perfection: Fold in toasted walnuts or pecans (about 1 cup) when you fold in the flour. Toasting them first is mandatory for flavor.

Recipe FAQs
How do I guarantee that glorious, shiny crinkle top on my brownies?
The true secret is dissolving the sugar! You must whisk the sugar vigorously into the warm melted chocolate and butter mixture for about 90 seconds off the heat; this crucial action partially dissolves the sugar, which creates the surface tension needed for that stunning, flaky crust.
Help! How can I tell when these fudgy Brownies are actually finished baking?
Look for edges that appear set, but the very centre should still look slightly soft and underdone when you check at the 30-minute mark. A toothpick inserted near the centre should come out with moist, sticky crumbs clinging to it that sticky residue, not wet batter, signals fudgy perfection.
Two hours cooling time? That’s a bit steep! Can I speed up the cooling process?
I know, patience is a virtue! While chilling the pan in the fridge can speed things up slightly, that full cooling time is essential for the structure; rushing it will give you crumbly, warm squares rather than dense, chewy treats that hold their shape.
I fancy switching things up a bit. Can I swap the chocolate type or use different mix-ins?
Absolutely! Feel free to fold in up to a cup of chunky additions like pecans, white chocolate chips, or even chopped biscuits before baking. However, always ensure your primary dark chocolate is high-quality (60 70% cocoa solids) as it is the foundation of the fudgy texture.
I've made a proper big batch. What’s the best way to store these long term?
Store them uncut in an airtight container at room temperature for up to five days; they keep their lovely moisture best this way. If you’re planning ahead, they also freeze brilliantly when tightly wrapped, lasting up to three months for whenever the craving strikes.
Ultimate Fudgy Crinkletop Brownies

Ingredients:
Instructions:
Nutrition Facts:
| Calories | 260 kcal |
|---|---|
| Protein | 3.0 g |
| Fat | 17.0 g |
| Carbs | 36.0 g |
