Green Bean Casserole: the Grown-Up Version with Homemade Cream Sauce
- Why We're Upgrading the Classic Green Bean Casserole
- The Green Bean Casserole Reset: Trading Tins for Texture
- Sourcing the Core Components for the Perfect Cream Sauce
- Essential Equipment and Prep Breakdown
- Phase 1: Mastering the Crispy Shallot Topping
- Phase 2: Building the Signature Homemade Cream Base
- Phase 3: Assembly and Baking This Next and Level Green Bean Casserole
- Troubleshooting and Preparing Your Green Bean Casserole Ahead of Time
- Serving Tips and Delicious Variations
- Recipe FAQs
- 📝 Recipe Card
Why We're Upgrading the Classic Green Bean Casserole
Listen, I love tradition. I really do. There’s a special place in my heart for the nostalgic casserole, the one made with three ingredients straight from a can. It reminds me of crowded holiday kitchens and maybe slightly stressed parents. But let’s be brutally honest: that dish is a textural nightmare.
It’s gloopy. It’s overly salty. The beans are mushy, and the onions are, well, fine, I guess, but they taste like they came out of a box because they did.
I spent years trying to figure out how to keep the comforting flavour profile of Green Bean Casserole while ditching the gelatinous mess. I tried adding extra cheese (too heavy). I tried using frozen beans (still too soft).
The breakthrough finally came when I realized the problem wasn't the ingredients themselves, but the source and the technique . We aren't making a shortcut dish here.
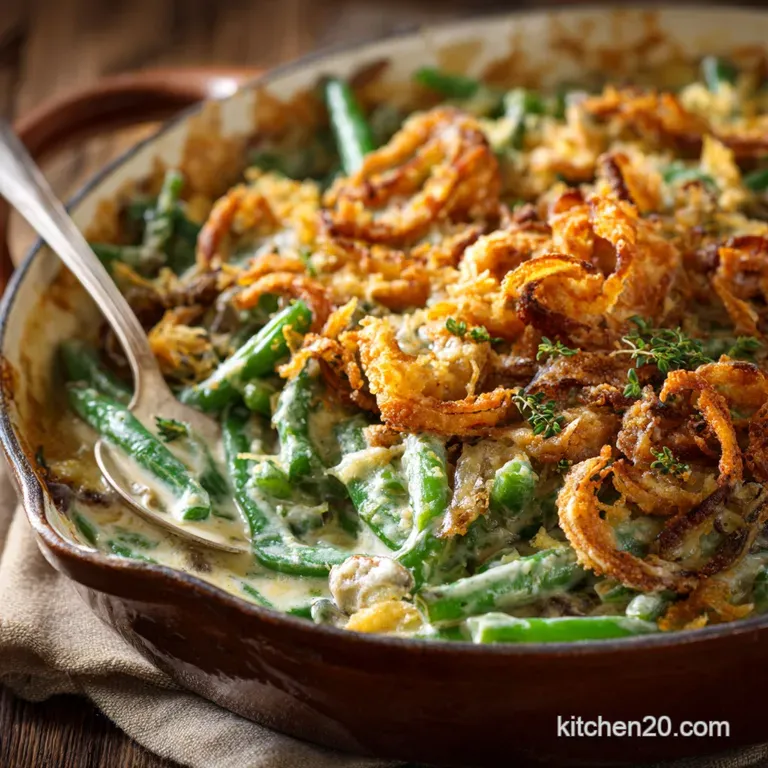
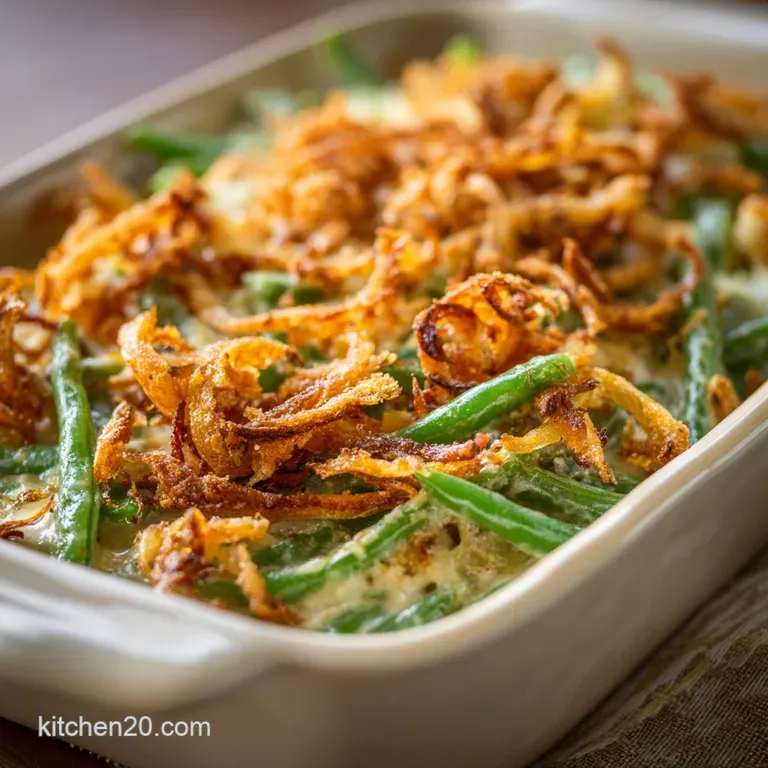
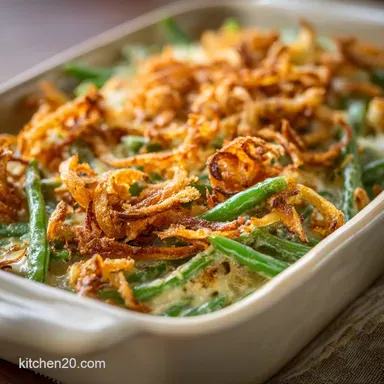
We are making a phenomenal side dish that happens to be named Green Bean Casserole, and it absolutely deserves a place at the grown and up table. This version has a homemade cream base that coats every bean in savoury richness, and a topping that snaps, crunches, and makes you forget the tinned stuff ever existed.
The Green Bean Casserole Reset: Trading Tins for Texture
The goal here is contrast. You want silky smooth sauce against firm and tender green beans, all crowned by shattering crisp shallots. Right now, your standard recipe gives you mush against mush, topped with maybe slightly stale crunch. We fix all of that.
The Flavor Failures of Tinned Soup (And How We Fix Them)
The core issue with canned condensed cream of mushroom soup is that it's designed to be shelf and stable, not intensely flavorful. It relies on copious amounts of sodium and starch stabilizers to create thickness, which results in that signature gelatinous quality that clings a little too hard to everything.
We are replacing that with a proper Béchamel style sauce what we call a cream of mushroom base built on a roux. We take time to brown real mushrooms, infusing the butter and stock with deep, earthy umami before the flour even gets near the pan.
This means the flavour comes from actual ingredients, not just factory salt. We also swap regular black pepper for white pepper (trust me on this) for a cleaner, warmer heat that doesn’t leave black specks in your pristine sauce.
A Texture Test: Fresh Beans vs. Frozen or Canned
You absolutely must use fresh green beans (I prefer the thin haricots verts if you can find them). Canned beans are pre and cooked into oblivion. They’ve given up the ghost. Frozen beans are better, but they often release too much water when thawed, making your sauce runny during the bake.
Our secret weapon? The blanch and shock technique. We boil the beans just long enough (3- 4 minutes) to tenderize them slightly while keeping that wonderful snap. Then, straight into an ice bath they go.
This stops the cooking immediately, locks in that vibrant green colour, and ensures that when they bake for 25 minutes in the casserole, they finish cooking perfectly without turning into sad, wilted strings.
Achieving Decadence Without Compromise
This is a holiday side dish. We are not counting calories here. We are leaning into comfort. We use heavy cream, full stop. And we use good quality butter to build that creamy, luxurious roux. Trying to make this recipe "light" defeats the entire purpose of an Ultimate Green Bean Casserole. It’s meant to be rich.
It’s meant to be something special. Embrace the butter.
Sourcing the Core Components for the Perfect Cream Sauce
The difference between a good casserole and a truly brilliant one is the stock. Don't grab that heavily salted carton from the back of the cupboard and call it a day. If you have homemade chicken or vegetable stock, use it. If you’re buying it, make sure it’s low and sodium so you can control the seasoning.
This is critical because the stock is what dilutes the roux and provides the foundation of the sauce. If your stock is weak or too salty, the entire casserole tastes thin or overwhelming.
Essential Equipment and Prep Breakdown
I know you want to jump straight into the cooking, but a little organization upfront saves so much chaos later (especially when the main turkey is fighting for oven space).
The Ultimate Mushroom Selection Guide
Please skip the plain white button mushrooms. They are fine, but they don't give us the depth we need. I always use cremini mushrooms (sometimes called chestnut mushrooms). They have a sturdier texture and a much deeper, earthier flavour that holds up beautifully against the cream and the savoury stock.
The key is to slice them thinly and sauté them until they are properly browned, not just steamed. They need to squeak when you stir them.
Choosing Your Beans: Snap, Trim, and Blanch
The haricots verts those thinner French green beans are my favourite because they are naturally more tender and cook quickly. You need to snap off those woody ends (the "tail"), but honestly, don’t stress about the tiny pointy top end.
Get them all trimmed, and then they're ready for their quick bath. Remember: boiling water, 3– 4 minutes, then straight into the freezing ice bath.
Detailed Shopping List (Metric and Imperial)
When you’re at the store, focus on quality for the items that define the texture and flavour:
| Item Focus | Quality Check | Why It Matters |
|---|---|---|
| Shallots | Firm, dry, no soft spots | They fry better and hold their shape. |
| Cream | Heavy Cream (35% fat) | Crucial for the velvety mouthfeel. |
| Stock | Low and Sodium Chicken/Veggie | Allows us to control the final salt level. |
Required Tools: From Saucepan to Casserole Dish
The most crucial piece of kit, especially for the topping, is a deep and fry thermometer. Frying shallots can go from perfectly golden to burnt sadness in about forty and five seconds. Keeping that oil at a steady 350°F (175°C) is non and negotiable for success.
You’ll also need a solid, heavy and bottomed saucepan for the sauce; it distributes heat evenly, preventing the roux from burning on the bottom.
Related Recipes Worth Trying
- Pioneer Woman Mac and Cheese: The Creamiest, Baked Casserole Recipe — Master the definitive Pioneer Woman Mac and Cheese recipe. This Creamy Baked Mac N Cheese uses evaporated milk for a velvet sauce, making it the perfect...
- Sweet Potato Casserole with Marshmallows The Best Brown Butter Pecan Streusel Recipe — Sweet Potato Casserole with Marshmallows is essential for the holidays This recipe features browned butter crunchy pecan streusel and roasted sweet potatoes...
- Creamy Low Carb Keto Sweet Potato Casserole The Great Pretender — Foolproof Low Carb Keto Sweet Potato Casserole Get that creamy spiced holiday classic using a genius low carb substitute base The perfect Keto Side Dishes...
Phase 1: Mastering the Crispy Shallot Topping
This is where we ditch the tinned stuff and prove we are professionals. The key to the best and ever crispy fried shallots is giving them a little bath first. Seriously. We soak the thinly sliced shallots in buttermilk (or whole milk if that’s all you have).
This roughs up the surface just enough so the flour and cornstarch coating adheres beautifully.
CRITICAL WARNING: Do not rinse the shallots after draining them from the buttermilk! You want that tangy residue to help the flour stick.
You’ll mix your flour with cornstarch or rice flour (this is a genius move, trust me). The starch ensures a lighter, shatteringly crisp coating that stays crunchy long after it hits the casserole. Fry them in small batches. Too many at once, and the oil temperature drops, resulting in soggy, greasy onions.
Phase 2: Building the Signature Homemade Cream Base
The sauce is the foundation. It needs to be savoury, mushroomy, and incredibly creamy. We start by sautéing the sliced creminis until they release all their moisture and start to caramelize (about 8– 10 minutes). They should look deeply golden and smell nutty.
The Art of the Butter and Flour Roux
Once the mushrooms are set aside, we make the roux. Equal parts butter and flour, cooked together over medium heat for a full two minutes. You must stir constantly. I mean it. If you don't cook it long enough, your sauce will taste like raw flour. If you burn it, you start over. Simple as that.
Slow Simmering for Deep Mushroom Flavor Infusion
Once your pale roux is ready, slowly, slowly whisk in the warm stock. Adding it gradually prevents lumps from forming. As soon as it starts to bubble, it thickens immediately. Reduce the heat, stir in the cream, the minced garlic, thyme, and that little pinch of nutmeg (which is vital for any cream sauce, frankly).
Then, return the perfectly browned mushrooms to the pot. Let that sauce simmer for just five minutes. That slow simmer is what marries all the flavours together.
Phase 3: Assembly and Baking This Next and Level Green Bean Casserole
Now the easy part. The prepped beans and the spectacular sauce are ready.
Combining the Sauce and Beans Smoothly
Gently fold the blanched, drained green beans into the creamy sauce. Don't use tongs and stab them. Use a rubber spatula and gently incorporate them. You want every bean coated, but you don't want to mash them up.
Layering the Dish for Optimal Presentation
Pour the entire mixture into your prepared baking dish. If you want a little extra complexity and a nice baked top crust, sprinkle a quarter cup of freshly grated Parmesan cheese over the top now. It bakes up golden and adds a lovely salty note.
Frying Safely and Achieving Golden Perfection
(This concept was mainly covered in Phase 1, but this is the moment we check our crispy shallots.) Make sure they are totally cool and ready to go. Remember: don't put them on the dish until the very last minute. We bake the casserole without the topping.
Baking time is about 20– 25 minutes at 375°F (190°C), just until the sauce is bubbly hot throughout. Then, once it’s out of the oven and resting, scatter those perfect, crunchy shallots right before it hits the table. That’s the money shot.
Troubleshooting and Preparing Your Green Bean Casserole Ahead of Time
The biggest fear with any casserole is sogginess. The main offender is usually the beans, either overcooked initially or added cold to a cold sauce, leading to condensation.
To avoid mush: Make sure your beans were properly shocked and drained.
Making the Components Up to 24 Hours Prior
This Green Bean Casserole is a fantastic make and ahead dish, which is essential for holiday sanity.
- Shallots: Fry and drain the crispy shallots completely. Store them in an airtight container at room temperature. Do not refrigerate.
- Sauce and Beans (Separated): Make the mushroom cream sauce entirely. Store it in one container in the fridge. Blanch and drain the beans and store them in another container.
- Day Of: On baking day, gently warm the sauce on the stove to loosen it (it will be thick). Fold in the beans, transfer to the baking dish, and bake as directed.
Reheating Leftovers Without Sacrificing Texture
Leftovers will never be as crunchy as day one, but we can try! Reheat individual portions in the oven or toaster oven (350°F / 175°C) until warm, rather than microwaving, which steams the dish and guarantees mush. If you have any leftover crispy shallots, throw a few on top of the reheated portion.
Nutritional Snapshot and Serving Suggestions
Yes, this is richer than the tinned version. It uses real cream and butter. But honestly, it’s a holiday side. Don’t sweat the fat content. Focus on serving it alongside something that cuts the richness a sharp vinaigrette salad or some tart cranberry sauce works wonders.
Serving Tips and Delicious Variations
Want to play around? You absolutely should. I’m all about tinkering with tradition.
- Umami Boost: A dash of Worcestershire sauce or even a spoonful of white miso paste stirred into the cream sauce near the end adds a phenomenal layer of deep, savory complexity that makes people ask, "What is that?"
- Spice it up: Add a quarter teaspoon of smoked paprika alongside the white pepper for a smoky undertone.
- Cheesy Swap: Instead of Parmesan, use shredded Gruyère or smoked Gouda in the sauce for a nuttier, more intense flavour profile. Don't add too much just half a cup melted in at the end.
Swapping Ingredients: Adding Bacon or Smoked Cheese
If you are a bacon fanatic (and who isn't?), here's how you fold it in:
Render about 4 ounces of diced bacon or lardons in the pan before you start the mushrooms. Remove the bacon pieces, but leave the rendered fat. Use that fat instead of some of the butter to sauté your mushrooms and build your roux.
The final crispy bacon bits can be stirred into the casserole mixture before baking, or sprinkled over the top alongside the shallots for double the crunch. It’s brilliant. It makes the ultimate Green Bean Casserole with bacon, without a doubt.

Recipe FAQs
Can I make this fantastic Green Bean Casserole ahead of time for the big day?
Absolutely, it's a lifesaver for holiday prep! Make the homemade mushroom sauce and blanch the beans up to two days prior, storing them separately; combine and bake just before serving, which will save you a proper rush.
Why are my lovely fried shallots going soggy? It ruins the whole effect!
Timing is everything! The crispy shallots must be added at the very last moment before serving, as if you bake them with the casserole, the steam turns them into a soft, sorrowful mess a real tragedy.
Crikey, my sauce is lumpy! What did I muck up when making the roux?
Lumps usually happen when cold stock hits a hot roux too quickly; ensure your stock is warmed gently and whisk it in very slowly, bit by bit, to create a smooth, homogenous sauce without any gritty texture.
What other ingredients can I bung in to jazz this grown-up Green Bean Casserole up?
For a savoury boost, try sautéing 4 oz of smoked bacon (lardons) before the mushrooms, or stir in a tablespoon of white miso paste into the sauce just before baking for an intense umami depth that's a proper game changer.
How do I store leftovers and reheat them without the texture being absolutely ghastly?
Store the baked casserole (without the crispy topping) in the fridge for up to four days, and reheat gently in a 350°F (175°C) oven until bubbling; simply save any leftover shallots and scatter them on top just before serving for that crucial crunch.
Ultimate Green Bean Casserole
Ingredients:
Instructions:
Nutrition Facts:
| Calories | 350 kcal |
|---|---|
| Fat | 30 g |
| Fiber | 4 g |
