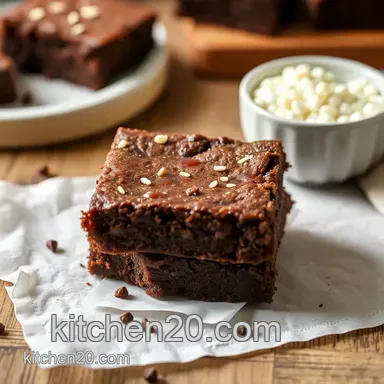
30 Minute Decadent Gluten Free Brownies
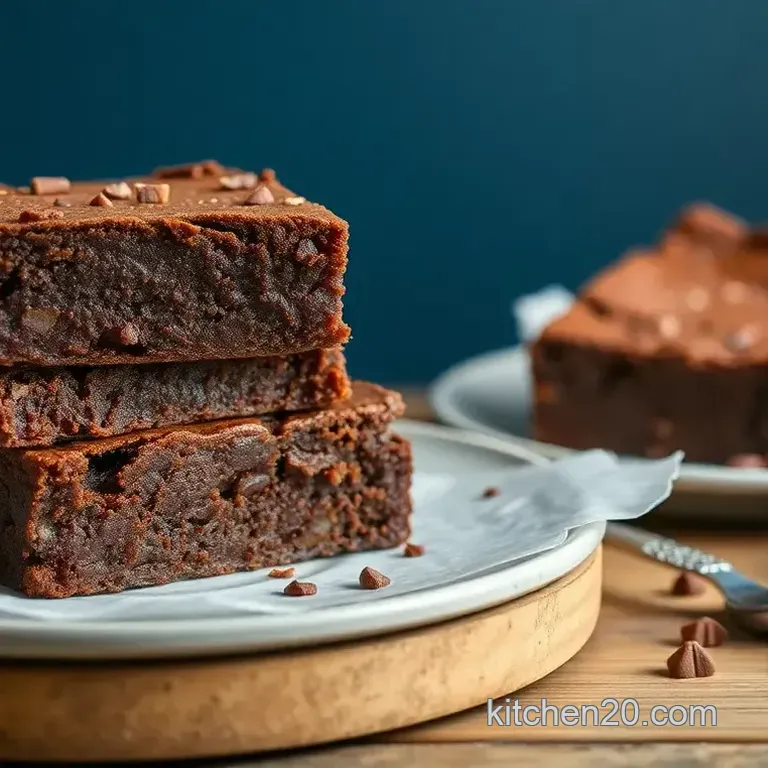
- Time: 10 min active + 25 min baking + 20 min cooling
- Flavor/Texture Hook: Rich chocolate with a shattering top crust
- Perfect for: Sudden dessert cravings or GF guests
The smell of toasted cocoa and melted butter usually takes over my entire kitchen by 4 PM on a Tuesday. I remember the first time I served these to my brother, who thinks most gluten-free treats taste like sweetened cardboard. He took one bite, looked at me, and asked if I'd accidentally used a regular flour blend.
That's the goal here. We aren't aiming for a "good for being gluten free" dessert. We want something that stands up to any classic bakery square. These 30 Minute Decadent gluten free Brownies hit that mark by focusing on the fat and sugar balance rather than trying to mimic bread.
You can expect a mahogany colored treat with a dense, lush center. It's a straightforward process, but there are a few specific moves with the whisk that make the difference between a dull block and a professional looking square.
Fast Facts
Here are the key details. While this recipe is built for speed, make sure not to rush the cooling process, or you'll be left with a gooey mess on your plate.
| Metric | Detail |
|---|---|
| Prep Time | 10 minutes |
| Bake Time | 25 minutes |
| Total Time | 55 minutes |
| Yield | 16 brownies |
| Oven Temp | 350°F (177°C) |
| Pan Size | 8x8 inch |
If you're craving a different texture, my Easy Homemade Brownies recipe uses standard flour for a classic chew, but this one is the clear winner for a fast, grain free alternative.
How it Actually Works
I used to think gluten-free baking was all about finding the perfect blend of starches. Turns out, for brownies, less is more.
- Almond Flour: This provides a nutty base that holds moisture better than rice flour, preventing that dry, sandy texture.
- Egg Aeration: Whisking the eggs and sugar for a full two minutes creates a thin layer of meringue like bubbles that rise to the top, creating the crackle.
The Ingredient List
Opting for a premium cocoa powder significantly enhances the chocolate's richness. If possible, steer clear of lower grade options.
What Each Ingredient Does
| Ingredient | What It Does | Best Swap |
|---|---|---|
| Unsalted Butter | Delivers moisture and richness | Coconut Oil |
| Granulated Sugar | Adds sweetness and forms the crust | Maple Syrup |
| Almond Flour | Provides a nutty base and structure | Oat Flour |
| Cocoa Powder | Gives a deep chocolate taste | Melted Dark Chocolate |
Full Shopping List
- 1/2 cup (115g) unsalted butter, melted Why this? Ensures a fudgy center
- 1 cup (200g) granulated sugar
- 2 large eggs
- 2 tsp (10ml) pure vanilla extract
- 1/2 cup (45g) unsweetened cocoa powder Why this? For a powerful chocolate punch
- 1/2 cup (65g) almond flour Why this? Retains moisture better than mixes
- 1/4 tsp (1.5g) salt
- 1/2 cup (90g) semi sweet chocolate chips
| Original Ingredient | Substitute | Why It Works |
|---|---|---|
| Unsalted Butter | Coconut Oil (full fat) | Matches the fat levels. Note: Brings a subtle coconut flavor |
| Almond Flour | Oat Flour | A nut-free option. Note: Result is slightly grainier |
| Granulated Sugar | Coconut Sugar | A lower-GI alternative. Note: Produces a darker shade and less crackle |
The Essential Tools
You don't need professional gear to pull this off, though these specific tools will simplify the cleanup.
- 8x8 inch baking pan: The standard size for these brownies.
- Parchment paper: Crucial for removing the brownies intact.
- Whisk: A sturdy balloon whisk helps incorporate air.
- Rubber spatula: Perfect for folding in dry ingredients without overworking the batter.
While I typically use a KitchenAid stand mixer for the whisking, a hand whisk is a great alternative if you don't mind a little elbow grease.
Mixing and Baking

Let's dive into the steps. To maintain a dense texture, be careful not to overmix the batter after incorporating the flour.
Phase 1: The Foundation
- Preheat the oven to 350°F (177°C).
- Place a sheet of parchment paper in your 8x8 inch pan, making sure the edges extend beyond the pan's rim. Note: This prevents sticking and simplifies removal.
Phase 2: The Emulsion
- Combine the melted butter and sugar in a large bowl, whisking until smooth.
- Mix in the eggs and vanilla extract. Whisk for 1–2 minutes until the batter is pale and airy. Note: This is the secret to the shiny top.
- Use a rubber spatula to gently fold in the salt, almond flour, and sifted cocoa powder. Stir only until no flour streaks are visible.
- Fold in the chocolate chips.
Phase 3: The Bake
- Pour the mixture into the pan and smooth out the top.
- Bake for 22–25 minutes until the edges are set and have pulled away from the sides, though the center should still jiggle a bit.
- Remove from the oven and let the pan cool on a wire rack for 20 minutes.
Chef's Tip: To achieve perfectly sharp squares, put the pan in the freezer for 10 minutes after it hits room temperature. This solidifies the fats and stops the brownies from sticking to your knife.
Solving Common Problems
Even the most straightforward recipes can run into issues, often due to a simple timing error.
Fixing Cakey Texture
If your brownies have a sponge like consistency, they've been in the oven too long. A toothpick that comes out completely clean is a sign of overbaking; instead, it should have a few moist crumbs clinging to it.
Handling Curdled Batter
This happens when cold eggs are added to melted butter. If the batter looks split, simply keep whisking for another minute. The friction and warmth will help the emulsion come back together.
Solving Flat Tops
A matte, flat surface usually means the eggs and sugar weren't whisked long enough. Air bubbles are what create that signature thin, crisp layer on top.
| Problem | Root Cause | Solution |
|---|---|---|
| Cakey Center | Overbaked | Remove 2-3 mins earlier next time |
| Greasy Top | Butter too hot | Let butter cool slightly before mixing |
| Grainy Crumb | Flour not sifted | Sift cocoa and almond flour together |
Flavor Variations
Now that you've mastered the fundamentals, feel free to experiment with various mix-ins. This is where these 30 Minute Decadent gluten free Brownies truly stand out.
Adding a Nutty Crunch
For a savory touch, stir in 1/4 cup of toasted pecans or walnuts during the final mixing stage. This provides a wonderful textural contrast to the dense center.
Making it dairy-free
To prepare gluten and dairy-free brownies, substitute the butter with refined coconut oil and use dairy-free chocolate chips. The coconut oil actually helps the center stay even more moist.
The Espresso Boost
Stir 1 teaspoon of instant espresso powder into the cocoa powder. It won't make them taste like coffee; instead, it simply makes the chocolate flavor "darker" and more intense. For more inspiration on balancing flavors, you might like how a pinch of salt enhances sweets, similar to the profile in this Spring Roll Peanut Sauce.
Quick Adaptation Guide
- For a firmer set: Chill in the fridge for 1 hour before cutting.
- For more fudge: Underbake by 2 minutes and cool completely.
- For a nutty hit: Add 1/4 cup toasted walnuts.
| Fresh Component | Shortcut Version | Trade off |
|---|---|---|
| Real Chocolate Chips | Extra Cocoa Powder | Flour heavy texture, less "melt" |
| Almond Flour | Pre mixed GF Flour | Grainier mouthfeel, can be drier |
Storage and Waste
These brownies actually improve after a few hours in the fridge because the flavors meld.
- Fridge Storage
- Keep them in a sealed container for up to 5 days. They stay fudgy and rich.
- Freezer Storage
- Wrap individual squares in parchment and foil. They last for 3 months. Just thaw one at a time.
- Reheating
- Give a square a 10 second zap in the microwave for that "just out of the oven" feel.
Zero Waste: If you have a tiny bit of batter left in the bowl, don't waste it. Smear it on a piece of foil and bake it as a "tester" brownie. Also, the leftover parchment paper scraps can be used to line smaller tins for mini batches.
Serving Ideas
Visual appeal is key, even for a simple home bake. Since these 30 Minute Decadent gluten free Brownies are so indulgent, you want their appearance to reflect that richness.
I recommend pairing these with a scoop of chilled mascarpone or a swirl of salted caramel. The tang of the cheese balances the intense chocolate. For parties, slice them into small 1 inch squares instead of large portions; this gives them the feel of a decadent truffle rather than a heavy dessert.
To achieve a more professional "plated" effect, lightly dust the top with powdered sugar right before serving. This accentuates the crackly crust and makes the deep mahogany color stand out.
Recipe FAQs
What can I use instead of almond flour?
Stick with almond flour to maintain the specific fudgy texture. If you enjoyed the tender crumb in our no chill dough cookies, you'll see how the fat in almond flour creates a similar richness.
How do I store these brownies to keep them fudgy?
Store these in an airtight container in the fridge; they will keep for up to 5 days. The flavors meld after a few hours of chilling, improving the taste.
When are the brownies officially done baking?
Pull them out when the edges are set and slightly pulling away from the sides. The center should still have a slight jiggle to ensure they stay decadent.
How to get that shiny, crackly top on the brownies?
Whisk the eggs and vanilla vigorously for 1 to 2 minutes. This incorporates air into the batter and creates that classic professional finish.
Is it true that gluten-free brownies are always dry?
False. The combination of almond flour and melted butter ensures these stay moist and dense.
Do I really need to chill the batter before baking?
Actually, no. This recipe is designed to go straight into the oven to keep the total time efficient.
Bake gluten free Brownies In 30 Minutes