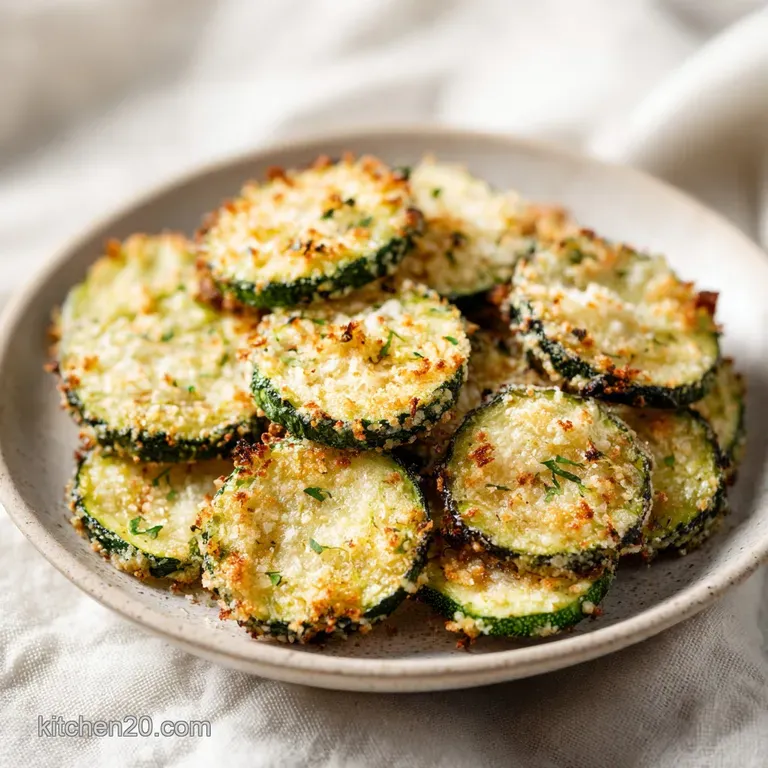
Parmesan Zucchini Crisps: Shatter-Crisp and Buttery
- Time: Active 20 minutes, Passive 25 minutes, Total 45 minutes
- Flavor/Texture Hook: A shattering, salty crust with a tender, buttery center.
- Perfect for: Low carb snacking, quick weeknight sides, or budget-friendly appetizer prep.
- Make Irresistible Parmesan Zucchini Crisps Today
- Why the Layers Stay Crunchy
- Essential Ingredient Deep Dive
- Gathering Your Necessary Ingredients
- Efficiency First Kitchen Equipment
- Step by Step Preparation Guide
- Fixing Common Crunch Problems
- Flavor Swaps and Variations
- Smart Storage and Leftover Use
- Serving and Presentation Tips
- Recipe FAQs
- 📝 Recipe Card
Make Irresistible Parmesan Zucchini Crisps Today
Imagine the smell of toasted cheese and nutty breadcrumbs filling your kitchen while a tray of green rounds turns into something that sounds like a cracker when you bite into it. Zucchini is the absolute hero of this dish, not because it’s fancy, but because it’s a blank canvas that we can streamline into a crunchy masterpiece.
I’ve found that many people struggle with zucchini because it turns into a watery mess, but we aren't going to let that happen here. We’re focusing on efficiency and results by treating the ingredient with the respect its high water content demands.
The secret isn't a special appliance or a "magic" ingredient; it’s the salt. By using salt to draw out the internal moisture, we change the structure of the vegetable entirely. You want a snack that satisfies that salty craving without the heavy feeling of deep fried chips.
This version is baked at a high temperature to ensure the exterior sets quickly into a rigid, golden shell. It's a modern approach to a classic side dish that prioritizes texture over everything else.
We’ve all been there where a vegetable side dish feels like an afterthought. But when you get these Parmesan Zucchini Crisps right, they often disappear off the tray before the main course even hits the table.
I've streamlined the process so you can get from "I have a zucchini" to "I have a snack" in under 45 minutes without breaking the budget. It’s about working smart with what you have in the pantry and using a few key techniques to guarantee that every single bite has a visible, audible shatter.
Why the Layers Stay Crunchy
To get that specific texture, we have to understand why the squash usually fails us. It's basically a water balloon with a green skin. If you don't remove that water, it turns into steam, and steam is the enemy of anything crispy.
- Osmotic Extraction: Salt draws liquid out of the cell walls, allowing the zucchini to remain firm rather than mushy during the bake.
- Convection Airflow: Using a wire rack allows hot air to circulate under the rounds, preventing the "soggy bottom" syndrome.
- Protein Structure: The egg acts as a high strength glue that binds the heavy parmesan and panko to the slick surface of the squash.
- over High heat Evaporation: Baking at 425°F (220°C) flashes off remaining surface moisture while rapidly browning the cheese proteins.
| Method | Time | Texture | Best For |
|---|---|---|---|
| Standard Oven | 25 minutes | Rigid and deeply browned | Large batches for groups |
| Toaster Oven | 22 minutes | Very crispy edges | Single servings or snacks |
| Stovetop Pan | 12 minutes | Softer center, charred | Quick, smaller portions |
Choosing the right method depends on your timeline. While the oven provides the most consistent results for a large family, the stovetop can work if you’re only craving a handful of crisps and don't want to heat the whole kitchen.
However, for the best version of Parmesan Zucchini Crisps, the oven and wire rack combo is the gold standard for streamlining the process and ensuring every round is identical.
Essential Ingredient Deep Dive
When you're working on a budget, every ingredient needs to pull its weight. We aren't using filler here; every component has a job to do in terms of flavor or structural integrity.
| Ingredient | Science Role | Pro Secret |
|---|---|---|
| Kosher Salt | Moisture extractor | Use coarse grains to cover more surface area without over salting. |
| Parmesan | Fat and Binder | Freshly grated melts into a more cohesive "lace" than the canned stuff. |
| Panko | Structural Crunch | These airy crumbs create pockets that stay crisp even after the cheese cools. |
| Smoked Paprika | Color and Depth | Provides a "toasted" look even before the chips are fully browned. |
One paragraph break is required here to ensure the tables are not back-to-back and the HTML renders correctly for all readers.
Gathering Your Necessary Ingredients
You don't need a massive grocery list for this. Most of these items are likely sitting in your pantry right now, waiting to be used. The beauty of this recipe is that it takes basic staples and uses technique to make them feel more expensive than they are.
- 2 medium Zucchinis (approx. 500g): Look for firm ones with smooth skin. Why this? Smaller zucchini have fewer seeds and less water than the giant ones.
- Substitute: Yellow summer squash works perfectly for a brighter color.
- 1 tsp (6g) Kosher Salt: This is for the "sweating" phase. Why this? Salt draws out the water through osmosis.
- Substitute: Fine sea salt, but use 1/2 tsp as it is denser.
- 1 cup (90g) Freshly Grated Parmesan Cheese: The backbone of the flavor. Why this? Provides the salty, umami kick and the fat needed for browning.
- Substitute: Grana Padano or a dry Pecorino (though Pecorino is much saltier).
- 1/2 cup (50g) Fine Panko Breadcrumbs: For that essential shatter. Why this? Panko is lighter and crispier than traditional breadcrumbs.
- Substitute: Crushed pork rinds for a low carb/keto alternative.
- 1/2 tsp (1g) Garlic Powder: Savory depth.
- Substitute: Onion powder or a pinch of asafoetida.
- 1/2 tsp (1g) Smoked Paprika: For a hint of wood fired flavor.
- Substitute: Regular paprika or a tiny pinch of chipotle powder.
- 1/4 tsp (0.5g) Freshly Ground Black Pepper: To cut through the richness of the cheese.
- 1 Large Egg, beaten: The adhesive. Why this? Proteins in the egg set firmly, holding the crust in place.
- Substitute: 2 tbsp of heavy cream or plain yogurt if you're out of eggs.
Efficiency First Kitchen Equipment

To get these Parmesan Zucchini Crisps done effectively, we need the right setup. I'm all about streamlining the workflow so cleanup is a breeze.
First, you’ll want a rimmed baking sheet. This catches any stray crumbs or drips. More importantly, you need a wire cooling rack that fits inside that sheet.
Elevating the zucchini allows the heat to hit the bottom of the rounds, meaning you don't have to flip them halfway through. That’s a massive win for efficiency.
You’ll also need two shallow bowls for your dredging station. One for the beaten egg and one for the dry mix. If you have a mandoline slicer, now is the time to use it. It ensures every slice is exactly 1/8 inch thick, which means they will all cook at exactly the same rate.
If you’re using a knife, just take your time to keep the thickness consistent. Finally, a few sheets of paper towels are non negotiable for the moisture removal step.
step-by-step Preparation Guide
- Slice the zucchini into 1/8 inch rounds. Aim for uniformity so they finish cooking at the same time.
- Place the rounds in a single layer on paper towels. Sprinkle them evenly with the 1 tsp of kosher salt.
- Let them sit for 15 minutes. until beads of water pool on the surface. Note: This is the osmosis at work.
- Blot the rounds firmly with more paper towels. They must be bone dry, or the coating will slide off.
- Whisk the egg in one shallow bowl. In the second bowl, mix the parmesan, panko, garlic powder, paprika, and pepper.
- Preheat your oven to 425°F (220°C). Prepare your baking sheet with the wire rack on top.
- Dip a zucchini round into the egg, let the excess drip off, then press it firmly into the cheese mixture.
- Arrange the coated rounds on the wire rack in a single layer. ensure they aren't touching for better airflow.
- Bake for 20-25 minutes. until the crust is deep golden brown and rigid. Note: They will crisp up further as they cool.
- Remove from the oven and let them sit for 2 minutes before serving.
Fixing Common Crunch Problems
If your crisps aren't shattering like you expected, it's usually a moisture or temperature issue. Zucchini is very forgiving, but it won't tolerate being steamed.
Why Your Zucchini Is Soggy
The most common culprit is skipped prep. If you don't let the salt sit long enough or if you're shy with the paper towels, the internal water will turn the crust into a soggy paste during the bake. Make sure you press down hard when blotting. Also, check your oven temperature.
If your oven runs cold, the zucchini will cook through and get soft before the outside has a chance to crisp up.
| Problem | Root Cause | Solution |
|---|---|---|
| Coating falling off | Surface was too wet | Blot slices until paper towels stop getting damp. |
| Burnt edges, raw center | Slices were too thick | Keep slices to 1/8 inch; use a mandoline for precision. |
| Chewy breading | Oven temp too low | Ensure oven is fully preheated to 425°F before the tray goes in. |
One more paragraph here to separate the table from the checklist as per our formatting standards.
Common Mistakes Checklist
- ✓ Skip the "sweating" phase? You'll end up with a puddle on your tray.
- ✓ Overcrowding the rack? Air needs to flow between the rounds to crisp the sides.
- ✓ Using pre shredded parmesan with cellulose? It won't melt and crisp as well as freshly grated.
- ✓ Not pressing the breading in? Use your fingers to really pack that mixture onto the slice.
Flavor Swaps and Variations
You can easily adapt this recipe to fit different flavor profiles or dietary needs without losing the signature crunch. If you're looking for a spicy Mediterranean twist, add a teaspoon of dried oregano and a pinch of red pepper flakes to the breading.
It gives it a "pizza style" flavor that pairs beautifully with a side of marinara.
If you love Italian flavors, these go beautifully alongside some potato gnocchi for a full meal. For those using modern appliances, these Parmesan Zucchini Crisps thrive in an air fryer. Just cook them at 400°F for about 8-10 minutes, shaking the basket halfway through.
For a dairy-free alternative, you can swap the parmesan for nutritional yeast and a little extra salt. The texture will be slightly different more of a "dust" than a "lace" but the flavor is surprisingly close.
If you're looking for something more substantial, you could try these with thick cut eggplant slices, though you'll need to increase the "sweating" time to 30 minutes to account for the denser flesh.
Smart Storage and Leftover Use
Let’s be honest, these are best eaten immediately. However, if you have leftovers, don't just toss them in a plastic bag. They will get soft within an hour in the fridge. To store, place them in a single layer in a container with a piece of parchment paper between layers.
They stay safe to eat in the fridge for up to 3 days.
To reheat and reclaim the crunch, use an oven or air fryer. Microwave reheating is strictly forbidden here as it will turn them into rubber. 3 minutes at 400°F in an air fryer usually brings them back to life. For zero waste, if you have tiny ends of the zucchini left that were too small to slice, chop them up and throw them into a morning omelet or a creamy pesto sauce for extra texture.
Serving and Presentation Tips
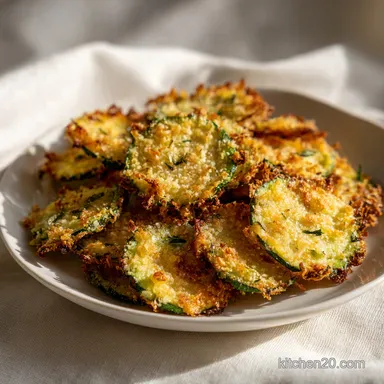
Presentation is where you can make a budget snack look like a restaurant appetizer. Instead of piling them in a bowl where the bottom ones will steam, lay them out on a flat platter in overlapping rows. This keeps the air moving and looks much more professional.
A sprinkle of fresh lemon zest right before serving adds a brightness that cuts through the salt of the parmesan.
For a full seafood feast, pair these with Garlic Basil Butter Scallops. The crunch of the zucchini rounds is the perfect foil to the velvety texture of the scallops. If you're serving these as a standalone snack, a small bowl of spicy aioli or even a simple Greek yogurt dip with lemon and dill works wonders. Just remember to serve them while they are still warm enough for the cheese to be slightly pliable but the crust to be firm.

Recipe FAQs
How do you make zucchini parmesan crisps crispy?
Place the rounds on a wire cooling rack set over a baking sheet. This allows hot air to circulate underneath the zucchini while baking at 425°F, ensuring the crust sets rigid rather than steaming.
Why aren't my zucchini chips crispy?
Excess moisture is the primary culprit. If you skip the 15-minute salting step or fail to blot the rounds until bone dry, the steam released during baking will turn the crust soggy instead of golden.
Why are my Parmesan crisps chewy?
The slices are likely too thick. Stick to a consistent 1/8 inch thickness so the moisture evaporates efficiently; if they are too chunky, they will retain water and remain soft even after 25 minutes of baking.
How do I get breading to stick to zucchini?
Press the rounds firmly into the breadcrumb mixture after dipping them in the beaten egg. If you enjoyed mastering the stable emulsion technique in other recipes, you will recognize that creating a solid bond here requires that initial egg coat to be completely absorbed by the surface of the dry vegetable.
Is it true I can skip the salting step if I am in a hurry?
No, this is a common misconception. The salt is essential to draw out water via osmosis; without this 15-minute process, you cannot achieve the necessary dryness for a truly crisp exterior.
Can I use pre-grated parmesan for this recipe?
No, always use freshly grated parmesan. Pre-grated versions contain anti caking agents that interfere with the melting and bonding process, preventing the crust from forming a cohesive, golden layer.
How do I know when the zucchini crisps are finished baking?
Look for a deep golden brown color and a rigid texture. They require the full 20-25 minutes at 425°F to reach the point where the parmesan has caramelized and the breadcrumbs have hardened.
Baked Parmesan Zucchini Crisps
Ingredients:
Instructions:
Nutrition Facts:
| Calories | 174 kcal |
|---|---|
| Protein | 10.7 g |
| Fat | 7.8 g |
| Carbs | 13.8 g |
| Fiber | 1.5 g |
| Sugar | 3.1 g |
| Sodium | 515 mg |
