The Proper British Kitchen Simply Brilliant Homemade Sauerkraut Twoingredient Magic
- Ditch the Dairy Aisle: Why True Fermentation Beats Store-Bought Sauerkraut
- The Nostalgic Power of Culturing: Reclaiming Traditional Food Preservation
- The Absolute Essentials: What You Need for Perfect Cabbage Crunch
- The Hands-On Method: Transforming Cabbage into Homemade Sauerkraut
- The Wait Game: Monitoring Fermentation Progress Over Time
- Troubleshooting Common Fermentation Hurdles and Failsafes
- Extending the Life: Storage Secrets for Maximum Crunch Retention
- Recipe FAQs
- 📝 Recipe Card
Ditch the Dairy Aisle: Why True Fermentation Beats store-bought Sauerkraut
There’s a sad reality in the modern grocery store: most of the brightly coloured jars labelled "sauerkraut" lining the shelves have been pasteurised heat-treated to extend shelf life. While convenient, this process eradicates the very living cultures that make fermented foods so renowned.
If you are seeking the potent tang and the authentic gut-supportive qualities of this ancient preservation method, you must embrace the craft of making Homemade Sauerkraut .
Forget the flavourless, pale imitations; we’re going back to basics, the way your great aunts probably did it before the telly took over! This recipe walks you through the ancient, natural process of fermenting crisp green cabbage using just salt.
The result is a vibrant, flavour packed, probiotic powerhouse sharp, slightly sour, and utterly delicious. It’s incredibly versatile, whether accompanying a hearty bangers and mash or jazzing up a simple sandwich. It’s an absolute staple, much like a good cup of tea!
The Nostalgic Power of Culturing: Reclaiming Traditional Food Preservation
The idea of preserving food without refrigeration seems almost magical, yet it’s a foundational practice of human history. Fermentation, driven by naturally present lactic acid bacteria, transforms simple vegetables into highly nutritious, shelf stable goods.
This method, which results in the Fermented Sauerkraut Recipe we are exploring, isn’t just about extending the life of your cabbage; it’s about unlocking bioavailable nutrients and enhancing flavour complexity through controlled decomposition.
This Easy Sauerkraut Recipe requires patience more than expertise, relying on time and temperature to work their magic.
Understanding the Tang: What Makes This Recipe Different
What sets this preparation apart from quick refrigerator pickles is the depth of flavour achieved through full lactic acid fermentation. We are aiming for a final product that is bright, assertively tangy, and boasts a satisfying, slightly yielding crunch.
This is achieved by carefully balancing the cabbage with non-iodised salt a ratio of about 2 3 tablespoons of salt per 3 pounds of cabbage is the solid foundation for our Basic Homemade Sauerkraut .
The specific chemical dance between the salt drawing out water and the naturally occurring Lactobacillus bacteria consuming the sugars creates that unmistakable, complex sourness.
Why You Should Start Making Homemade Sauerkraut Today
The primary draw for modern enthusiasts making Homemade Sauerkraut in a Crock or jar is undeniably health related. The Homemade Sauerkraut Benefits are substantial; these probiotics replenish your gut microbiome, aiding digestion and potentially boosting immunity.
On top of that,, making your own allows you complete control over ingredients no hidden preservatives, no sugar added, just cabbage and salt. This purity makes it arguably the Best Sauerkraut For Gut Health you can consume.
The Simplicity of Salt and Cabbage: A Purist's Approach
To begin this rewarding process, you will need surprisingly few items. At its core, this is a two-ingredient wonder. We need 1.36 kg (about 3 lbs) of firm, heavy green cabbage heads, and 45g (3 tablespoons) of non-iodised salt.
Iodised salt is strictly off-limits as the iodine can inhibit the necessary bacterial growth. If you wish to add subtle warmth, consider crushing 1 teaspoon of caraway seeds or 5 lightly bruised juniper berries alongside the salt when you begin mixing.
The Absolute Essentials: What You Need for Perfect Cabbage Crunch
Preparing for a successful batch of Homemade Sauerkraut requires gathering a few key tools before you even reach for the knife. While many fermentation enthusiasts gravitate towards large ceramic crocks, you absolutely do not need one to start.
The process is incredibly forgiving, especially when Making Sauerkraut in a Jar .
Selecting Your Cabbage: Texture, Weight, and Freshness Metrics
The quality of your starting ingredient dictates the final texture. Look for cabbage heads that feel dense and heavy for their size; this indicates high water content, which is essential for producing enough natural brine. Discard any leaves that look bruised or wilted.
You’ll want to remove the tough outer leaves, but importantly, reserve one or two clean, intact outer leaves these will serve a functional purpose later in the process.
Salt Specifics: Choosing the Right Mineral for Brine Stability
As mentioned, salt is the key ingredient regulating the entire environment. We use non-iodised sea salt or kosher salt. The salt does two jobs: it draws moisture out of the cabbage cells to create the brine, and it creates an environment hostile to undesirable bacteria while welcoming the lactic acid producers.
The 2% salt ratio (roughly 3 tablespoons per 3 lbs of cabbage) ensures safety and results in the proper tang.
Necessary Tools: Jars, Weights, and Why You Don't Need Fancy Gadgets
For a smaller batch, a single 1-quart wide mouth Mason jar works perfectly. For larger quantities, a traditional ceramic crock is fantastic, but the principles remain the same. You will also need a very sharp knife or mandoline to achieve thin, uniform shreds around 1/8th of an inch (3mm) is ideal for even fermentation.
Finally, you need something to weigh the cabbage down. This can be specialized glass fermentation weights, or simply a clean jar filled with water placed on top of the cabbage to ensure every shred stays below the brine line.
Related Recipes Worth Trying
- The Ultimate Homemade Guacamole Recipe Easy Fresh — Tired of bland supermarket dips Learn how to make truly fresh guacamole bursting with lime and texture in just 15 minutes This easy guacamole recipe is...
- Pillows of Perfection Ultimate Fluffy Homemade Potato Gnocchi — Stop buying the rubbery stuff Learn how to make truly pillowy soft potato gnocchi from scratch with our foolproof Italian recipe Perfect with sage butter
- CloudLike Masa for Tamales Easy Homemade Dough Recipe — Unlock the secret to perfect homemade tamales Learn how to make truly light and fluffy masa dough using the crucial float test A foolproof guide
The Hands-On Method: Transforming Cabbage into Homemade Sauerkraut

The active part of this Homemade Sauerkraut Recipe is surprisingly quick, clocking in at about 30– 45 minutes of active prep time. First, remove the core from your cabbage heads and thinly shred the rest of the leaves.
Place all the shredded cabbage, the salt, and any optional spices (like caraway) into an enormous, very clean mixing bowl. Now comes the crucial step: massaging. Using your clean hands, vigorously massage and squeeze the salt into the cabbage.
You must continue this process for at least 5 to 10 minutes. You are looking for a dramatic transformation: the cabbage will wilt significantly, release a substantial amount of milky liquid, and soften considerably. This brine is the lifeblood of your ferment.
The Wait Game: Monitoring Fermentation Progress Over Time
Once the cabbage is sufficiently wilted and brining, it’s time to pack the vessel. This part requires diligence to ensure success.
Mastering the Massage: Achieving Optimal Brine Release
If after ten minutes of intense massaging you still have very little liquid pooling at the bottom of the bowl, you haven't massaged enough. Keep squeezing and punching down until you see at least enough liquid to potentially cover the shredded vegetable matter.
This pre-brining stage is non-negotiable for excellent results.
Packing the Vessel: Ensuring Full Submersion for Safety
Transfer the salted cabbage into your jar or crock, packing it down firmly layer by layer. Use a tamper or the back of a clean spoon to press out any trapped air pockets as you go. The goal is density. Once all the cabbage is packed in, the liquid brine that you created should naturally rise above the solids.
Use the reserved, clean outer cabbage leaf, folded like a blanket, to rest on top of the shredded mass. This follower leaf acts as a physical barrier, helping to keep the smaller pieces beneath the surface. Place your weight on top of this leaf.
First Milestones: Recognizing Initial Gas Production (The Bubble Phase)
Seal the jar loosely it must not be airtight, as the active fermentation process produces carbon dioxide gas that needs to escape, or your jar could crack. Place the vessel in a cool, dark spot, ideally between 60° F and 70° F ( 15° C to 21° C).
Within 24 to 72 hours, you should observe bubbles rising through the brine, signifying that the bacteria are active. If liquid overflows as gases release, simply wipe down the outside of the jar and check that the solids remain submerged.
Tasting Benchmarks: How to Know When Your Sauerkraut is Properly Pickled
This is where personal preference reigns supreme. Start tasting lightly after the first week. For a milder, crisp kraut, 1 to 2 weeks might be sufficient. If you prefer the deep, sharp sourness associated with traditional deli style kraut, allow it to ferment for 3 to 6 weeks, tasting every few days.
Once the flavour hits your perfect sweet spot or rather, your perfect sour spot seal the lid tightly and transfer it immediately to the refrigerator. Cold temperatures drastically slow the bacterial activity, preserving that precise flavour profile.
Troubleshooting Common Fermentation Hurdles and Failsafes
Fermentation is resilient, but things can occasionally go awry. The most common superficial issue is the formation of Kahm yeast, which appears as a harmless, thin white film floating on the surface. This is not mould and is generally safe, but it can impart an undesirable flavour.
When to Worry (and When Not To): Dealing with Kahm Yeast
If you see that thin white film, don't panic; this is typical Kahm yeast. Simply use a clean spoon to skim it off the surface. If you see fuzzy, colourful growth blue, green, or black mould that is different.
If mould penetrates the brine or the vegetable matter itself, sadly, that batch must be discarded to avoid illness. Always ensure the weight keeps the cabbage completely covered to prevent airborne contaminants from reaching the surface.
Extending the Life: Storage Secrets for Maximum Crunch Retention
Once the kraut is perfectly tangy, refrigeration is your pause button. Stored properly in a sealed jar in the coldest part of your fridge, your Homemade Sauerkraut can maintain excellent flavour and texture for many months, often up to a year, though we doubt it will last that long!
Flavor Variations: Adding Carrots, Herbs, and Spice Infusions
While the purist method uses only salt, this base is wonderful for experimentation. To introduce natural sweetness and colour, add thinly sliced carrots during the salting and massaging stage.
For an aromatic twist, try infusing the brine by adding cloves of garlic, peppercorns, or fresh dill fronds when packing the jar. This shows how flexible Making Sauerkraut in a Jar truly is.
Optimal Temperatures: Balancing Speed and Flavor Depth
Remember, temperature dictates speed. A warmer environment (up to 75° F) will yield finished kraut faster, perhaps in 10 days, but risks a softer final texture.
Cooler temperatures (closer to 60° F) slow the process down considerably, potentially taking a month or more, but this slow conversion generally yields the firmest, most complex flavour profile.
Serving Suggestions: Pairing Your Tangy Creation with Meats and Potatoes
Your freshly prepared kraut is now ready to elevate any meal. It is the quintessential accompaniment to roasted pork shoulder or sausages. Pile it high on rye bread with corned beef, Swiss cheese, and Russian dressing for the ultimate grilled Reuben sandwich experience.
Alternatively, stir a spoonful into creamy potato salad or add it to grain bowls for a crucial injection of acidity and probiotic punch.

Recipe FAQs
My Homemade Sauerkraut isn't bubbling; has the ferment stalled?
Don't reach for the panic button just yet! Sometimes, if your kitchen is a bit chilly, the helpful bacteria take their sweet time waking up. Try moving your jar somewhere slightly warmer, ideally around 70°F (21°C), and give it another day or two.
Ensure your cabbage is completely submerged under the brine; if it's not, the process won't kick off properly.
How long does it actually take until my Homemade Sauerkraut is ready to eat?
This depends entirely on your taste, mate, but generally, you're looking at 1 to 4 weeks. Start tasting it after about seven days; if it’s already sharp enough for you, you can stop the process by sealing it tightly and popping it in the fridge.
Colder temperatures mean a slower ferment, so patience is a virtue here!
I saw some white film floating on top; should I throw the whole jar away?
Hold your horses, that's usually just Kahm yeast, which is completely harmless, although it can sometimes give a slightly off-flavour. It looks a bit like a thin, dusty film, and you can simply skim it off with a clean spoon.
If you see any fuzzy blue, green, or black mould, however, that’s a different kettle of fish, and you’ll need to start that batch over.
Can I use iodised salt or table salt when making this sauerkraut?
Absolutely not! That’s a rookie error we want to avoid; iodised salt can actually inhibit the growth of the good bacteria needed for fermentation. You must use non-iodised salt, such as kosher salt or pure sea salt, which ensures a clean and successful ferment every time.
What’s the best way to store finished sauerkraut to keep it crunchy and fresh?
Once you’ve achieved the perfect tang, seal your jar tightly and move it straight to the back of the fridge, where it's nice and cold. Refrigeration slows the lactic acid production right down, effectively pausing the fermentation.
Stored properly in the fridge, it will easily last for several months, tasting better the longer it matures!
I want something different than plain cabbage what variations work well in homemade sauerkraut?
You’re in luck, as sauerkraut is brilliant for experimentation! Try adding a few bruised juniper berries and caraway seeds for a classic German flavour profile, or for a real kick, throw in grated ginger and some mild chilli flakes for a nice spicy edge.
Just remember to keep the salt ratio consistent regardless of what tasty extras you introduce.
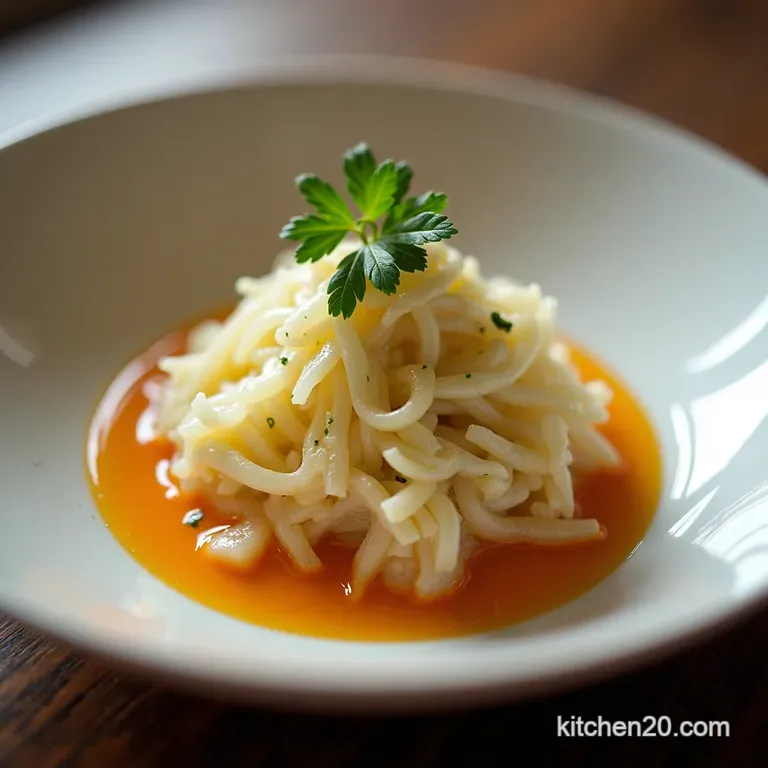
Brilliant Homemade Sauerkraut

Ingredients:
Instructions:
Nutrition Facts:
| Calories | 20 Cal |
|---|---|
| Fat | 0.1g |
| Fiber | 1.5g |
