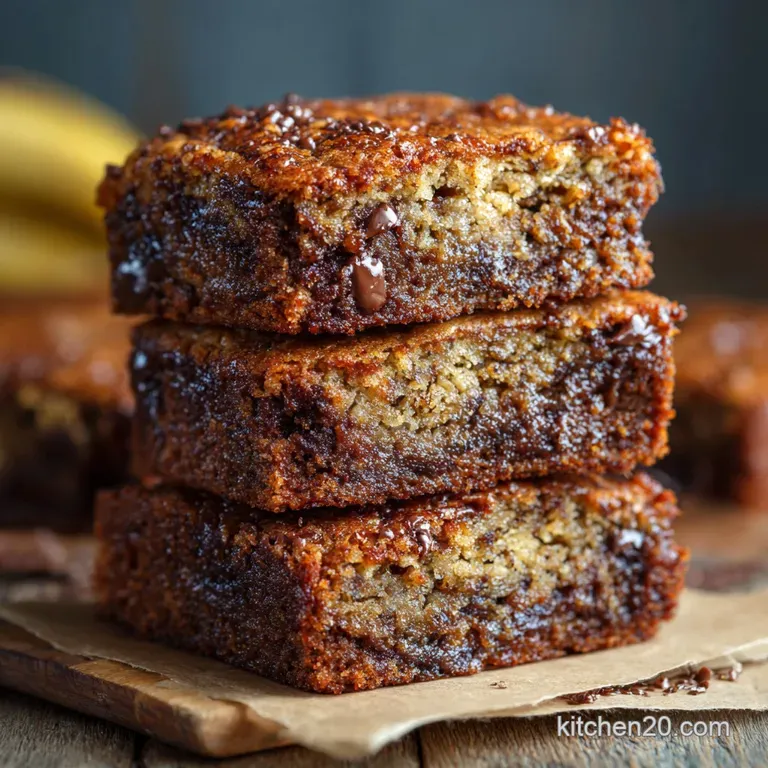
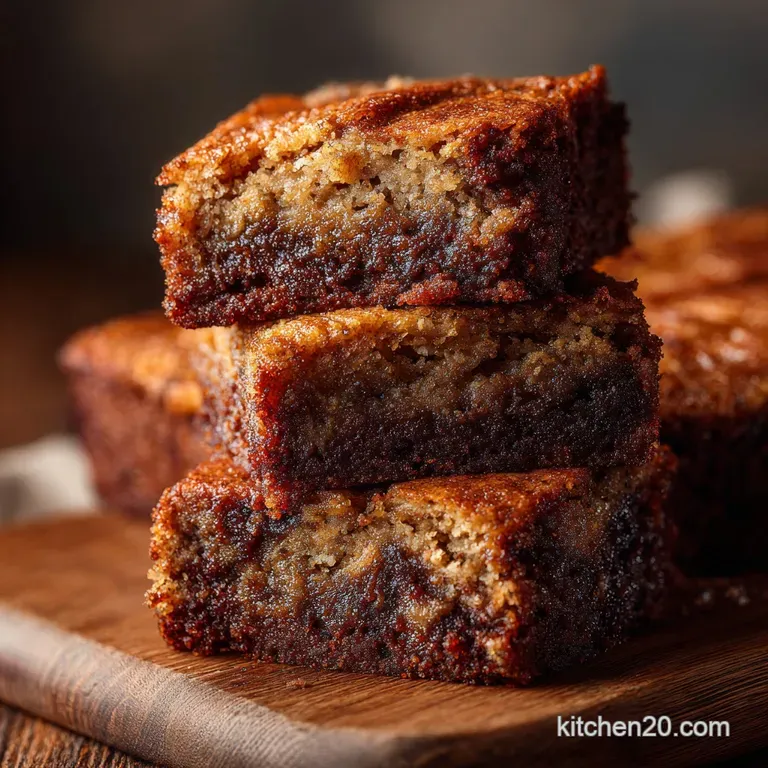
Brown Butter Banana Bread Bars with Toasted Walnuts
- Why We’re Ditching the Loaf Pan for Banana Bread Bars
- The Secret Weapon: Harnessing the Flavor of Brown Butter
- Essential Elements for Perfect Banana Bread Bars
- Tools of the Trade: Equipment for Speedy Baking
- Step-by-Step Guide to Assembling Your Batter
- Baking Timeline and Achieving the Perfect Golden Finish
- Troubleshooting Common Banana Bread Bar Issues
- Elevating the Recipe: Flavor Variations and Customizations
- Storing and Freezing Your Baked Goods for Maximum Freshness
- Recipe FAQs
- 📝 Recipe Card
Why We’re Ditching the Loaf Pan for Banana Bread Bars
Traditional banana bread requires a long, slow bake time, often leading to uneven cooking where the edges are stiff while the center remains slightly doughy. These quick, delicious Banana Bread Bars solve that problem entirely by using a standard sheet pan.
Baking the batter in a 9x13 inch pan drastically reduces the overall thickness, which cuts the required oven time down to a mere 30 to 35 minutes. The resulting treats are wonderfully fudgy and possess the dense, chewy texture reminiscent of true Banana Bread Brownies.
The Secret Weapon: Harnessing the Flavor of Brown Butter
This simple technique elevates standard baked goods into something complex and deeply satisfying with minimal effort. Brown butter, or beurre noisette , adds an intense, nutty caramel depth that perfectly complements the ripe bananas and warm spice profile.
This single foundational step makes our specific banana bread bars recipe stand head and shoulders above recipes using plain melted fat.
Achieving Ultimate Moistness and Depth of Flavor
The process of browning butter removes some of the water content while concentrating the inherent milk solids into rich, nutty flecks. These caramelized solids are folded directly into the batter, ensuring phenomenal flavor distribution throughout the bars.
This technique enhances the inherent sweetness of the overripe fruit, giving the bars a deep, bakery quality complexity without any fuss.
A Quick Comfort: Ready to Slice in Under an Hour
Since we utilize a large, shallow sheet pan, heat penetrates the batter quickly and evenly from all sides. This rapid bake time of just over half an hour means you can satisfy your banana bread craving almost immediately.
Although cooling is essential for clean slices, the bars are completely cooked and ready to begin setting far sooner than any traditional loaf could ever be.
A Nutty Twist: The Role of Toasted Walnuts
We incorporate roughly chopped walnuts into the mixture to provide a crucial textural contrast to the dense, fudgy base. Toasting the walnuts beforehand is vital, as this process deepens their earthy flavor profile and enhances their natural crunch.
This intentional step ensures every bite offers a satisfying mixture of moist banana, warm spice, and savory toasted nuttiness.
Essential Elements for Perfect Banana Bread Bars
The foundation of any superior banana bread bars recipe relies on using exceptionally ripe bananas; they should look nearly black or heavily spotted for maximum natural sweetness and moisture retention.
We combine granulated sugar, which aids in structure, with light brown sugar, which introduces a deep molasses flavor and essential gooeyness. This measured blend guarantees a soft interior and slightly caramelized edges, yielding fantastic results every single time.
Tools of the Trade: Equipment for Speedy Baking
Baking these bars is streamlined by using a standard 9x13 inch baking pan, which is key to achieving their thin, uniform shape. We highly recommend lining this pan with parchment paper, leaving an overhang to create a useful "sling." This simple trick allows for the effortless removal of the entire batch once cooled, guaranteeing clean and easy slicing.
Selecting the Right Bananas (Spotty is Best)
Bananas must be overly ripe for this recipe, offering concentrated sweetness and a high liquid content. The heavily spotted or fully black peel indicates that the starches have converted fully to sugar, which is crucial for the bars' signature moist texture.
If your bananas are too green, simply roast them whole in their skins at 300° F ( 150° C) for about fifteen minutes until they soften completely.
Mastering the Brown Butter Technique Before Mixing
Start by melting the cubed unsalted butter in a heavy bottomed saucepan over medium heat, stirring continuously to prevent scorching. The butter will bubble, then foam, and finally, the foam will subside, revealing gorgeous golden brown flecks settling at the bottom.
Immediately remove the pan from the heat and transfer the fragrant liquid into your mixing bowl to prevent it from continuing to cook and burn.
Your Baking Checklist: Pantry Staples and Pan Prep
Always begin by preheating your oven to 350° F ( 175° C) and ensuring the parchment lined pan is lightly greased on the exposed edges. Before mixing, measure all your dry ingredients, including the flour, baking soda, cinnamon, and salt, into a separate bowl.
Critically, ensure your eggs are at room temperature, which prevents the slightly cooled brown butter from seizing up the entire mixture.
Must Have Kitchen Gear for Bar Recipes
Beyond the standard 9x13 pan, a sturdy whisk is essential for properly integrating the sugars and mashed bananas into the warm brown butter. A flexible rubber spatula is necessary for the final, gentle folding stage of the batter, as this crucial tool prevents harmful over mixing and gluten development.
This specialized gear helps maintain the soft, chewy texture we desire in these delicious Banana Bread Bars.
Related Recipes Worth Trying
- Ultimate Pineapple Bars Recipe Zingy Tropical Crumb Bars — These classic Pineapple Bars feature a tender buttery shortbread crust and a bright tropical filling They are robust easy to transport and perfect for any...
- Simple Homemade Pita Bread Recipe Guaranteed Fluffy Pockets — Right then lets get down to brass tacks Ditch the rubbery shopbought stuff for this Simple Homemade Pita Bread recipe Minimal ingredients maximum puff and...
- The Ultimate Graham Cracker Toffee Bars Recipe Sticky Buttery Easy — This foolproof Graham Cracker Toffee Bars recipe sets perfectly every time Get the rich buttery brittle cracker toffee crunch topped with chocolate chips...
step-by-step Guide to Assembling Your Batter
Once the brown butter is slightly cooled, whisk in the mashed bananas, both sugars, room temperature eggs, and vanilla until the mixture is cohesive and the sugar begins to dissolve.
Separately, thoroughly mix the flour and leavening agents to ensure even distribution, preventing pockets of baking soda in the finished bar. Add the dry mixture to the wet mixture and use a flexible spatula to fold everything together carefully.
The key is to stop mixing the moment you see a few streaks of flour disappear; overmixing develops gluten and results in tough, less desirable banana bread bars without sour cream texture.
Baking Timeline and Achieving the Perfect Golden Finish
The batter should be scraped and spread evenly across the prepared 9x13 pan, ensuring the thickness is uniform for consistent baking results. Bake for 30 to 35 minutes until the edges are golden brown and starting to pull slightly away from the sides of the pan.
The reduced baking time, compared to a loaf, ensures maximum moisture retention, giving us wonderfully soft and satisfying Banana Bread Bars.
Creaming the Brown Butter and Sugars
Although we are using melted butter, the sugars are still vigorously whisked into the slightly cooled fat along with the mashed bananas. This initial stage helps the sugars begin to dissolve, creating a foundational syrup that locks in moisture during baking.
This careful emulsification ensures the final product is cohesive and achieves that sought after, dense fudgy interior.
Incorporating Wet Ingredients (The Science of Moisture)
The mashed banana is the primary source of both moisture and flavor, binding the other components while lending necessary natural sweetness. Using room temperature eggs introduces necessary fat and structure, helping to lift the batter slightly when activated by the baking soda.
Vanilla extract adds aromatic complexity, rounding out the deep caramel notes successfully introduced by the preliminary brown butter preparation.
Folding in the Dry Mix and Add-ins Gently
When combining the dry ingredients with the wet, use only a gentle folding motion with a spatula, cutting down through the middle and sweeping the batter up. This minimal movement prevents the formation of tough gluten strands, which guarantees tender and soft banana bread bars.
Once the flour is mostly incorporated, fold in the toasted walnuts only briefly to ensure they are evenly dispersed throughout the entire batch.
How to Test for Doneness (No More Guesswork)
To check if your Banana Bread Bars are fully cooked, rely on the toothpick or wooden skewer test performed near the center of the pan. The skewer should come out clean, or preferably, with just a few moist, sticky crumbs attached.
If you see wet, uncooked batter clinging to the skewer, return the pan to the oven for another three to five minutes, checking again immediately afterward.
Troubleshooting Common Banana Bread Bar Issues
The most frequent issue encountered when making this kind of recipe is a tough or rubbery texture, which almost always stems from overmixing the batter during the final combination step.
If your bars seem dry, the likely culprit was either insufficient banana ripeness or failing to measure the flour accurately using the careful spoon and-level method. If the center of the bars sinks after baking, ensure your baking soda is fresh, as old leavening agents won't provide the necessary structure to support the moist crumb.
Elevating the Recipe: Flavor Variations and Customizations
For a truly decadent dessert experience, consider finishing these bars with a generous, complementary glaze or frosting. The depth of flavor in these banana bread bars no frosting is already phenomenal, but adding a topping offers complexity and visual appeal.
A velvety banana bread bars with cream cheese frosting or a rich, sophisticated banana bread bars with brown butter frosting both pair beautifully with the warming spices in the base. You can also press in mini chocolate chips before baking for an added, luscious textural element.
Storing and Freezing Your Baked Goods for Maximum Freshness
Proper cooling is the essential first step to good storage; the bars must be fully cooled before placing them in any storage container. For long term storage, they freeze exceptionally well, especially if wrapped tightly in plastic wrap before being placed into an airtight freezer bag.
They maintain their quality for up to three months and should be thawed overnight at room temperature before serving.
Substitutions: Going Nut-Free or Adding Chocolate Chips
If you need a nut-free version of this recipe, simply omit the walnuts entirely, or substitute them instead with a cup of dark chocolate chips for a rich, melty Banana Bread Brownie effect.
For those aiming for banana bread bars healthy adjustments, you can successfully swap up to half of the all-purpose flour volume for whole wheat pastry flour. This simple change adds fiber without significantly compromising the delicious, moist crumb structure.
Dealing with High Altitude Baking Adjustments
Baking at high altitudes typically requires a slight increase in oven temperature, usually around 15° F, to set the structure more quickly before the leavening agents over expand.
You may also need to reduce the amount of baking soda by 1/8 teaspoon to prevent excess rise and the subsequent collapse or dry texture. This careful balance ensures that the Banana Bread Bars set properly and do not become gummy upon cooling.
Best Practices for Room Temperature Storage
Always store these Banana Bread Bars in an airtight container at room temperature for up to three days for optimal freshness and texture. If you live in a warm or excessively humid climate, storing them in the refrigerator might slightly extend their lifespan, although this can sometimes slightly dry out the edges.
If the bars are finished with a dairy based topping like cream cheese frosting, refrigeration is absolutely essential to prevent spoilage.
Nutritional Notes and Serving Suggestions
These dense, carbohydrate rich bars provide excellent sustained energy, making them ideal for an afternoon pick-me-up or a substantial breakfast alongside your morning coffee. For an indulgent dessert, serve the banana bread bars with a small scoop of high-quality vanilla bean ice cream and a drizzle of sea salt caramel sauce.
If you prefer a lighter, less decadent take, enjoy the pure flavor of these banana bread bars without sour cream or frosting, simply pairing them with a cup of strong black tea.

Recipe FAQs
How long will these delicious Banana Bread Bars keep fresh?
Treat them like proper banana bread; they stay beautifully moist in an airtight container at room temperature for 3 4 days, or you can pop them in the freezer for up to three months if you fancy batch baking.
I'm a bit nervous about browning the butter what's the trick to getting that nutty flavour without burning it?
Keep the heat medium and stir constantly; once it smells deeply nutty and you see golden flecks (like toasted biscuit crumbs) forming at the bottom, take it off the hob immediately and pour it into your mixing bowl to stop the cooking process.
My bananas aren't quite black yet. Can I still use them, or is the ripeness really that important?
Yes, it truly is essential! Overripe bananas are sweeter and provide the necessary moisture, stopping the bars from being dry; if yours are still a bit green, a quick roast in their skins at 300°F (150°C) for 15 minutes will save the day.
My bars crumbled when I tried to slice them. What did I do wrong, dear chef?
Don’t fret, that’s a classic mistake! The key is patience; you absolutely must let them cool completely in the tin, allowing the starches to set fully before attempting to lift them out and slice (at least 30 minutes).
Can I add different additions (like chocolate chips or a streusel) instead of walnuts?
Absolutely! Feel free to swap the walnuts for a cup of dark chocolate chips, or for a real pudding treat, try adding a buttery streusel topping before baking bob's your uncle!
Brown Butter Banana Bread Bars

Ingredients:
Instructions:
Nutrition Facts:
| Calories | 454 kcal |
|---|---|
| Protein | 1.9 g |
| Fat | 13.0 g |
| Carbs | 26.1 g |
| Fiber | 3.7 g |
| Sodium | 4507 mg |
