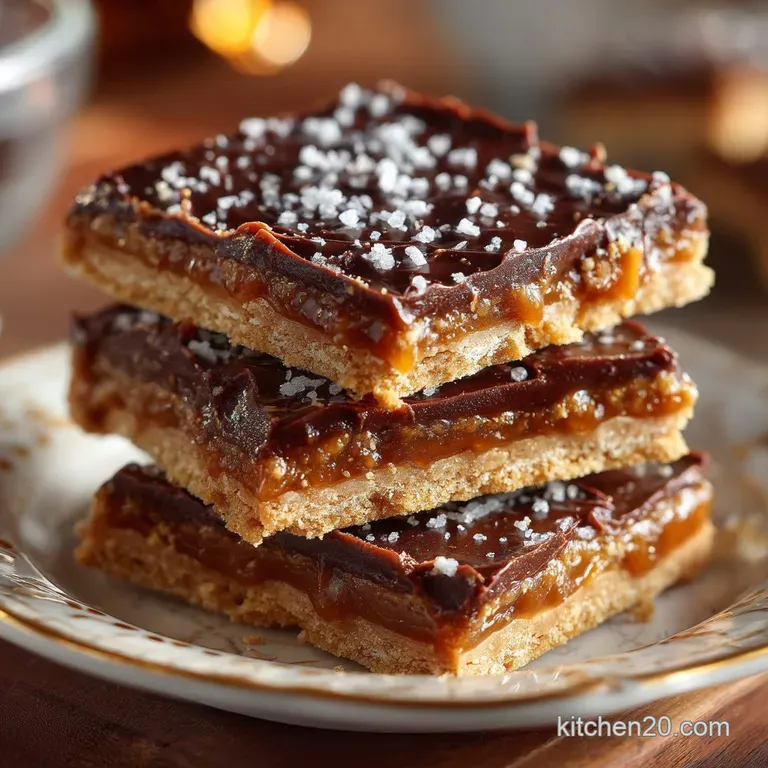
The Ultimate Graham Cracker Toffee Bars the Crack That Keeps on Giving
- Unlocking the Secret of the World’s Easiest Holiday Treat
- Essential Components for Your Homemade Toffee Base
- Laying the Foundation: Prepping Your Graham Cracker Base
- Mastering the Toffee Transformation (Achieving the Perfect Caramel Stage)
- The Final Layer: Melting, Spreading, and Setting Your Chocolate Topping
- Preservation Pointers: How to Store Graham Cracker Toffee Bars
- Elevating Your Batch: Creative Twists and Ingredient Swaps
- Dive into the Discussion: Your Questions About Homemade Crunch
- Recipe FAQs
- 📝 Recipe Card
Unlocking the Secret of the World’s Easiest Holiday Treat
There are certain recipes that become instant legends in the home kitchen, and the classic Graham Cracker Toffee Bars are certainly one of them. Combining a simple base, an unbelievably rich homemade toffee, and a smooth layer of chocolate, this dish is a triple threat.
What truly elevates this specific treat is its minimal commitment of time just 10 minutes of preparation and 15 minutes of cooking delivering maximum flavor with a supremely satisfying, buttery crunch.
Why We Call These "The Ultimate Graham Cracker Toffee Bars"
The key to perfection in this dish lies in the seamless harmony between the salty cracker base and the sticky, buttery caramel layer. Unlike many complicated confectionery projects, this Graham Cracker Toffee Bars recipe requires only pantry staples but tastes as though you’ve spent hours fussing over it.
The results are consistent, achieving that ideal balance of sweet and savory that makes the Cracker Toffee simply irresistible. It’s an essential, easy Toffee Recipe that should be in everyone’s repertoire.
The Sweet Science Behind the Perfect Brittle Texture
The secret to achieving the perfect brittle snap rather than a chewy taffy texture is controlled boiling. We rely on the marriage of brown sugar and butter, which, when cooked correctly, converts into a light, crisp caramel.
By bringing this mixture to a full rolling boil for a short, timed duration about 3 to 5 minutes we ensure enough moisture evaporates. This creates the structural integrity necessary for a truly brittle set once chilled, resulting in a toffee that shatters delightfully when broken.
Demystifying "Christmas Crack": A Year Round Delight
You may have heard these Graham Cracker Toffee squares referred to by their slightly dramatic nickname, "Christmas Crack." While they undeniably shine on a festive holiday platter, this incredibly simple confection is too good to reserve only for December.
With minimal effort and fast turnover, these bars are a brilliant choice for quick entertaining, potlucks, or simply satisfying that sudden craving for something truly indulgent any time of year.
Essential Components for Your Homemade Toffee Base
Building the perfect bar starts with understanding the role of each ingredient. For the base layer, you will need approximately one standard sleeve of graham crackers (about 18 sheets) to neatly cover the bottom of a 9x13 inch pan.
The heart of the operation the toffee requires two core ingredients: one cup (225 grams) of butter and one cup of firmly packed light brown sugar. We also incorporate a teaspoon of pure vanilla extract just off the heat for a foundational aromatic depth.
Selecting the Best Salted Butter and Brown Sugar Duo
While the recipe inherently balances sweet and savory elements, it is always best practice to use unsalted butter (good quality is highly recommended). This allows you, the baker, complete control over the final seasoning.
The use of light brown sugar, packed tightly, is non-negotiable for this particular Cracker Toffee , as the molasses content provides a richer, more complex depth than granulated white sugar could ever achieve.
Beyond Basics: Optional Toppings for Flavor Depth
Once the toffee is set and the bars are fresh out of the oven, they are ready for their crowning glory. We use one cup (175 grams) of semi sweet chocolate chips, relying on the residual heat of the toffee to melt them into a glossy layer.
For texture, traditionalists will opt for graham cracker toffee bars with pecans , using about half a cup (60 grams) of lightly toasted, chopped nuts. Finally, a generous sprinkling of flaky sea salt truly makes the whole affair sing.
If you need graham cracker toffee bars no nuts , simply substitute with toasted seeds like pepitas, or omit entirely.
The Importance of a Heavy Bottomed Saucepan
When making any caramel or toffee, the right equipment is paramount. A sturdy, heavy bottomed saucepan is essential here. Its density ensures heat is distributed slowly and evenly across the bottom, drastically reducing the risk of scorching or burning the brown sugar mixture, which can happen swiftly and fatally in thin walled pots.
Do I Really Need a Candy Thermometer for This Recipe?
Thankfully, no, you absolutely do not need a candy thermometer for this streamlined Toffee Recipe . While professional caramel making often requires precise temperature readings (like soft ball or hard crack), this specific graham cracker toffee bars recipe relies on visual cues and a timed rolling boil (3 to 5 minutes) to achieve the necessary brittle set.
This simplicity is precisely why it’s earned its reputation as the easiest of all toffee preparations.
Laying the Foundation: Prepping Your Graham Cracker Base
The preparation of your 9x13 inch baking pan is a non-negotiable step that ensures effortless removal later. Start by lining the entire pan with heavy duty aluminum foil, being sure to leave a substantial overhang along the long sides these will become your "handles." Next, the graham crackers must be laid out in a single, tight layer.
Break pieces as needed to fill any visible gaps, creating a solid, impenetrable surface. This foundation is critical, preventing the hot liquid toffee from seeping underneath and gluing the bars permanently to the pan.
Mastering the Toffee Transformation (Achieving the Perfect Caramel Stage)
The transformation of butter and sugar into glorious caramel is a simple but precise endeavor. In your prepared heavy bottomed saucepan, melt the butter and brown sugar together over medium heat, stirring until the sugar crystals are fully dissolved.
Once melted, increase the heat slightly and bring the mixture to a full, continuous rolling boil meaning the bubbles cover the entire surface and continue to form even as you stir. Time this boil for exactly 3 to 5 minutes. The mixture will darken slightly to a rich, true caramel color.
Immediately remove the pan from the heat and gently stir in the vanilla extract before proceeding rapidly to the next step.
Related Recipes Worth Trying
- Properly Chewy Soft HoneyOat Granola Bars Recipe — Forget brittle supermarket bricks This Homemade Granola Bars Recipe yields the Best Granola Barssoft chewy and perfect for lunchboxes See the secret inside
- Firecracker Fiesta Spicy Jalapeño Popper Stuffed Mushrooms — These creamy cheesy Spicy Jalapeño Popper Stuffed Mushrooms are addictive party starters Loaded with bacon and cheddar theyre easier than you think Get the...
- Chewy LowCarb Coconut Bars Easy Keto Dessert — Discover the best LowCarb Coconut Bars that are delightfully chewy and packed with tropical flavour This easy keto coconut dessert recipe is foolproofget baking
The Final Layer: Melting, Spreading, and Setting Your Chocolate Topping
Once the toffee is cooked, the process becomes fast paced, capitalizing on the high heat.
The Tight Fit: Properly Lining the Baking Sheet
Before the toffee is poured, confirm that your foil liner is taut and the generous overhangs are in place. This foundational preparation is the single most important tip for a clean lift out and easy cleanup.
Creating a Seamless Cracker Puzzle (No Gaps Allowed)
After the base is arranged, carefully and immediately pour the hot toffee mixture evenly over the entire layer of graham crackers. Use a heat safe spatula to coax the sticky goodness into all the corners, ensuring every cracker piece is fully coated.
Simmering Secrets: When to Pull the Toffee Off the Heat
Place the pan in your preheated 350° F ( 175° C) oven and bake for a short 5 to 7 minutes. This brief bake sets the toffee structure and ensures it completely penetrates the crackers.
You’ll know it’s ready when the caramel layer is bubbling vigorously across the surface.
Spreading the Sticky Goodness Evenly Across the Bars
Upon removing the pan from the oven, immediately scatter the cup of graham cracker toffee bars chocolate chips over the hot surface. Allow the chips to sit undisturbed for about five minutes; the residual heat from the toffee will do all the melting work.
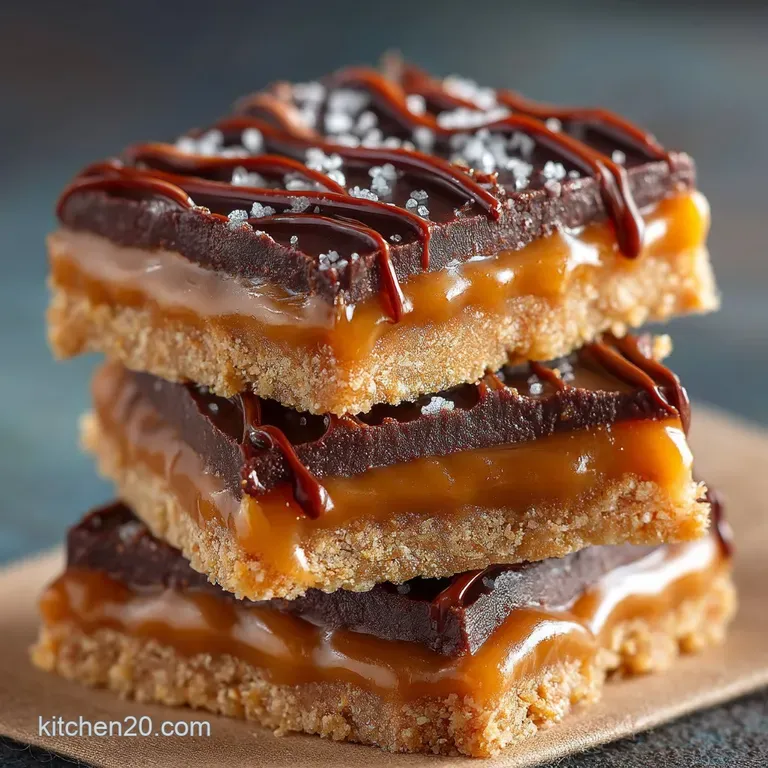
Achieving a Smooth, Glossy Chocolate Finish
Use an offset spatula or the back of a spoon to gently spread the now-softened chocolate into a smooth, even, glossy layer. Be careful not to press too hard and disturb the toffee underneath.
While the chocolate is still wet, sprinkle the chopped pecans (or other desired topping) and flaky sea salt generously across the surface.
Chilling Protocol for Optimal Cracking and Crunch
The final, essential step is patience. Allow the bars to cool at room temperature for about 30 minutes, then transfer the pan to the refrigerator to chill for at least one hour.
This rigorous chilling protocol is what solidifies the toffee and chocolate layers, guaranteeing the ideal brittle snap when you go to cut or break the finished Graham Cracker Toffee Bars .
Preservation Pointers: How to Store Graham Cracker Toffee Bars
Once fully set and cut into servings (this recipe typically yields 30 36 small bars), your Graham Cracker Toffee Bars should be stored in an airtight container. They maintain their best quality and crunch when stored at a cool room temperature for up to one week.
If your kitchen tends to be warm, storing them in the refrigerator will prevent the chocolate from blooming or melting.
Elevating Your Batch: Creative Twists and Ingredient Swaps
This basic formula is incredibly adaptable. If you are preparing graham cracker toffee bars no nuts due to allergies, try swapping the pecans for toasted sunflower or pepita seeds to retain the necessary crunchy texture.
For a festive twist, try the Peppermint Bark variation by using white chocolate chips and crushing candy canes over the top instead of nuts. A sophisticated option is the Salted Bourbon Caramel: replace one teaspoon of the vanilla extract with a good quality bourbon stirred in immediately after pulling the toffee from the heat.
Dive into the Discussion: Your Questions About Homemade Crunch
This incredibly popular treat generates a few common questions, particularly around storage and dietary adjustments.
Keeping the Crunch: Countertop vs. Refrigerator Storage
The crunch of this Cracker Toffee is best maintained when stored at a steady, cool room temperature in a sealed container. While refrigeration is ideal for preventing melting (especially if using milk chocolate), the cold can introduce minimal moisture, which can subtly dull the crispness over several days.
Can I Freeze These Toffee Bars? (Shelf Life Explained)
Absolutely. If you want to prepare these well in advance, they freeze beautifully. Once fully set and cut, wrap the bars tightly in aluminum foil, then transfer the wrapped batches into a large freezer safe bag. They can be successfully stored for up to three months.
Thaw them overnight in the refrigerator before serving.
Gluten-free and Vegan Adaptation Strategies
The base is easily adaptable; simply source gluten-free graham crackers. For a fully vegan version, high-quality, stick form plant based butter substitutes work exceptionally well in the toffee mixture, creating a rich, dairy-free Graham Cracker Toffee that sacrifices none of the original indulgence.
Switching the Base: Using Saltines or Pretzels Instead of Grahams
Yes, you can certainly switch the base for a different flavor profile. Saltine crackers, often used in similar recipes, offer a stronger salt sweet contrast than the graham cracker base.
Pretzels provide a unique, knotty texture and a pronounced savory note, successfully changing the entire focus of the finished Toffee Recipe .
Troubleshooting Tips: My Toffee Didn't Harden (Fixing Common Errors)
If your toffee came out soft and chewy instead of hard and brittle, the issue is almost certainly a result of under boiling. For the toffee to set hard, it needs to reach the required temperature by boiling for the full 3 to 5 minutes.
If you pulled it off the heat too soon, too much moisture remained in the mixture. Ensure the next batch achieves a complete, rolling boil for the full duration to guarantee that satisfying snap.
Nutritional Snapshot: Understanding the Sweet Indulgence
It is important to acknowledge that the Graham Cracker Toffee Bars are a rich, indulgent treat. Based on a small, estimated serving of 32 bars, each piece contains roughly 180 to 200 calories, primarily from the butter, brown sugar, and chocolate.
This is a dessert meant for enjoyment and sharing, an occasional sweet pleasure rather than an everyday staple.
Recipe FAQs
My toffee layer stayed chewy and gooey, not snappy. Did I muck up the boil time?
Yes, the boiling time is the sticky wicket in this recipe! If the toffee remains soft and pulls when cut, it means you didn't quite boil it long enough for the sugar concentration to crystallise properly.
You need to aim for that full 3 to 5 minutes of rapid, rolling boil, ensuring it reaches the proper high temperature to guarantee a crisp, brittle set once cooled.
Are there any brilliant shortcuts or substitutions for the classic Graham Cracker Toffee Bars recipe?
Absolutely, feel free to get creative! Many keen bakers swap out the graham crackers for salty alternatives like water biscuits (saltines) or even mini pretzels for a stronger salty sweet punch sometimes called 'Cracker Candy'.
You can also make a brilliant gluten-free version by using GF digestive biscuits or rice crispbreads as your base layer.
These are utterly moreish! How long can I keep them, and what’s the best way to store them?
If stored in a good, airtight biscuit tin, these bars will happily keep for up to 7 days at room temperature. However, if your kitchen is particularly warm, keeping them in the fridge is advisable as it stops the chocolate from blooming and ensures the toffee remains beautifully brittle.
They also freeze well if you wrap them tightly in foil first.
I'm in a rush is it absolutely essential to chill these before cutting?
Please don't skip the chill time; it’s utterly crucial if you want a presentable finish. Cutting the bars when the toffee or chocolate is still even slightly warm will result in a disastrous, gooey, sticky mess rather than clean, satisfying shards.
Give them a proper 60-minute stint in the fridge for that perfect professional snap and easy removal.
I’m not keen on pecans. What other chocolate and nut variations would work brilliantly?
You can swap the semi sweet chocolate for dark, milk, or even white chocolate (think of a festive peppermint bark variation!). If nuts aren't your thing, try toasted coconut flakes, colourful sprinkles, or crushed freeze dried raspberries for a vibrant colour pop.
For a subtle twist, melt a spoonful of smooth peanut butter into the chocolate before spreading.
Ultimate Graham Cracker Toffee Bars Recipe

