Simple Granola: the Everyday Crunch Recipe
- Mastering the Everyday Crunch: Why Homemade Granola Is Better
- The Science of the Cluster: Texture Secrets for Simple Granola
- Gathering Your Pantry Staples: Essential Ingredients and Variations
- The Simple Granola Method: Achieving Perfectly Golden Batches
- Professional Granola Tips and Troubleshooting Common Errors
- Maintaining the Crunch: Storage Best Practices
- Creative Ways to Serve Your Homemade Batch
- Recipe FAQs
- 📝 Recipe Card
Mastering the Everyday Crunch: Why Homemade Granola Is Better
I swear, the scent of this baking is proof that small effort yields massive payoff. It’s that glorious mix of warm vanilla, deeply toasted oats, and spicy cinnamon that just hugs your entire house.
This Simple Granola recipe is not just food; it’s an aroma therapy session disguised as breakfast. Forget the dusty, flavorless cereal box stuff. We are making something truly addictive here.
For years, I stubbornly bought expensive bags of granola, telling myself it was too complicated to make. What a lie that was! Making Simple Granola at home is shockingly fast, incredibly cheap, and gives you total control over the sugar levels and flavors.
Seriously, why pay eight bucks for a tiny bag of pre-made when you can make a huge batch for half the price in under an hour?
This recipe, honed through dozens of slightly burnt, slightly soggy attempts, is the absolute bedrock of my pantry. I’ve cracked the code on those giant, satisfying clusters everyone wants, and I’m spilling all the secrets.
Get ready to ditch the store-bought stuff forever and start your mornings the crunchy, delicious way.
The Science of the Cluster: Texture Secrets for Simple Granola
Getting beautiful, sturdy clusters in your Simple Granola isn’t luck; it’s chemistry. The secret lies in the binding agents, the temperature, and, most importantly, the waiting game. If you follow these rules, you won't end up with sad, separate oat flakes.
You’ll get solid chunks of deliciousness.
The Secret to Professional Grade Clusters
The key binding agents here are the liquid sweetener (maple syrup or honey) and the oil. When you mix them, they create a sticky film over the oats. Crucially, when baking low and slow, these sugars caramelize without burning.
Then, when the granola cools down, the caramelized sugar film acts like cement, gluing the pressed oats together. You absolutely must press the granola onto the pan before baking. This forces the oats into maximum contact, maximizing the bond.
Just Seven Core Ingredients: A Minimalist Approach
I love this approach because it’s clean and fast. We’re using only the essentials: oats, a fat, a sweetener, vanilla, salt, and maybe a spice. That’s it. You don’t need fifty fancy nuts and seeds to achieve perfection.
This Simple Granola recipe with oats proves that sometimes, less truly is more delicious. It’s the perfect base, a blank canvas ready for whatever dried fruit or chocolate chips you decide to throw in later.
Recipe Difficulty Rating and Prep Time
I rate this recipe as genuinely easy. Active prep time is literally ten minutes. If you can measure things and stir them in one bowl, you can master this. The hardest part, honestly, is waiting for it to cool down so you can eat it.
We are looking at a total commitment of about 45 minutes of heat time, but most of that is passive oven time.
The Importance of Oats and Binding Agents
When making Simple Granola , the quality of your oats matters a lot. Use old-fashioned rolled oats, please. They hold their shape and have the surface area necessary for the binding agents to adhere effectively.
Binding agents, like maple syrup, provide the necessary stickiness and sweetness. The oil then ensures the binding agent distributes evenly and helps create that deep, golden brown toasted color without drying everything out.
Why Low and Slow Baking Ensures Deep Flavor
Baking Simple Granola at 300°F (150°C) prevents scorching the delicate edges while allowing the heat to penetrate the large mass evenly. High heat often results in an exterior that looks done, maybe even too dark, but a middle that's still soggy and chewy (in a bad way).
The low and slow method coaxes out the incredible nutty aroma of the oats and allows the maple syrup to gently caramelize, deepening the flavor profile immensely.
Balancing Sweetness and Salt for Maximum Impact
I know, you might wonder why the heck we need half a teaspoon of fine sea salt in a sweet breakfast recipe. Trust me on this. Salt is essential for cutting the cloying sweetness of the maple syrup and intensifying the natural, toasty flavor of the oats and nuts.
A properly seasoned batch of Simple Granola has layers of flavor, not just a sugary wallop.
Gathering Your Pantry Staples: Essential Ingredients and Variations
This is where we talk ingredients, but mostly, we talk flexible substitutions. Because who wants to run to the store for one thing? Not me. I want to make great food with what I already have on hand.
Selecting the Right Oats (Rolled vs. Quick)
Always opt for old-fashioned rolled oats. They are the backbone of this particular Simple Granola recipe with oats. Quick oats are pre-steamed and cut smaller, meaning they absorb the liquid too fast and often turn mushy during the mixing phase, leading to smaller, less defined clusters. Save the quick oats for making Soft and Chewy Granola Bars: The Easy Baked Recipe That Wont Crumble instead, where that texture is actually desirable!
Liquid Sweeteners: Maple Syrup vs. Honey Comparison
My preferred binder for the best Simple Granola is pure maple syrup. It provides a cleaner, almost butterscotch like flavor and is easier to mix because it's slightly thinner than honey.
However, if you are looking for a simple granola recipe with honey , you can substitute it 1:1. Just know that honey is often stickier and contains more fructose, which means it can brown faster. Keep a closer eye on the oven if you swap!
| Sweetener | Flavor Profile | Clumping Power | Browning Risk |
|---|---|---|---|
| Maple Syrup | Clean, caramel, slightly woodsy | Excellent | Low to Medium |
| Honey | Stronger, floral, very sweet | Excellent (stickier) | Medium to High |
Healthy Oil Choices for Optimal Roasting
The oil’s job is to coat the oats, facilitate the toasting process, and prevent sticking. You need a neutral, over high heat oil. Canola or grapeseed oil work perfectly. I love using coconut oil, especially if I want the granola to have a faintly tropical hint, but make sure it’s fully melted before you measure it and mix it with the maple syrup.
Can you make a simple granola recipe no oil ? You can try swapping the oil for apple sauce, but you will sacrifice the crispness and rich, roasted flavor we are aiming for here.
Flavor Boosters: Spices and Extracts
Cinnamon and vanilla are mandatory for my basic Simple Granola . But don’t stop there! Try adding a quarter teaspoon of nutmeg and cloves in the winter, or a generous pinch of cardamom for an exotic lift.
If you happen to have almond extract lying around, swap half the vanilla for almond it seriously enhances the nutty flavors, even if you skip the actual nuts.
The Simple Granola Method: Achieving Perfectly Golden Batches
Let’s get our hands sticky. Remember, the texture and crunch of this Simple Granola depend entirely on how you handle it before it goes into the heat and how you treat it coming out.
Combining the Wet and Dry Bases
First, whisk your dry ingredients oats, nuts, spices, and salt in your biggest mixing bowl. Make sure that salt isn’t just sitting in one spot, otherwise you’ll get pockets of intense flavor.
Then, in a separate bowl, whisk your wet ingredients until they look homogeneous and slightly cloudy. Pour the wet over the dry. Using a sturdy rubber spatula, fold and mix until every single oat flake is glistening. You shouldn't see any dry, powdery bits at the bottom.
This step is non-negotiable for even toasting.
Spreading and Initial Oven Setup
Grab your parchment lined sheet pan. Spread the sticky Simple Granola mixture onto the pan, forming a relatively even, single layer. It should look like a soft, messy carpet. Now, here is the secret to cluster success: Press down firmly across the entire surface.
Use the flat side of your spatula or the back of a large spoon. You are compressing the ingredients, forcing them to bond. Pop that pan into the 300°F (150°C) oven, set your timer for 20 minutes, and walk away.
Chef’s Note:
The heat is mild, but the smell will be intense. The initial 20 minutes of baking time allows the compression to set as the sugars begin to bind. Do NOT open the door or peek during this critical initial phase.
The Critical Midway Stir and Turning Technique
After 20 minutes, the edges will likely be starting to turn a nice light gold. Pull the pan out. Now, this is the most counter intuitive part of making Simple Granola . You are only going to gently nudge the edges toward the center.
Leave the large centre mass completely alone and undisturbed. This prevents the outer edges from scorching while allowing the center to continue forming those coveted large clusters. Return the pan to the oven for the final 10 to 15 minutes.
When it’s done, it should be uniformly golden brown and your entire kitchen should smell divine.
Cooling Strategy for Maximum Cluster Formation
This is arguably the most important step for achieving massive clusters. When the granola is done baking, pull it out and place the sheet pan directly onto a cooling rack. Do not touch it. Do not poke it. Do not break it up.
Just leave it alone for a full hour, or until it’s completely cold and brittle. As the granola cools, the caramelized maple syrup hardens, turning that soft, warm sheet into a solid, crunchy slab.
If you try to stir it while it’s still warm, you will break all the bonds and end up with plain, separate oats. Once it's fully cooled, lift the edges of the parchment and break it up with your hands into big, glorious chunks.
Professional Granola Tips and Troubleshooting Common Errors
Even the most Simple Granola can sometimes go sideways. Here are the issues I’ve personally battled and how to win against them.
How to Fix Granola That Won’t Clump
The biggest reason for non-clumping is usually two things: not enough binder, or stirring too soon. If your Simple Granola feels dry right after mixing, you might need an extra tablespoon of maple syrup. However, if it comes out of the oven golden but still separates upon cooling, you stirred it too much during the baking process or didn't press it down firmly enough initially. The fix? If it's already cooled, you can try tossing it with 1/4 cup of maple syrup that has been briefly warmed, repress it onto a clean sheet, and bake it at 250°F (120°C) for another 15 minutes, followed by the mandatory cool down. If you want more tips on binding, check out my full guide on Healthy Granola: Low-Sugar Recipe for Clumpy Perfection .
Preventing Over Browning and Burnt Edges
Burnt edges are almost always a sign that your oven runs hot, or you didn't stir the edges halfway through. Invest in an inexpensive oven thermometer to verify your actual temperature setting; 300°F is critical.
If your edges still brown quickly, try turning the heat down to 285°F for the second half of the bake, or use a silicone baking mat instead of parchment, as it conducts heat slightly less fiercely.
When to Add Nuts and Dried Fruit (For Best Results)
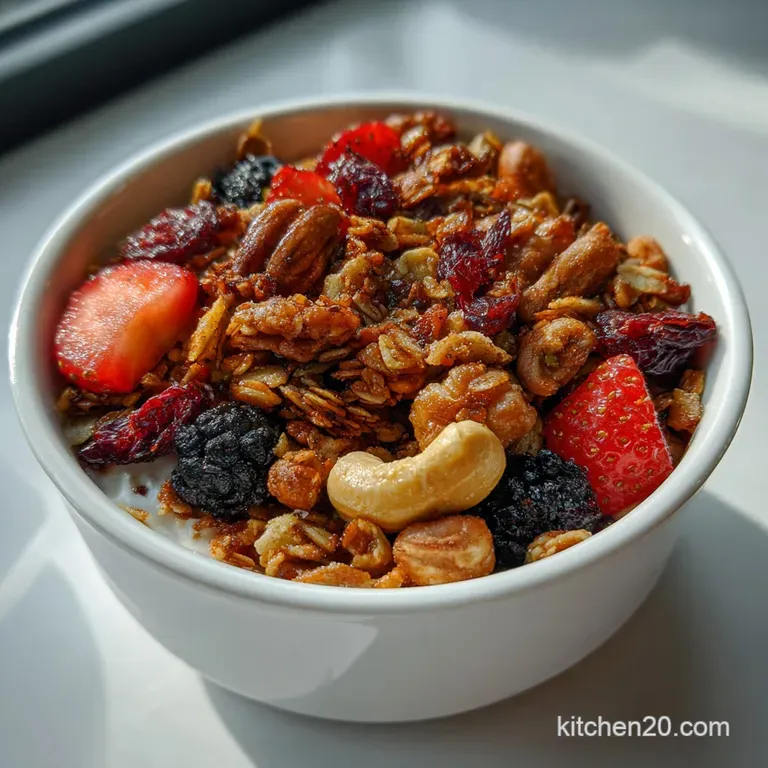
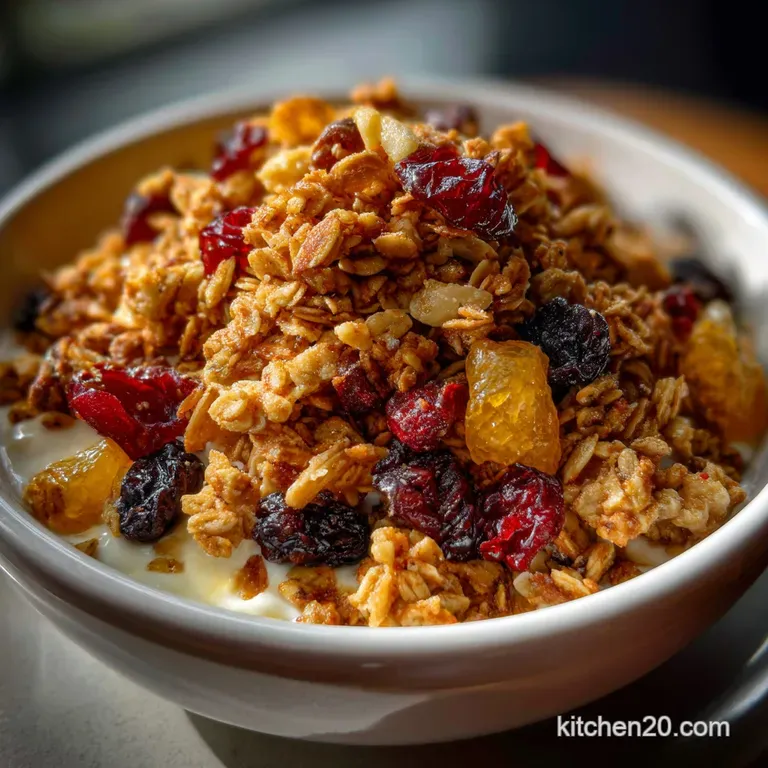
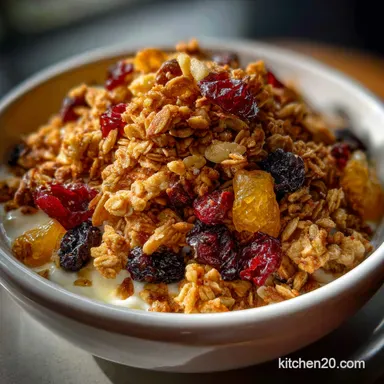
Nuts and seeds, like pecans or almonds, should be added to the dry mix before baking. Roasting them significantly enhances their flavor and crunch. But dried fruit cranberries, raisins, cherries is added only after the Simple Granola has completely cooled and been broken into chunks.
If you bake the fruit, it becomes tough, leathery, and prone to burning or drying out completely. Adding it at the end keeps the fruit plump and chewy.
Maintaining the Crunch: Storage Best Practices
You just made this perfect batch of Simple Granola; let’s not let it go soft! Proper storage is essential for preserving that satisfying crunch.
Ideal Containers for Long Term Freshness
A truly airtight container is your best friend. I prefer glass jars with rubber seals or large, heavy duty Ziploc bags that you can press all the air out of. Plastic storage containers work, but sometimes they let in humidity over time. The enemy of crunchy granola is air and moisture.
Ensure the granola is 100% cool before sealing it up. Even a tiny bit of residual heat will create condensation inside the container, leading to a soggy mess.
Shelf Life and Signs of Stale Granola
When stored correctly, your homemade Simple Granola will easily last 4 to 6 weeks at cool room temperature. You might notice it starts losing its intense aroma around week five, which is the first sign of staleness. If it feels slightly soft or chewy, it means moisture has crept in.
Don't worry, you can re-crisp it! Spread it on a baking sheet and bake it at 250°F (120°C) for about 5 to 10 minutes, let it cool again completely, and the crunch will return.
Can You Freeze Homemade Granola?
Yes, absolutely! Simple Granola freezes wonderfully. Place the completely cooled clusters into a freezer safe bag or container, pressing out as much air as possible. It will keep well in the freezer for up to 3 months.
When you want to use it, just pull it out and let it sit at room temperature for about 15 minutes. It thaws quickly, retaining all its texture.
Creative Ways to Serve Your Homemade Batch
You’ve mastered this simple granola recipe maple syrup style. Now, how do you eat it?
I’m typically a purist a handful eaten straight out of the jar is standard. But this Simple Granola also transforms other dishes. Sprinkle a generous amount over a scoop of plain Greek yogurt for protein, or use it as a crunchy crust base for a quick fruit tart. I even love to use it instead of cookie crumbs when I make my No Bake Chocolate Cheesecake: Ultra Velvety and So Simple to Make . The toasted oats provide such a great contrast to the creamy filling.
If you are looking for an even chunkier breakfast option, try pairing this Simple Granola with milk, or simply mixing it into your morning smoothie bowl. This simple granola recipe with honey (or syrup, in this case!) is so versatile, you’ll never run out of ways to enjoy it.
Once you taste this perfect, homemade crunch, you’ll realize this simple granola recipe is the best basic breakfast staple you can possibly keep stocked in your kitchen.

Recipe FAQs
How do I ensure my granola forms big, satisfying clusters?
The key to clusters is two-fold: first, ensure you press the mixture firmly onto the baking sheet before it goes into the oven. Second, and most critically, allow the granola to cool completely without stirring.
Do not break the slab until it is entirely cooled and crisp, as this allows the sticky sweeteners to set properly.
What is the best way to store this simple granola, and how long does it last?
Store the completely cooled granola in an airtight container, such as a glass jar or sealed plastic tub, in a cool, dark pantry. Granola is highly susceptible to humidity, so ensure the container is tightly sealed; properly stored, this recipe stays fresh and crunchy for up to four weeks.
Can I substitute the oil in this recipe, and what effect will it have?
Yes, you can substitute the oil; it primarily acts as a binder and crisping agent. While neutral vegetable oils or melted coconut oil work best, you can substitute it with melted butter for a richer, more toasted flavor, though butter will shorten the shelf life slightly.
My granola came out soft or chewy instead of crunchy. What went wrong?
This usually indicates the granola needs more time to fully dry out, or the oven temperature was slightly too high, causing the outside to brown before the center was dry. Try returning the granola to a turned off oven for 15-20 minutes, or ensure you are using the 'low and slow' method recommended for dehydration.
I want to reduce the sugar. Can I use less sweetener?
You can slightly reduce the sweetener, but remember it plays a crucial role in the browning, binding, and crisping processes, not just the flavor. Reducing it too much will result in a drier, sandier texture with fewer clusters, so start by reducing only 1 or 2 tablespoons if necessary.
When is the proper time to add mix-ins like dried fruits, nuts, or chocolate chips?
Dried fruits (like raisins or cranberries) must be added after the granola has fully baked and cooled, as they burn easily and become hard if baked. Nuts and seeds can be added during the last 15 minutes of baking, and chocolate chips should only be stirred in once the granola is completely cool.
How can I make this "Simple Granola" completely vegan or gluten-free?
To make the recipe vegan, ensure you are using pure maple syrup or agave instead of honey. For gluten-free requirements, simply substitute standard rolled oats with certified gluten-free rolled oats, ensuring all other flavorings or additions are also certified GF.
Chefs Simple Granola Recipe
Ingredients:
Instructions:
Nutrition Facts:
| Calories | 1296 kcal |
|---|---|
| Protein | 31.6 g |
| Fat | 63.3 g |
| Carbs | 156.9 g |
