Tasty Chocolate Cool Whip Crinkle Cookies
- Time: Active 40 mins, Passive 10 mins, Total 50 mins
- Flavor/Texture Hook: Fudgy, cocoa rich centers with a shatter crisp sugar crust
- Perfect for: Last minute bake sales, holiday cookie swaps, or beginner friendly gifting
- Master the Ultimate Tasty Chocolate Cool Whip Crinkle Cookies
- Fudgy Physics and the Chemistry of Cracks
- Fast vs Classic Comparison for Busy Home Bakers
- Simple Elements Required for Fudgy Chocolate Success
- Tools Needed to Streamline Your Baking Platform
- The Step-by-Step Evolution from Bowl to Oven
- Solving Common Baking Errors for Flawless Results
- Creative Flavor Networks for Every Palate
- Three Levels of Aesthetic Presentation
- Keep Your Cookies Fresh and Flavorful
- Drink Pairings to Connect Your Dessert Experience
- Recipe FAQs
- 📝 Recipe Card
Master the Ultimate Tasty Chocolate Cool Whip Crinkle Cookies
We've all been there the sudden realization that you need a dessert in under an hour, but the butter is rock hard in the fridge and your patience is even thinner. I used to think that "authentic" cookies required hours of chilling and expensive cocoa powder, but this recipe completely changed my perspective.
It's the kind of kitchen magic that feels like a glitch in the system because the results are so disproportionately good compared to the effort involved.
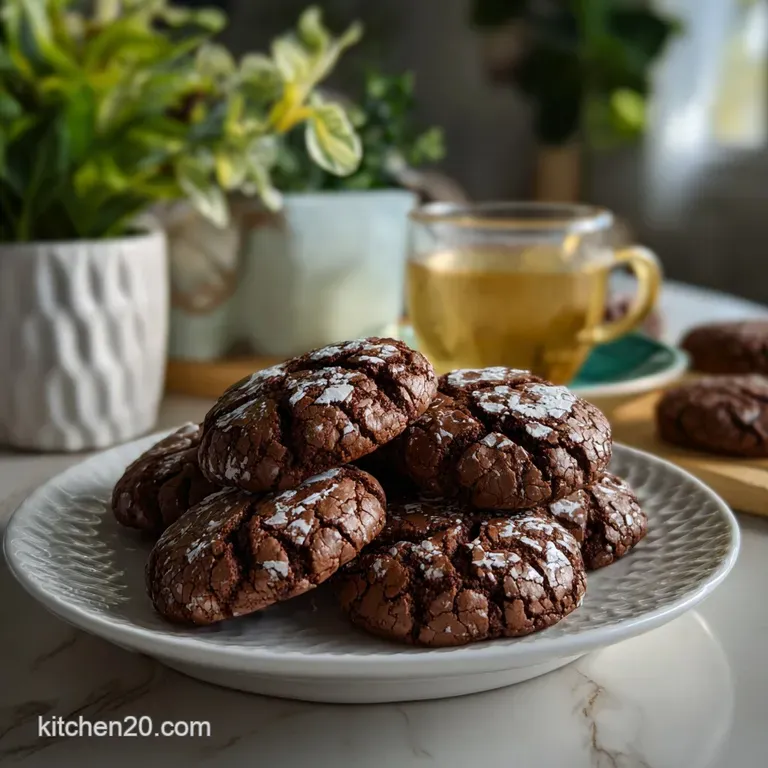
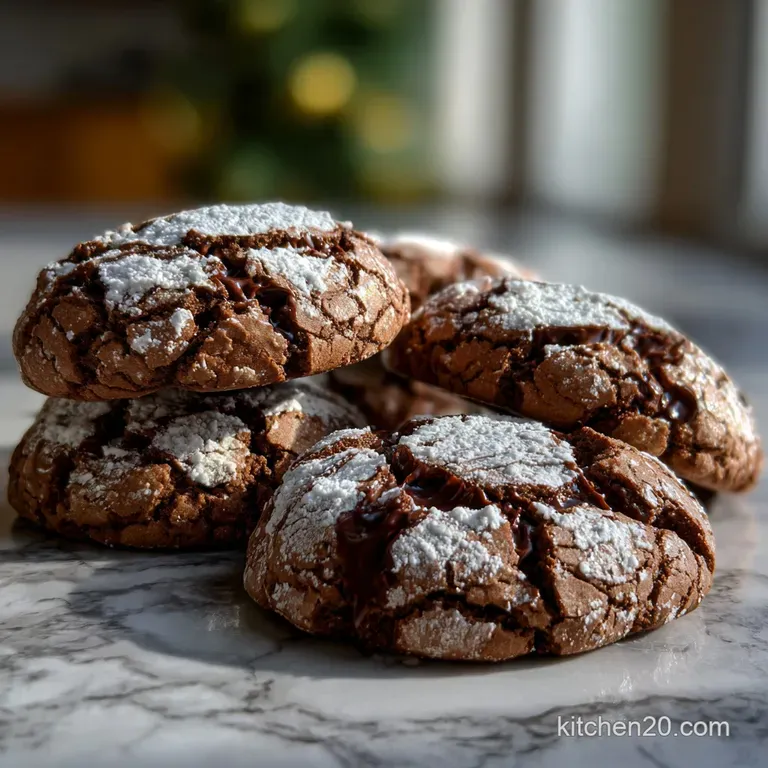
Imagine a cookie with a velvety, brownie like interior that stays soft for days, encased in a stark white, snowy landscape of powdered sugar. When these bake, the dough expands and pulls the sugar apart, creating these beautiful dark fissures that look professional but are actually just a result of simple physics.
I've served these at high end dinner parties and kids' birthdays alike, and they always disappear first.
What I love about this platform for baking is how it connects the simplicity of a box mix with the unique texture of whipped topping. You aren't just making a cookie; you're creating a localized flavor network that hits every sensory note.
We're going to walk through the exact mechanics of why this works, the common pitfalls to avoid, and how to plate them so they look like they came from a boutique bakery.
Fudgy Physics and the Chemistry of Cracks
The science behind this specific texture is a fascinating evolution of standard cookie chemistry. Most cookies rely on the ratio of fat to flour, but here, we are integrating a pre emulsified whipped topping which introduces a massive amount of stabilized air into the dough.
- Sucrose Dehydration: The powdered sugar coating draws moisture from the surface of the dough ball, creating a dry, brittle "skin" that shatters as the interior expands.
- Protein Denaturation: The single egg provides just enough structure to keep the aerated topping from collapsing, ensuring the cookie stays thick rather than spreading into a pancake.
- Starch Gelatinization: The pre treated flour in the cake mix absorbs the moisture from the whipped topping rapidly, which is why the dough feels so sticky and thick.
Fast vs Classic Comparison for Busy Home Bakers
| Feature | This Quick Method | Classic From Scratch | The Trade off |
|---|---|---|---|
| Active Prep | 10 minutes | 30 minutes | Saved time vs more control over sugar types |
| Texture | Ultra fudgy/Cloud like | Chewy/Dense | This version is lighter and more like a brownie |
| Ingredients | 4 items | 10+ items | Simplicity vs customized flavor profiles |
Since we are focusing on efficiency here, it's important to understand that the cake mix acts as our primary flour and leavening platform. If you’re looking for a similar level of decadence in a more traditional format, you might enjoy the rich profile of my Chocolate Fudge recipe, which uses similar flavor science to achieve that melt in-the mouth feel.
Simple Elements Required for Fudgy Chocolate Success
The beauty of these Tasty Chocolate Cool Whip Crinkle Cookies lies in the simplicity of the components. However, because there are so few ingredients, the quality and state of each one matter immensely for the final outcome.
- 1 box (15.25 oz) chocolate cake mix: This is your base platform. Why this? It contains the perfect ratio of flour, sugar, and leavening agents already.
- 1 tub (8 oz) whipped topping, thawed: I recommend the standard version rather than "extra creamy" for better structural integrity. Why this? It provides fat and aeration without the weight of heavy butter.
- 1 large egg, room temperature: Never use a cold egg directly from the fridge. Why this? Room temp eggs emulsify much better with the fats in the topping.
- 1 cup (120g) powdered sugar: This is for the "crinkle" effect. Why this? It creates the necessary moisture barrier for the surface to shatter.
Component Analysis
| Ingredient | Science Role | Pro Secret |
|---|---|---|
| Chocolate Cake Mix | Structural Platform | Sift it first to remove any stubborn lumps for a silky dough. |
| Whipped Topping | Aeration & Emulsion | Ensure it is fully thawed but still cold to keep the dough manageable. |
| Powdered Sugar | Texture Gradient | Use a double coat technique to ensure the white pops against the dark dough. |
When selecting your cake mix, think about the depth of flavor you want. A "Devil's Food" or "Dark Chocolate" mix will provide a more intense cocoa experience, similar to the dark, moody notes found in the The Chip Shop recipe. If you want a milder, more nostalgic taste, a standard milk chocolate mix works beautifully.
Tools Needed to Streamline Your Baking Platform
You don't need a professional laboratory to get these right, but a few specific tools will make the process much cleaner. This dough is notoriously sticky think of it like working with edible velcro so the right equipment is a must for maintaining your sanity.
- Large Mixing Bowl: Glass or metal works best as they don't retain odors from previous meals.
- Silicone Spatula: This is non negotiable for folding the whipped topping into the dry mix without deflating all the air.
- Small Cookie Scoop (1 tablespoon size): This ensures all 24 cookies are the same size, which is critical for even baking.
- Parchment Paper or Silicone Mats: Do not grease the pan; the sugar will stick. Use a liner for a clean release.
- Wire Cooling Rack: This prevents the bottoms from getting soggy due to trapped steam.
Chef Note: If you don't have a cookie scoop, lightly oil your hands with a flavorless oil like canola before rolling the dough. It stops the "velcro" effect and lets you get a smooth sphere.
The step-by-step Evolution from Bowl to Oven
Follow these steps precisely. The timing and the way you handle the dough are what separate a flat, messy cookie from a beautiful, craggy masterpiece.
- Prep the station. Preheat your oven to 350°F and line two large baking sheets with parchment paper. Note: A hot oven is vital for the immediate "shatter" of the sugar crust.
- Combine the wet. In your large bowl, gently whisk the room temperature egg until the yolk and white are fully integrated.
- Fold the topping. Add the 8 oz tub of thawed whipped topping to the egg. Fold it gently; we want to keep the air bubbles intact.
- Integrate the base. Pour in the 15.25 oz chocolate cake mix. Use your spatula to fold the dry into the wet until no streaks of flour remain. until a thick, sticky dough forms.
- The Chill Factor. Place the entire bowl in the fridge for at least 20 minutes. Note: This makes the "sticky velcro" dough much easier to handle.
- Portion the dough. Using your scoop, drop 1 tablespoon sized balls into a separate bowl containing the 120g of powdered sugar.
- The Sugar Veil. Roll the ball in the sugar until it is heavily coated. It should look like a snowball.
- Position for growth. Place the balls on the prepared sheets, spaced 2 inches apart. Do not flatten them!
- The Transformation. Bake for 10 minutes until the cracks are wide and the edges feel set.
- Final Set. Let them rest on the hot pan for 5 minutes before moving them to the wire rack. Note: Carryover cooking finishes the center without drying it out.
Solving Common Baking Errors for Flawless Results
Even with a 4 ingredient recipe, things can go sideways if the environment isn't right. I've seen these cookies go from "snowy mountains" to "melted puddles" just because of a humidity spike or a cold egg.
Why Your Cookies Spread Too Much
If your cookies come out thin and flat, it's usually a temperature issue. If the whipped topping was too warm when mixed, or the dough wasn't chilled before rolling, the fat melts before the structure of the cake mix can set in the oven.
| Problem | Root Cause | Solution |
|---|---|---|
| Disappearing Sugar | Dough was too wet | Chill dough longer and use a heavier coat of sugar. |
| Rubbery Texture | Over mixing the batter | Fold the ingredients just until combined; don't use a stand mixer on high. |
| Burnt Bottoms | Dark baking sheets | Use parchment paper and place the rack in the center of the oven. |
Common Mistakes Checklist
- ✓ Ensure the whipped topping is fully thawed; frozen chunks will create steam pockets and ruin the texture.
- ✓ Use a fresh box of cake mix; if it's been in the pantry for two years, the leavening might be dead.
- ✓ Don't skip the 20 minute chill; it's the difference between a round cookie and a blob.
- ✓ Roll the dough balls twice in the sugar if your kitchen is humid; the first layer will absorb moisture, the second will stay white.
- ✓ Check your oven temp with an external thermometer; even 10 degrees can change the crinkle pattern.
Creative Flavor Networks for Every Palate
Once you've mastered the chocolate version, you can treat this recipe as a platform for endless innovation. The "cake mix + whip" formula is a versatile architecture that supports various flavor profiles.
- The Mint Evolution: Add 1/2 teaspoon of peppermint extract to the dough and use a chocolate mint cake mix. It creates a refreshing, "thin mint" vibe.
- The Peanut Butter Connection: Stir in 1/2 cup of mini peanut butter chips before chilling. The salty sweet contrast is a total revolution for the palate.
- The Mexican Hot Chocolate: Add 1 teaspoon of cinnamon and a tiny pinch of cayenne pepper to the dry cake mix for a subtle, warming heat.
Dietary Adjustments
| Original Ingredient | Substitute | Why It Works |
|---|---|---|
| Standard Cake Mix | gluten-free Cake Mix | Most GF mixes behave similarly with whipped topping. Note: Texture may be slightly more crumbly. |
| Large Egg | 1/4 cup Applesauce | Good for egg allergies. Note: Result will be much softer and less "puffy." |
Three Levels of Aesthetic Presentation
Connecting with your guests starts with the eyes. Here is how to evolve your plating from a simple home snack to a restaurant level dessert.
Level 1: The Simple Stack
Place the cookies in a rustic pile on a wooden board. The high contrast of the white sugar and dark chocolate is enough to make them look appetizing without any extra effort. This is perfect for casual family gatherings where the focus is on sharing.
Level 2: The Polished Gift
Stack three cookies and tie them with a piece of minimalist kitchen twine. Place them inside a clear cellophane bag. This highlights the crinkle pattern and makes the "snowy" effect look intentional and artisanal. It's a great way to showcase the work you put into the even coating.
Level 3: The Restaurant Experience
Place a single cookie in the center of a wide, matte black plate. Draw a thin, precise circle of raspberry coulis around it. Add a single, small mint leaf tucked under one edge of the cookie. The acidity of the berries cuts through the fudgy richness of the chocolate, creating a professional flavor profile.
| Level | Focus | Key Element |
|---|---|---|
| Simple | Accessibility | Wooden board |
| Polished | Gifting | Kitchen twine |
| Restaurant | Contrast | Raspberry coulis |
Keep Your Cookies Fresh and Flavorful
Because these cookies are so moist (thanks to the whipped topping), they need to be stored carefully to maintain that "shatter" on the outside without the inside getting stale.
- Storage: Keep them in an airtight container at room temperature for up to 4 days. If it's very humid, the sugar might start to dissolve if that happens, just give them a quick dust of fresh powdered sugar before serving.
- Freezing: These freeze exceptionally well. You can freeze the baked cookies for up to 3 months. To thaw, just leave them on the counter for 30 minutes.
- Zero Waste Tip: If you have a few cookies that have gone a bit hard, crumble them up! They make an incredible topping for vanilla bean ice cream or can be folded into a cheesecake base for a crinkle cookie crust.
Drink Pairings to Connect Your Dessert Experience
To truly round out the experience, pair these cookies with a beverage that complements the deep cocoa notes. A cold glass of whole milk is the classic choice, but if you want to be more innovative, try a nitro cold brew coffee. The creaminess of the nitrogen bubbles mimics the aerated texture of the cookie.
For a nighttime treat, a small glass of Ruby Port is a game changer. The dark berry notes in the wine harmonize with the chocolate cake mix, making the whole experience feel like a sophisticated revolution in snacking.
If you're feeling adventurous, a spicy Chai latte also works wonders, as the ginger and cardamom play beautifully against the sugary crust of the cookies. Whatever you choose, these Tasty Chocolate Cool Whip Crinkle Cookies are sure to be the star of the show.

Recipe FAQs
Can I use a different type of cake mix?
Yes, you can experiment with other chocolate flavors. A "Devil's Food" or "Dark Chocolate" mix yields a more intense cocoa flavor, similar to the rich notes in our The Chip Shop recipe. A standard milk chocolate mix offers a milder, more nostalgic taste.
Why are my cookies spreading too much?
This is usually a temperature issue. If the whipped topping was too warm or the dough wasn't chilled sufficiently before rolling, the fat melts too quickly in the oven before the cake mix structure can set.
How do I get the perfect crinkle effect?
Roll the chilled dough balls generously in powdered sugar before baking. This creates a dry outer layer that shatters and cracks as the cookie expands, similar to how moisture creates texture differences in pastry doughs.
Can I make these cookies gluten-free?
Yes, with a few adjustments. Use a gluten-free chocolate cake mix; most behave similarly with whipped topping. Be aware that the texture might be slightly more crumbly, but still delicious.
How should I store these cookies?
Store in an airtight container at room temperature for up to 4 days. If your kitchen is humid, the sugar coating might start to dissolve; a quick re-dusting before serving will fix this.
Can I freeze the cookie dough?
Yes, absolutely. You can scoop and freeze the dough balls for up to 3 months before baking. Just roll them in powdered sugar right before they go into the oven.
What can I drink with these cookies?
Classic whole milk is always a winner. For something more sophisticated, try a nitro cold brew coffee to mimic the cookie's aerated texture, or a Ruby Port whose dark berry notes complement the chocolate, much like in our The Chip Shop recipe.
Chocolate Cool Whip Cookies

Ingredients:
Instructions:
Nutrition Facts:
| Calories | 114 kcal |
|---|---|
| Protein | 0.9 g |
| Fat | 2.8 g |
| Carbs | 21.3 g |
| Fiber | 0.6 g |
| Sugar | 14.8 g |
| Sodium | 148 mg |
