Granola: the Chunky Maple-Pecan Cluster Recipe
- Introducing the Baker Street Breakfast Blend: Our Ultimate Chunky Granola
- Pantry Essentials: Ingredients & Smashing Substitutions for Your Batch
- The Science of Crunch: Why This Maple-Pecan Recipe Always Forms Clusters
- Step-by-Step Method: Baking Your Way to Perfect Granola Clusters
- Mastering the Bake: Expert Tips and Troubleshooting Common Granola Mishaps
- Keeping It Fresh: Storage, Shelf Life, and Freezing This Batch
- Beyond the Bowl: Creative Ways to Serve Your Homemade Blend
- Recipe FAQs
- 📝 Recipe Card
Introducing the Baker Street Breakfast Blend: Our Ultimate Chunky Granola
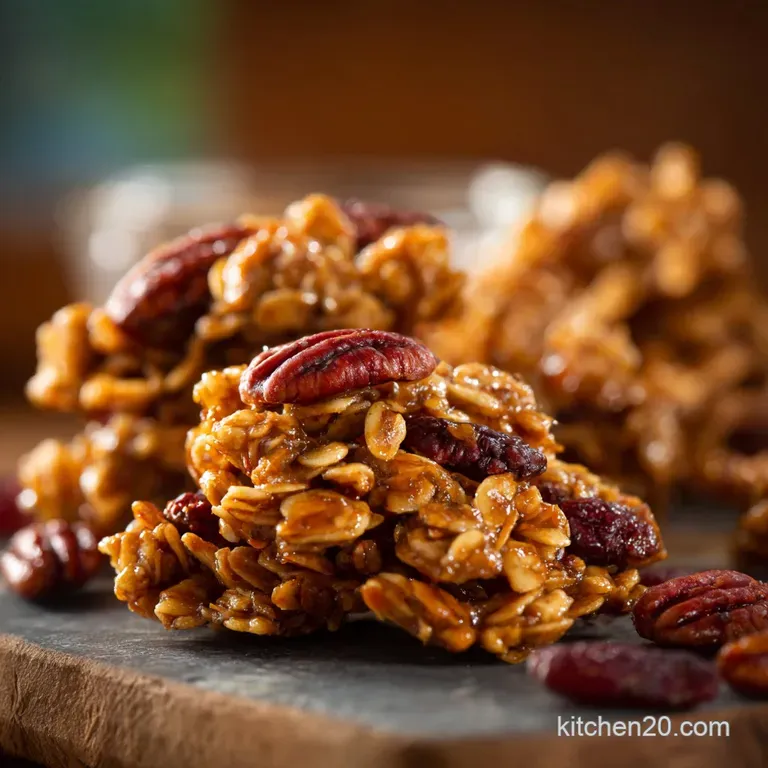
Can you smell that? It’s the deep, cozy scent of maple syrup caramelizing, the warmth of cinnamon, and the nutty goodness of pecans all baked into one spectacular crunch. That signature aroma is the first sign you are about to bite into the world’s best homemade Granola .
Forget those dusty, disappointing bags from the shop.
This recipe is an absolute lifesaver because it’s fast, incredibly economical, and provides guaranteed clusters none of that sad, sandy stuff here. I promise that once you start making your own big batch of Granola , you’ll never go back; it’s just too satisfying to know exactly what’s in your breakfast.
Plus, a big container of this keeps the busy morning chaos manageable for weeks on end.
We’re not just going to dump ingredients into a bowl; we are employing specific baking techniques to achieve peak cluster perfection. Get your biggest bowls ready, because this is the definitive method for baking chunky maple pecan Granola that actually holds together.
What Makes a Cluster Granola Superior?
The difference between a sad, scattered oat mix and this glorious, cluster heavy Granola is entirely down to two things: compression and cooling. We need enough sticky binder (that maple syrup and brown sugar combo) to act like cement when it dries out.
If you don't press the mixture firmly onto the baking sheet before baking, the clusters simply won't form; they need that initial pressure.
A superior Granola also requires balance. Too many nuts, and the mixture falls apart; too much syrup, and it bakes into a caramel brittle. This recipe hits the sweet spot, yielding glorious, large chunks perfect for eating straight out of the jar.
Equipment Checklist for Batch Cooking
You don’t need any fancy gadgets, but the right equipment does make the job faster and guarantees even baking.
- Two large, heavy duty baking sheets (essential for thin, even layers).
- Parchment paper (non-negotiable for cluster formation and cleanup).
- A sturdy rubber spatula for mixing and pressing.
- A small saucepan or microwave safe jug for warming the binders.
Quick Overview: Timing and Difficulty
This recipe is wonderfully deceptive. It looks impressive, but the difficulty level is definitely low it's mostly about patience! Active prep time takes less than 15 minutes, which is super fast for such a luxurious homemade Granola .
The waiting (cooling) time is mandatory, but you can go do something else while those clusters set their structure.
| Stage | Time |
|---|---|
| Prep Time | 15 minutes |
| Cook Time | 45– 60 minutes |
| Cooling/Rest Time | 60 minutes (minimum) |
Pantry Essentials: Ingredients & Smashing Substitutions for Your Batch
One of the beautiful things about making homemade Granola is how customizable it is. If you don't have pecans, use walnuts! If you hate pumpkin seeds, skip them. This base recipe is a canvas, but here are the key players and their best understudies.
The Oat Base: Choosing the Right Flake
You absolutely must use old-fashioned rolled oats for this chunky maple pecan Granola . Do not, under any circumstance, use instant or quick cooking oats.
Quick oats are processed too finely; they soak up the liquid too fast and disintegrate during baking, leading to a dusty, sad final result instead of hearty, clustered Granola .
- Substitution Note: If you want a gluten-free Granola , ensure your rolled oats are certified GF. They behave exactly the same way in the recipe.
Perfecting the Maple Pecan Ratio
Pecans are soft and buttery, offering a gorgeous contrast to the crunchy oats, which is why they star in this specific Granola . We chop them roughly, making sure they are roughly the size of a pumpkin seed so they incorporate beautifully into the clusters.
| Ingredient | Substitute Option |
|---|---|
| Pecans | Walnuts, Sliced Almonds, or Cashew pieces |
| Pumpkin Seeds | Sunflower seeds or Sesame seeds |
Oil Options for Maximum Crispness
We need a neutral oil here to help crisp the oats and prevent sticking without adding a competing flavour. Rapeseed (Canola) oil is my go-to because it’s cheap and flavourless.
- Substitution Alert: You can swap the neutral oil for melted coconut oil, which adds a subtle richness and helps the Granola clusters set firmly. However , make sure the coconut oil is fully liquid when mixing, or it will seize up when it hits the cold oats. If you use melted unsalted butter, the flavour is richer, but you should expect the shelf life of your batch of Granola to be reduced by about a week due to the milk solids.
Adjusting Sweetness and Spice
The combination of maple syrup and brown sugar is the secret weapon for deep caramelisation. Maple syrup provides complex flavour and moisture, while the brown sugar ensures those hard, satisfying clusters form during cooling. Don't forget the salt!
Chef's Note: The flaky sea salt is non-negotiable. It cuts through the sticky sweetness and makes the flavour of your homemade Granola actually pop. Without it, the final product can taste cloyingly sweet and flat.
- Syrup Swap: You can use honey instead of maple syrup, but be aware that honey often makes the Granola stickier and slightly chewier rather than perfectly crisp. Adjust your cooking time upwards by about five minutes if using honey.
The Science of Crunch: Why This Maple Pecan Recipe Always Forms Clusters
Achieving large, glorious clusters in your Granola isn't magic; it's chemistry involving sugar and heat management. The low, slow temperature (300°F/150°C) is key because it allows the moisture inside the oats to evaporate completely without burning the pecans or scorching the sugars.
We use two types of sugar (maple syrup and brown sugar) because they react differently to heat. The dissolved brown sugar coats the oats, and when it cools, it turns into a rigid, caramel like structure. The crucial step is the pressing and the resting.
When you press the mixture firmly onto the sheet, the warm, sticky oats touch each other and bond. As the sugar cools, that bond becomes solid, resulting in big, beautiful chunks of Granola .
I learned this the hard way, constantly opening the oven door and stirring too soon it resulted in a beautiful, but very fine, oat dust. This batch of Granola requires patience.
step-by-step Method: Baking Your Way to Perfect Granola Clusters

Preparing the Wet Mixture (The Maple Syrup Stage)
In a small saucepan, combine the maple syrup, brown sugar, and oil. Heat gently over low heat, stirring until the brown sugar is completely dissolved. This should only take 2– 3 minutes. Once smooth and warm, remove it from the heat and stir in the vanilla extract.
It is essential that this mixture is warm when it hits the dry ingredients.
Why Wet Ingredients Must Be Warm
Warm wet ingredients ensure the sugars are fully dissolved and highly viscous. When you pour this warm binder over the dry oats, it coats them much more effectively and evenly than a cold, thick binder would.
This even coating is vital for every piece of your chunky Granola to be properly crunchy.
Mixing and Spreading for Uniformity
In your largest mixing bowl, combine the oats, chopped pecans, pumpkin seeds, cinnamon, and flaky salt. Give it a thorough toss. Pour the warm wet binder over the dry ingredients and mix carefully with your spatula.
Keep mixing until you are absolutely certain every single oat flake is coated; scrape the bottom of the bowl for any dry patches. Divide the mixture evenly between your two parchment lined baking sheets.
The Importance of Pressing and Resting
Once spread, take the back of your spatula or a clean piece of parchment and firmly press the mixture down across both trays. You want it dense and compact like a giant, slightly rustic cookie.
This compression forces the sugar coated oats and nuts into direct contact, priming them for cluster formation during the bake.
Low and Slow Baking Temperature
Preheat the oven to 300°F (150°C). Slide the pressed trays into the oven. Bake for 25 minutes completely undisturbed. This initial bake sets the bottom structure of the Granola .
The Critical Non-Stirring Bake
After 25 minutes, pull the trays out, rotate them, and very gently turn the edges inward with your spatula. Do not break up the center yet! We are only trying to prevent the outside edges from burning.
Put them back in and bake for another 20– 30 minutes until the entire sheet of Granola is light golden brown and your kitchen smells divine. Remove the trays and place them on wire racks.
Mastering the Bake: Expert Tips and Troubleshooting Common Granola Mishaps
Baking Granola is usually simple, but there are a few places where home cooks tend to stumble. Let's fix those common errors right now.
How to Prevent Burning the Pecans
Nuts and seeds burn much faster than oats because of their high fat content. The secret here is twofold: using that low 300°F temperature and ensuring you have enough binder to shield them slightly.
If you notice the nuts getting dark before the oats are golden, cover the entire sheet loosely with a piece of foil for the last 15 minutes of baking. This ensures your maple pecan Granola is cooked through, not scorched.
Dealing with Soggy or Sticky Results
Soggy Granola means one thing: moisture. Either your oven temperature was too high (which burns the outside before drying the inside), or you didn't bake it long enough.
If your cooled Granola still feels chewy or sticky, spread it back out on the trays and bake it for another 10– 15 minutes at 275°F (135°C). That super low temperature will gently dry out the Granola without burning it.
Sometimes, overly humid weather can also affect the final crunch of your homemade Granola .
When to Add Dried Fruit (Optional Add-Ins)
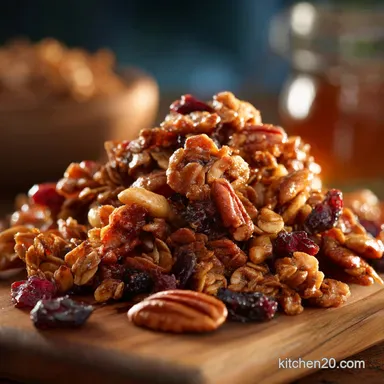
If you love dried cranberries, raisins, or apricots in your Granola , listen up: Do not add them before baking. Dried fruits will burn, turn rock hard, or simply become unpleasant if subjected to 45 minutes of heat.
Wait until the Granola is completely cooled and broken into clusters, then simply stir the dried fruit in. I usually aim for about ½ cup of dried fruit per batch of this chunky Granola .
Keeping It Fresh: Storage, Shelf Life, and Freezing This Batch
Since this maple pecan Granola uses oil (not butter), it has a fantastic shelf life, making it perfect for batch cooking.
The Best Containers for Long Term Freshness
Airtight is the key word. Store your cooled Granola in large mason jars or heavy duty plastic containers with a tight sealing lid. Exposure to air will make the clusters go stale and soft very quickly.
Recognizing When Your Granola is Past Its Best
Homemade Granola usually lasts 3 to 4 weeks at room temperature if properly stored. If you notice the taste is slightly bitter, or the texture feels greasy and stale, the fats in the nuts or oil may have gone rancid. This is rare within a month, but always trust your nose.
Good Granola should smell nutty and sweet.
Can You Freeze Homemade Granola?
Absolutely, yes! If you’re truly an overachiever and made a triple batch of this fantastic Granola , freezing is a brilliant option. Simply pack the completely cooled and clustered Granola into freezer safe bags, squeezing out as much air as possible. It will keep well for up to three months. To thaw, just let the bag sit on the counter for an hour or two. It thaws perfectly crisp, ready to eat immediately. If you're a big fan of portable breakfasts, you might also be interested in my recipe for Soft and Chewy Granola Bars: The Easy Baked Recipe That Wont Crumble — it’s the logical next step after mastering this chunky Granola .
Beyond the Bowl: Creative Ways to Serve Your Homemade Blend
If you somehow manage to resist eating all of this incredible chunky Granola straight out of the jar, here are a few ways to serve it that go beyond the usual yoghurt scenario.
- Ice Cream Booster: Sprinkle a heavy layer of the Granola over vanilla or coffee ice cream for texture and flavour that rivals any fancy sundae topping.
- The Power Parfait: Layer Greek yoghurt, berries, and several handfuls of the maple pecan Granola in a tall glass for an impressive and nutritious mid-morning snack.
- Milk Soak: For a simpler breakfast, use this blend exactly like cereal, soaking a small amount in cold milk. The clusters hold up beautifully without dissolving immediately.
- Crisp Topping: Instead of a traditional flour based crisp topping, use a layer of this homemade Granola over baked apples or fruit crumbles. It provides unbelievable crunch and flavour.
This homemade, chunky maple pecan Granola isn't just a recipe; it's an investment in better breakfasts. Seriously, go make a batch right now!

Recipe FAQs
How do I ensure my granola forms those large, satisfying clusters?
The key to clusters is minimal disturbance during the final stages of baking and cooling. Avoid stirring the granola during the last 15 minutes, and crucially, let it cool completely on the baking sheet without touching it.
Pressing the granola down slightly with the back of a spatula before cooling also helps the maple syrup solidify and bind the clusters together.
My granola feels soft or chewy, not crunchy, even after cooling. What went wrong?
This usually indicates the granola retains residual moisture, often due to humidity or insufficient baking time. Try placing it back in a cooling oven (around 250°F / 120°C) for another 10 to 15 minutes to fully dry it out.
Ensure your baking sheet is not overcrowded, as that can steam the oats rather than crisping them.
Can I use substitutions for the maple syrup, or can I make this recipe less sweet?
Maple syrup is crucial for achieving sturdy clusters because of its specific sugar composition. You can try substituting up to half of the maple syrup with honey or agave, but reducing the overall liquid sweetener content too much will result in a crumbly mixture.
To reduce sweetness, you can increase the amount of salt and cinnamon slightly to balance the flavor profile.
What is the best way to store my homemade granola, and how long will it keep fresh?
Store the completely cooled granola in an airtight container at room temperature, making sure it is sealed tightly and kept away from direct sunlight or heat. Properly stored granola will maintain its freshness and crunch for about 3 to 4 weeks. If it begins to soften, re-toast it briefly in a low oven.
Can I swap the pecans for other nuts or seeds?
Absolutely, this recipe is highly customizable, and pecans can easily be swapped for walnuts, almonds, hazelnuts, or a mix of pumpkin and sunflower seeds. Ensure any larger nuts are roughly chopped to distribute evenly and aid the structural integrity of the clusters.
Toasting the nuts slightly before mixing can also enhance their flavour.
Do I need to use old-fashioned rolled oats, or can I use instant oats?
Always use old-fashioned rolled oats for the best outcome in granola recipes, as they hold their shape well during baking. Instant or quick oats are too thin and highly processed; they tend to become dusty or mushy, preventing the formation of those large, desirable chunky clusters.
When should I add dried fruit, such as raisins or dried cherries?
Dried fruits should always be mixed into the granola after it has fully cooled down, never before or during the baking process. Baking dried fruits causes them to become tough, potentially burn, and can introduce unwanted moisture that compromises the overall crispness of the mixture.
Chunky Maple Pecan Granola
Ingredients:
Instructions:
Nutrition Facts:
| Calories | 350 kcal |
|---|---|
| Fat | 20 g |
| Fiber | 5 g |
