The Crispetycrunchety Butterfinger Bundt Cake with Peanut Butter Drizzle
- Maximizing Flavor and Texture with This Decadent Cake
- Why This Butterfinger Bundt Cake is Your New Dessert MVP
- Essential Components for the Perfect Batter and Drizzle
- Beyond the Mixer: Specialized Tools for the Best Bundt Results
- Step-by-Step Guide to Baking Your Butterfinger Masterpiece
- Crafting the Signature Peanut Butter Drizzle
- Troubleshooting and Expert Tips for Baking Success
- Storing, Serving, and Customizing Your New Favorite Cake
- Recipe FAQs
- 📝 Recipe Card
Maximizing Flavor and Texture with This Decadent Cake
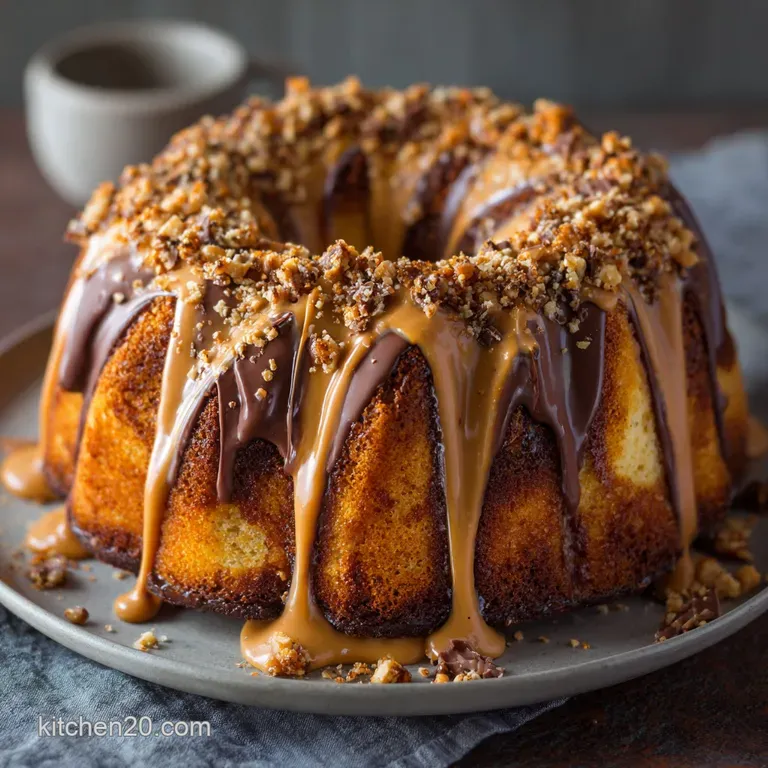
There is perhaps no better marriage of elegance and fun than a perfectly executed Bundt cake especially one that incorporates a beloved classic candy bar. This is not simply a standard cake mix; this Butterfinger Bundt Cake is a carefully engineered comfort dessert designed to maximize the classic crispety crunchety texture of the Butterfinger candy bar while maintaining an unbelievably moist and luxurious crumb.
We’re moving beyond standard Bundt Cakes Recipes by layering flavors and textures: a deep, rich vanilla base, the salty sweet crunch of peanut butter candy, and a creamy, flowing peanut butter glaze. The resulting cake is substantial enough to feel like a high-quality treat, yet surprisingly simple to create.
Why This Butterfinger Bundt Cake is Your New Dessert MVP
When searching for the perfect dessert that offers both crowd appeal and ease of execution, this recipe delivers on all fronts. This particular iteration moves far beyond the capabilities of a plain cake mix, transforming into a dense, moist bake that holds up beautifully to the heavy candy inclusion.
The secret to an ultra moist crumb
The key to achieving a truly luxurious texture, reminiscent of the best butterfinger pound cake from scratch , lies in two specific additions to the standard boxed yellow cake base: instant pudding and full fat sour cream (or Greek yogurt).
By incorporating an entire 3.4 oz box of instant vanilla or banana pudding mix, we introduce extra starch and emulsifiers that trap moisture and fat, preventing the cake from drying out during the long bake.
The half cup of sour cream further contributes to this velvety mouthfeel, yielding a cake that stays fresh and tender for days.
Harnessing the perfect peanut butter crunch
The integrity of the candy is crucial. We use 5 oz of coarsely chopped Butterfinger candy within the batter. Unlike chocolate, the unique honeycomb structure of the Butterfinger resists dissolving completely, meaning that even after 50 to 55 minutes in the oven, you retain satisfying pockets of crunch and concentrated peanut butter flavor.
This is what truly elevates this easy butterfinger bundt cake above similar recipes.
Built for bake sale stardom or simple snacking
The dense nature of this cake ensures that it travels and slices beautifully, yielding a generous 14 slices. It has the stability required for bake sale transport and the visual appeal of a showstopper, thanks to the deep, fluted crown shape of the pan and the dramatic cascade of the peanut butter drizzle.
The surprisingly simple approach to high impact baking
While the result tastes like an heirloom butterfinger pound cake recipe , the core process utilizes a streamlined, doctored mix method. This allows us to achieve a deep, rich flavor profile without the lengthy creaming process required in fully scratch baking, drastically reducing active prep time to a mere 15 minutes.
Essential Components for the Perfect Batter and Drizzle
To ensure success, all cold ingredients specifically the four large eggs and the whole milk or buttermilk must be brought to room temperature before mixing. The foundation of the cake begins with one standard 15.25 oz box of yellow cake mix, which is whisked together with the instant pudding mix.
To create the desired moisture and richness, we blend in a cup of milk, a half cup of neutral cooking oil, and the aforementioned sour cream, along with a teaspoon of pure vanilla extract. These components are beaten together until smooth and thick.
Finally, the defining element is the 5 oz of Butterfinger bars, coarsely chopped and ready for folding. For the iconic finish, the glaze requires a base of 1 1/2 cups of sifted confectioners' sugar combined with two tablespoons of creamy peanut butter, thinned out gradually with three to four tablespoons of whole milk or heavy cream until it reaches a thick yet pourable state.
Beyond the Mixer: Specialized Tools for the Best Bundt Results
While a stand mixer or robust hand mixer is necessary for beating the cake batter to the right consistency, the success of any Bundt cake hinges entirely on the specialized equipment and preparation techniques. We rely on a high-quality 12-cup decorative Bundt pan.
Achieving a flawless release from this intricate pan is non-negotiable.
The role of instant pudding in moisture retention
When preparing what is essentially an old fashioned butterfinger bundt cake adapted for modern convenience, the instant pudding plays a powerful functional role.
It increases the viscosity of the batter, ensuring that the heavy Butterfinger pieces do not sink to the bottom during baking, but remain evenly suspended throughout the crumb. This uniform distribution is key to getting that peanut butter crunch in every single bite.
Selecting the right Butterfinger chunks (size matters)
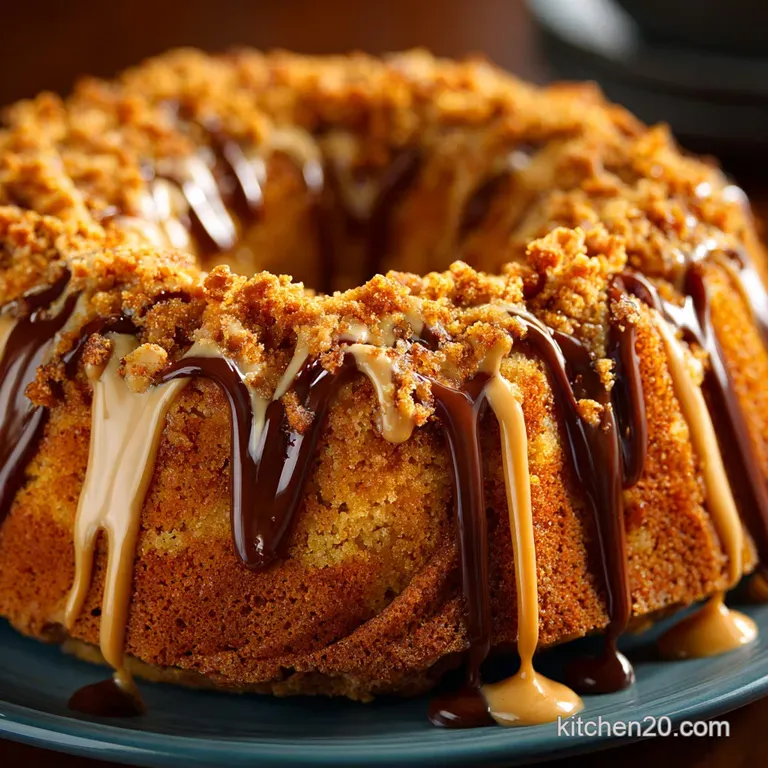
For the interior of the cake, the 5 oz of candy bars should be coarsely chopped —about the size of small peas. We want chunks that offer resistance and are clearly identifiable after baking. In contrast, the 3 oz set aside for the final topping must be finely crushed .
This ensures the garnish adheres neatly to the wet peanut butter glaze, creating maximum visual and textural appeal upon serving.
Ingredients checklist for the Crispety Crunchety Butterfinger Bundt Cake
To recap the foundation of this superior cake: start with the dry components (cake mix and instant pudding), then add the wet elements (room temperature eggs, milk, oil, sour cream, and vanilla), and finish with the primary inclusion (5 oz of coarsely chopped Butterfinger).
For the finishing steps, ensure you have the powdered sugar, creamy peanut butter, and extra milk for the glaze, plus the remaining 3 oz of finely crushed candy for the final presentation.
Prepping your Bundt pan for a flawless release
This step determines the fate of your Butterfinger Bundt Cake . Even if you have a non-stick pan, thorough preparation is mandatory. Preheat your oven to 325° F ( 160° C).
Then, apply a high-quality baking spray that contains flour (or the traditional method of brushing melted shortening into every crevice, followed by a light dusting of flour). Ensure every ridge and nook of the 12-cup pan is coated.
Related Recipes Worth Trying
- Perfect Vanilla Mug Cake Fluffy Speedy Ready in 5 Minutes — Ditch the rubbery horrors This foolproof Vanilla Mug Cake is unbelievably fluffy and ready in 5 minutes Its the ultimate Mug Cake Microwave Easy recipe for...
- The Best Spiced Pumpkin Cheesecake Whoopie Pies Recipe — These glorious Pumpkin Cheesecake Whoopie Pies are miniature soft pumpkin cakes filled with a tangy cream cheese frosting An ultimate autumnal comfort bake
- Best Ever Moist Carrot Cake Recipe with Tangy Cream Cheese Frosting — Say goodbye to dry bakes This Ultimate Moist Carrot Cake Recipe uses brown sugar and oil for a tender crumb topped with the perfect zesty cream cheese frosting
step-by-step Guide to Baking Your Butterfinger Masterpiece
Once the dry ingredients (cake mix and pudding) are briefly combined in the mixer bowl, the liquid components room temperature eggs, oil, milk, sour cream, and vanilla extract are added.
The batter should first be mixed on a low speed until everything is barely incorporated, then increased to a medium speed for precisely two minutes. This specific timing develops the structure without resulting in a tough cake.
Immediately after mixing, use a rubber spatula to gently fold in the 5 oz of coarsely chopped candy. Pour the finished batter evenly into the prepared pan, tapping it gently on the counter to eliminate any trapped air bubbles before placing it in the preheated 325° F oven.
The total bake time required is between 50 and 55 minutes.
Crafting the Signature Peanut Butter Drizzle
This phase of the recipe is dedicated to ensuring the integrity of the cake's shape and the perfect consistency of its decadent topping.
Achieving the ideal batter consistency
After the initial two minutes of mixing, the batter should be thick, smooth, and slightly voluminous. It is important to avoid the temptation to mix longer than required, as this can develop excess gluten, resulting in a rubbery cake texture and defeating the purpose of creating a rich, butterfinger pound cake recipe texture.
Gently folding in the Butterfinger pieces
The goal of folding is simple distribution, not integration. Use a slow, under and-over motion with a spatula to incorporate the 5 oz of chopped candy. This preserves the air incorporated during the beating stage and ensures the candy is evenly suspended throughout the finished cake.
The crucial bake time and temperature check
Baking at 325° F ( 160° C) is key; this slightly lower temperature compared to standard cake mix instructions prevents the edges from setting too quickly and drying out before the centre is cooked.
The cake is done when a long wooden skewer inserted near the crown comes out clean, possibly with a few moist crumbs clinging to it, indicating it is cooked through but still tender.
Cooling and unmolding for an intact crown
Upon removing the cake from the oven, place it on a wire rack for a mandatory 15 to 20 minutes of initial cooling in the pan . This period allows the exterior structure to firm up while the interior cools enough to prevent sticking.
Exceeding 20 minutes risks the sugars cooling completely and acting like glue. After this precise window, swiftly invert the cake onto the cooling rack or serving platter. It must then cool completely for a minimum of two hours before proceeding with the glaze.
Mixing the glaze for perfect flowing consistency
In a small bowl, whisk together the sifted confectioners' sugar and creamy peanut butter. Gradually add the milk or heavy cream (start with three tablespoons and add the fourth only if needed).
The final consistency should be opaque, thick enough to cling to the cake, but still thin enough to run seductively down the fluted sides of the cake.
Troubleshooting and Expert Tips for Baking Success
Baking in a specialized mold like a Bundt pan presents unique challenges that are easily overcome with a few key expert strategies.
Common pitfalls when using a boxed cake mix base
The biggest mistake is treating the mix like a simple boxed recipe. This butterfinger bundt cake recipe is significantly modified with extra fat and liquid (sour cream, oil, milk, pudding), meaning the prescribed mixing time of two minutes on medium speed is critical for maximum lift and moisture do not simply follow the box's suggestion.
Overmixing after the two minutes will activate too much gluten, resulting in a dense, chewy cake rather than the desired tender crumb.
How to achieve that golden brown crust without drying the interior
The low and slow baking temperature ( 325° F) is intentionally set to encourage gradual heating. This ensures the cake achieves that desirable golden brown crust and moist interior simultaneously.
If you notice your crust browning too quickly, lightly tent the cake with aluminum foil during the last 15 minutes of baking.
Shelf life and the best method for long term storage
This is a robust cake with excellent shelf life due to the high fat content from the oil and sour cream. Stored tightly wrapped at room temperature, it remains wonderfully fresh for three to five days.
For longer storage, slice the cooled, unglazed cake, wrap the slices individually in plastic wrap and foil, and freeze for up to three months. Glaze and garnish only after thawing.
Flavor variations: Swapping out the candy or glaze base
While the Butterfinger Bundt Cake is perfect as written, the cake base is versatile. For a richer, darker flavor, substitute the yellow cake mix for a devil's food mix and swap the Butterfinger for Heath bars (toffee crunch).
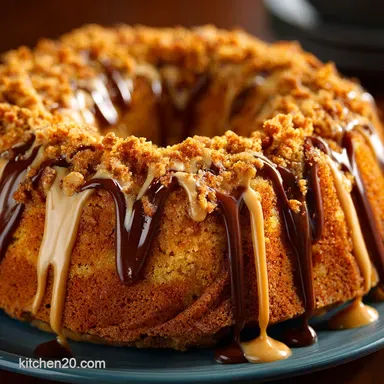
Alternatively, the peanut butter glaze can be replaced entirely by a simple, luxurious dark chocolate ganache for a powerful chocolate peanut combination.
Storing, Serving, and Customizing Your New Favorite Cake
Once glazed and garnished with the remaining 3 oz of finely crushed Butterfinger candy, the cake is ready for its moment. This dessert pairs beautifully with simple accompaniments, allowing the rich peanut butter flavors to truly shine.
For an elevated presentation, serve warm slices alongside a scoop of high-quality vanilla bean ice cream or salted caramel gelato, creating an impressive 'A La Mode' experience. The richness of this easy butterfinger bundt cake is also ideally balanced by a strong cup of coffee, such as a freshly brewed Americano or espresso.
If serving a classic dessert spread, a simple dollop of freshly whipped cream provides a lovely, light counterpoint to the dense, moist crumb, ensuring this Bundt cake holds its place as a celebrated classic among all your favorite Pound Cake Recipes.

Recipe FAQs
My Bundt cakes always stick! What's the secret to getting this beauty out without a spot of bother?
Ah, the classic Bundt cake dilemma! The key is meticulous preparation, mate. You must use a high-quality baking spray that contains flour (like Baker's Joy), ensuring you coat every single nook and cranny.
Secondly, remember the golden rule of cooling: let the cake sit in the pan on a wire rack for precisely 15 to 20 minutes before flipping. Any longer, and the cooling sugars act like cement, leaving you in a sticky situation!
Why is this specific Butterfinger Bundt Cake recipe so much moister than others I've tried?
That’s down to the brilliant combination of instant pudding mix and sour cream (or Greek yogurt) we’ve sneaked into the batter. These ingredients add extra fat and starch, which prevent the cake structure from drying out during baking, ensuring a rich, tender crumb that stays beautifully moist for days.
It's truly the secret weapon that elevates this from a simple cake mix to a proper showstopper.
I'm not keen on peanut butter can I use a different glaze or candy bar in the recipe?
Absolutely, feel free to jazz it up! If peanut butter isn't your cup of tea, a simple chocolate ganache or even a classic vanilla powdered sugar icing works wonderfully and pairs well with the cake's base flavour.
As for the candy, you could swap the Butterfinger for Heath bars (for a toffee crunch) or even crunchy bits of pre-packaged shortbread, though you’ll lose that unique “crispety crunchety” texture.
How long will this cake keep fresh, and should I keep it in the fridge?
Because of the cake’s incredible moisture levels, it holds up very well. Kept tightly sealed in an airtight container at room temperature, it will stay fresh and soft for about 3 to 4 days no need to clutter up the fridge!
If you want to keep it longer, you can freeze unglazed slices for up to three months; just be sure to wrap them tightly in cling film followed by foil.
Can I skip using a cake mix and make this from scratch if I’ve got the time?
Certainly, if you want to put in the elbow grease! You would need a robust vanilla or yellow cake recipe that produces about 8-9 cups of batter, and you’ll still want to incorporate that crucial instant pudding mix for structure and moisture.
Just remember to compensate for the higher fat content by reducing butter or oil slightly in your scratch recipe it’s all about balance, after all.
Crispety Crunchety Butterfinger Bundt Cake
Ingredients:
Instructions:
Nutrition Facts:
| Calories | 438 kcal |
|---|---|
| Protein | 4.6 g |
| Fat | 5.8 g |
| Carbs | 34.3 g |
| Fiber | 0.7 g |
| Sodium | 241 mg |
