The Ultimate Crispy Chicken Parmesan a True Comfort Classic
- Achieving That Signature Shatter: Why This Chicken Parmesan Recipe Dominates
- Sourcing the Star Components for Flawless Chicken Parmesan
- Essential Equipment for Culinary Success
- Mastering the Cutlet: Preparation for Optimal Crisping
- The Triple Dip: Building the Ultimate Crunchy Crust
- Frying to Golden Perfection: Secrets to Non-Soggy Results
- Pro Tips for Elevating Your Next Batch of Chicken Parmesan
- Storage Strategies and Reheating for Maximum Flavor Retention
- Recipe FAQs
- 📝 Recipe Card
Achieving That Signature Shatter: Why This Chicken Parmesan Recipe Dominates
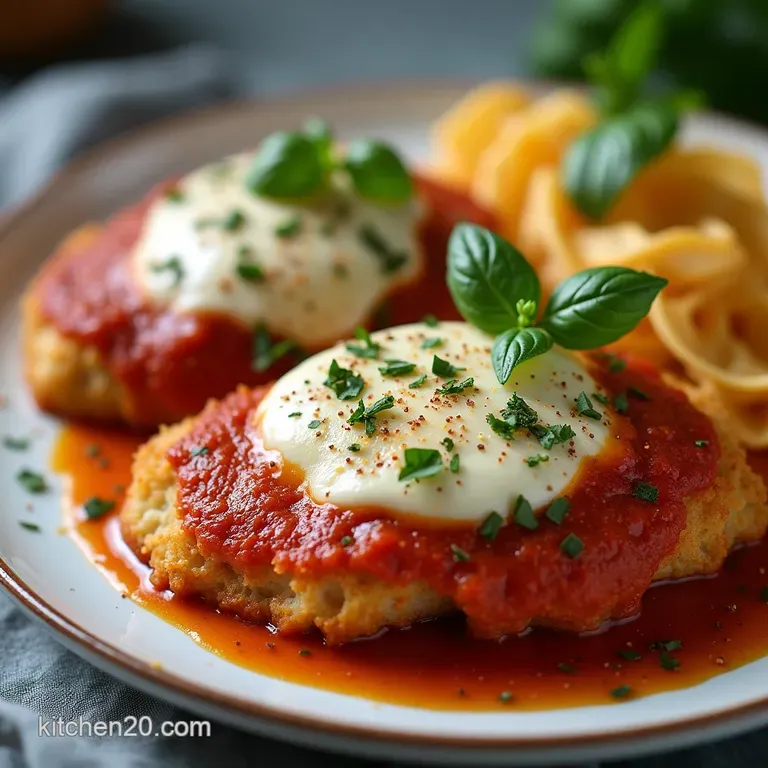
Forget soggy weeknight attempts! This Chicken Parmesan recipe is engineered for perfection, delivering authentic, shatteringly crisp chicken cutlets that stand up gloriously to rich, slow simmered tomato sauce and bubbling pools of melted mozzarella and Parmesan cheese.
This isn't just another weeknight meal; it's an experience. We are aiming for that textural contrast that defines great Italian American comfort food the crunchy exterior yielding to tender, juicy meat underneath.
This focus on crunch is what separates the merely good from the truly unforgettable Best Chicken Parmesan Recipe .
Beyond the Basics: What Makes This Crunch Unforgettable
The secret to that signature shatter lies entirely in the breading technique and the frying medium. We move beyond standard breadcrumbs to incorporate Panko, which creates lighter, airier flakes that toast faster and absorb less oil.
On top of that,, we enhance the dry dredge by folding in a portion of our finely grated Parmigiano Reggiano directly into the crumbs. This inclusion not only seasons the crust from the inside out but also aids in achieving an even deeper golden hue during frying.
Mastering this crust is the first crucial step toward creating the definitive Chicken Parmesan Dinner .
A Brief History of Pollo alla Parmigiana's Journey to America
While often perceived as ancient Italian fare, the specific combination we know as Chicken Parmesan is decidedly Italian American, emerging in the early 20th century in Italian immigrant communities in the Northeast.
It’s a brilliant adaptation of the Milanese cotoletta (a simple breaded and fried cutlet) combined with the baked cheese and tomato traditions often seen in Southern Italian pasta dishes.
This evolution highlights how immigrant cooks ingeniously elevated simpler ingredients into the hearty, restaurant worthy centerpiece we celebrate today. Understanding this lineage inspires us to respect the quality of each component in this Classic Chicken Parmesan Recipe .
Setting Expectations: The Perfect Balance of Texture and Tang
When assembling this dish, we look for equilibrium. The richness of the fried, cheesy cutlet demands a bright counterpoint. Our carefully prepared tomato sauce needs enough acidity and herbaceous depth to cut through the fat of the cheese and oil, preventing the overall dish from feeling too heavy.
The goal is a harmonious bite: the saltiness of the Parmesan, the creamy melt of the mozzarella, the satisfying crunch of the crust, and the bright tang of the tomato, all coming together in a single, cohesive mouthful that defines the ultimate Recipe For Chicken Parmesan .
Sourcing the Star Components for Flawless Chicken Parmesan
Success in any classic dish hinges on the quality of its core elements. Since this dish relies on relatively few ingredients, ensuring each one is premium makes a profound difference in the final product.
We need excellent chicken, sharp cheese, and a vibrant sauce to anchor the flavour profile of this Homemade Chicken Parmesan Recipe .
Essential Equipment for Culinary Success
While you don’t need a commercial kitchen, having the right tools streamlines the process significantly. A good piece of equipment ensures even cooking, which is vital for both the frying and the final baking phases.
For a medium difficulty recipe like this, having the correct setup prevents common pitfalls like uneven cooking or a soggy bottom crust.
The Holy Trinity of Coating: Flour, Egg Wash, and Panko Power
The breading station is where the magic begins. You will require three separate, shallow dishes. The first holds all-purpose flour, seasoned simply with salt and pepper to start the flavour foundation. The second is for the egg wash two large eggs lightly beaten until frothy which acts as the crucial glue.
The final dish is the textural core: here, we combine high-quality Panko breadcrumbs (essential for superior crunch), dried oregano for aromatic depth, garlic powder for foundational savoury flavour, and a quarter cup of finely grated Parmigiano Reggiano.
This seasoning within the crust itself ensures flavour permeates every layer.
Selecting Premium Cheeses: Mozzarella, Parmesan, and Beyond
For the topping, we utilize a two-pronged cheese approach. First, slices of fresh, low-moisture mozzarella are laid over the sauce on the cutlet this provides that glorious, bubbly melt.
We supplement this with a layer of pre-shredded, low-moisture mozzarella to ensure comprehensive coverage and a perfect golden bake. Finally, the sharpest, freshest Parmigiano Reggiano you can find is grated over the top just before baking.
Its strong, nutty flavour profile is indispensable for authentic Chicken Parmesan .
Crafting a Robust, Simmered Tomato Sauce Base
While you can certainly use a high-quality jarred marinara to save time, if you are pursuing the Chicken Parmesan Dinner of your dreams, a quick, robust sauce elevates the entire dish. Ensure your sauce has simmered long enough to deepen its flavour; it should not taste overly acidic.
We use this sauce sparingly: first, a thin base layer in the baking dish to prevent sticking, and then a controlled amount over the chicken to maximize cheese melt while minimizing crust saturation.
Tools to Ensure Even Thickness and Perfect Frying
Uniformity is key for even cooking. Invest a few minutes pounding your chicken breasts thinly and evenly (to about 1/2 inch thick) using a meat mallet or the bottom of a heavy pan.
For frying, a large, heavy bottomed skillet, ideally cast iron, retains heat beautifully, which is necessary to maintain a consistent oil temperature during the crucial shallow fry stage.
Mastering the Cutlet: Preparation for Optimal Crisping
The preparation of the protein dictates the texture of the final product. If the chicken is too thick, it will take too long to cook through, potentially causing the crust to burn before the centre is done. A thin, consistent cutlet ensures swift cooking and maximum crust integrity.
Tenderizing Technique: Pounding the Chicken Breast Uniformly
Start with four substantial boneless, skinless chicken breasts. Slice each horizontally to yield two thinner pieces, resulting in eight cutlets total (this yields excellent portions, or you can stick to four larger ones).
Place the cutlets between two sheets of plastic wrap and gently pound them to an even 1/2 inch thickness. This process tenderizes the meat and guarantees that the entire cutlet cooks through at the same rate as the crust achieves peak crispness.
Seasoning the Dredge: Flavor Infusion at Every Layer
Seasoning must happen at every stage to avoid a bland centre. Once pounded, the cutlets are seasoned liberally with salt and pepper directly before hitting the flour. Remember, the flour is lightly seasoned, the eggs are plain, but the breadcrumb mixture carries the bulk of the flavour profile via the added Parmesan, oregano, and garlic powder.
Related Recipes Worth Trying
- The Ultimate 30Minute Marry Me Chicken Recipe — Forget takeout This easy Marry Me Chicken Recipe delivers incredible creamy sundried tomato flavour in just 30 minutes A perfect weeknight dinner guaranteed...
- The Ultimate Crispy Bang Bang Chicken Recipe Double Fry Technique — Forget soggy takeaway Master homemade Crispy Bang Bang Chicken with a doublefry method for shatteringly crisp results and the perfect spicysweet sauce
- Best Crispy Southern Fried Chicken Recipe Buttermilk Brine Magic — Achieve shattering crust and moist meat with this Southern Fried Chicken recipe Learn the buttermilk brine secrets for ultimate comfort food royalty
The Triple Dip: Building the Ultimate Crunchy Crust
This three step process is non-negotiable for achieving that lasting crispness. First, dust the cutlet entirely in the seasoned flour, shaking off every visible excess clump. Second, immerse it completely in the egg wash, allowing any dripping excess to fall back into the bowl.
Finally, press the cutlet firmly and deliberately into the Panko/Parmesan mixture, ensuring the entire surface, including the sides, is thickly coated.
Frying to Golden Perfection: Secrets to Non-Soggy Results
Frying is where many home cooks lose the battle against sogginess. The goal here is rapid searing to set the crust, not deep cooking the chicken entirely.
Oil Temperature Mastery: Achieving a Quick, Crisp Exterior
Heat about 1/2 inch of a high heat oil (like canola or grapeseed) in your skillet over medium high heat until it reaches approximately 350° F ( 175° C).
A quick test: drop a stray breadcrumb in; if it immediately sizzles vigorously but doesn't brown within 10 seconds, the temperature is correct. Frying in batches is essential; overcrowding the pan drops the oil temperature instantly, leading to greasy, soft cutlets.
Fry each side for just 2 to 3 minutes until deeply golden brown. Immediately transfer the crisped cutlets to a wire rack set over a baking sheet to allow air circulation, preventing steam from softening the undersides.
The Layering Sequence: Sauce, Cheese, and Final Bake Integration
Preheat your oven to 400° F ( 200° C). Spread a thin veil of your marinara sauce on the bottom of your 9x13 inch baking dish just enough to prevent sticking. Arrange the fried cutlets on this sauce base.
Now, to preserve the crunch, spoon a controlled amount of sauce only over the centre of each cutlet, leaving about a quarter inch border dry. Place one slice of fresh mozzarella on top, followed by a sprinkle of shredded mozzarella and the final dusting of fresh Parmesan.
This controlled topping ensures maximum melt without drowning the glorious crust. Bake for 10 to 15 minutes until the cheese is perfectly melted and bubbly, and the internal chicken temperature registers 165° F ( 74° C).
Pro Tips for Elevating Your Next Batch of Chicken Parmesan
For those looking to adapt or enhance this classic, a few tweaks can yield even more spectacular results. If you are short on time but still crave a crunch, consider the Chicken Parmesan Air Fryer method for a slightly lighter, but still crisp, alternative after the initial breading.
To expand this into a full pasta feast, you can easily double the sauce volume and serve it alongside Chicken Parmesan Fettuccine .
Storage Strategies and Reheating for Maximum Flavor Retention
Leftover Chicken Parmesan is a treasure, but it requires careful storage. Allow the dish to cool completely before transferring leftovers (sauce, chicken, and cheese intact) to an airtight container. Store in the refrigerator for up to three days.
Reheating is best done in a conventional oven or toaster oven set to 350° F ( 175° C) on a wire rack over a baking sheet. This allows heat to penetrate gently while helping to re-crisp the coating.
Avoid the microwave at all costs unless you are aiming for chewiness!
Pairing Perfection: Ideal Side Dishes to Complete the Meal
This dish is intensely flavourful and rich, so sides should offer contrast or absorption. A bright, peppery arugula salad dressed simply with olive oil and lemon zest cleanses the palate beautifully. For those seeking extra carbs, garlic bread for dipping into extra sauce is a must.
For a vegetable side that soaks up the pan juices, blistered green beans or sautéed spinach with pine nuts work wonderfully.
Troubleshooting Common Issues (e.g., Bland Sauce or Soft Coating)
If your sauce tastes flat, it likely needs acid a tiny splash of red wine vinegar or balsamic added right before serving can wake up muted tomato flavours. If your coating is soft, you likely fried at too low a temperature, or you let the cutlets sit too long before baking.
Always rest fried items on a wire rack, never paper towels, to prevent residual steam from softening the underside crust.
make-ahead Instructions for Effortless Entertaining
To prep for a party, you can complete the entire breading process up to 24 hours in advance. Arrange the breaded, uncooked cutlets on parchment lined baking sheets and refrigerate. When ready to cook, follow the frying instructions exactly.
You can also prepare the sauce entirely a day ahead and allow the flavours to meld further. This makes serving a delicious Chicken Parmesan Sandwich option later in the week just as simple.
Nutritional Snapshot: Understanding the Components of This Classic Dish
While undeniably decadent, this recipe offers substantial protein from the chicken breast. The carbohydrates come primarily from the breading and the sauce base. It is a celebratory dish; however, those monitoring sodium or saturated fat should opt for baked preparation where possible, use very lean chicken, and ensure their sauce is made with minimal added salt.

Recipe FAQs
How do I stop my Chicken Parmesan from getting soggy when I bake it?
This is the classic battlefield for any good Parm! The secret is twofold: make sure your cutlets are truly golden brown and crisp after frying, and crucially, don't drown them in sauce before baking. Only spoon a small amount of marinara over the centre of each cutlet, leaving the crispy edges exposed to the oven heat.
Can I make the Chicken Parmesan ahead of time?
You can certainly prep components in advance, which saves time on the night. Fry the chicken cutlets completely, let them cool fully, and store them layered between parchment paper in the fridge for up to a day.
Reheat them briefly in a hot oven (400°F) for 5 minutes before topping with sauce and cheese to re-crisp them before the final bake.
What’s the best oil to use for frying the Chicken Parmesan cutlets?
You need an oil with a high smoke point, as you want that crust to crisp up fast! Canola, vegetable, or grapeseed oil are excellent, neutral choices. Olive oil is lovely, but using pure extra virgin oil can cause it to smoke and burn before the chicken is cooked through, so a light olive oil blend is safer for frying.
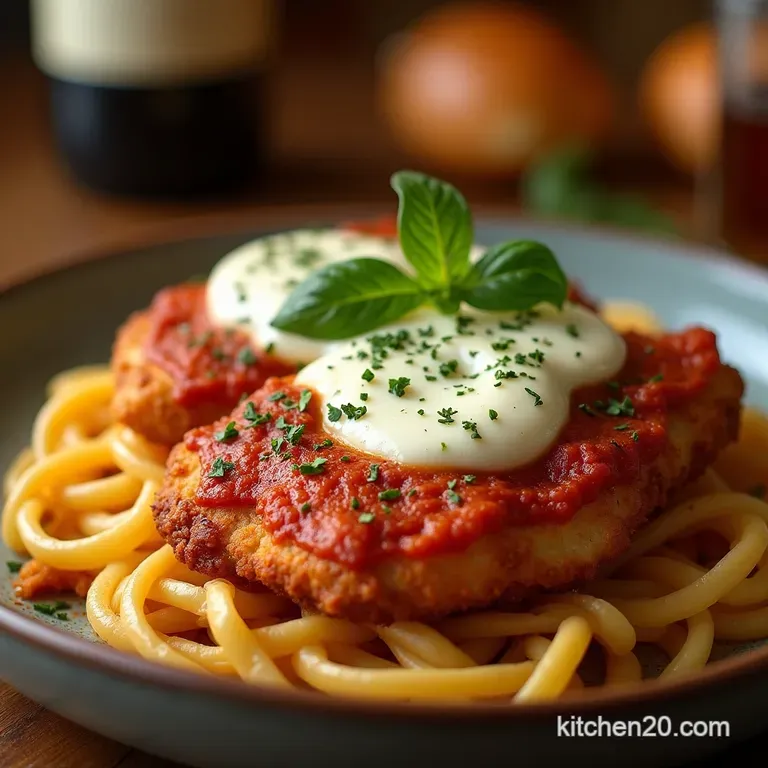
What should I serve with Chicken Parmesan to make it a proper meal?
You need something simple to soak up all that gorgeous sauce! Al dente spaghetti is the traditional partner, perhaps tossed with just a touch of garlic and olive oil if you don't want to overload on marinara. Alternatively, crusty garlic bread is non-negotiable for mopping up any leftovers!
Can I use an air fryer or bake everything instead of pan-frying the Chicken Parmesan?
Absolutely, especially if you're watching the fat content. For an air fryer, spray the breaded cutlets lightly with oil and cook them at about 375°F (190°C) until golden brown before topping with cheese and finishing in the air fryer for a few more minutes.
Baking alone works too, but you miss out on that intense, deep fried flavour base.
Crispy Chicken Parmesan Recipe

Ingredients:
Instructions:
Nutrition Facts:
| Calories | 1699 kcal |
|---|---|
| Protein | 56.6 g |
| Fat | 59.9 g |
| Carbs | 93.4 g |
| Fiber | 20.6 g |
| Sodium | 1216 mg |
