Crispy Crunchy Homemade Dill Pickles a Right Proper Brine
Recipe Introduction
Quick Hook
Fancy a bit of tang? Ever wondered how to make dill pickles that pack a proper punch? This recipe is your ticket to flavour town, bringing that classic dill pickle taste right to your kitchen.
Brief Overview
Pickles have been around for yonks. Cultures across the globe have been preserving food through pickling for centuries. This dill pickle recipe with fresh dill is pretty straightforward and only needs about 35 minutes of prep time plus about a week or two of patience.
This recipe should make about 4 jars of awesome.
Main Benefits
How to make homemade dill pickles offers a good source of probiotics for gut health. They're also smashing on burgers or just as a quick snack.
This crisp dill pickle recipe is special because it delivers that perfect balance of salty, tangy, and garlicky flavor.
Now, let's talk ingredients.
Ingredients & Equipment
Right, let's talk about what you'll need. No fancy stuff here, promise! We're how to make dill pickles , after all, not rocket science.
Main Ingredients for Pickling Greatness
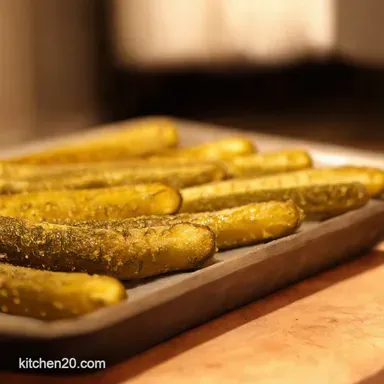
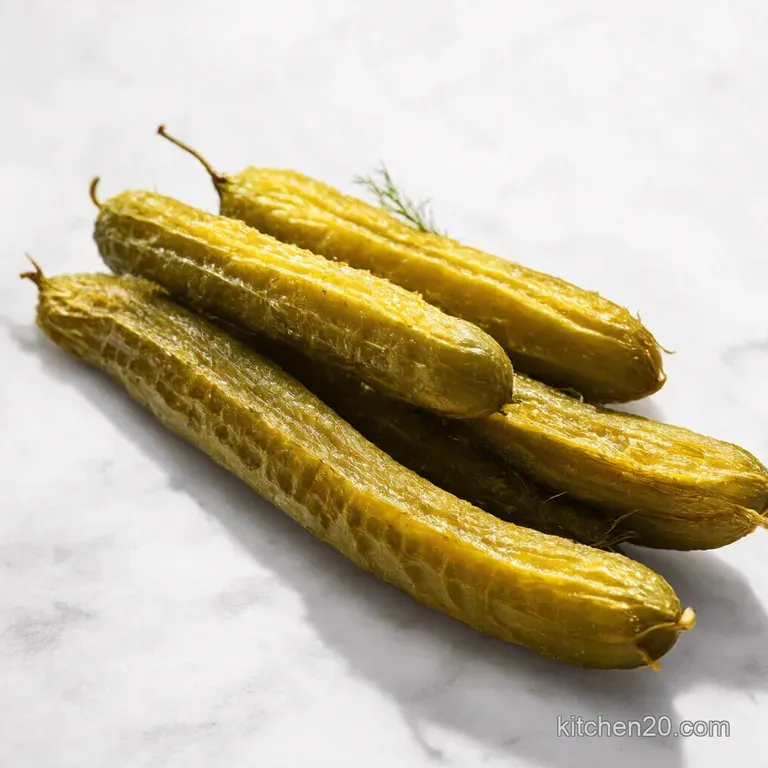
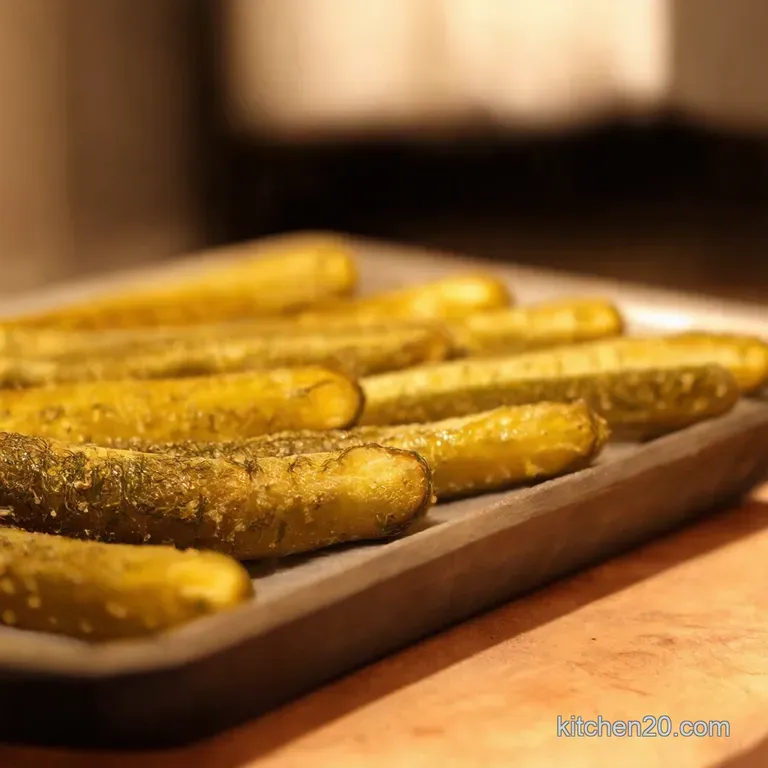
You'll need 2 pounds (900g) pickling cucumbers. Freshness is key. Look for firm ones, about 4-5 inches long . Avoid the ones that look a bit sad.
For the brine, grab 4 cups (950ml) white vinegar. 4 cups (950ml) of water as well. Don't forget 1/4 cup (50g) kosher or pickling salt.
Regular table salt can make your brine cloudy, honestly . A dash of 4 teaspoons (20ml) sugar too, keeps it real.
For each jar, you need 2 cloves of garlic, smashed. And 1 head (or 1 tbsp dried) fresh dill, of course.
Can't make dill pickle recipe with fresh dill without it! Add 1/2 teaspoon (2.5ml) peppercorns, and 1/4 teaspoon (1.
25ml) mustard seeds. Want it hot? A pinch of red pepper flakes.
A few grape leaves help keep them crisp dill pickle recipe . I nick them from my neighbour's garden. Only kidding…sort of.
Seasoning Notes
The brine is everything . Salt and vinegar are key. It needs to be spot on. The dill is the aromatic.
Use fresh if you can, but dried works in a pinch. For a spicy kick, add some chilli flakes.
Don't have mustard seeds? No worries! Turmeric adds a similar depth of flavour. It's all about experimenting! This homemade pickle brine recipe can easily be tweaked.
Equipment Needed
You don't need to spend a fortune. You’ll need a large pot to make the brine. Plus, 4 x 1-pint jars , all squeaky clean.
A canning funnel helps stop you making a mess. Plus, a ladle to pour the brine into the jars. No need to be too fancy!
Sterilise your jars. It's super important. A best dill pickle recipe canning is no good if it all gets nasty!
That's it! Simple stuff, really. Now you know how to can dill pickles you can dive in and get started.
Pickling Perfection: How to Make Dill Pickles Like a Pro
Honestly, there's nowt quite like the satisfying crunch of a dill pickle . Shop bought ones are alright, but how to make dill pickles at home? It's dead easy and you'll never go back, promise! Plus, you can impress your mates with your kitchen skills.
Right, let's get started!
Prep Like a Boss: Mise en Place is Key
First things first: get your ingredients sorted. This is called mise en place, fancy French for "everything in its place".
Wash 2 pounds of pickling cucumbers , trim the ends, and decide if you want spears or slices. Sterilize 4 1-pint jars by boiling or using the dishwasher.
Crush 8 garlic cloves . Measure out your 4 cups of vinegar , 4 cups of water , salt, sugar, dill, peppercorns, mustard seeds and red pepper flakes if you're feeling brave.
Pro Tip: Get everything chopped and measured before you start. This saves you time and prevents disasters, trust me I learnt that the hard way.
From Garden To Jar: step-by-step to Dill iciousness
- Pack each jar with 2 garlic cloves , 1 dill head/tablespoon dried dill, 1/2 teaspoon peppercorns , 1/4 teaspoon mustard seeds , red pepper flakes (optional), and then tightly pack your cucumbers. Leave 1/2 inch of space at the top.
- In a large pot, mix 4 cups white vinegar , 4 cups water , 1/4 cup kosher salt , and 4 teaspoons sugar .
- Bring to a boil over medium high heat. Stir until the salt and sugar dissolve.
- Carefully ladle the hot brine into each jar, still leaving 1/2 inch of space at the top.
- Wipe the jar rims clean and secure the lids and bands, but don't over tighten.
- Process your jars in a boiling water bath for 10 minutes for shelf stable pickles. If you plan to keep them in the fridge, skip this step. This is how to can dill pickles properly!
- Cool your jars. Listen for that satisfying "pop", meaning they've sealed. If one doesn't seal, refrigerate it right away.
Become a Pickle Pro: Tips and Tricks
Want the crispest pickles? Use grape leaves in each jar to maintain that crunch.
Avoid this common mistake: overpacking the jars! Brine needs to circulate.
The ultimate make-ahead option? These refrigerator dill pickle recipe means you can enjoy them soon! For best results, wait at least 7 days before tucking in.
You'll want the flavours to do their dance.
Recipe Notes: The Nitty Gritty on How to Make Dill Pickles
Alright, you've got the recipe for how to make dill pickles . Now for the goss on making them absolutely brilliant .
These are all the little tips and tricks I've learned. It's time to get down to the real deal.
Serving 'Em Up Right: Plating and Presentation
Honestly, presentation matters, doesn't it? For the crisp dill pickle recipe , forget chucking a load of pickles in a bowl.
Think about layering your spears artfully on a platter. Pop them next to some proper cheese.
Complementary sides : A nice sharp cheddar, crusty bread, and maybe a pint of your favourite brew. It's a picnic, innit.
Or, get a bit fancy with a Bloody Mary . Top tip: Garlic dill pickle recipe goes amazingly with a strong cocktail.
Storing Your Pickled Treasures
Right, you've made a batch and now what?
- Refrigeration : Kept in the fridge, these should last a fair few weeks. Make sure that they are properly sealed!
- Freezing? : I wouldn’t, personally. They'll lose their crunch.
- Reheating : Erm, you don't reheat pickles. Just saying.
This bit is so important. It is not advisable. You can also learn How To Can Dill Pickles to make them shelf stable.
Mix It Up: Variations on a Theme
Fancy a bit of a change?
- Lower sodium : Reduce the amount of salt in the brine. Maybe add herbs.
- Seasonal swaps : Try adding some chili in Autumn or Spring onions in summer.
If you're thinking of a dill pickle recipe with fresh dill , you can always experiment with other herbs as well!
Nutrition: The Good Stuff
Look, pickles aren't a health food per se . But they're low-calorie and can be a good source of probiotics.
Eating homemade dill pickles can be a tasty way to get some probiotics. Always good for the gut, that is.
Get Pickling!
So, there you have it. All my secrets on how to make homemade dill pickles .
Don't be scared to experiment. Find out what you like. Even use a fermented dill pickles recipe if you want to get really fancy.
Trust me, once you've tasted your own best dill pickle recipe canning , you'll never go back to the shop bought stuff.
Grab your cucs and get started. You won't regret it! You got this!
Frequently Asked Questions
How do I make dill pickles extra crunchy, like the ones from the shop?
Getting that perfect crunch is all about a few key tricks! Firstly, use the freshest cucumbers you can find they should be firm and unblemished. Secondly, trim off the blossom end of each cucumber, as this contains enzymes that can soften pickles.
Adding grape leaves to the jar is also a classic move; they contain tannins that help keep the pickles crisp.
What kind of cucumbers are best for making homemade dill pickles?
You'll want to hunt down pickling cucumbers, like Kirby cucumbers. They're smaller, firmer, and have thicker skins than your regular salad cucumber, meaning they'll hold their shape and crunch during the pickling process. Avoid anything too waxy or with large seeds, as these tend to get mushy.
How long do I have to wait before I can eat my homemade dill pickles? I'm peckish!
Patience is a virtue, especially when it comes to pickling! You really need to wait at least 7 days, but ideally 14, for the flavours to fully develop and the cucumbers to properly pickle. Think of it like a fine wine it gets better with age (well, up to a point!).
Opening them too soon will leave you with cucumbers that are more vinegary than properly pickled.
Can I adjust the recipe to make spicy dill pickles, or are there any other variations I can try?
Absolutely! To add some heat, toss in some extra red pepper flakes or even a sliced jalapeño to each jar. For a sweeter take, increase the sugar in the brine by a tablespoon or two. You could also try substituting the white vinegar with apple cider vinegar for a slightly more complex flavour.
If you're feeling fancy, adding a bay leaf to each jar adds a subtle, aromatic twist.
How do I make dill pickles shelf stable, and how long will they last?
For shelf stable pickles, you'll need to process them in a boiling water bath after sealing the jars. This involves submerging the sealed jars in boiling water for 10 minutes to create a vacuum seal. Properly processed and sealed dill pickles can be stored in a cool, dark place for up to a year.
If you skip the water bath, you must store them in the fridge, where they'll last for a couple of months.
Is there any way to cut down on the sodium when considering how to make dill pickles?
You can reduce the amount of salt slightly, but be aware that salt is crucial for both flavour and preservation. A good compromise is to use kosher salt or pickling salt, as they don't contain additives that can cloud the brine.
Also, ensure you're using the right ratio of vinegar to water, as the vinegar also acts as a preservative. Taste as you go and adjust to your liking, but don't skimp too much!
Crispy Crunchy Homemade Dill Pickles A Right Pro