Kimchi Fried Rice: the Ultimate Crispy Kimchi Bokkeumbap
- The Ultimate Kimchi Bokkeumbap: Tangy, Spicy, and Crispy Kimchi Fried Rice
- Decoding Kimchi Bokkeumbap: The Ultimate Korean Comfort Food
- The Science of Sizzle: Why This Kimchi Fried Rice Recipe Delivers Maximum Flavour
- Essential Elements: Ingredients for Authentic Kimchi Bokkeumbap
- Mastering the Wok: Step-by-Step Guide to Crispy Kimchi Fried Rice
- Troubleshooting & Technique: Achieving Flawless Fried Rice
- Practical Guide: Storage, Reheating, and Make-Ahead
- What to Serve With Kimchi Bokkeumbap
- Recipe FAQs
- 📝 Recipe Card
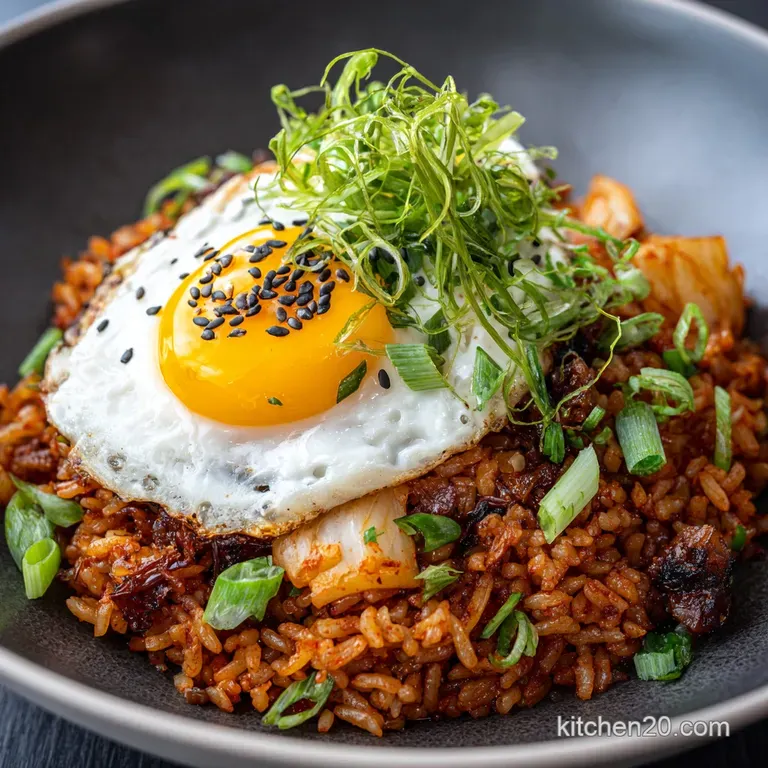
The Ultimate Kimchi Bokkeumbap: Tangy, Spicy, and Crispy Kimchi Fried Rice
Decoding Kimchi Bokkeumbap: The Ultimate Korean Comfort Food
That signature sizzle? It's heaven. When the sharp, tangy perfume of fermented cabbage hits the high heat, everything changes, promising deep, fiery comfort food that hits all the flavour notes simultaneously: sour, salty, sweet, and spicy.
You just know this easy Korean recipe is going to be spectacular the minute the kimchi starts to caramelize.
Honestly, Kimchi Bokkeumbap (Kimchi Fried Rice) is my weeknight hero and the best answer to the eternal question, "What do I do with this leftover rice?" Got cold, stale rice and a forgotten jar of kimchi in the fridge? Perfect.
This dish is fast, incredibly cheap, and transforms those scraps into a truly vibrant, satisfying meal in about 20 minutes flat.
We aren't aiming for sticky, sad, gummy rice here, my friend. We are chasing the smoky, crunchy texture known as wok hei (or close enough for a home stove). Stick with these over high heat, focused techniques, and I guarantee you'll master this classic Korean rice dish today.
The Science of Sizzle: Why This Kimchi Fried Rice Recipe Delivers Maximum Flavour
What Makes Kimchi Fried Rice a Seoul Kitchen Staple?
Kimchi Bokkeumbap isn't just fried rice; it’s a cultural cornerstone built on efficiency and flavour depth. It capitalizes on ingredients that only get better with age, namely old kimchi and day-old rice.
It’s comforting, satisfying, and totally addictive, especially with that runny fried egg soaking into the spicy grains.
Achieving the Perfect Crispy Texture (A Guide to over High heat Frying)
The biggest difference between decent fried rice and incredible fried rice is the temperature of your pan. We need to fry the rice, not steam it! You must use a large enough vessel (a wok or a heavy skillet) and keep the heat high so the moisture rapidly evaporates, allowing the rice grains to toast and crisp slightly.
The Essential Flavour Components: Tang, Umami, and Smoky Heat
The key to balance here is managing the three primary flavours. We get tang from the old kimchi, umami from the soy sauce and rendered pork fat, and controlled heat from the Gochujang and the high temperature frying process. Don't skimp on the sugar; it is crucial for cutting the acidity of the kimchi.
The Magic of Aged Kimchi: Optimizing Acidity for Flavour Depth
I’m serious about this: the older, the better. Fresh kimchi is delicious, of course, but for fried rice, you need that seriously sour, fermented kick. That aggressive acidity is what allows the flavour to stand up to the frying process and gives the dish its characteristic punch.
If your kimchi is less than a week old, it might taste a little flat when cooked.
Stale Rice is the Secret: Minimizing Moisture for Crispy Grains
This is non-negotiable, truly. Using freshly cooked, warm rice guarantees a sticky, gummy mess because the starches haven’t set, and the moisture level is too high. Day-old, refrigerated rice is drier, holds its shape perfectly, and absorbs the flavourings without disintegrating. If you want a deeper dive into controlling rice moisture for meal prep, check out my recipe for Cauliflower Rice Salads in a Jar: Keto Meal Prep That Stays Fresh .
The Gochujang and Kimchi Juice Glaze
Mixing the Gochujang sauce before adding it to the wok ensures it cooks evenly. Adding the reserved kimchi brine (juice) right into the hot pan after caramelizing the kimchi concentrates that sour flavour beautifully, basically giving you a natural flavour booster shot.
Essential Elements: Ingredients for Authentic Kimchi Bokkeumbap

Selecting the Right Rice Type and Preparation (Day-Old is Mandatory)
Medium grain rice like Calrose or short grain Korean sticky rice works well because it retains some chewiness. Jasmine rice is also totally acceptable. The most important thing is that the rice must be thoroughly cold.
Break up the clumps with your hands before adding it to the pan.
Optimizing Your Kimchi: Cutting and Fermentation Level Notes
Roughly chop the kimchi into pieces about the size of a fingernail. If they are too large, they won’t caramelize properly, and they’ll dominate the bite. Make sure you reserve two tablespoons of that valuable kimchi juice!
The Seasoning Suite: Soy Sauce, Sesame Oil, and Gochujang Explained
Gochujang provides that signature deep red colour and fermented chili heat. We use soy sauce primarily for salt and umami a little goes a long way since the bacon and kimchi are already salty.
Sesame oil should always be added right at the very end, off the heat; cooking it destroys its flavour.
Swaps and Variations for the Base Seasonings
It’s always helpful to have a backup plan, especially if you’re trying out an easy Korean recipe for the first time and are missing an ingredient.
| If you don't have... | You can use... | Note |
|---|---|---|
| Gochujang (Chili Paste) | Sriracha + 1/2 tsp sugar | Sriracha is less complex and sweet, so the sugar helps balance the flavour profile. |
| Bacon/Pork Belly | Spam (Luncheon Meat) or Hot Dogs | Spam is incredibly traditional in Korean military stew (Budae Jjigae) and works brilliantly here; just dice and fry until crispy. |
| Light Soy Sauce | Tamari or Fish Sauce | Tamari is a great gluten-free option. If using fish sauce, use half the amount and taste test. |
Mastering the Wok: step-by-step Guide to Crispy Kimchi Fried Rice
Step 1: Building the Aromatics and Caramelizing the Kimchi Base
First, render that protein! Place the diced bacon or pork belly in your wok over medium high heat. Cook until it’s beautifully crispy and you’ve got about 1 2 tablespoons of shimmering rendered fat in the pan. Remove the protein and set it aside; we’ll add it back later for maximum crunch.
Increase the heat to high. Add your chopped kimchi and minced garlic to the fat. Sauté aggressively for 2– 3 minutes. You want the edges of the kimchi to caramelize and slightly darken, releasing a wonderful nutty aroma.
Pour in the reserved kimchi brine and cook until it evaporates, which should only take about 30 seconds.
Step 2: over High heat Rice Incorporation and Searing
Now, drop the cold rice into the wok. Don't be shy about the heat! Use your spatula to spread the rice out, then press it down firmly against the hot surface for a few seconds. Rapidly stir fry and toss the rice for 3- 4 minutes, ensuring every single grain is coated in that fiery red kimchi mixture and fat.
It must sizzle loudly.
CRUCIAL CHEF'S NOTE: If you hear steaming instead of frying, your pan is too cold or too full. Remove some rice, or crank the heat up immediately. The goal is to separate and sear the grains.
Step 3: Sauce Integration and Final Seasoning Check
Push the rice to one side of the pan to create a cleared spot. Pour the premixed Gochujang, soy sauce, and sugar sauce into the clear area. Cook the sauce for about 15 seconds until it slightly darkens and smells toasted.
Then, rapidly fold the sauce through the rice until the mixture is uniform and a vibrant, glorious red colour. Remove the pan from the heat, stir in the reserved crispy bacon/pork, and finish with the toasted sesame oil.
The Perfect Topping: Frying the Sunny Side Up Egg
No Kimchi Bokkeumbap is complete without a crown. Heat a separate small pan with neutral oil over medium heat. Fry two large eggs sunny side up until the whites are just set but the yolk remains gorgeously runny. A perfectly fried egg is essential for richness, mixing with the spicy rice when you break it open.
Season with salt and pepper immediately.
Troubleshooting & Technique: Achieving Flawless Fried Rice
Common Mistakes: Avoiding Soggy Bokkeumbap
The number one mistake I used to make was trying to cook too much rice at once. Never overcrowd the pan. If you double this recipe, cook it in two separate batches.
Overloading the wok drops the temperature instantly, and the released moisture traps the rice, turning it into mush instead of crisping it up.
Managing the Heat: Wok Technique for Smoky 'Wok Hei' Flavour
Keep the heat high, and keep it moving! If you're using a home electric stove, you might need to leave the rice undisturbed for 30 45 seconds between tosses to allow the bottom layer to actually sear and develop that desirable smoky flavour before stirring again.
Practical Guide: Storage, Reheating, and make-ahead
Reheating Leftovers While Maintaining Crispness
Kimchi fried rice keeps beautifully in the fridge for up to 4 days. To reheat it properly and avoid sogginess, use a over high heat method. Heat a non-stick skillet over medium high heat with a tiny bit of oil. Add the rice and spread it thinly.
Cook for 3- 4 minutes, stirring only occasionally, until the edges are crispy again.
Freezing Kimchi Fried Rice: Is It Recommended?
I wouldn't recommend it. While technically possible, freezing and thawing fried rice drastically alters the texture; the grains become soft and lose their distinct crispness when reheated. This dish is so fast, it's genuinely best cooked fresh.
What to Serve With Kimchi Bokkeumbap
Traditional Banchan Pairings (Side Dishes)
Kimchi Bokkeumbap is a complete meal, but it shines when served alongside some simple Korean side dishes (Banchan). Try a cooling side of quick pickled radishes (like Kkakdugi) or simply some plain, steamed spinach seasoned with sesame oil. The fresh contrast cuts through the spicy heat perfectly.
Beverage Recommendations to Balance the Spice
A chilled bottle of Korean Soju is the classic choice, or a light, crisp Korean beer (like Cass or Hite) works wonders. If you're going non-alcoholic, chilled barley tea (Boricha) is refreshing and traditional.

Recipe FAQs
Why must I use day-old or chilled rice for proper Kimchi Bokkeumbap?
Using day-old or thoroughly chilled rice is the most critical step for achieving a crispy, non-soggy result. Freshly cooked rice retains too much moisture, which creates steam when hit with high heat, resulting in a sticky or gummy texture.
Chilling the rice allows the grains to firm up and dehydrate slightly, ensuring they crisp up beautifully in the wok.
How ripe should my kimchi be for the best flavor, and should I drain the liquid?
The best flavor comes from well fermented, sour kimchi, often referred to as "aged" kimchi. This intense sourness develops a deep umami flavor when cooked down, which is essential for authenticity.
While you should squeeze excess liquid from the kimchi pieces to prevent sogginess, reserve 2-3 tablespoons of the bright red kimchi juice to add back in for color and tangy flavor.
My fried rice always turns out soggy. What common mistakes should I avoid?
Sogginess usually stems from low heat or an overcrowded pan, which lowers the cooking temperature and causes ingredients to steam instead of fry. Ensure your wok or skillet is screaming hot before adding the ingredients, and cook large portions in two separate batches if necessary.
Also, avoid adding too much liquid soy sauce or kimchi juice all at once.
Can I make this Kimchi Fried Rice vegetarian or vegan?
Yes, this recipe is highly adaptable. Simply omit any pork belly or ham and replace it with firm, pressed tofu cubes or earthy shiitake mushrooms for texture. Crucially, ensure the kimchi you purchase is genuinely vegan, as traditional recipes often use fish sauce or shrimp paste as a fermentation agent.
How do I adjust the spice level if my kimchi is already very spicy?
To moderate the heat, reduce the amount of added gochujang (Korean chili paste) by half, or omit it entirely if your kimchi is fiery. You can also temper the spice by adding a small amount of sugar (around half a teaspoon) to balance the intense heat and acidity.
Garnish with a cooling drizzle of mayonnaise or sour cream upon serving.
What is the best oil to use, and why is sesame oil added at the very end?
Start cooking with a high smoke point oil like canola, grapeseed, or neutral vegetable oil, as fried rice requires extremely high heat. Sesame oil has a very low smoke point and loses its flavor quickly when heated; therefore, it is reserved to be drizzled in just before serving, providing the final, aromatic flourish.
How long can I store leftover Kimchi Bokkeumbap, and what is the best way to reheat it?
Store any leftovers in a sealed, airtight container in the refrigerator for up to three days. For the best reheating results, spread the rice in a thin layer in a hot skillet or wok and cook over medium high heat. Avoid the microwave, which tends to soften the rice texture and make it gummy.
Crispy Kimchi Fried Rice Recipe
Ingredients:
Instructions:
Nutrition Facts:
| Calories | 422 kcal |
|---|---|
| Protein | 17.3 g |
| Fat | 15.4 g |
| Carbs | 36.7 g |
