Deliciously Crunchy Chilaquiles: a Mexican Breakfast Delight
Discovering Chilaquiles: Breakfast Brilliance
Oh my gosh, i remember the first time i tried chilaquiles . i was at this little hole-in-the-wall mexican joint in my town.
The aroma hit me before i even sat down! i had no clue what chilaquiles were, but the moment i took my first bite, it was like a flavor explosion in my mouth.
Seriously, those crispy tortilla chips, that warm salsa, and all those toppings? mind blowing! and now, i want to share this delightful mexican breakfast recipe with you.
So, let’s dive into the world of chilaquiles and whip up something magical!
A Flavorful History
Chilaquiles aren’t just some trendy dish that popped up overnight. they have roots deep in traditional mexican dishes . originating from the mesoamerican culture and evolving over the centuries, they were once a way to use up those stale corn tortillas.
People would fry them, toss them in a sauce, and top them with whatever was handy. fast forward to now, and you’ll find chilaquiles on breakfast menus from coast to coast.
They’re super popular. and honestly, who doesn’t love a dish that’s both fun and tasty, right?
Why You'll Love This Recipe
So, how easy are chilaquiles to make? i’d say it’s as simple as pie! you’re looking at just 30 minutes total for prep and cooking.
It’s ideal for those busy mornings when you want something hearty but don’t want to spend hours in the kitchen.
Plus, it's an affordable meal that yields four satisfying servings talk about a win-win!
Now, let’s chat about the benefits. chilaquiles provide a great balance of carbs, fats, and proteins, especially when you pile on the toppings like eggs and avocado.
They’re not just a breakfast; they’re a vibe! perfect for a sunday brunch or a cozy weekday breakfast at home.
You can totally customize them too! want them spicy? go for a hot salsa. prefer them veggie packed? toss in some fresh peppers and onions.
And here's the kicker: chilaquiles stand out from other breakfast options. while pancakes and waffles can feel heavy and syrup laden, chilaquiles bring a light, crunchy texture to the table.
So, if you’re in the mood for something that feels a bit healthier yet indulgent, these are where it’s at!
Time to Gather Your Ingredients
So, are you ready to give this a whirl? you’ll need some basic ingredients. grab yourself some fried corn tortillas , red or green salsa, and a few toppings that tickle your fancy think cheese, avocado, and maybe even a poached egg if you're feeling fancy.
As we get rolling into the ingredients section, remember, chilaquiles aren’t just food; they’re about bringing people together. whether you're digging into them solo or sharing with friends and family, each bite comes with a sprinkle of love and nostalgia.
So, let’s get cooking and make some deliciously crunchy chilaquiles that will transport your taste buds straight to mexico!
Essential Ingredients Guide to Making Mouth Watering Chilaquiles
So, let’s dive into the scrumptious world of cooking, particularly those delightful and crispy chilaquiles that just give your taste buds a fiesta! if you’ve ever thought, “i wanna whip up some easy chilaquiles,” but felt a little lost, fear not!
I’ve got you covered with this handy ingredient guide that’ll make your mexican breakfast recipes shine like a diamond.
Premium Core Components
First things first. Let’s talk about those premium core components you’ll need to rock out your chilaquiles.
Measurements: You want six corn tortillas cut into quarters. In metric, that’s about 180g. For your frying, grab 1 cup (240ml) of vegetable oil. That’s how we get that golden, crispy crunch!
Quality Indicators: Fresh tortillas are key! Look for that lovely corn smell and softness. If they feel hard, just say, "Nope!" as you walk away.
Storage guidelines: you wanna keep those tortillas in a cool, dry place. don’t toss them in the fridge; they’ll get icky.
And their shelf life? about a week, but they’ll be best within the first few days.
Freshness Tips: Feel the tortillas! If they start cracking or smell funny, toss 'em out definitely not what you want in your traditional Mexican dish!
Signature Seasoning Blend
Now onto flavor! The signature seasoning blend is what makes these chilaquiles pop with flavor.
Essential Spice Combos: Just a simple mix of cumin and garlic powder can turn your sauce into a zingy delight.
Herb Selections: Fresh cilantro works wonders as a topping. Trust me! It’s like a party for your mouth.
Flavor Enhancers: Consider using some good old-fashioned salsa green or red, your call, my friend. They each bring their own flair to the fiesta.
Regional Variations: If you’re feeling adventurous, swap out the usual salsa for some chipotle salsa for a smoky kick!
Smart Substitutions
We all have those days when you’re out of something, right? Here’s where smart substitutions come in.
Common Alternatives: No corn tortillas? Flour tortillas work too, or even store-bought tortilla chips in a pinch!
Dietary Modifications: Make it vegetarian by using vegetable broth instead of chicken. Add sautéed veggies like bell peppers for extra color.
Emergency Replacements: Okay, no salsa? Just whip up some crushed tomatoes with a sprinkle of salt and pepper. Boom! You’re good to go.
Seasonal Options: In summer, toss in some fresh tomatoes or jalapeños for an added punch.
Kitchen Equipment Essentials
Alright, let’s chat gear. You’ll want your kitchen equipment essentials ready before you embark on this chilaquiles adventure.
Must Have Tools: A frying pan or skillet is essential. You’ll also need a slotted spoon for fishing out those golden chips. Don’t forget a knife and cutting board for the fresh toppings!
Alternative Equipment Options: No skillet? No problem. A Dutch oven can do the trick too. Just keep an eye on that heat!
Preparation Tips: Make sure your oil is hot enough around 350° F ( 175° C). Perfect for crispy tortilla chips!
Storage Solutions: After frying, let those chips cool on paper towels to soak up any excess oil.
Wrapping It Up
So, before you dive back into our chilaquiles recipe , remember this: every ingredient you pick is a key player in your breakfast symphony.
You’re gonna love how these mexican breakfast recipes easily come together to create a comforting plate of goodness.
Stay tuned for my step-by-step instructions on creating your own deliciously crunchy chilaquiles. Let’s get cooking, amigos!
Cooking Like a Pro: The Art of Making Chilaquiles
Let me tell you, nothing says “good morning” quite like a plate of chilaquiles . this deliciously crunchy mexican dish is not just eye-catching; it’s comforting, packed with flavor, and a perfect way to kick start your day.
So, if you’re ready to dive into the realm of professional cooking methods, grab your apron, ’cause i’m about to spill some secrets that’ll make you a kitchen rockstar.
Essential Preparation Steps
First off, let’s talk mise en place . it sounds fancy, right? but it really just means you should have all your ingredients prepped and in one place before you start cooking.
So chop those tortillas, measure out your salsa, and get everything ready to roll. trust me, this makes the cooking process way smoother.
Next is time management . it’s like juggling but way tastier. start with frying your corn tortillas. you’ll need to heat 1 cup of vegetable oil over medium heat .
Fried corn tortillas are what give chilaquiles that irresistible crunch. time it about 2- 3 minutes per batch and keep an eye on them! burnt tortillas? not cool.
Also, being organized helps! Keep your workspace tidy and everything you need within reach. It makes a world of difference; I learned this the hard way when I searched for salt and nearly burned my breakfast!
And don’t forget safety: handle hot oil carefully and, if you’re poaching eggs, watch out for splashes!
Step-by-step Process
Alright, let’s get cooking! Here’s a simple breakdown:
- Heat that oil: Get it sizzling hot!
- Fry the chips: Toss in those corn tortilla quarters. Drain them on paper towels and sprinkle with salt.
- Make that sauce: Grab a large skillet and combine 2 cups of salsa with ½ cup of chicken broth , 1 tsp cumin , and 1 tsp garlic powder . Heat until it’s bubbly and embracing those flavors.
- Mistreat your chips: Fold those crispy tortilla chips into the sauce and stir gently for about 2- 3 minutes . You don’t want them to turn mushy they should still have some crunch!
Pay attention to timing here, friends! The key to perfect chilaquiles is about finding that right balance.
Expert Techniques
So, here’s where things get real. If you want your chilaquiles to impress, keep these expert techniques in mind. Quality is everything! I always say: use fresh ingredients your dish will thank you.
Check for doneness by tasting a chip after it’s been in the sauce for a minute. if it’s got a nice blend of flavors while still being crunchy that’s your ticket! and if things start feeling too soggy, an extra minute in a hot oven can work wonders.
And if you ever find yourself in a jam, remember my golden rule: cheese fixes everything. Seriously! A sprinkle of queso fresco can elevate your dish from “meh” to “OMG!”
Success Strategies
Now, let’s chat about common mistakes. one big no-no? overcooking the tortillas 2- 3 minutes is all you need for frying.
Another rookie error is neglecting the temperature. too hot, and those chips will burn. too cold, and they’ll soak up all that oil without achieving that crispy finish.
For quality assurance, always taste along the way. it’s a game changer! and if you’re like me and can’t resist that morning scramble, make-ahead options are your best friend.
Prep your tortillas and sauce separately the night before. just heat it all up in the morning, fold those chips in, and you’re set!
Wrapping It Up
So, there you have it. with these professional cooking methods, you’ll be whipping up easy chilaquiles that rival any mexican restaurant.
Just remember that cooking should be fun, not stressful. turn up your favorite playlist, embrace the chaos, and don’t be afraid to make it your own.
Like my buddy Isabel Eats always says, "Food is love, and love is food!" And who doesn’t want to share that love over a plate of chilaquiles ?
In the next section, we’ll dive into some additional information on customizing your recipes and making the most out of those leftover ingredients! Stay tuned!
Additional Recipe Information for Chilaquiles Lovers
When it comes to chilaquiles , i can’t even stress how happy this dish makes me! it’s got easy chilaquiles appeal for busy mornings or lazy brunches, plus, it’s one of those mexican breakfast recipes that everyone loves.
So, let’s dive into the juicy details here are some pro tips, presentation styles, storing tricks, and all the good stuff you want to know!
Pro Tips & Secrets
Oh, i've learned a couple of tricks in my cooking adventures. first off, when frying your fried corn tortillas , do it in batches.
This ensures each chip gets that perfect crunchiness. no soggy chips allowed! you want them to hold onto that salsa just right.
Honestly, if you want to save time while making your sauce, just use store-bought salsa. it’s not cheating; it’s smart! but, if you’re feeling all chef like, jazz it up with some cumin or a squeeze of lime.
It’s a real game changer.
Presentation? Don’t skimp on it. Toss in some bright avocado slices and a sprinkle of cilantro. Trust me, it’s like wearing your Sunday best for brunch! Presentation does wonders, folks.
Perfect Presentation
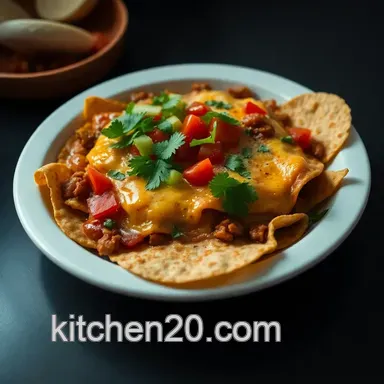
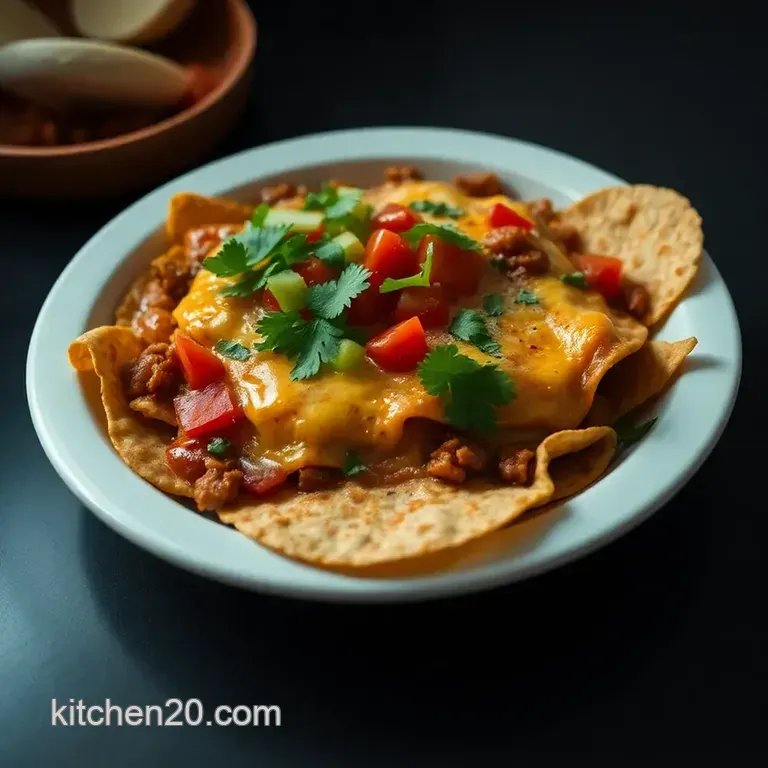
Now let’s chat about plating. when i’m serving chilaquiles , i like to go for colors. the bright greens from the avocado and the rich reds from your salsa make your plate pop.
It’s all about that visual appeal! go ahead and sprinkle some crumbled cheese on top, and maybe toss in a lime wedge for that extra flair.
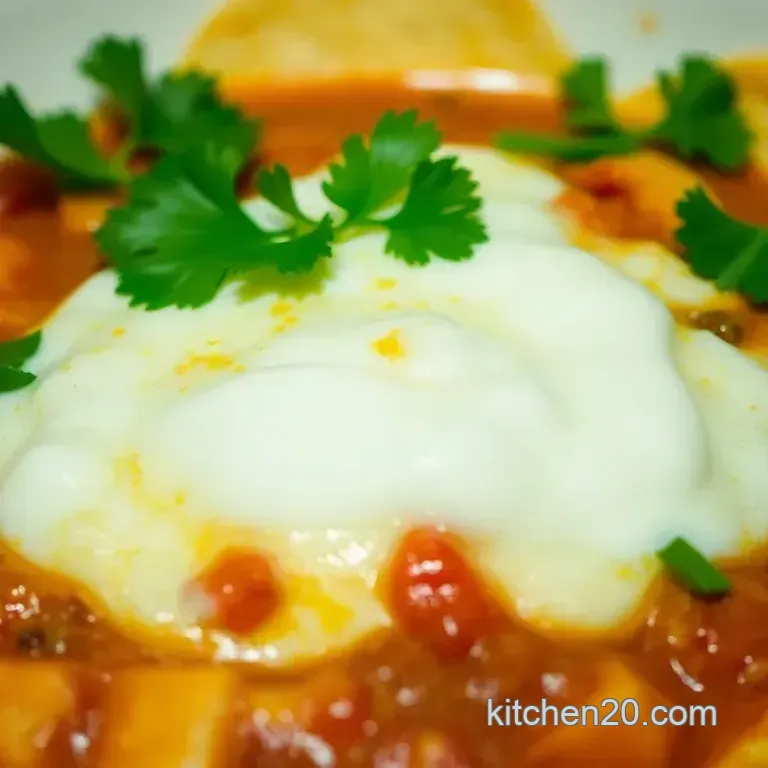
For garnish, don’t be afraid to add a dollop of sour cream or greek yogurt. it gives such a beautiful creamy finish! and remember, a little cilantro can brighten up the whole dish.
Seriously, a sprinkle goes a long way!
Storage & make-ahead
Okay, life happens, and sometimes you just can’t eat all those delicious chilaquiles right away. if you have leftovers (which is rare but can happen), store them in an airtight container in the fridge for up to 3 days .
To keep things tasty, separate the fried corn from the sauce until you’re ready to eat again. this prevents the chips from getting all soggy.
When it comes to reheating, a brief stint in the oven will help revive that crunch. Heat it at about 350° F for around 10 minutes , and it should come back to life! You might lose a bit of freshness but hey, it’s still chilaquiles!
Creative Variations
Now, let your creativity soar! you can totally adapt these chilaquiles to your taste. want something lighter? go vegetarian by tossing in some sautéed peppers and using veggie broth.
If you’re craving more protein, try adding shredded chicken or crumbled chorizo!
Don’t forget about seasonal ingredients, either. in the summer, throw in some fresh corn or diced tomatoes to make it pop it's like a fiesta in your mouth! and if you're feeling ultra adventurous, try using green salsa for that zesty kick.
Complete Nutrition Guide
What’s cool about chilaquiles ? they can be pretty healthy if you pay attention to portions. a typical serving clocks in around 450 calories , packed with good stuff like fiber from the tortillas and healthy fats from the avocados.
If you’re counting macros, it has about 10g of protein (more if you add those eggs!). but remember, balance is key! pair these with some fresh greens on the side to keep your meal light and nutritious.
Encouraging Conclusion
So, there you go everything you need to know about making & enjoying chilaquiles! cooking doesn’t have to be complicated. let loose, have fun, and remember that no two plates will ever look the same.
If anything, these vibrant dishes are all about sharing love and flavor.
Next time you whip up a batch, don’t forget to enjoy every bite. You deserve it! Happy cooking, and let those Mexican dishes shine on your table!
Frequently Asked Questions
What are chilaquiles and where do they come from?
Chilaquiles are a traditional Mexican breakfast dish made from crispy tortilla chips simmered in a flavorful salsa or sauce. They are believed to have originated from the Aztecs, who used leftover tortillas, making it a sustainable and delicious way to use up food!
Can I make chilaquiles ahead of time?
While chilaquiles are best enjoyed fresh, you can prepare the components ahead of time. Fry your tortilla chips and make the sauce, then combine them just before serving to keep the chips crispy. You can also cook additional toppings like eggs or sautéed veggies in advance.
How do I keep the tortilla chips from getting soggy in my chilaquiles?
The key to crispy chilaquiles is to add the fried tortilla chips to the sauce right before serving. Additionally, allow the chips to cool slightly before mixing them in, which helps retain their crunchiness while still soaking up some sauce flavor.
What toppings should I use for my chilaquiles?
Toppings can really make your chilaquiles shine! Common additions include crumbled queso fresco, sliced avocado, sour cream, and fresh cilantro. You can also add proteins like poached eggs or shredded chicken to enhance the dish!
Can chilaquiles be made vegetarian or vegan?
Absolutely! For vegetarian chilaquiles, simply use vegetable broth in the sauce instead of chicken broth. To make them vegan, skip dairy toppings and choose a plant based sour cream or nutritional yeast for a cheesy flavor!
How can I store leftovers of chilaquiles?
Leftover chilaquiles can be stored in an airtight container in the fridge for up to two days. However, the chips might get soggy if they sit too long. To keep them crisp, try separating the components and reheating them individually.
Deliciously Crunchy Chilaquiles A Mexican Breakf