The Ultimate Allbutter Pie Crust Food Processor or Manual Method
Mastering the All-Butter Pie Crust: Why Flakiness Matters
If you ask any serious pastry chef what defines a truly magnificent pie, they won't point to the filling; they will undoubtedly focus on the crust. The crust is the framework, the structure, and the critical textural counterpoint to whatever deliciousness rests inside.
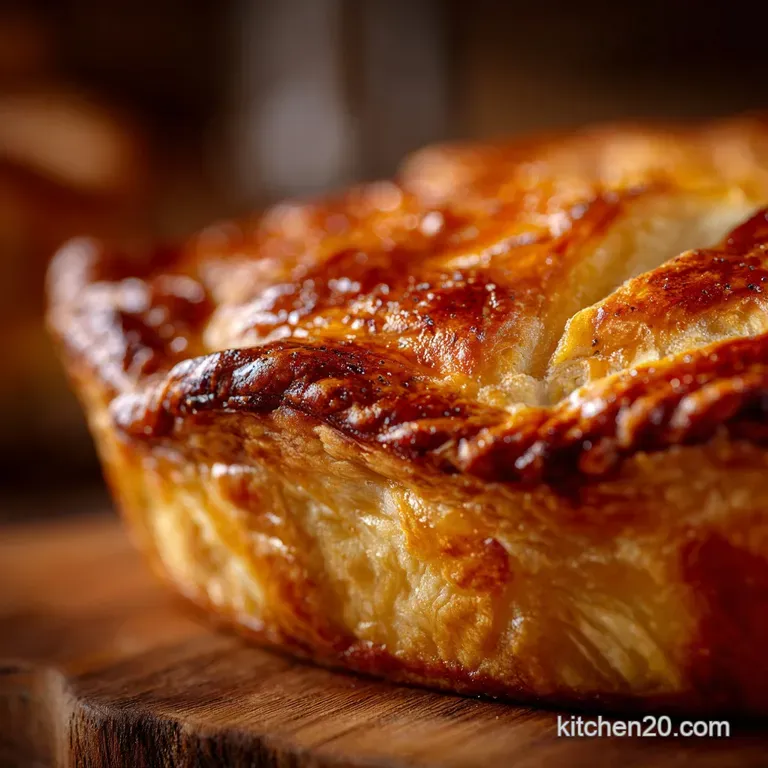
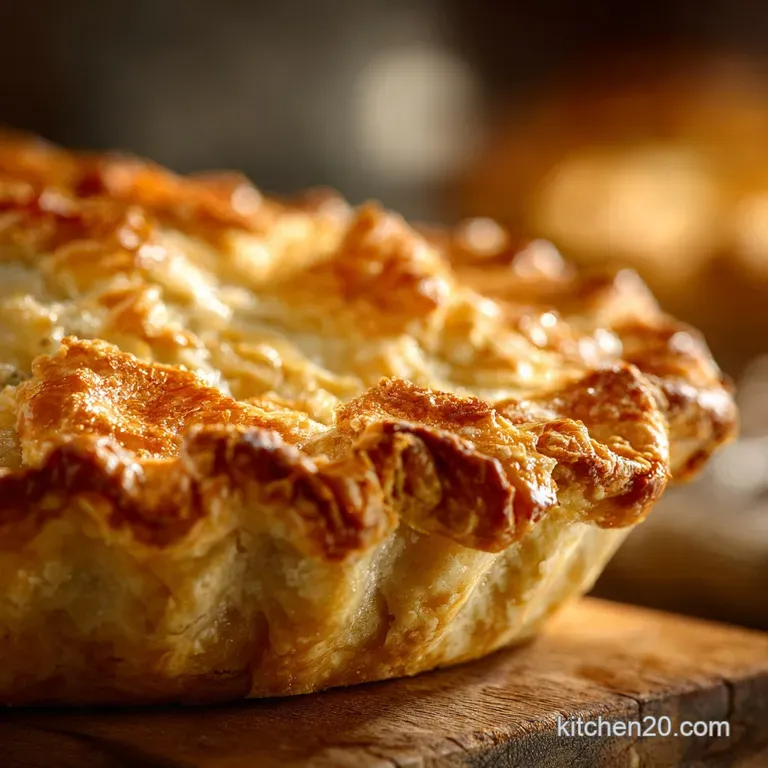
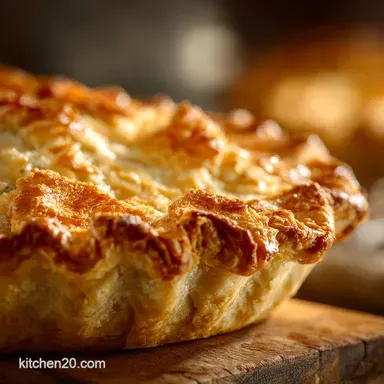
Our goal today is to create the quintessential AllButter Pie Crust , distinguished by its deeply rich flavor and spectacular, towering layers of flakiness. This dough is sturdy enough to hold the wettest filling yet tender enough to shatter on the first bite.
Bidding Farewell to the Soggy Bottom
The dreaded "soggy bottom" is the bane of every pie baker’s existence, but it is entirely avoidable with proper technique. Achieving the ideal texture crisp, flaky, and golden comes down to understanding thermodynamics.
Flakiness occurs when tiny pieces of cold fat melt rapidly during baking, releasing steam which forces apart the layers of gluten established by the flour and water. If your ingredients are warm, the fat melts prematurely, integrating fully into the flour, resulting in a tough, dense, and ultimately wet-prone crust rather than the airy, Flaky Pie Crust Recipe we are aiming for.
Temperature is the foundation of success.
The Baker’s Secret: Elevating Simple Ingredients
The remarkable thing about pastry is that its excellence relies on just four pantry staples: flour, fat, liquid, and salt. When developing the All Butter Pie Crust Recipe , we are meticulous about the quality and measurement of each component.
While the ingredients are simple, the execution is where the magic happens. We must respect the delicate balance between hydration (which develops gluten) and fat suspension (which prevents excessive gluten development).
When executed precisely, this simple foundation yields the Perfect Pie Crust every time.
Is Butter Truly Better? An Expert Analysis
For the ultimate flavor profile, butter is unequivocally superior. While shortening or lard can often yield a higher "fluff" factor due to their extremely high melting points, they lack the deep, creamy flavor that only high-quality dairy fat provides.
Since butter contains about 20% water, it generates more steam during baking than pure fats, contributing significantly to lift and flakiness. On top of that,, the golden color and rich caramelization that happens on an All Butter Pie Crust simply cannot be matched by other fats.
This is why institutions like all butter pie crust king arthur and countless professional kitchens insist on using 1 cup (two full sticks) of cold, unsalted butter for their base recipe.
Sourcing the Building Blocks of Superior Pastry
A great Perfect Pie Crust starts long before the mixing bowl it starts with selecting and preparing the components correctly. The success of this medium difficulty recipe hinges on precision and temperature management.
The Critical Temperature of Butter and Water
Temperature is non-negotiable. To create that signature flakiness, your butter must be cut into $1/2$-inch cubes (226 g) and chilled in the freezer for at least 15 minutes before use. This extreme cold is vital.
Similarly, the water we will need 6 to 10 tablespoons (90 to 150 ml) must be ice water, ideally containing a few cubes, which keeps the dough mass cool as we introduce moisture.
We start conservatively with 6 tablespoons and only add more spoon-by-spoon, ensuring we use only the minimal amount required to bind the dough.
Choosing the Right Flour for Maximum Puff
We rely on 2 ½ cups (295 g) of standard All-Purpose Flour. Unlike bread flour, which is high in protein and meant for developing strong, elastic gluten, all-purpose flour provides the ideal medium. It allows for enough gluten development to give the dough structure while remaining tender.
We also incorporate a touch of granulated sugar (1 tablespoon) not for sweetness, but because it assists in achieving the beautiful, desirable golden brown color during baking.
Essential Kitchen Gear for Effortless Dough Preparation
While the process can be done entirely by hand, having the right tools makes the task easier and faster, which is critical for maintaining cold temperatures. You will need a large mixing bowl (chilled if possible), plastic wrap, a rolling pin, and, most importantly, a tool for integrating the fat.
Many bakers prefer a pastry blender for control, but using a Food Processor is faster and incredibly effective for achieving a superior All Butter Pie Crust Food Processor blend, provided you use short, controlled pulses.
How Much Salt Does a Sweet Pie Need?
Don't skip the salt. Even in a sweet dessert pie, 1 teaspoon of fine sea salt is essential. It balances the richness of the butter and heightens the overall flavor profile. Beyond taste, salt also slightly affects the gluten structure, contributing to a more nuanced, tender finished product.
Related Recipes Worth Trying
- The Best Spiced Pumpkin Cheesecake Whoopie Pies Recipe — These glorious Pumpkin Cheesecake Whoopie Pies are miniature soft pumpkin cakes filled with a tangy cream cheese frosting An ultimate autumnal comfort bake
- Authentic Keto Pecan Pie Tarts The Secret to SugarFree Syrup — Rich buttery Keto Pecan Pie Tarts featuring a perfect gooey low carb pecan pie filling Forget corn syrup These individual bites are utterly foolproof and...
- Foolproof GlutenFree Keto Almond Flour Pie Crust Recipe — Tired of crumbly low carb baking This tender sturdy GlutenFree Keto Almond Flour Pie Crust is surprisingly easy and perfect for any filling
From Crumbles to Cohesive Dough: The Technique Breakdown
The transformation of disparate ingredients into a cohesive, manageable dough requires speed and a light touch. Remember, we are aiming for shaggy clumps, not a smooth, elastic mass.
Cutting the Cold Butter: The Pea-Sized Particle Method
In your chilled bowl (or food processor), combine the flour, salt, and sugar. Then, scatter the frozen butter cubes over the dry mixture. The key technique here is to cut the fat into the flour until the mixture resembles coarse meal, with a crucial difference: you want many visible pieces of butter ranging from the size of small peas to large flakes.
If you are using the All Butter Pie Crust Food Processor method, pulse the mixture 10 to 12 times; stop immediately when the largest pieces are pea-sized. These pockets of visible, cold butter are what guarantee the layered steam release needed for a Flaky Pie Crust Recipe .
Hydration Control: Adding Ice Water Spoon by Spoon
Once the butter is incorporated to the correct texture, it is time to hydrate the dough. Measure your initial 6 tablespoons of ice water and pour it over the mixture. If you are opting for the advanced tenderizing method often discussed by all butter pie crust sally's baking addiction experts, add 1 teaspoon of distilled white vinegar or vodka to this liquid; this prevents excess gluten formation.
Quickly stir with a spatula or pulse 3 4 times. Pinch a handful of the mixture if it holds together without crumbling, you are finished. If not, add additional water one tablespoon at a time, mixing minimally, until shaggy clumps form.
Forming the Discs and the Crucial Rest Period
Turn the shaggy mixture out onto a lightly floured surface. Quickly gather the dough and divide it in half. Form each half into a flat, round disk about 1 inch thick. Do not knead. Excessive handling warms the butter and develops tough gluten strands.
Wrap each disk tightly in plastic wrap and refrigerate for a minimum of 30 minutes, though an ideal resting period of two hours is highly recommended. This rest is non-negotiable; it chills the butter back down, and critically, it allows the gluten to relax, which is essential for preventing the dough from shrinking back when you roll it.
Rolling Out Your All-Butter Pie Crust
When ready to roll, take one disc out of the fridge for 5 to 10 minutes to temper slightly, making it less prone to cracking. On a lightly floured surface, roll the dough from the center outwards, rotating it frequently to ensure an even 12- to 13 inch circle, approximately $1/8$-inch thick.
Use the minimum flour necessary for dusting. Once rolled, transfer it gently to your pie plate and chill the prepared crust for 15 minutes before baking or filling.
Beyond the Basics: Expert Tips and Recommended Fillings
Mastering pie dough involves not just following the recipe, but understanding the troubleshooting steps and knowing how to adapt the dough for various applications.
Preventing Shrinkage: Why Your Dough Pulled Back
If your crust shrank significantly during rolling or baking, it is almost certainly a result of insufficient chilling or over mixing during the preparation stage. When gluten is highly developed, it forms an elastic network that contracts when heated.
The long, two-hour rest period detailed in this All Butter Pie Crust Recipe is the ultimate remedy, allowing the gluten strands to completely relax, preventing that frustrating spring back phenomenon documented in troubleshooting guides like those published by all butter pie crust nyt .
Perfect Pairings: Sweet Potato and Other Popular Pie Ideas
This robust, flaky dough is designed to handle rich, often wet fillings. For sweet options, it is the quintessential base for a rich Chocolate Pecan Pie or a classic Tart Cherry filling. The dairy notes in the crust complement the spice and texture of a traditional Sweet Potato Pie beautifully.
For savory options, the crust holds up spectacularly well for deep dish Chicken and Mushroom Pot Pies or hearty Quiche Lorraine.
Blind Baking Explained: Achieving Crispness Before Filling
Blind baking is required for pies with very wet fillings (like quiches or banana cream) or pies with no bake fillings. To blind bake, the chilled, prepared crust is lined with parchment paper and filled with pie weights or dried beans.
Bake the crust at 375° F ( 190° C) for about 15 minutes to set the edges, then remove the weights and bake for another 5– 10 minutes until the bottom is just turning golden.
This process, also highly recommended by all butter pie crust king arthur for custards, ensures the crust is sealed and sturdy before the filling is added.
Storing Your Dough: Freezing Instructions for Future Use
This dough recipe yields enough for one double crust pie or two single crust pies. If you only need one, the extra disk freezes perfectly. Once wrapped tightly in plastic, place the disk in a freezer bag or airtight container. The dough will keep in the freezer for up to three months.
To thaw, transfer the disk to the refrigerator 24 hours before you plan to use it.
Advanced All-Butter Pie Crust Variation: Incorporating Vodka
For an exceptionally tender and easy-to-handle crust, many bakers swear by the use of alcohol. As noted previously, substituting 1 teaspoon of ice water with 1 teaspoon of distilled white vodka or white vinegar provides a clever benefit. Unlike water, alcohol does not contribute to the formation of gluten.
It allows you to add necessary moisture to the dough to make it pliable for rolling without the risk of over developing the gluten, ensuring the tenderest possible Perfect Pie Crust .

Recipe FAQs
What’s the secret to those glorious, sky-high flakes? Is the food processor cheating?
Absolutely not! The key to those perfect, layered flakes is maintaining small, distinct pockets of cold fat we're looking for pea-to-nickel sized chunks of butter. These cold spots release steam during baking, pushing the pastry apart to create those lovely layers.
The food processor is just a speedier tool; the crucial thing is to only pulse 10 12 times to avoid turning the butter into a smooth paste.
Help! I’m worried about getting a ‘soggy bottom.’ What are the best tips for blind baking this AllButter Pie Crust?
Fear not the soggy bottom! The best defense is a double chill: once after forming the dough and again after placing the rolled pastry into the tin. When blind baking, line the chilled crust with parchment paper, fill it completely with pie weights or dried beans, and bake until the edges are set.
Finally, remove the weights and finish baking for 5-10 minutes until the base looks dry and matte, ensuring a perfectly sturdy foundation.
My dough keeps cracking when I roll it out. It's giving me a spot of bother!
Cracking usually means your dough is either too cold or too dry. If it's fresh out of the fridge, let the disk sit on the counter for 5 10 minutes to temper slightly before rolling.
If it cracks despite warming, it needs a touch more hydration; use a clean pastry brush to dab a few drops of ice water onto the crack and fold the dough quickly over the seam before continuing to roll.
How long can I keep this dough, and can I freeze it for a future Sunday roast pot pie?
You’re in luck this dough is excellent for planning ahead. Tightly wrapped in cling film, the prepared disks will happily last 3 to 4 days in the refrigerator, allowing you to prep well in advance. For longer storage, wrap the disks thoroughly in foil and freeze for up to three months.
Just be sure to let it thaw overnight in the fridge before you tackle the rolling stage!
What’s the main difference between this rich AllButter Pie Crust recipe and one made with shortening?
Flavour, pure and simple! The generous use of quality butter provides a decadent richness and depth of flavour that shortening can't match. While shortening might offer marginally more flakiness due to its higher melting point, the butter option delivers a superior flavour profile, a beautiful golden colour, and avoids the often processed nature of vegetable shortening.
It’s worth the calorie count for the taste alone.
Foolproof Allbutter Pie Crust Recipe
Ingredients:
Instructions:
Nutrition Facts:
| Calories | 1205 kcal |
|---|---|
| Protein | 31.3 g |
| Fat | 17.8 g |
| Carbs | 188.3 g |
| Fiber | 0.4 g |
| Sodium | 40867 mg |
